00198608-02_SM_CP20P2_Kunde_EN.pdf - 第42页
5 Pressure control valve (PRV) 5.2 Replacing the pressure control valve (PRV) 42 Service Manual SIPLACE SpeedStar (C&P20 P2) 01/2019 Removal Fig.52: Loosening the screws ► Remove the fastening screws (2) (TX20). …
5 Pressure control valve (PRV)
5.2 Replacing the pressure control valve (PRV)
Service Manual SIPLACE SpeedStar (C&P20 P2) 01/2019 41
5.2 Replacing the pressure control valve (PRV)
Parts
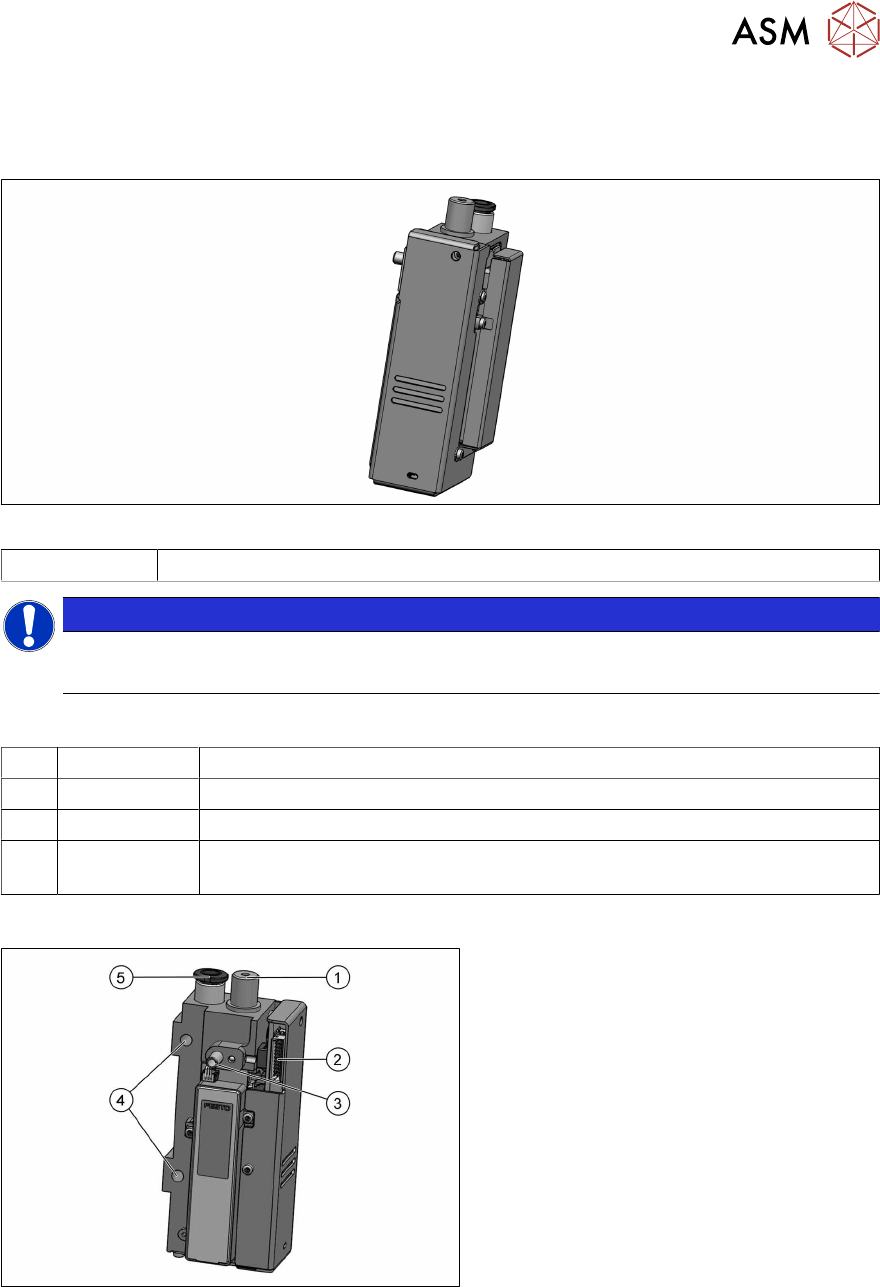
Fig.50: Pressure control valve (PRV)
03136795‑xx Pressure control valve (PRV)
NOTICE
Damaged cable
► If the cable is damaged, contact the SIPLACE service team.
Equipment and tools
T47 00386253-xx Torque screwdriver ESD 0.4-1.0 Nm
T99 03171856-xx Torque Allen swap blade 1.5 mm TX20
C08 00308458-xx Cable ties B=2.5mm, L=102mm Panduit
T --- Tools for removing/fitting and calibrating the placement head, if needed
(see also the service manual for your machine)
Overview
Fig.51: Overview of PRV
1. Exhaust air, for cooling the X linear mo-
tor
2. Energy and data supply
3. Vacuum/air blast for pickup/placement
circuit
4. Holes for the screws fastening the PRV
(TX20)
5. Compressed air connection
Preparation
► Remove the head from the machine. For details about removing and fitting the placement
head, refer to the service manual for your machine.
Fit the head on the head mount [03056231‑xx].
► Make sure that the component sensor protective cap is fitted.
1.1.3 "Safety instructions for the component sensor" [}6]
5 Pressure control valve (PRV)
5.2 Replacing the pressure control valve (PRV)
42 Service Manual SIPLACE SpeedStar (C&P20 P2) 01/2019
Removal
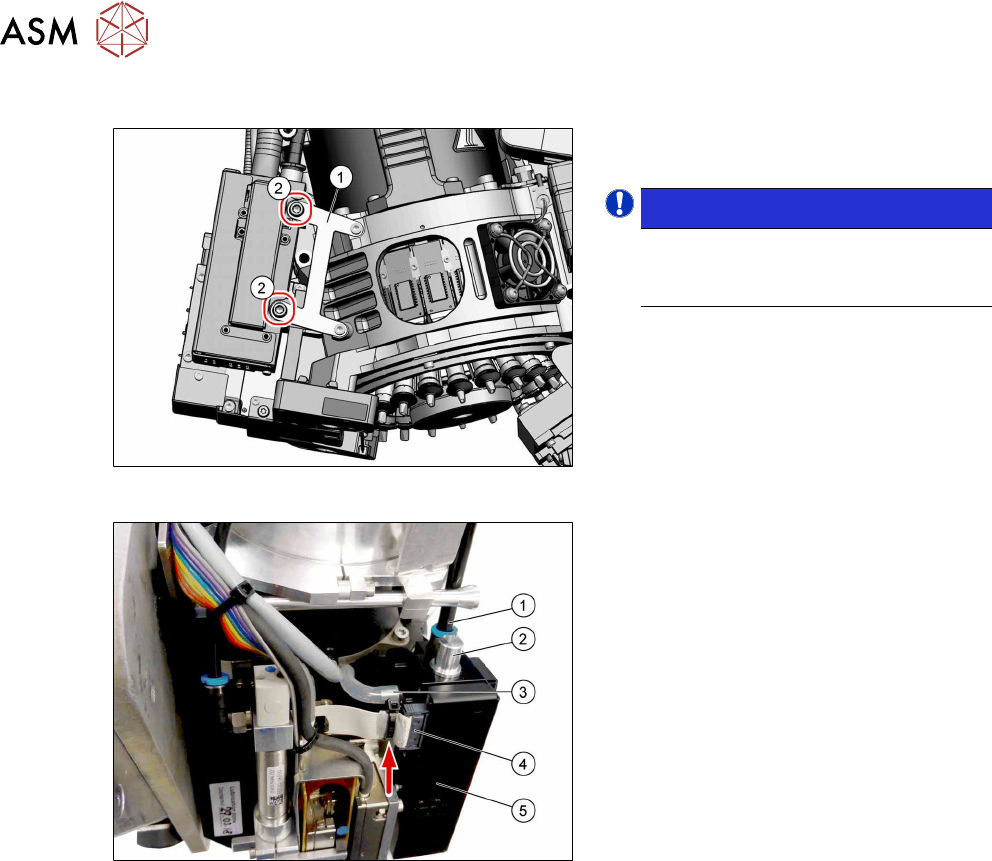
Fig.52: Loosening the screws
► Remove the fastening screws(2)
(TX20).
NOTICE!
Support plate (1)
You do not need to completely dis-
mantle the support plate.
.
Fig.53: Pulling off the hoses and removing the PRV
► Pull the hoses(1), (2) and(3) off.
► Remove the cable ties from the flat rib-
bon cable.
► Press the side latches on the con-
nector(4) and then pull this off.
► Carefully pull the PRV(5) out.
Installation
► Follow the removal instructions in reverse order for installation. Also observe the following
instructions:
► Fasten the support plate to the PRV with two screws (TX20, M4x25, torque 0.9Nm).
► Perform "zero correction" for the pressure control valve.
5 Pressure control valve (PRV)
5.3 Replacing the exhaust air hose
Service Manual SIPLACE SpeedStar (C&P20 P2) 01/2019 43
5.3 Replacing the exhaust air hose
Parts
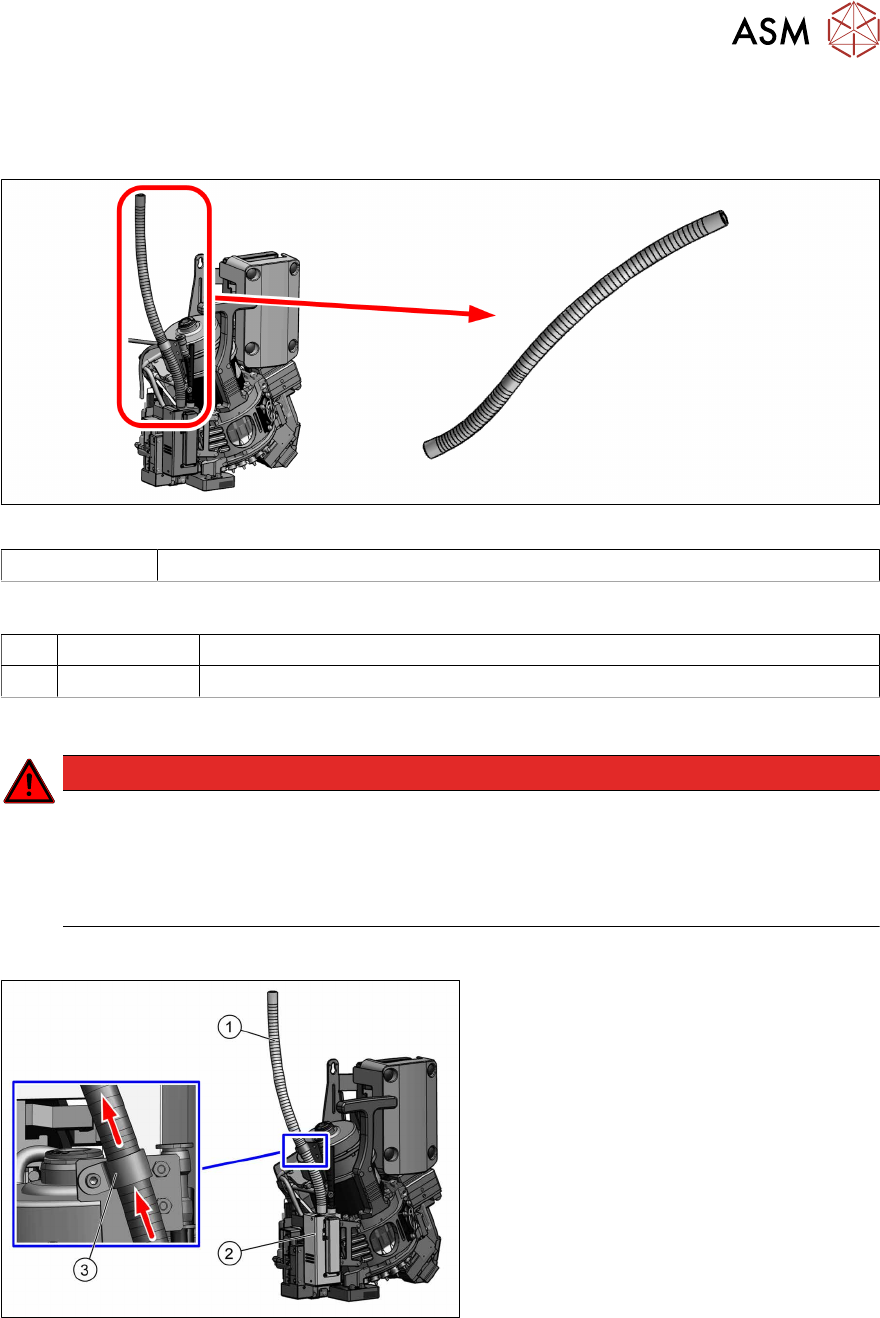
Fig.54: Exhaust air hose
03006727-xx Silicone hose, Di 8, Da 12, conductive
Equipment and tools
T 00381443‑xx Pipe/hose cutters Festo ZRS 7658
Service manual for your machine
Preparation
DANGER
Replacement in the machine
It is possible to replace the exhaust air hose inside the machine, without removing the
placement head.
► In this case, observe the safety instructions in the instruction manual and the service
manual for your machine!
Removal
Fig.55: Exhaust air hose
► Loosen the exhaust air hose(1) on the
PRV(2) and then pull it through the
hose clamp(3).
Installation
► Cut the new hose to a length of 295mm.
► Follow the removal instructions in reverse order for further installation.