00198608-02_SM_CP20P2_Kunde_EN.pdf - 第79页
10 Miscellaneous (fan, retaining elements) 10.2 Replacing the retaining element mount and mount Service Manual SIPLACE SpeedStar (C&P20 P2) 01/2019 79 Removal Fig.112: Top left mount Only for top left mount: ► Remov…
10 Miscellaneous (fan, retaining elements)
10.2 Replacing the retaining element mount and mount
78 Service Manual SIPLACE SpeedStar (C&P20 P2) 01/2019
10.2 Replacing the retaining element mount and mount
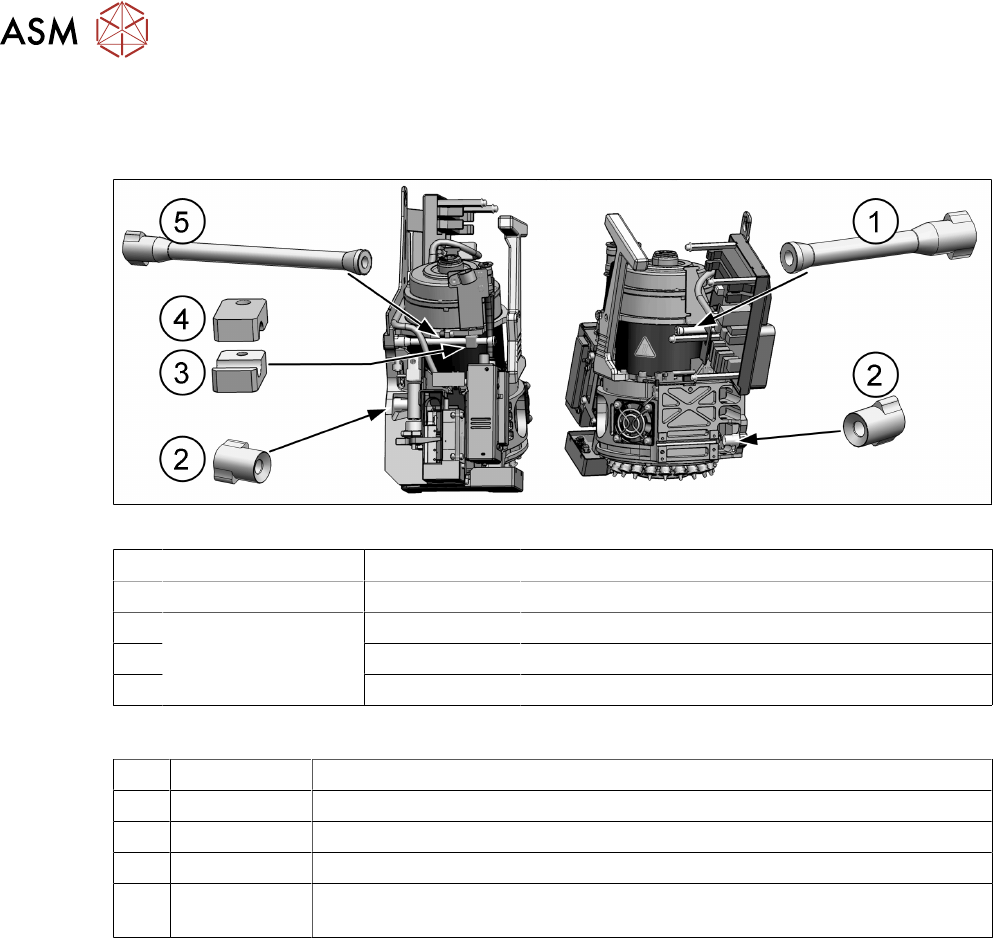
Parts
Fig.111: Retaining element mount and mount
1 Top right 03139206-xx Retaining element TR / C&P20 P2 S 2
2 Bottom right/left 03069898-xx Retaining element BR / C&P20 A
3 Top left 03149793-xx Mount 2 retaining element / C&P20 P2 S 2
4 03139617-xx Mount retaining element / C&P20 P2 S 2
5 03138542-xx Retaining element TL / C&P20 P2 S 2
Equipment and tools
T44 00386132-xx Torque screwdriver ESD 0.1-0,6 Nm
T47 00386253-xx Torque screwdriver ESD 0.4-1.0 Nm
T76 00386135-xx Torque interchangeable blades 1.5 mm, hexagonal
T97 03075862-xx Torque Allen swap blade 1.5 mm TX8
T --- Tools for removing/fitting and calibrating the placement head, if needed
(see also the service manual for your machine)
Preparation
► Remove the head from the machine. For details about removing and fitting the placement
head, refer to the service manual for your machine.
► Do not fit the head onto the head mount.
► Make sure that the component sensor protective cap is fitted.
1.1.3 "Safety instructions for the component sensor" [}6]
10 Miscellaneous (fan, retaining elements)
10.2 Replacing the retaining element mount and mount
Service Manual SIPLACE SpeedStar (C&P20 P2) 01/2019 79
Removal
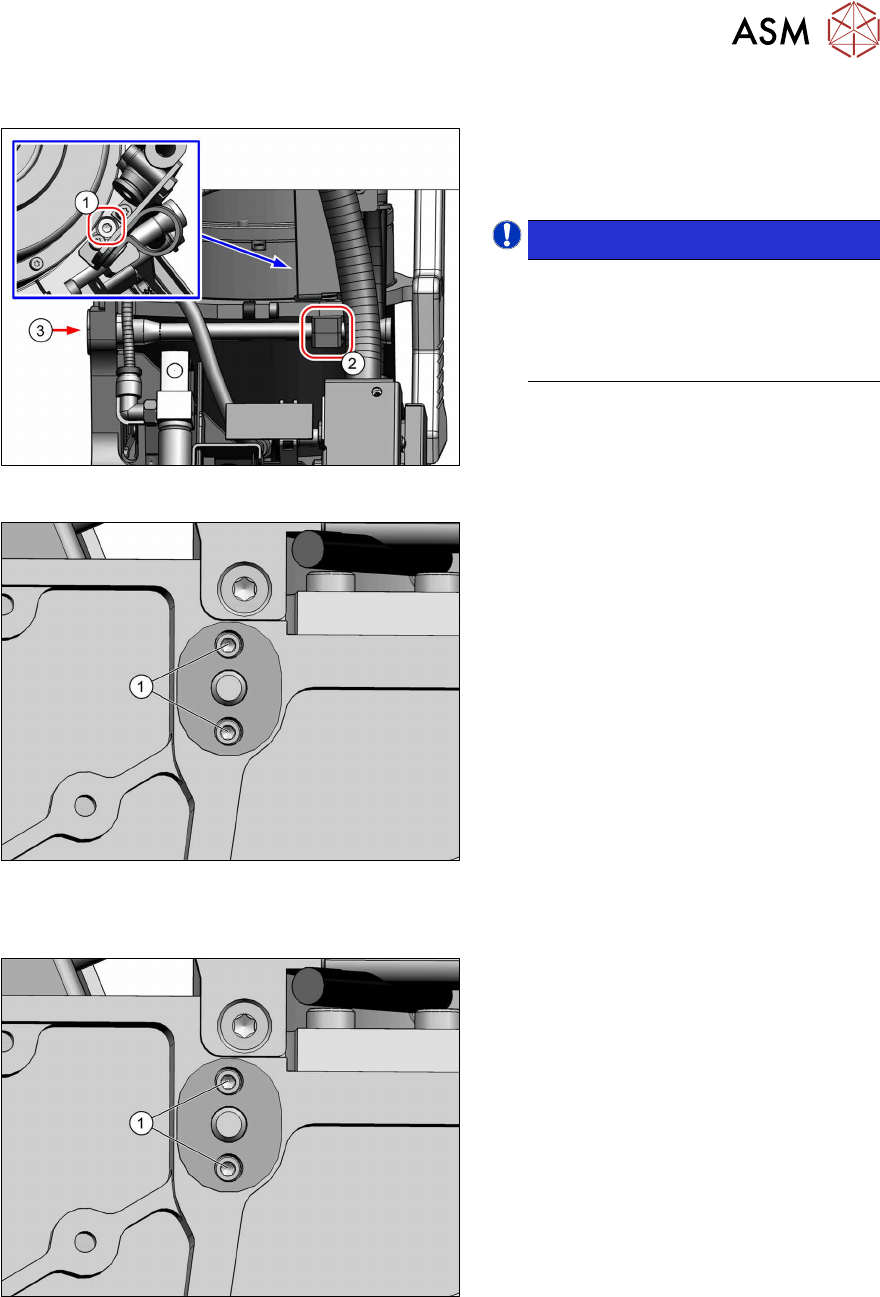
Fig.112: Top left mount
Only for top left mount:
► Remove the fastening screw(1) (TX8)
and then remove the bottom mount(2).
NOTICE!
The top part of the mount is still
clamped into place by the retaining
element. This can be taken off as soon
as the retaining element is loosened
from behind(3).
.
Fig.113: Screws fastening the retaining element
► Remove the two screws(1) (Allen1.5)
fastening the retaining element to the
back of the head.
The retaining element can now be
taken off the front of the head.
Installation
Fig.114: Screws fastening the retaining element
► Fasten the retaining element with two
screws(1) (Allen1.5, M1.6x6, torque
0.15Nm).
For top left retaining element only:
Fit the top holder at the same time.
10 Miscellaneous (fan, retaining elements)
10.2 Replacing the retaining element mount and mount
80 Service Manual SIPLACE SpeedStar (C&P20 P2) 01/2019
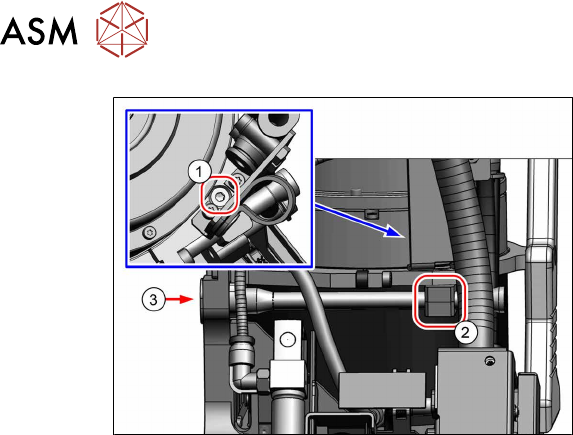
Fig.115: Top left mount
Only for top left mount:
► Fasten the two holders(2) with a
screw(1) (TX8, M3x16, torque
0.6Nm).