444CEMM1 - 第129页
Page 1-67 REGULAR MAINTENANCE 1 444C-E-MMA01-A08-02 Check Every 560 Hours (Once a Month) 17. Raise the nozzle which has been measured. ∗ Press UNLOCK + for pos 1. 18. T urn OFF the vacuum for the nozzle position which ha…
Page 1-66
OFF ( )
ON ( )
SERVO
444C-E-MMA01-A08-01
Check Every 560 Hours (Once a Month)
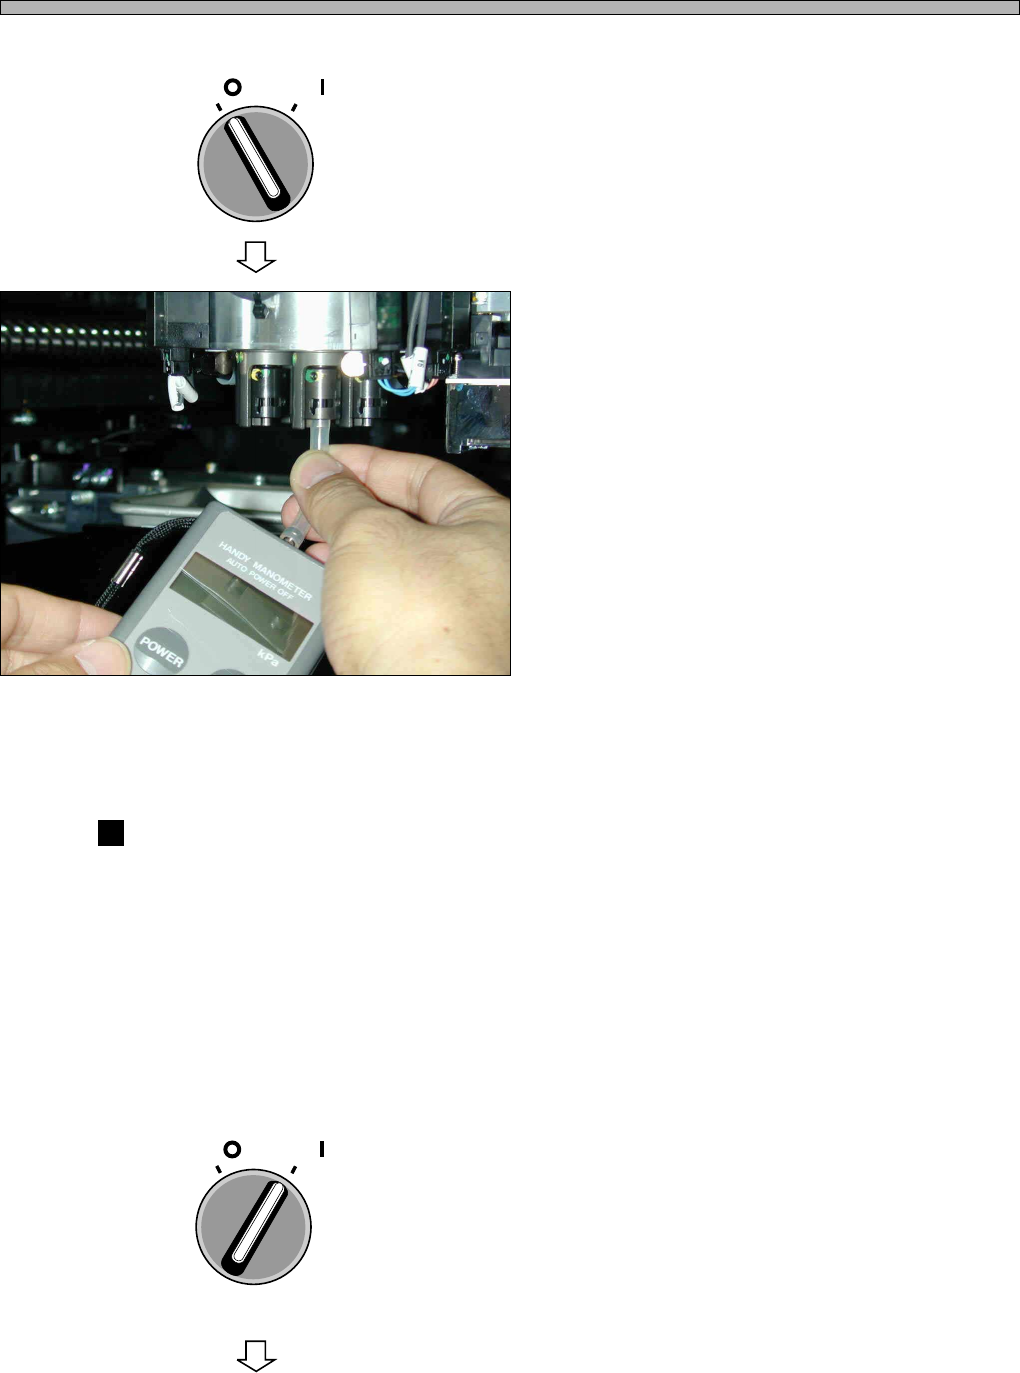
10. Turn OFF the servo switch.
11. Open the safety cover.
12. Detach the nozzle located at the posi-
tion selected in steps 8 and 9, and
then set the vacuum gauge to the
nozzle holder tip.
∗ If you take a measurement with a nozzle
attached, a vacuum can leak from the joint of
its reflector; therefore, a correct value may not
be measured.
(The vacuum gauge shown on the left is an
example. It is not an attachment.)
13. Check the vacuum pressure.
∗ Ensure that the vacuum pressure is over 80.0
kPa.
The vacuum pressure is not over 80.0 kPa
Check the following items. Inform us if there is no trouble.
1. Checking air leakage in the vacuum pass
• Ensure that no break in the pass. (no sound of air leakage)
2. Checking trouble in the vacuum pump
• Check for strange noise from the vacuum pump.
• Check for waste of parts.
• Check the vacuum pressure of the vacuum pump by the gauge attached to the pump.
14. Take off the vacuum gauge.
15. Close the safety cover.
16. Turn ON the servo switch.
OFF ( )
ON ( )
SERVO
444C-520P
To the next page
Page 1-67
REGULAR
MAINTENANCE
1
444C-E-MMA01-A08-02
Check Every 560 Hours (Once a Month)
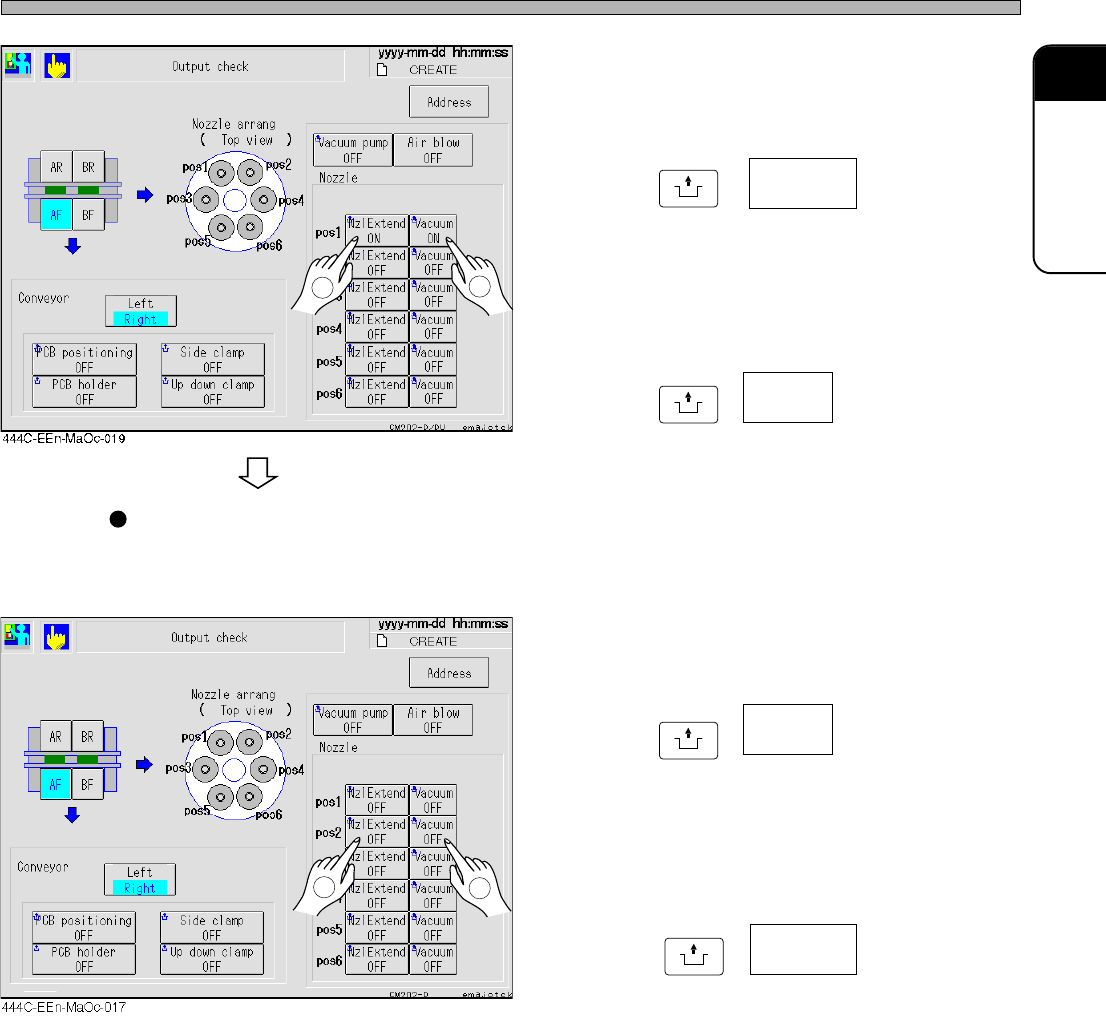
17. Raise the nozzle which has been
measured.
∗ Press
UNLOCK
+ for pos 1.
18. Turn OFF the vacuum for the nozzle
position which has been measured.
∗ Press
UNLOCK
+ for pos 1.
Measure the nozzle at other position.
(Here we describe position 2 as an example.)
19. Turn ON the nozzle position to be
measured.
∗ Press
UNLOCK
+ for pos 2.
20. Lower the nozzle at the position to be
measured.
∗ Press
UNLOCK
+ for pos 2.
After it, repeat steps 10 to 20, and check the vacuum pressure at all nozzle positions.
Vacuum
OFF
Vacuum
ON
Nzl Extend
ON
2
1
1
2
Nzl Extend
OFF
Page 1-68
444C-E-MMA01-A09-04
Check Every 560 Hours (Once a Month)
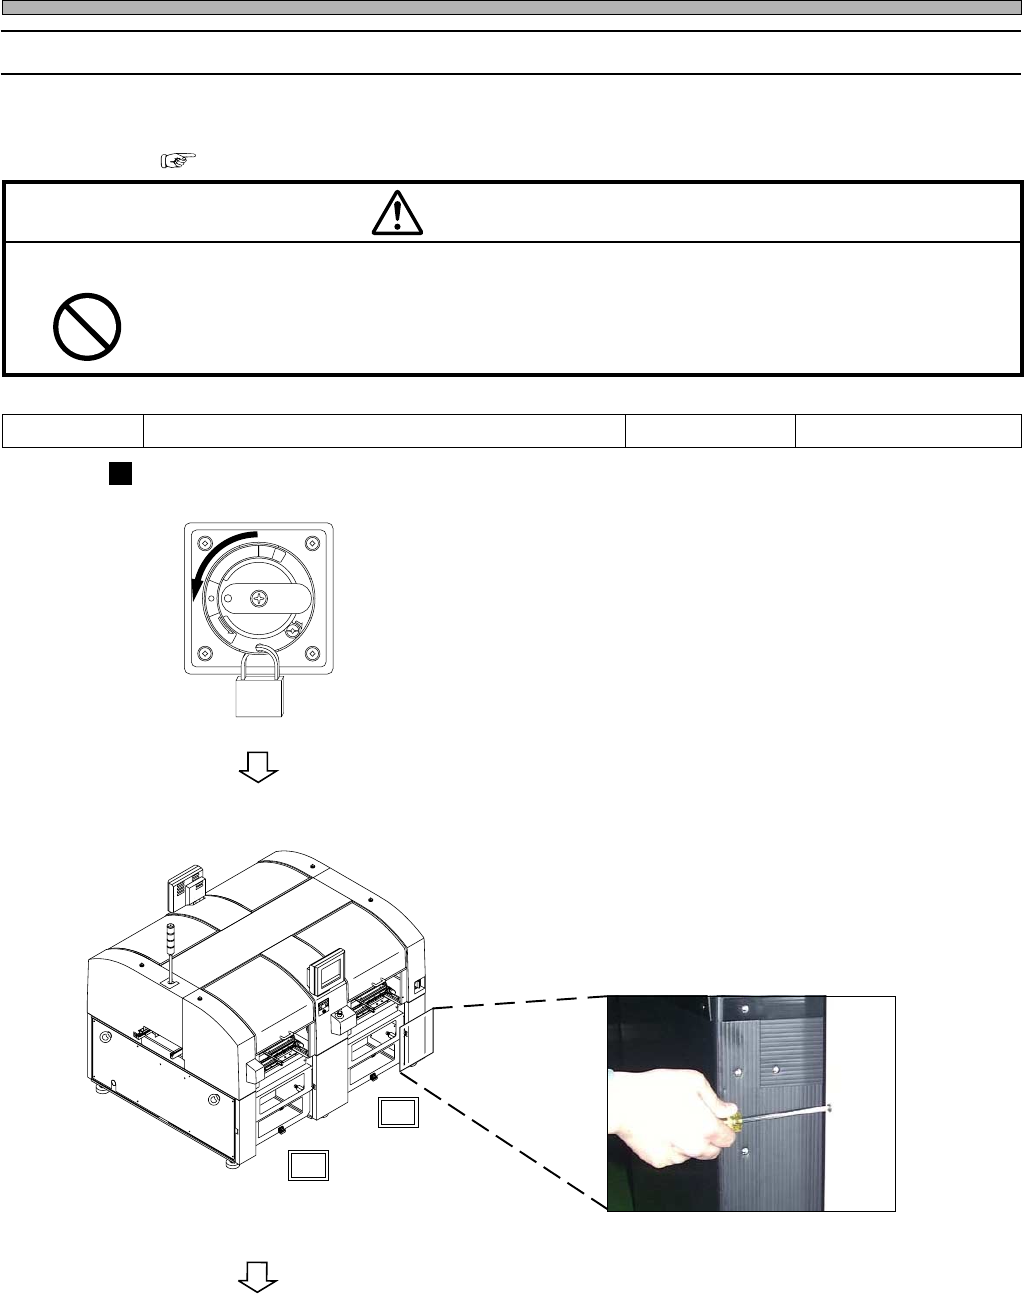
1-5-2 Cleaning and Lubricating the Cutting Unit
For D/DU, the cutting unit is an option. The cutter consists of the fixed blade and movable blade.
∗ For DU/DHU specifications, it is necessary to remove the feeder base cover for the maintenance.
“1-2-3 Setting and Removing the Feeder Base Cover (Only for DU/DHU Specifications)”
Procedures of CM201-D/DU and CM202-D/DU
1. Turn OFF the power.
∗ Lock the main switch. A worker should carry
the key. (DU/DHU only)
2. Open the cover at the lower right of
the machine rear side.
∗ Remove the screw with the Philips driver.
M60E
DO NOT TOUCH THE CUTTER BLADE WITH YOUR FINGERS.
The edge is so sharp that you may injure yourself.
CAUTION
Tools Philips driver, wrench, and cloth Required time 30 minutes
R
E
L
E
A
S
E
T
R
I
P
O
F
F
O
N
R
E
S
E
T
4U4C-AB00
AR
BR
444C-401P
To the next page
444C-457E