444CEMM1 - 第156页
Page 1-94 1-10-1 Replacing Color T ouch Panel Back Light Back Light Built-in Color T ouch Panel Position The color touch panel of this machine has a back light built-in. Back Light Replacement Procedure 1 . T urn OFF the…
Page 1-93
REGULAR
MAINTENANCE
1
444C-E-MMA01-A09-02
1-9 Check Every 18000 Hours (Once Three Years)
1-9-1 Transfer Head : Replacing the Shaft
Abrasion of the shaft will cause an unsmooth nozzle motion. That will be the major factor of pick-up/
mount trouble. So the parts need to be replaced regularly.
∗ Please tell our service engineer in case of the parts replacement.
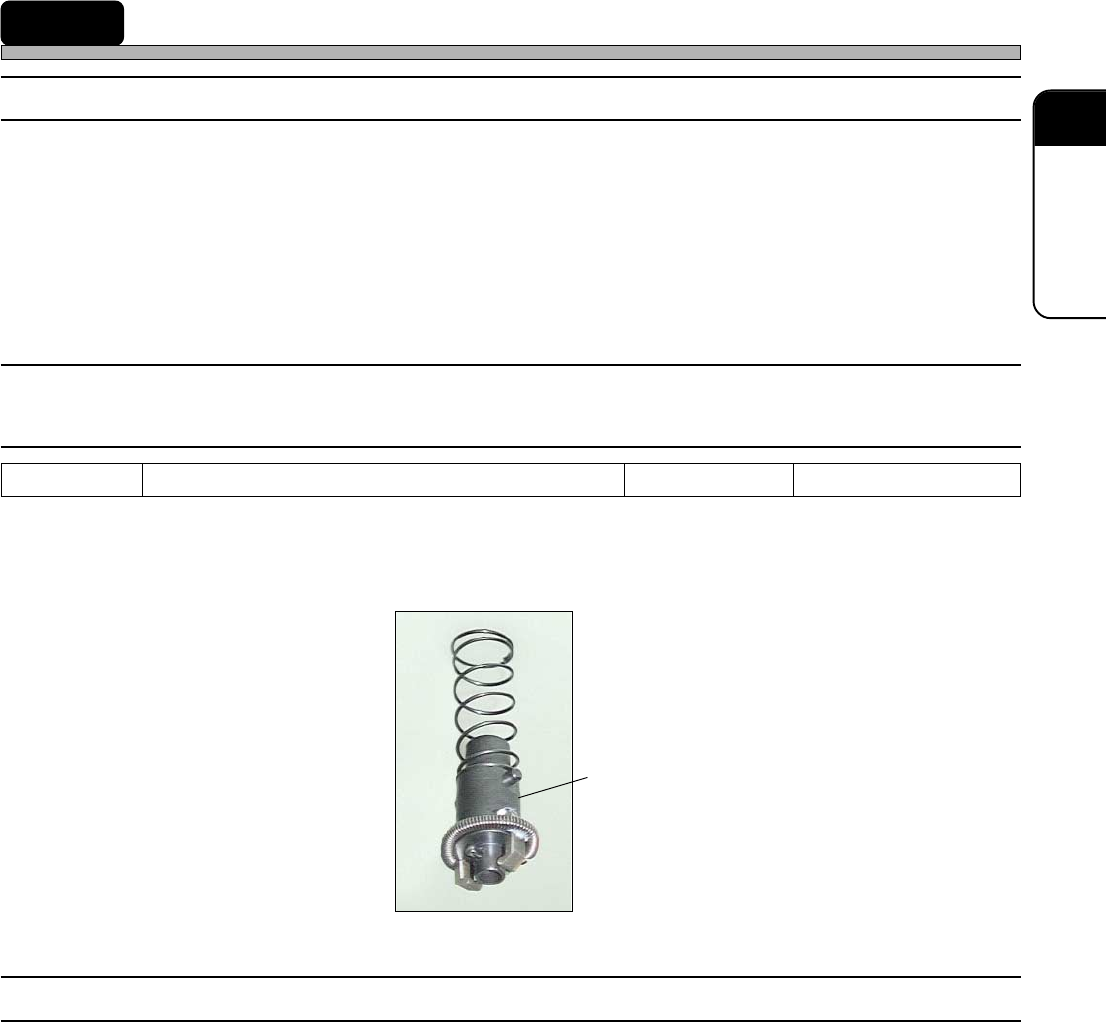
1-9-2 Transfer Head : Nozzle Holder • Clamp Arm • Spring for
Clamp Claw Holder • Spring for Nozzle Cushion
Abrasion of each parts will cause an unsmooth nozzle motion. That will be the major factor of pick-
up/mount trouble. So the parts need to be replaced regularly.
∗ We recommend replacing each part simultaneously at the same timig.
1-9-3 XY Unit : Cable Bear
Abrasion of the cable bear will cause the disconnection of the wiring and pipe, and so the parts
need to be replaced regularly.
∗ Please tell our service engineer in case of the parts replacement.
Tools Philips driver Required time 15 minutes
Nozzle holder
444C-470P
Page 1-94
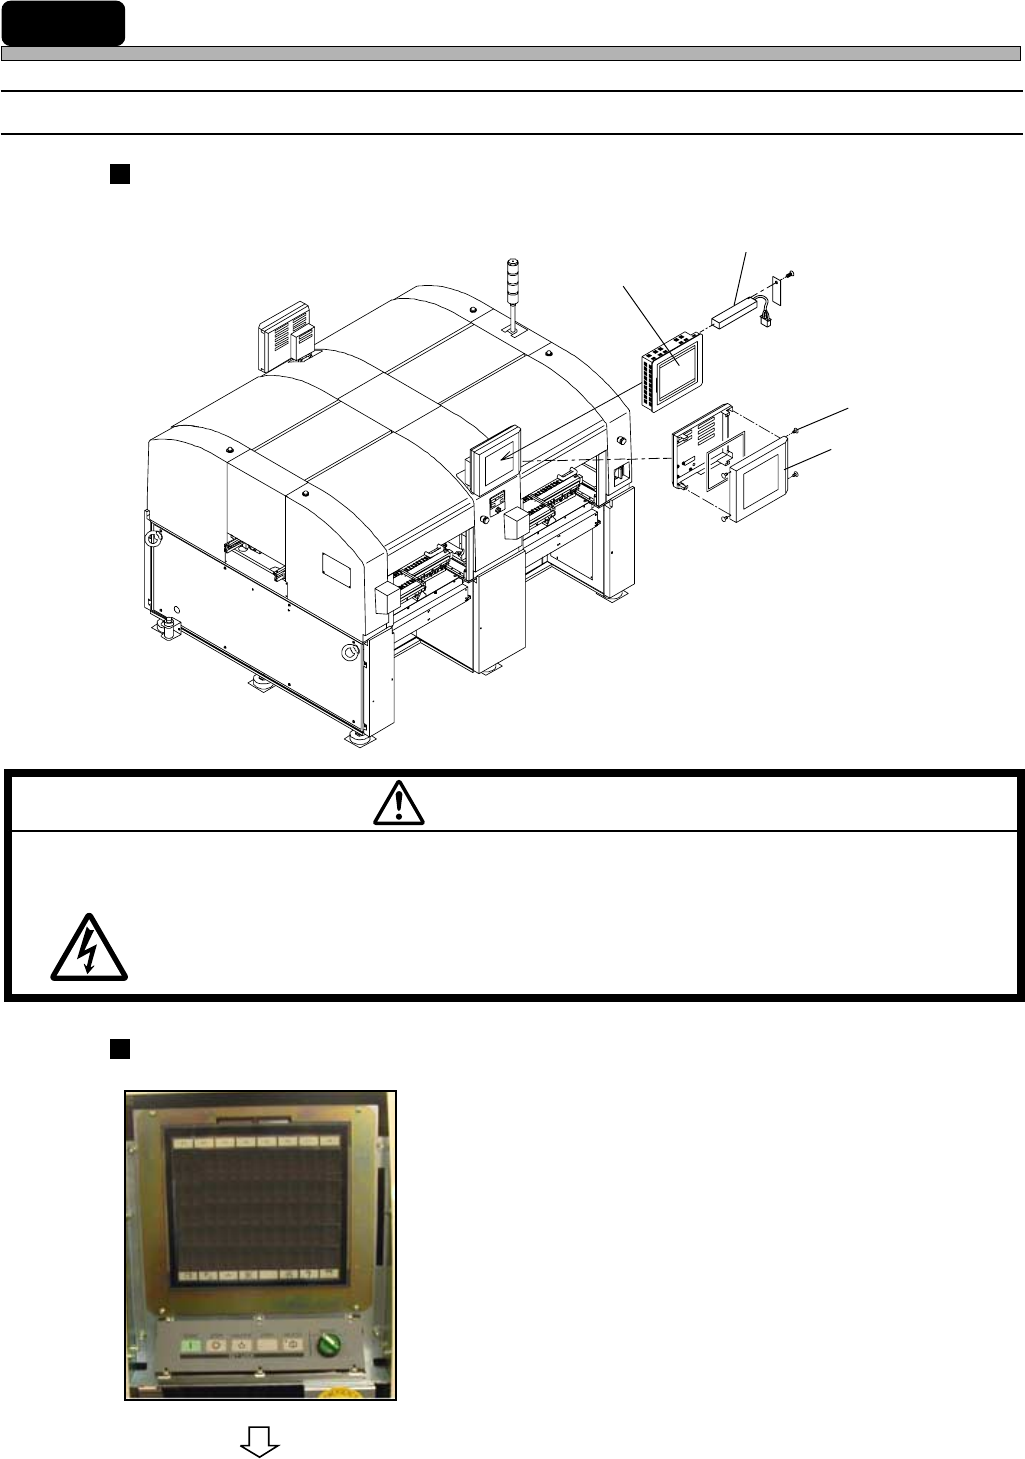
1-10-1 Replacing Color Touch Panel Back Light
Back Light Built-in Color Touch Panel Position
The color touch panel of this machine has a back light built-in.
Back Light Replacement Procedure
1. Turn OFF the power supply of the
machine.
2. Remove the screws at the side of the
color touch panel cover, and remove
the cover.
M59EB
CUT OFF THE POWER SUPPLY BEFORE CARRYING OUT ANY WORK FOR
THE MACHINE.
You will have a serious electric shock.
WARNING
To the next page
493C-025P
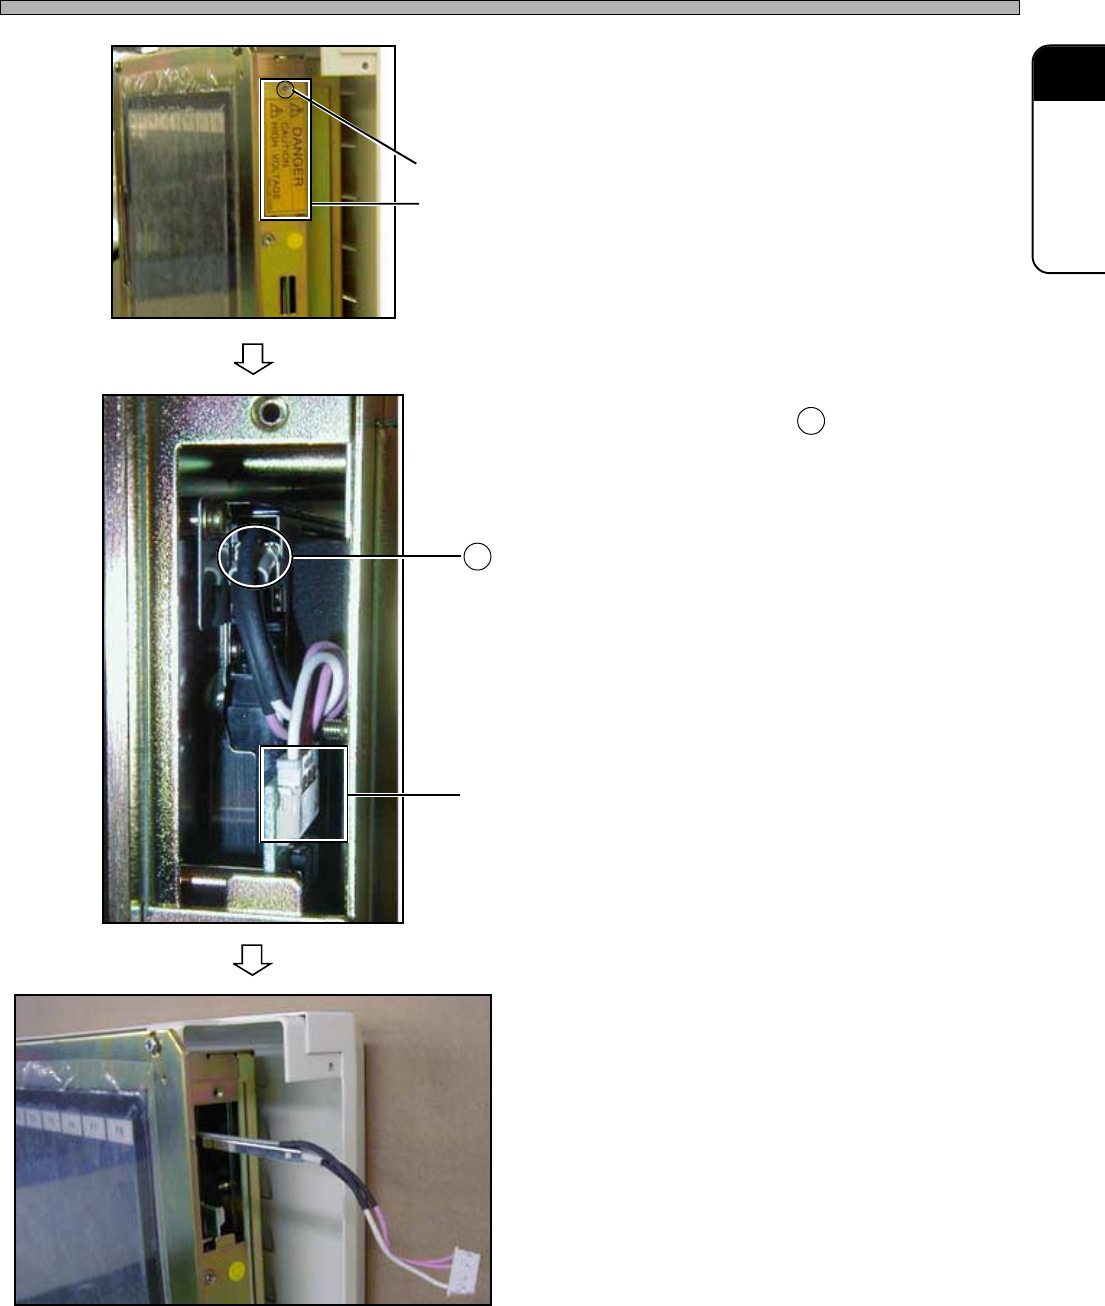
Back light
Color touch panel
444C-463E
Screw
Cover
444C-E-MMA01-A09-02
1-10 Replacing Consumable Parts
Page 1-95
REGULAR
MAINTENANCE
1
Replacing Consumable Parts
3. Remove one M3 countersunk screw,
and remove the hatch (plate) for back
light replacement.
4. Raise the bending 1 with a needle-
nose plier and the like, and pull out
the power supply connector.
5. Pull out the back light.
6. Insert the replacement back light.
7. Connect the power supply connector.
8. Restore the raised bending with a
needle-nose plier and the like.
9. Attach the replacement back light.
10. Attach the color touch panel cover.
11. Turn ON the power supply of the
machine.
∗ Make sure the back light turns on.
One M3 countersunk screw
Hatch (Plate) for back light replacement
493C-024P
493C-029P
1
Power supply connector
493C-030P
444C-E-MMA01-A09-00