444CEMM1 - 第91页
Page 1-29 REGULAR MAINTENANCE 1 Check Every 140 Hours (Once a Week) 010DC0AA00 444C-E-MMA01-A05-04 T ransfer head Nozzle holder 444C-513P 444C-464E Nozzle holder Spring for nozzle cushion Dirt on this spring will prevent…
Page 1-28
Check Every 140 Hours (Once a Week)
1-4-3 Cleaning and Lubricating the Nozzle
This part describes changing the nozzle holder set on the transfer head, the nozzles and the
vacuum filter, and also describes cleaning and lubricating the optional nozzle changer and the
nozzles set on it.
∗ For DU/DHU specifications, it is necessary to remove the feeder base cover for the maintenance.
“1-2-3 Setting and Removing the Feeder Base Cover (Only for DU/DHU Specifications)”
Flow chart
1. Selecting the operation table
2. Removal
a. Removing the nozzle holder from the transfer head
(Removing the nozzle from the nozzle changer)
b. Removing the nozzle from the nozzle holder
3. Removing the Vacuum Filter
4. Cleaning
a. Cleaning the nozzle holder
b. Cleaning the nozzle
(Cleaning the nozzle changer)
∗ The nozzle is not allowed to accept an ultrasonic cleaning. If it accepts the ultrasonic
cleaning, the nozzle reflector will corrode to cause a chip recognition error.
5. Setting (Changing) the Vacuum Filter
6. Cleaning the holder of the transfer head
7. Checking and setting the nozzle arrangement
a. Setting the nozzle to the nozzle holder
b. Checking the nozzle arrangement
c. Setting the nozzle holder to the transfer head
(Setting the nozzle to the nozzle changer)
8. Re-checking the nozzle arrangement
Tools
Cloth, air ejector, grease gun, syringe and tweezers
Required time 30 minutes
444C-E-MMA01-A05-04
Page 1-29
REGULAR
MAINTENANCE
1
Check Every 140 Hours (Once a Week)
010DC0AA00
444C-E-MMA01-A05-04
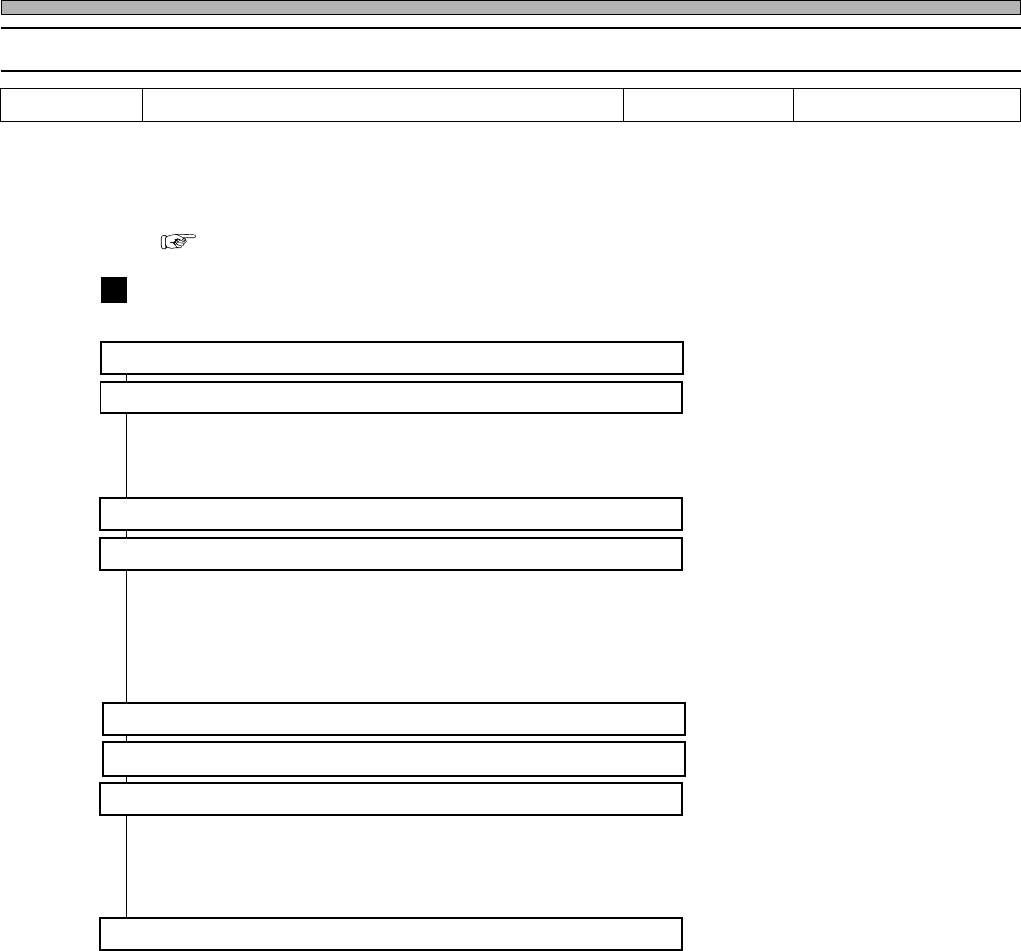
Transfer head
Nozzle holder
444C-513P
444C-464E
Nozzle holder
Spring for nozzle cushion
Dirt on this spring will prevent proper work of
the nozzle cushion.
Inner and outer circumferences of the nozzle holder
Dirt on the inner and outer circumferences of
the nozzle holder will prevent proper operation
of it, with the deterioration of the mounting
accuracy and a pick-up error.
Spring for nozzle clamp arm holder
This section holds the clamp arm. Dirt on the
spring will prevent proper operation of the
nozzle clamp.
Nozzle holder engagement face
Dirt on the engagement face of the nozzle
holder causes an air leak, because it will not
closely contact with the nozzle surface in
nozzle chucking.
This prevents the nozzle from picking up chips
properly and will deteriorate the mount accu-
racy and make false pickup.
Nozzle clamp arm
This directly catches the nozzle. Dirt on the arm will prevent
catching the nozzle, precision parts, lead to air leakage, and
cause wrong pickup and mounting.
Vacuum Filter
This is located on the air route and prevents dust in the air from coming into the machine. If
dust accumulates here, it will be hard to generate and break a vacuum at the tips of the
nozzles; therefore, the machine cannot display its true performance.
∗ The filter is expendable. If it accepts the ultrasonic cleaning, it will be clean outwardly;
however, the passing flow rate will not be restored, with a pick-up error and the deterioration
of the mounting accuracy.
Rolls of parts
Nozzle
Nozzle taper face
This is the part to be chucked by the nozzle
holder of the transfer head. The taper face or
chucking groove with dust or dirt will cause air
leakage or false chucking.
Nozzle reflector
This is the black resin part. To prevent the
surface from being dirty, the special coating is
given to it. Chips are recognized by reflecting
the LED light from the line camera. This part
with dirt will cause false recognition.
Nozzle tip (Nozzle)
This is the part to directly contact with and pick up chips. Dust on the sides can be the shadow in
recognition and cause the false recognition. Dirt in the pickup hole will cause false pickup.
444C-515P
444C-516P
444C-E-MMA01-A05-04
Page 1-30
Check Every 140 Hours (Once a Week)
OFF ( )
ON ( )
SERVO
444C-E-MMA01-A05-07
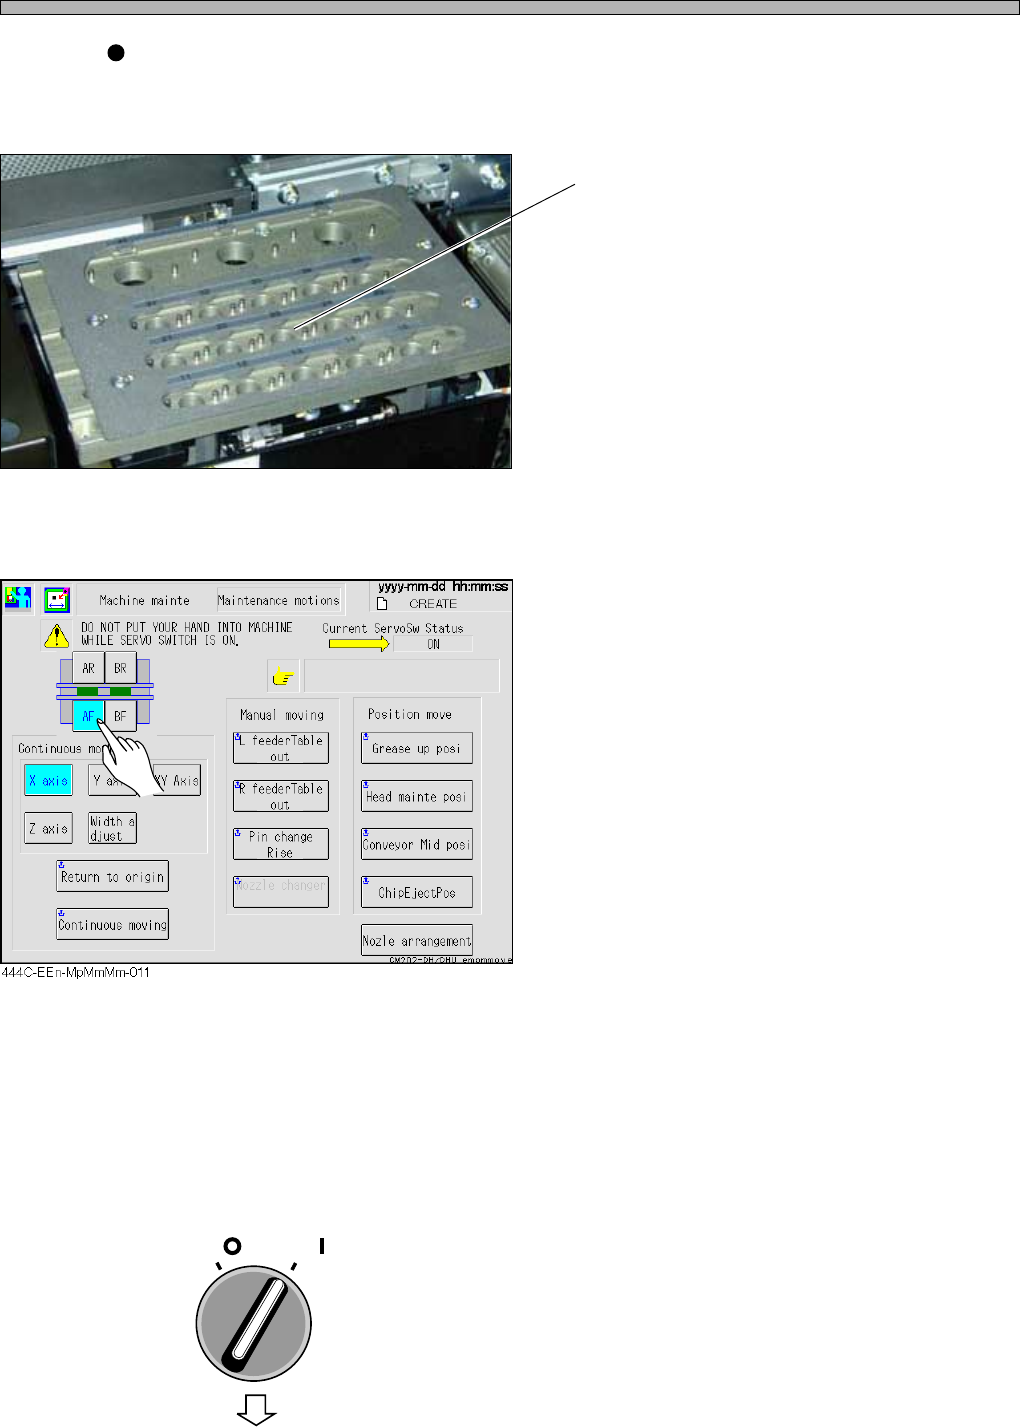
1. Selecting the operation table
1. Select the operation table.
2. Removal
a. Removing the nozzle holder from the transfer head
(Removing the nozzle from the nozzle changer)
At the “Maintenance Motions” screen, move the transfer head to the nozzle exchange table, and
remove the nozzle holder.
If an optional nozzle changer is installed, remove the nozzle here.
1. Ensure that the safety cover is
closed, and turn ON the servo switch.
To the next page
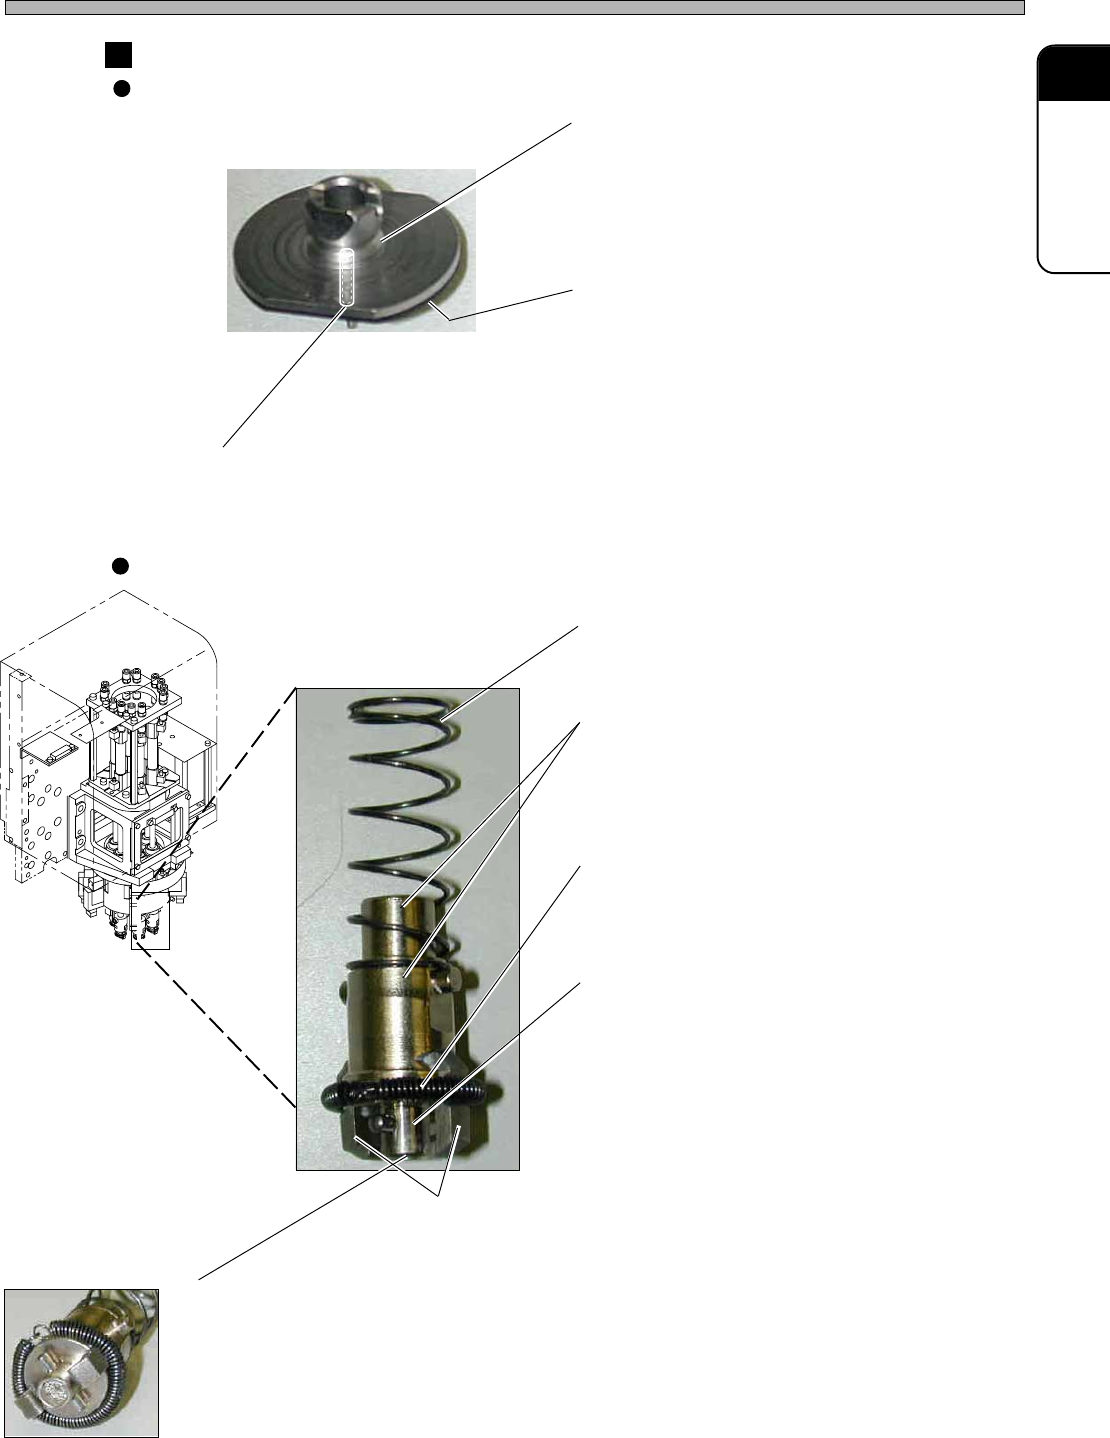
Nozzle changer (option)
This unit stocks the nozzle. You can set each nozzle corresponding to the production. The transfer
head exchanges the nozzle by chucking it from this unit for the device exchange, and it saves the
operation time.
Top face of the nozzle changer
Dirt on the top face of the nozzle changer will
make dirt on the nozzle reflector.
444C-487P