bnp-b2365(eng)b.pdf - 第306页
6. Troubleshooting 6 - 1 6-1 Points of caut ion and c onf irmation ........................................................................................ ........... 6-2 6-1-1 LED display when al arm or warni ng occu r…
5. Spindle Adjustment
5 - 60
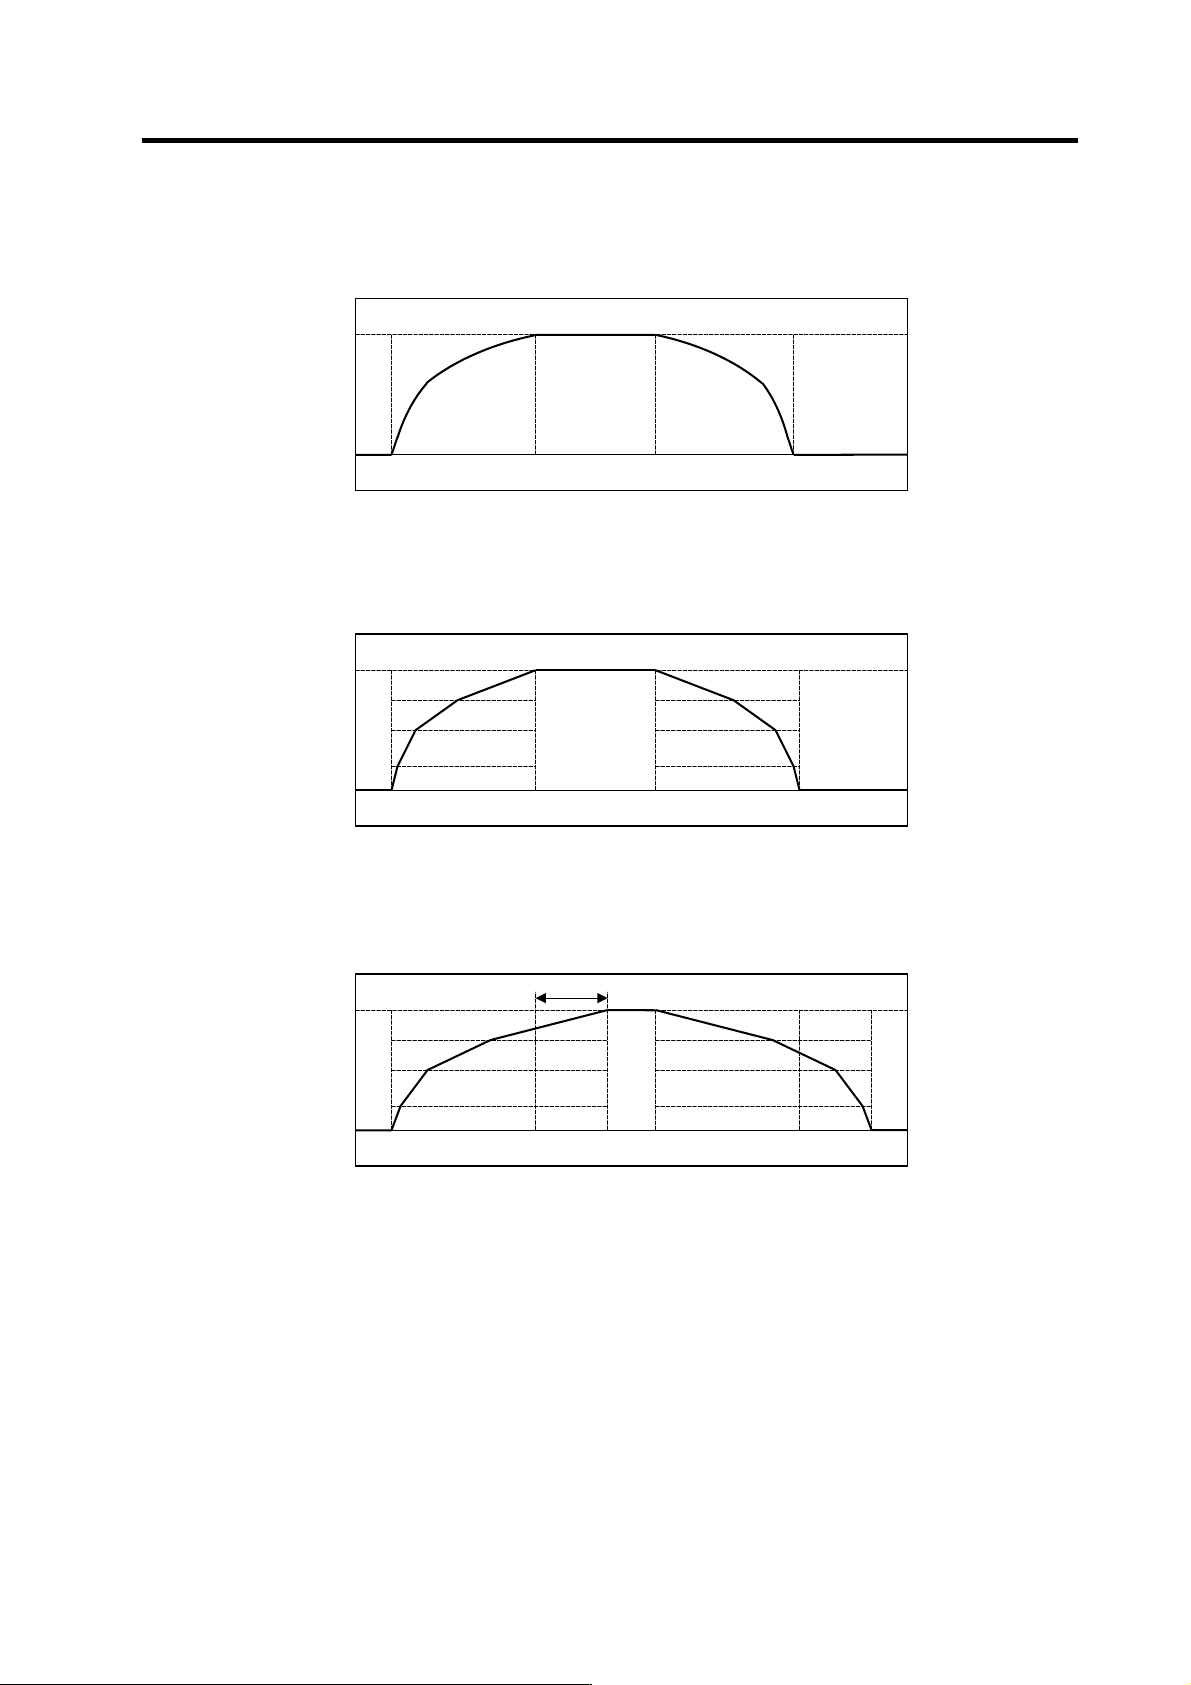
(3) Adjusting the multi-step acceleration/deceleration time constants
[1] Measure the acceleration/deceleration waveform to the spindle's maximum rotation speed
using S command operation. (No. 1 spindle, No. 2 spindle)
Example of spindle acceleration/deceleration wa veform
[2] Calculate the multi-step acceleration/deceleration pattern based on the acceleration/
deceleration waveform for the spindle with a long acceleration/deceleration time.
Calculation of multi-step acceleration/deceleration
[3] Set the actual acceleration/deceleration time constant in the parameters while maintaining a
50% margin from each time constant calculated in step [2].
Setting the multi-step acceleration/deceleration parameters
[4] Try spindle synchronous acceleration/deceleration operation with the actual machine, and
confirm that the speed is accelerated or decelerated at 50% or less of the load meter value. If
the load meter value exceeds 50%, adjust the time constant again.
0
Time
10000
Speed FB
(r/min)
0
Time
10000
Speed FB
(r/min)
1-step
2-step
3-step
4-step
0
Time
10000
Maintaining a 50% margin
Speed FB
(r/min)

6. Troubleshooting
6 - 1
6-1 Points of caution and confirmation ................................................................................................... 6-2
6-1-1 LED display when alarm or warning occurs .............................................................................. 6-3
6-2 Protective functions list of units ........................................................................................................ 6-4
6-2-1 List of alarms.............................................................................................................................. 6-4
6-2-2 List of warnings .......................................................................................................................... 6-9
6-3 Troubleshooting .............................................................................................................................. 6-10
6-3-1 Troubleshooting at power ON.................................................................................................. 6-10
6-3-2 Troubleshooting for each alarm No. ...................................................................................... .. 6-11
6-3-3 Troubleshooting for each warning No......................................................................................6-40
6-3-4 Parameter numbers during initial parameter error................................................................... 6-44
6-3-5 Troubleshooting the spindl e system when there is no alarm or warning................................. 6-45
6. Troubleshooting
6 - 2
6-1 Points of caution and confirmation
If an error occurs in the servo drive unit or spindle drive unit, the warning or alarm will occur. When a
warning or alarm occurs, check the state while observing the following points, and inspect or remedy
the unit according to the details given in this section.
<Point s of confirmation>
[1] What is the alarm code display?
[2] Can the error or trouble be repeated? (Check alarm history)
[3] Is the motor and servo drive unit temperature and ambient temperature no rmal?
[4] Are the servo drive unit, control unit and motor grounded?
[5] Was the unit accelerating, decelerating or runnin g at a set speed? What was the speed?
[6] Is there any difference during forward and backward run?
[7] Was there a momentary power failure?
[8] Did the trouble occur during a specific operatio n or command?
[9] At what frequency does the trouble occur?
[10] Is a load applied or removed?
[11] Has the drive unit been re placed, parts replaced or emergency measu re s taken?
[12] How many years has the unit been operating?
[13] Is the power supply voltage normal? Does the st ate change greatly according to the time ban d?
CAUTION
1. This power supply unit uses a large capacity electrolytic capacitor. When the
CHARGE lamp on the front of the power supply unit is lit, voltage is still
present at the PN terminal (TE2). Do not touch the terminal block in this
state.
2. Before replacing the unit, etc., always confirm that there is no voltage at the
PN terminal (TE2) with a tester or wait at least 15 minutes after turning the
main power OFF.
3. The conductivity in the unit cannot be checked.
4. Never carry out a megger test on the drive unit or power supply unit as the
unit could be damaged.