bnp-b2365(eng)b.pdf - 第89页
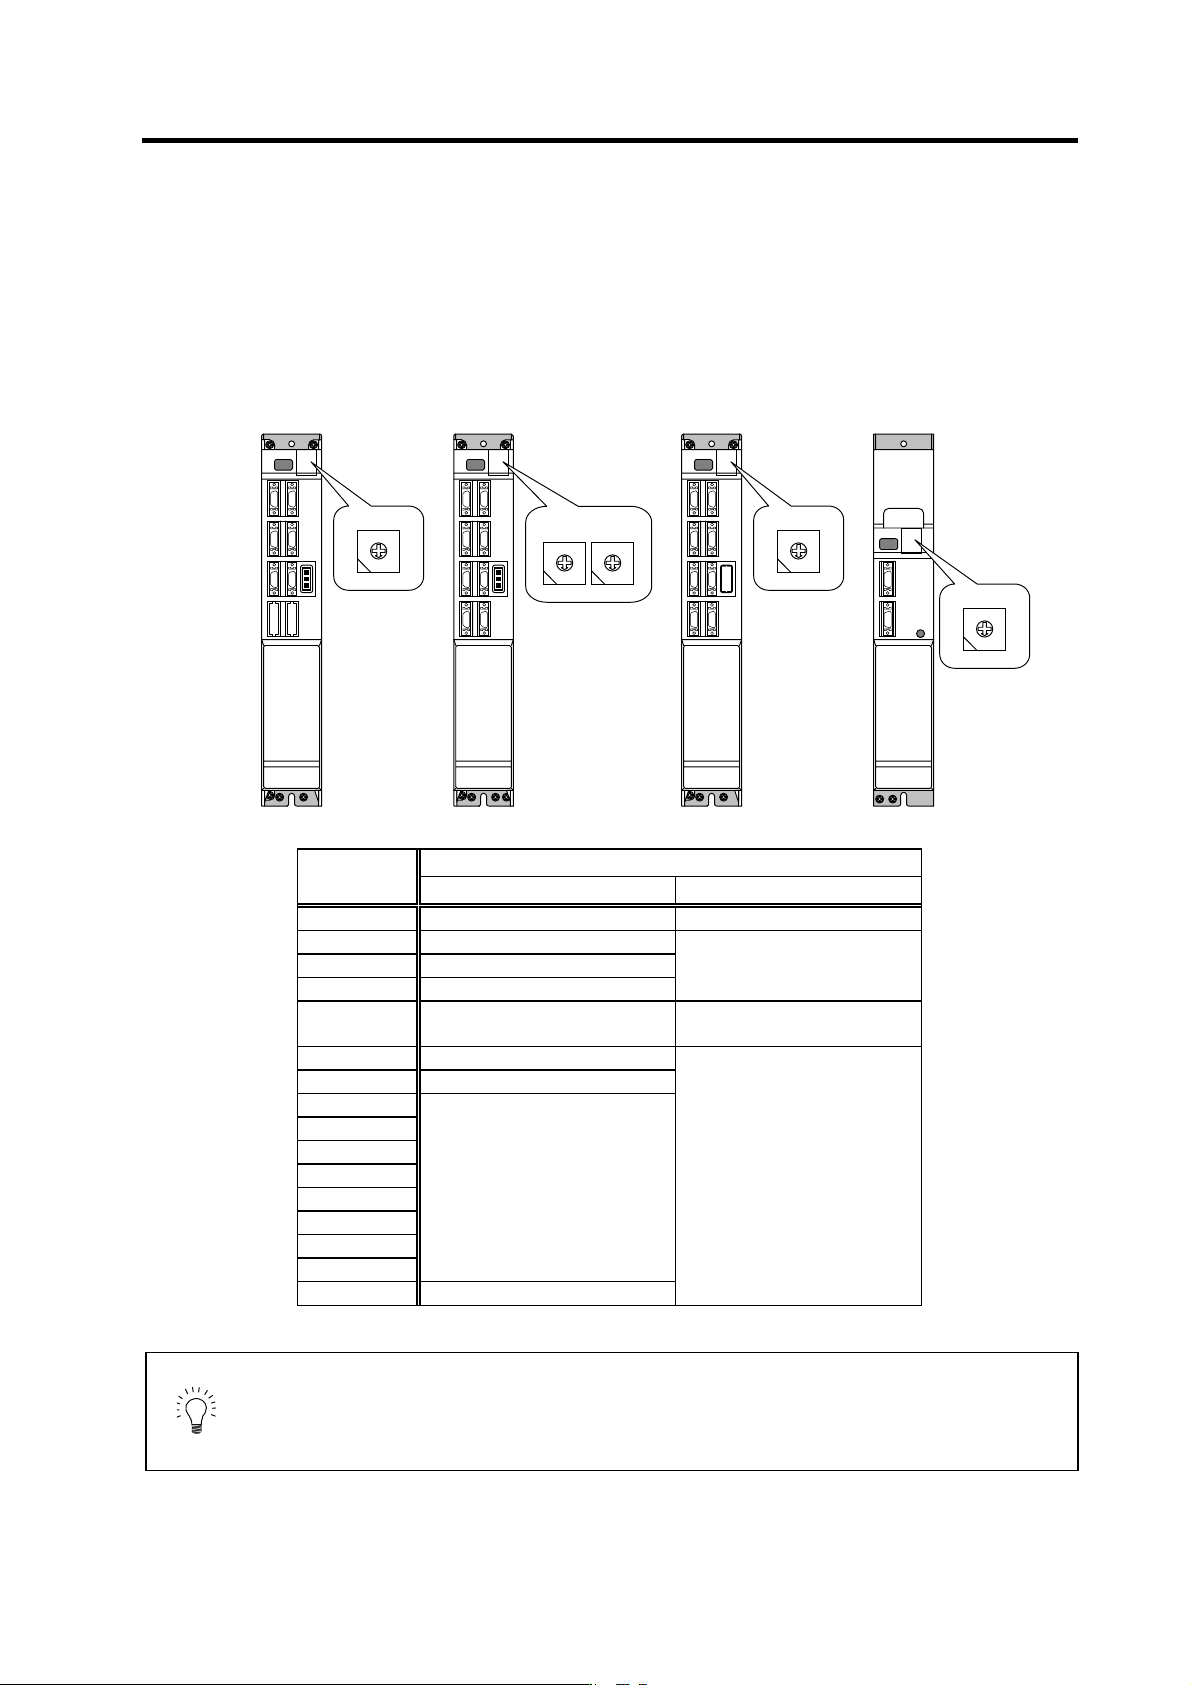
3. Setup 3 - 2 3-1 Initial setup 3-1-1 Setting the rotary switch Before turning on the power, the axis No. must be set with the rotary switch. The rotary switch settings will be validated when the units are turned ON. De…

3. Setup
3 - 1
3-1 Initial setup........................................................................................................................................ 3-2
3-1-1 Setting the rotary switch ............................................................................................................ 3-2
3-1-2 Transition of LED display after power is turned ON .................................................................. 3-3
3-1-3 Servo standard specifications and high-gain specifications ...................................................... 3-4
3-2 Setting the initial parameters for the servo drive unit (High-gain specifications).......................... 3-5
3-2-1 Setting the standard parameters ............................................................................................... 3-5
3-2-2 List of standard parameters for each servomotor.................................................................... 3-11
3-2-3 Servo parameter list................................................................................................................. 3-23
3-3 Setting the initial parameters for the servo drive unit (Standard specifications) ............................ 3-39
3-3-1 Setting the standard parameters ............................................................................................. 3-39
3-3-2 List of standard parameters for each servomotor.................................................................... 3-44
3-3-3 Servo parameter list................................................................................................................. 3-51
3-4 Restrictions on servo control .......................................................................................................... 3-63
3-4-1 Restrictions of electronic gear setting value ............................................................................3-63
3-4-2 Restrictions on absolute position control ................................................................................. 3-64
3-5 Setting the initial parameters for the spindle drive unit................................................................... 3-65
3-5-1 Spindle specification parameters............................................................................................. 3-65
3-5-2 List of spindle parameters........................................................................................................ 3-70
3-6 Initial adjustment of the spindle PLG ............................................................................................ 3-104
3-6-1 Adjusting the PLG installation................................................................................................ 3-104
3-6-2 Z phase automatic adjustment............................................................................................... 3-110
3-6-3 Motor end PLG automatic adjustment ................................................................................... 3-111
3-6-4 Spindle end PLG automatic adjustment ................................................................................ 3-112
3. Setup
3 - 2
3-1 Initial setup
3-1-1 Setting the rotary switch
Before turning on the power, the axis No. must be set with the rotary switch. The rotary switch settings
will be validated when the units are turned ON.
Details
Setting the
rotary switch
Setting the MDS-C1-V1/V2/SP Setting the MDS-C1-CV
0 1st axis External emergency stop invalid
1 2nd axis
2 3rd axis
3 4th axis
Setting prohibited
4 5th axis
External emergency stop valid
(Used CN23)
5 6th axis
6 7th axis
7
8
9
A
B
C
D
E
Setting prohibited
F Axis not used
Setting prohibited
POINT
When an axis that is not used is selected, that axis will not be controlled when
the power is turned ON, and "Ab" will remain displayed on the LED. If the power
of the axis not in use is disconnected, the NC system's emergency stop cannot
be released.
1st axis
Servo drive unit
(MDS-C1-V1)
2nd axis
Servo drive unit
(MDS-C1-V2)
Spindle drive unit
(MDS-C1-SP)
Power supply unit
(MDS-C1-CV)
0
1 F
2 E
4 C
3 D
5 B
6 A
7 9
8
0
1 F
2 E
4 C
3 D
5 B
6 A
7 9
8
L axis
0
1 F
2 E
4 C
3 D
5 B
6 A
7 9
8
M axis
0
1 F
2 E
4 C
3 D
5 B
6 A
7 9
8
0
1 F
2 E
4 C
3 D
5 B
6 A
7 9
8
3. Setup
3 - 3
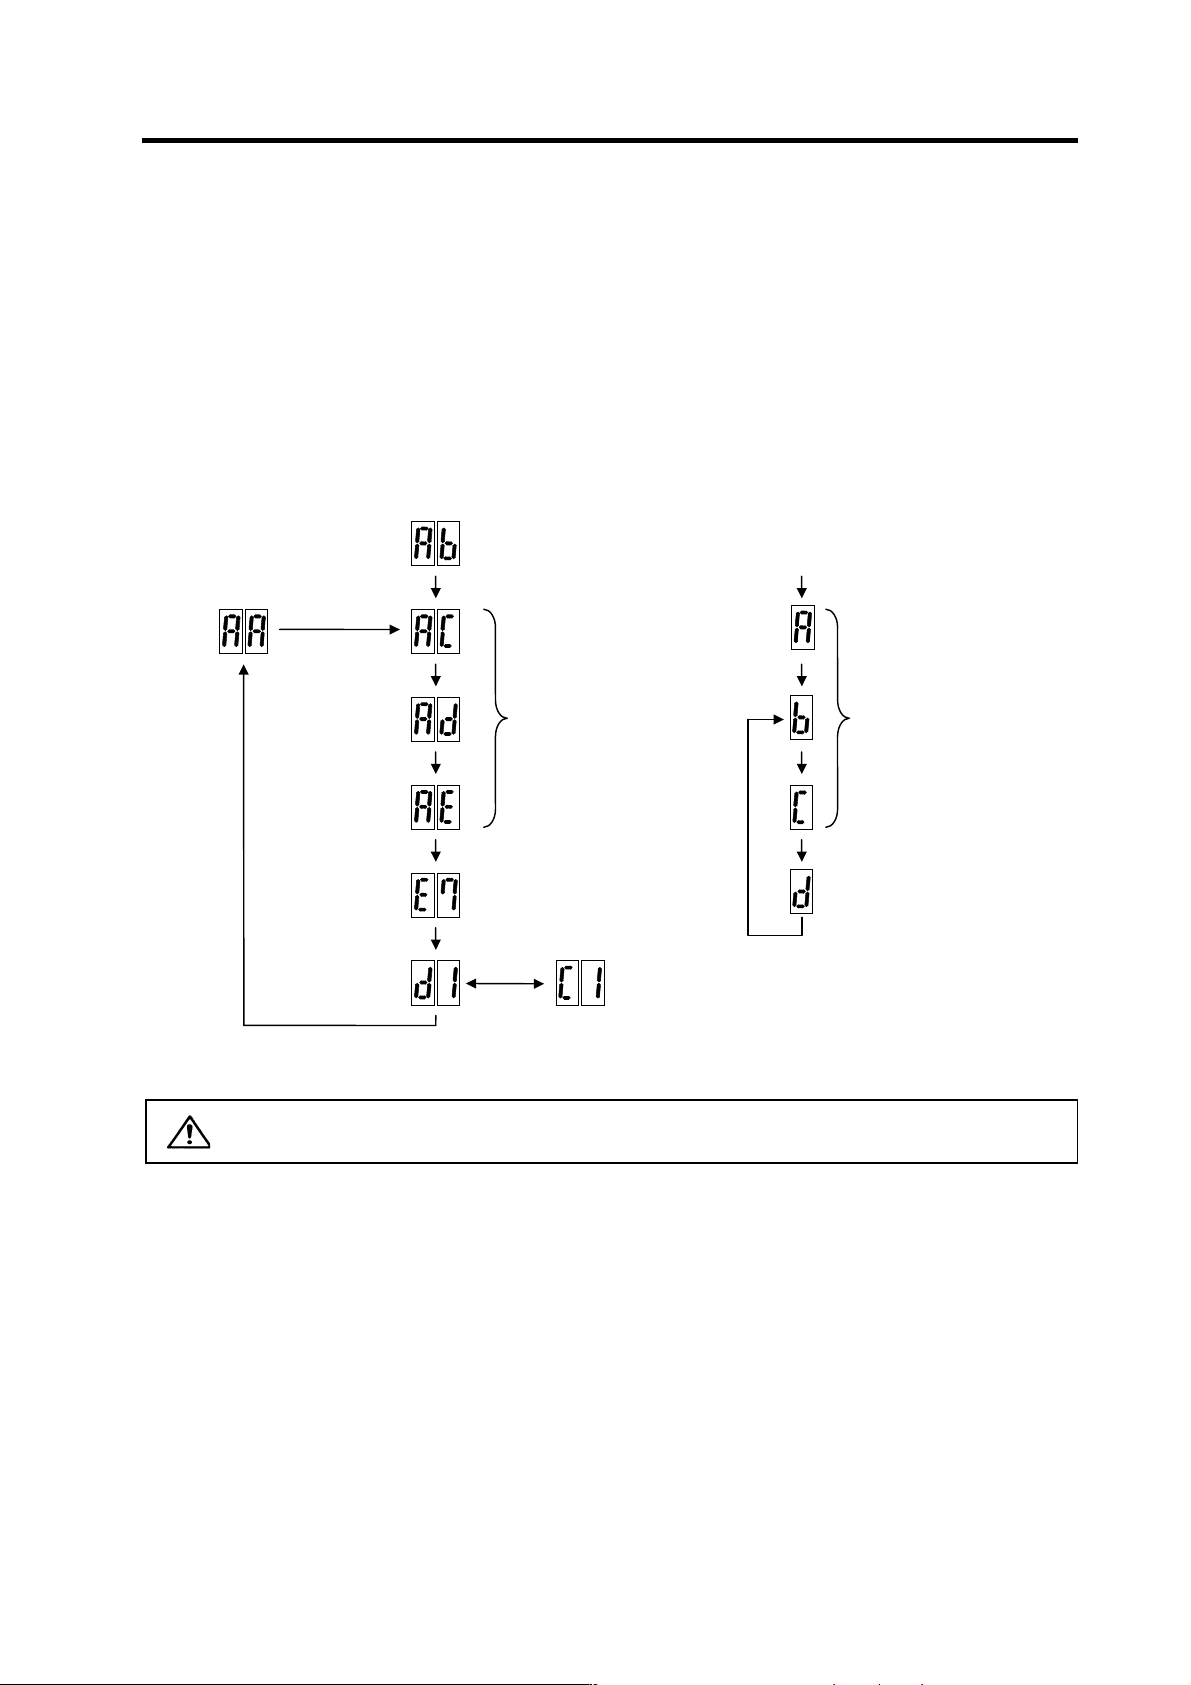
3-1-2 Transition of LED display after power is turned ON
When CNC, each drive unit and the power supply unit power have been turned ON, each unit will
automatically execute self-diagnosis and initial settings for operation, etc. The LEDs on the front of the
units will change as shown below according to the progression of these processes.
If an alarm occurs, the alarm No. will appear on the LEDs. Refer to "6-1 LED display when alarm or
warning occurs" for details on the alarm displays.
CAUTION
Always input emergency stop when starting the servo system.
Executing initial
communication with NC
Drive unit initialization complete
Waiting for NC power start up
Emergency stop state
The LED will alternate between
F# → E7 → not lit.
(# is the set axis No.)
Repeats lighting and going out.
(1st axis in the display example)
NC power ON
Waiting for NC
power start up
NC power OFF
NC power ON
LED display
Servo ON state Servo OFF sate
Drive units
Executing initial communication
with NC
A : Initializing
b : Ready OFF, in emergency stop
c : Ready ON/servo OFF
Emergency stop state
NC power
ON
LED display
Servo ON state
Power supply unit