3_AVS-V2_MCT-UM-internal_EN_07-2019 - 第31页
ASM AVS - U SER M ANUAL P AGE 31 OF 182 3. 4.3 Pr epar e wor k on pr int ers
ASM AVS - USER MANUAL
PAGE 30 OF 182
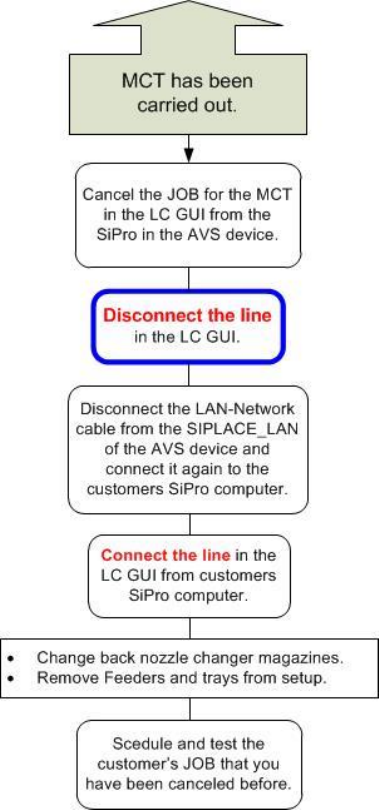
3.4.2 Post processing work on customer site
ASM AVS - USER MANUAL
PAGE 31 OF 182
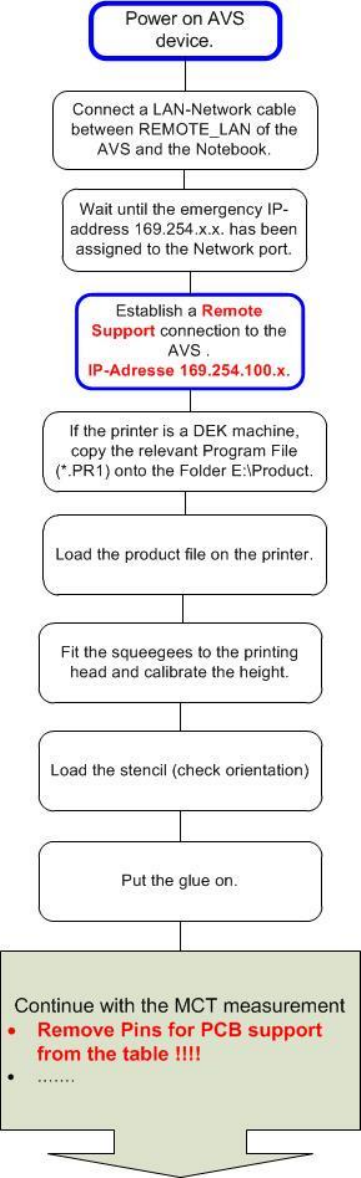
3.4.3 Prepare work on printers
ASM AVS - USER MANUAL
PAGE 32 OF 182
3.5 Controlling the ASM AVS
The engineer's notebook is always set to DHCP (automatic referencing of network ad-dress).
To avoid having to modify the standard TCP/IP settings at the notebook, the ASM AVS network
card responsible for the remote connection uses an address from the address range
169.254.xxx.xxx which has been released by Microsoft for emergency addresses.
If a connection is established to another subscriber and it is not possible to assign an ad-dress to
this connection (because the network in question does not have a DHCP server) then, on the ex-
piry of a timeout, an address from the range 169.254.xxx.xxx is assigned automatically.
The procedure described below can then be used to establish a remote connection to the ASM
AVS computer.
NOTICE
The time that elapses before a remote desktop connection is successfully established depends, on the one
hand, on the notebook timeout described above and, on the other, on the ASM AVS computer boot time.
This can take several minutes.
If the automatic allocation of the emergency address is not working properly, the IP address can
be applied via the properties window of the Ethernet connection on the notebook.
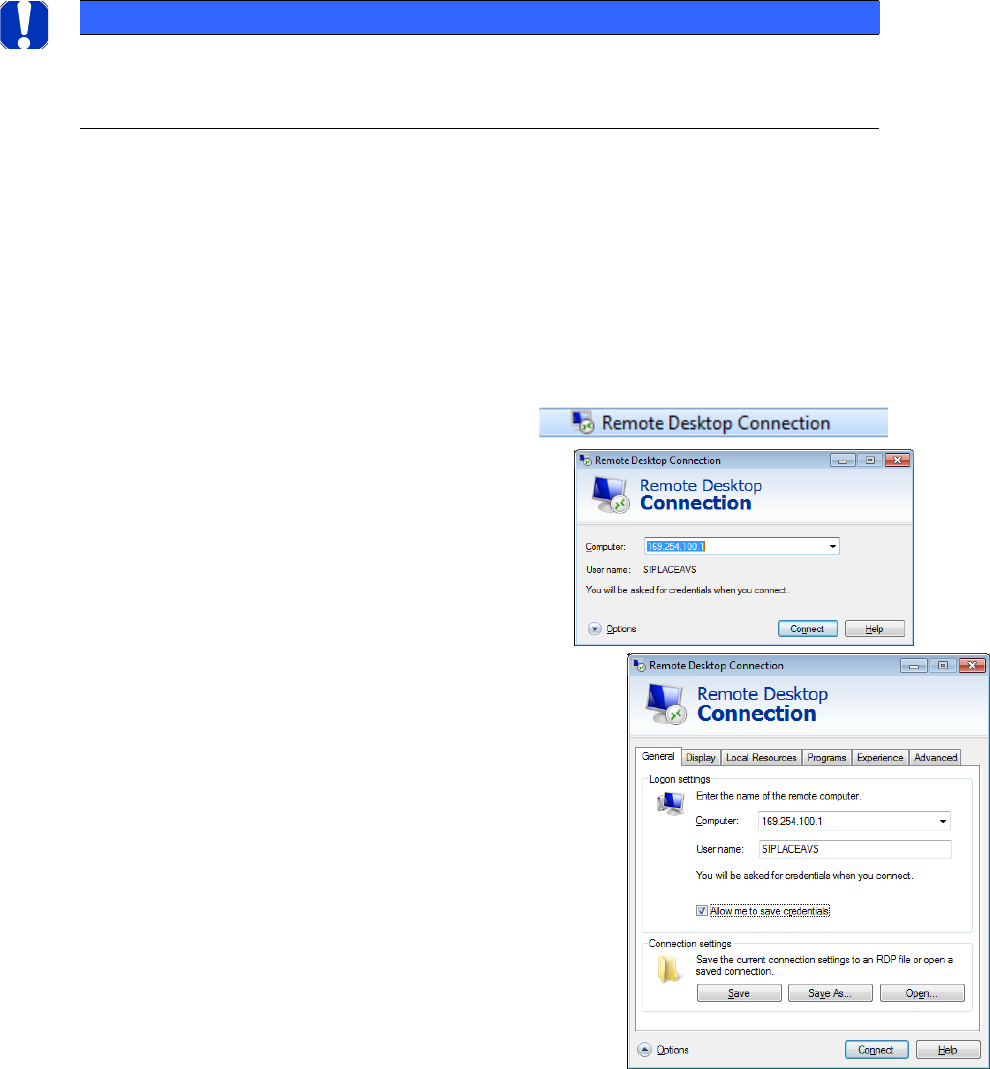
3.5.1 Establishing the Notebook ASM AVS connection
Establishing the Remote Desktop connection:
On the Notebook: START => Accessories =>
Insert the TCP/IP-address of the ASM AVS and
press »Connect« =>
The TCP/IP-address is always like 169.254.100.x.
The last number of the address means the
serial number of the AVS device.
Click on the Button »Options«.
Here you can insert your login data:
Username: SIPLACEAdmin
Password: MS128
Activate the option »allow me to save credentials«.
The remote connection can be stored for the next time as
a Link on the desktop of your computer. Therefore, click
onto the »Save As…« Button and follow the instructions.