Service Manual SIPLACE SmartFeeder.pdf - 第182页
8 Repairs to SmartFeeder 2x8 mm X / Xi 8.5 Pickup window 182 Service Manual SIPLACE SmartFeeder 4 - 8 mm X / Xi SIPLACE SmartFeeder 2 x 8 mm X / Xi 11/2020 ► Loosen the axis on the pickup window (1) and push this out of…
8 Repairs to SmartFeeder 2x8 mm X / Xi
8.5 Pickup window
Service Manual SIPLACE SmartFeeder 4 - 8 mm X / Xi SIPLACE SmartFeeder 2 x 8 mm X / Xi 11/2020 181
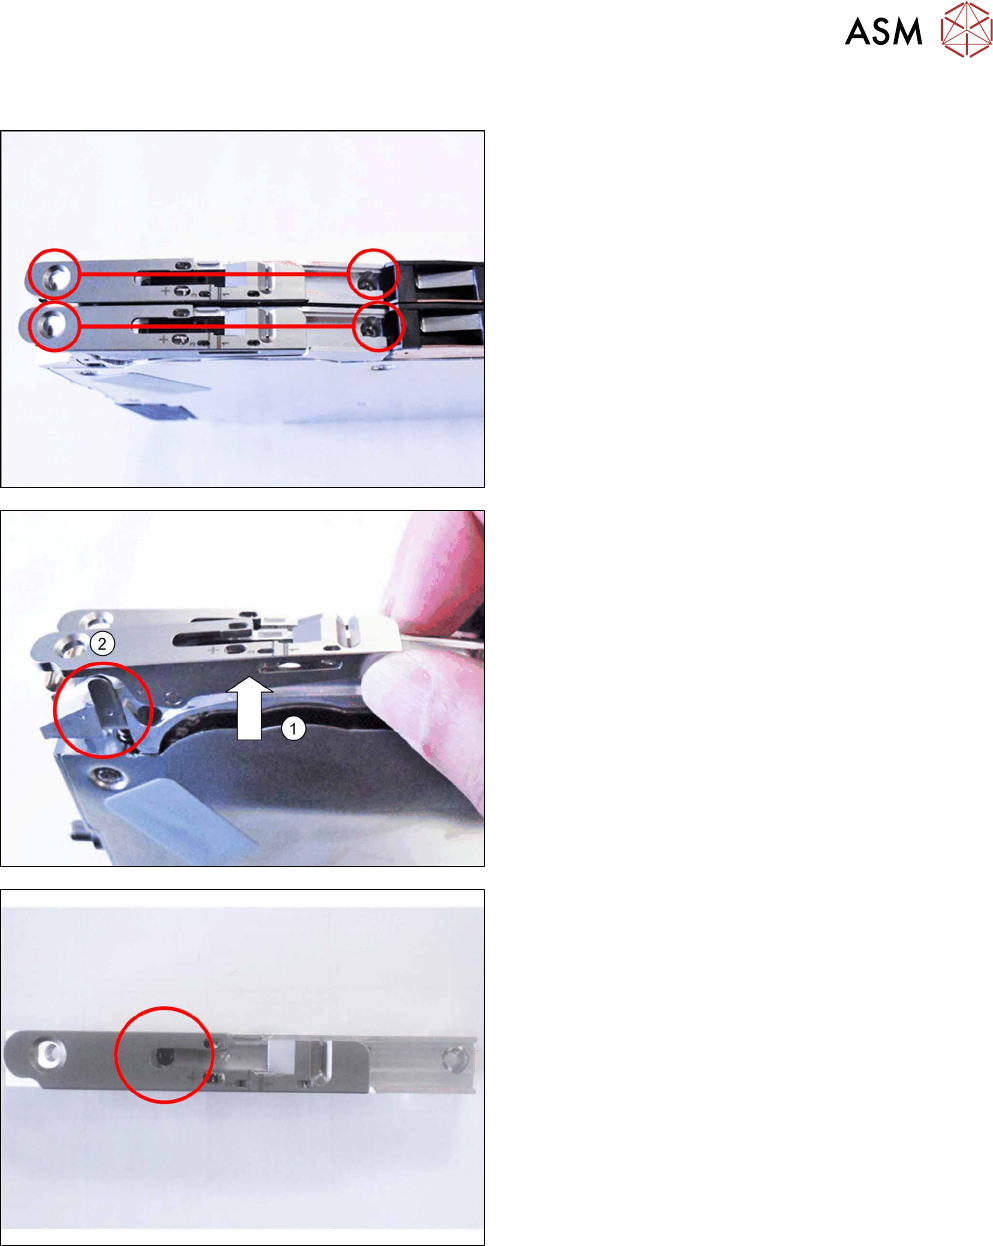
8.5.1 Removing the pickup window
► Remove the 2 marked screws fastening the rel-
evant pickup window and tape duct to the feeder
module.
► Lift the pickup window up and off, together with
the tape duct.(1)
► Also remove the pressure spring and the pres-
sure bracket, to prevent these being lost.(2)
► Remove the fitting screw fastening the pickup
window axis.
8 Repairs to SmartFeeder 2x8 mm X / Xi
8.5 Pickup window
182 Service Manual SIPLACE SmartFeeder 4 - 8 mm X / Xi SIPLACE SmartFeeder 2 x 8 mm X / Xi 11/2020
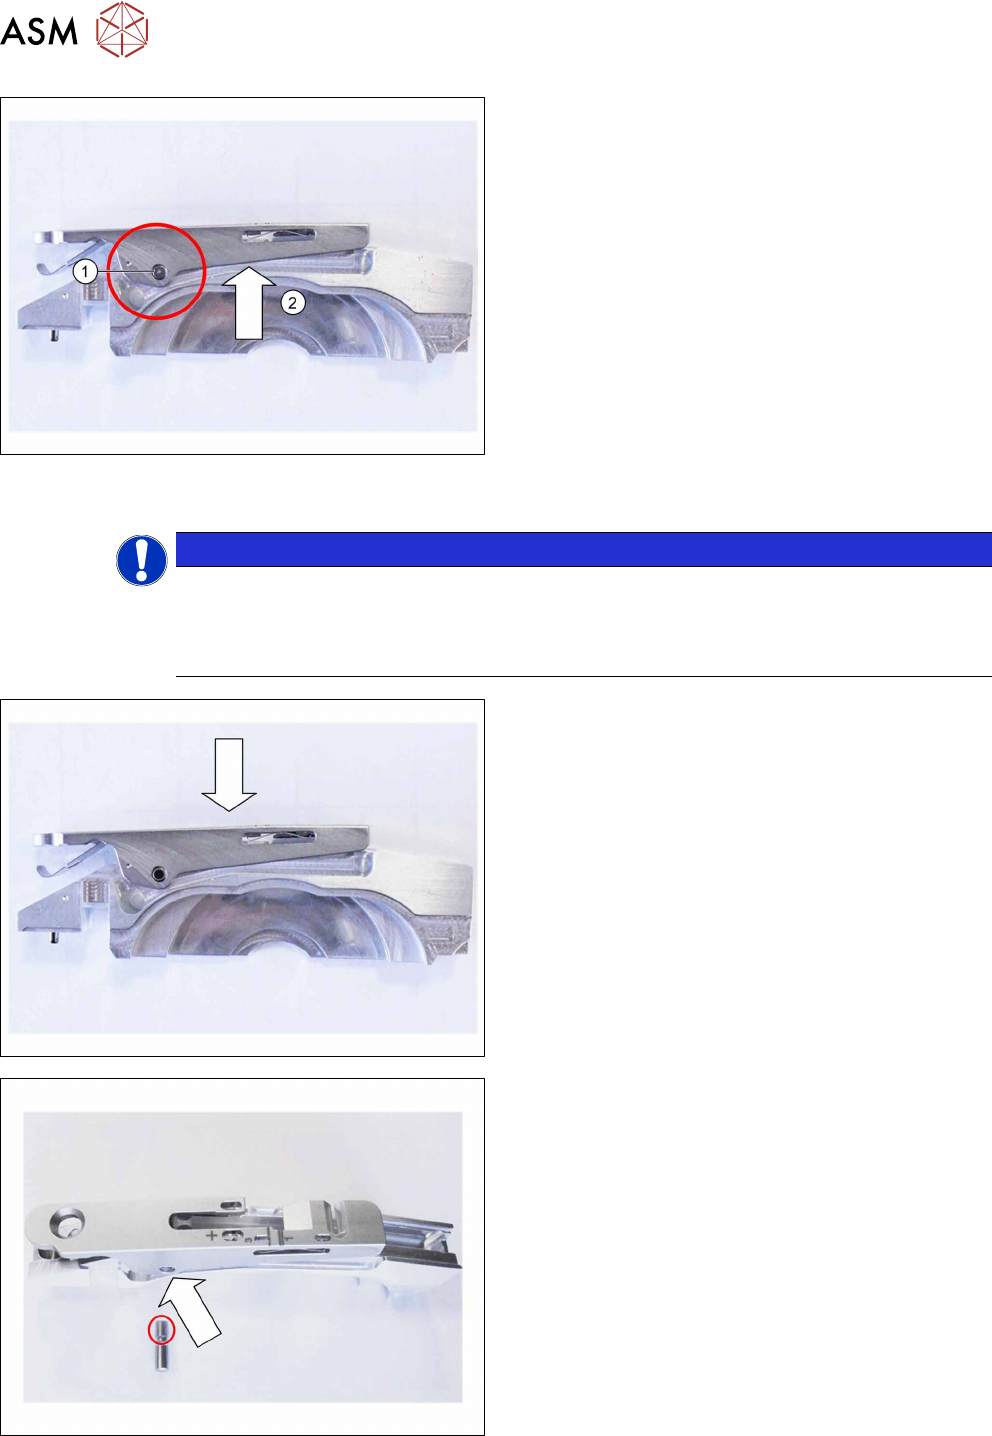
► Loosen the axis on the pickup window(1) and
push this out of the tape duct.
► Lift the pickup window up and off.(2)
8.5.2 Fitting the pickup window
NOTICE
If using the old spare parts
If you want to use the old tape duct, clean it thoroughly before fitting, particularly around the
drilled hole into which the axis will be fitted.
Clean the pressure spring.
► Fit the pickup window onto the tape duct from
above, as shown.
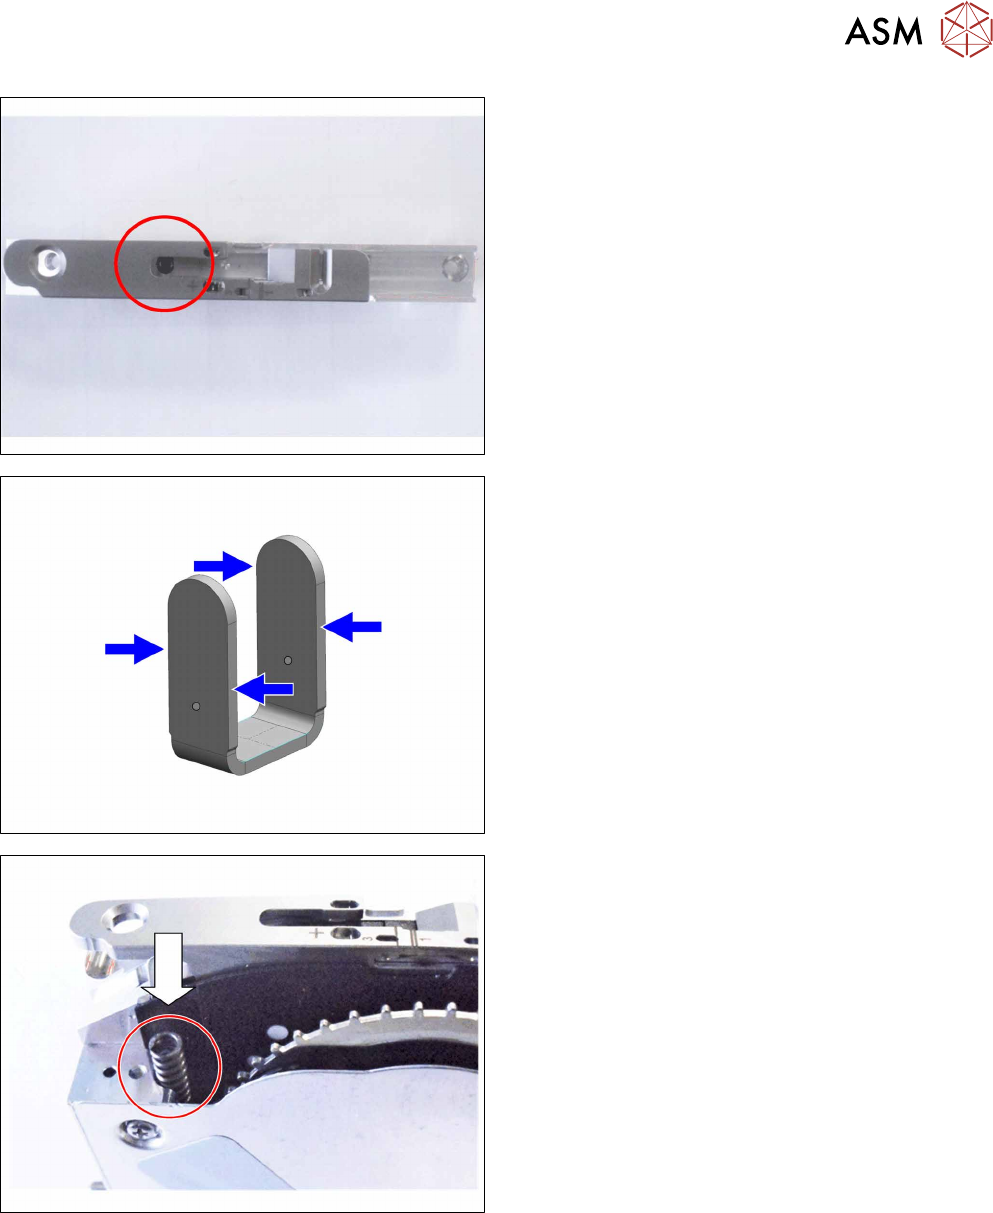
► Push the axis into the tape duct, with the short
end pointing forwards.
► Fasten the axis.
8 Repairs to SmartFeeder 2x8 mm X / Xi
8.5 Pickup window
Service Manual SIPLACE SmartFeeder 4 - 8 mm X / Xi SIPLACE SmartFeeder 2 x 8 mm X / Xi 11/2020 183
► Fix the pickup window axis into the tape duct with
the fitting screw.
► Clean the pressure spring.
► Apply "Klubersynt GE 14-151 Tub 45g" grease
[03005735-xx] to the side edges of the pressure
fork.
► Insert the pressure spring.