Service Manual SIPLACE SmartFeeder.pdf - 第220页
8 Repairs to SmartFeeder 2x8 mm X / Xi 8.9 Foil rocker 220 Service Manual SIPLACE SmartFeeder 4 - 8 mm X / Xi SIPLACE SmartFeeder 2 x 8 mm X / Xi 11/2020 8.9.2 Cable light barrier emitter Spare part required Fig.68: Cab…
8 Repairs to SmartFeeder 2x8 mm X / Xi
8.9 Foil rocker
Service Manual SIPLACE SmartFeeder 4 - 8 mm X / Xi SIPLACE SmartFeeder 2 x 8 mm X / Xi 11/2020 219
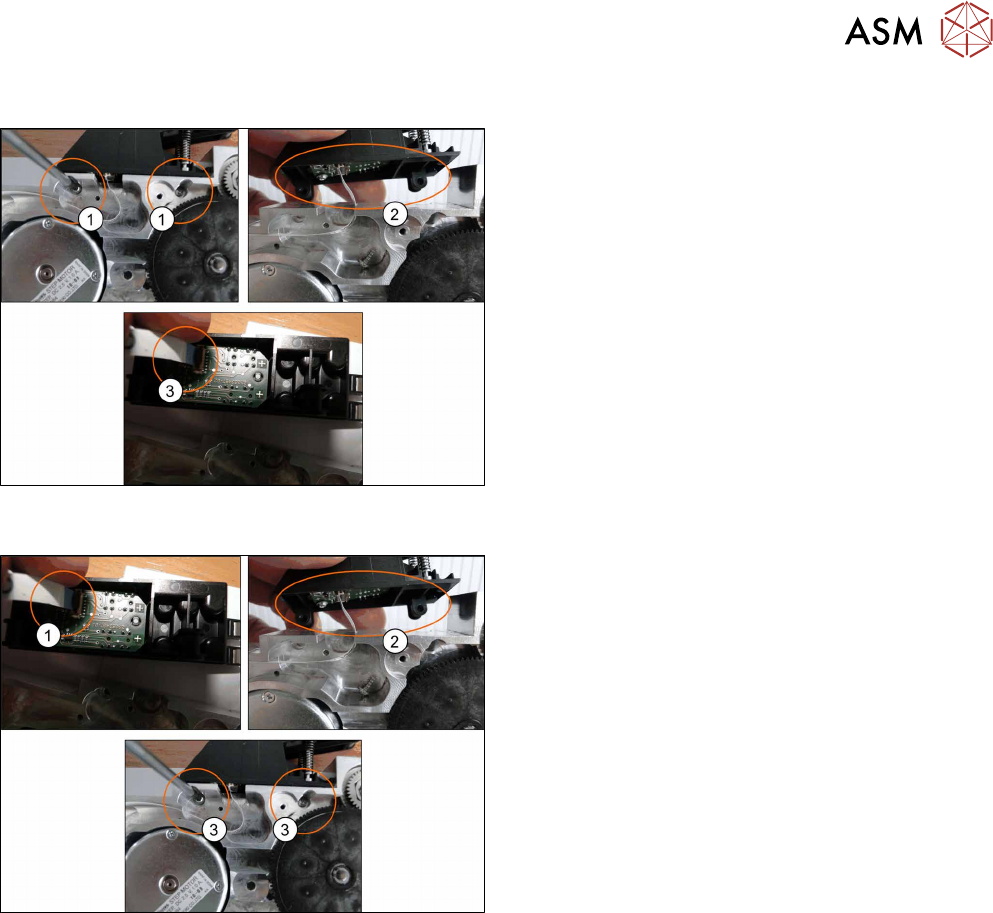
8.9.1.1 Removing the Foil Rocker Cpl.
► Place the feeder on a stable, level and clean sur-
face.
► Remove the left and right side covers. (See 8.3.1
"Removing the Left Side Cover" [}174], 8.3.3
"Removing the Right Side Cover" [}175])
► Loosen and remove the TORX screws from the
foil rocker.(1)
► Push the foil rocker to the right(2)
► Remove the cable from the connection.(3)
8.9.1.2 Fitting the Foil Rocker Cpl.
► Insert the end of the flat ribbon cable (with the
blue side pointing upwards) as far as the stop in
the marked flat ribbon connection
. Fold the connection closed and make sure that
the cable is securely fitted. (1)
► Fit the foil rocker onto the feeder module
base.(2)
► Fix the foil rocker into place with 2 TORX
screws.(3)
► Refit the left and right side covers (see 8.3.2 "Fit-
ting the Left Side Cover" [}175], 8.3.4 "Fitting the
Right Side Cover" [}176]).
8 Repairs to SmartFeeder 2x8 mm X / Xi
8.9 Foil rocker
220 Service Manual SIPLACE SmartFeeder 4 - 8 mm X / Xi SIPLACE SmartFeeder 2 x 8 mm X / Xi 11/2020
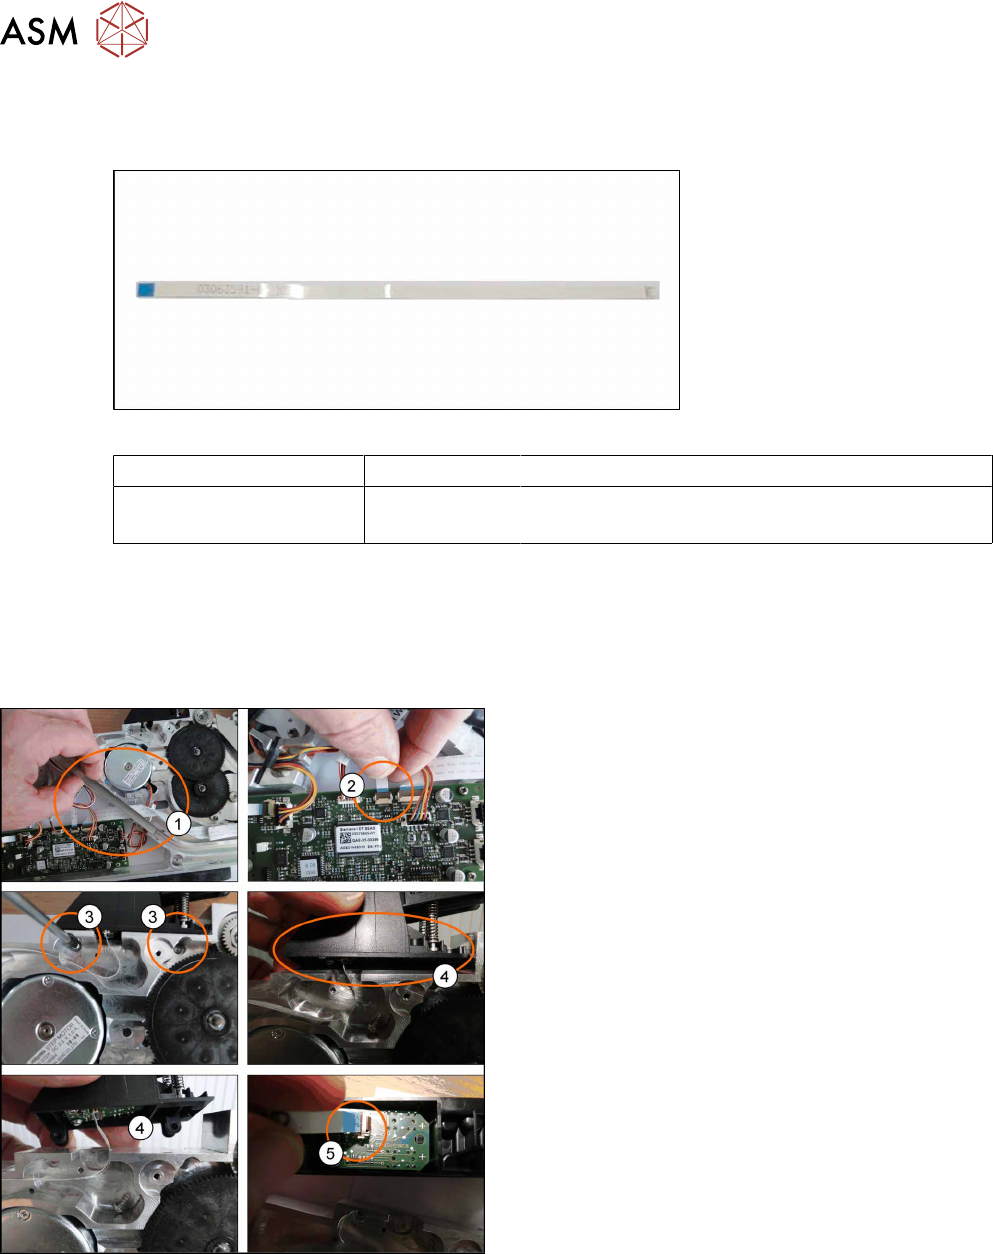
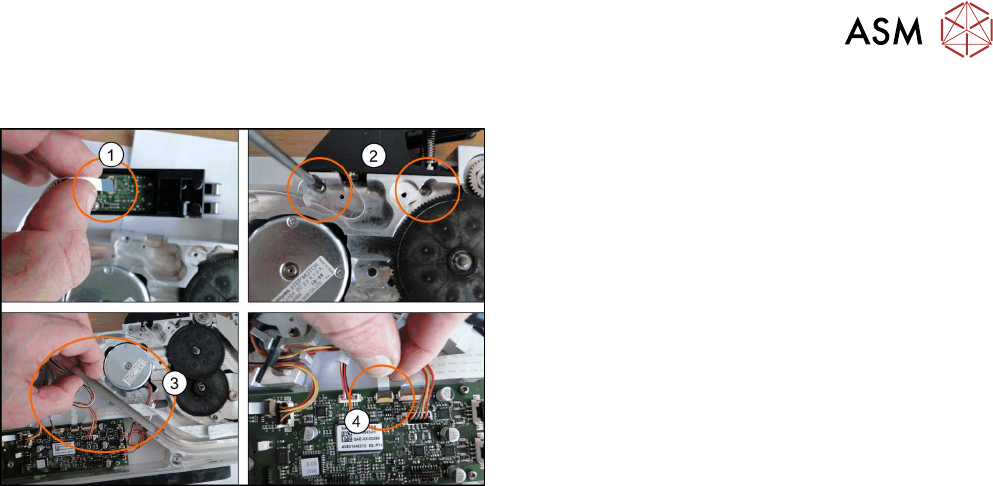
8.9.2 Cable light barrier emitter
Spare part required
Fig.68: Cable light barrier emitter
Feeder module Item no. Designation
SmartFeeder 2x8mmX
SmartFeeder 2x8 mm Xi
03063591-xx Cable light barrier emitter
Tools required
●
TORX screwdriver 0.6Nm, size T8
●
Small flat-bladed screwdriver
8.9.2.1 Removing the light barrier emitter cable
► Place the feeder on a stable, level and clean sur-
face.
► Remove the left and right side covers. (See 8.3.1
"Removing the Left Side Cover" [}174], 8.3.3
"Removing the Right Side Cover" [}175])
► Remove the tape duct.(1)
► Unplug the photo interrupter cable from the main
board.(2)
► Loosen and remove the TORX screws (RF-
SN75-2.5x8-9.8) from the foil rocker.(3)
► Push the foil rocker to the right(4) and unplug the
cable.(5)
8 Repairs to SmartFeeder 2x8 mm X / Xi
8.9 Foil rocker
Service Manual SIPLACE SmartFeeder 4 - 8 mm X / Xi SIPLACE SmartFeeder 2 x 8 mm X / Xi 11/2020 221
8.9.2.2 Fitting the light barrier emitter cable
Fasten the new cable at the same positions as the old
cable.
► Attach the cable to the foil rocket connector.(1)
Insert the end of the flat ribbon cable (with the
blue side pointing upwards) as far as the stop in
the marked flat ribbon connection.
Fold the connection closed and make sure that
the cable is securely fitted.
► Fix the foil rocker into place with two TORX
screws. (2)
► Replace the tape duct, making sure that the
cable is at the bottom.(3)
► Connect the cable to the main board. (4)
Insert the end of the flat ribbon cable (with the
blue side pointing upwards) as far as the stop in
the marked flat ribbon connection.
Fold the connection closed and make sure that
the cable is securely fitted.
► Refit the left and right side covers (see 8.3.2 "Fit-
ting the Left Side Cover" [}175], 8.3.4 "Fitting the
Right Side Cover" [}176]).