Service Manual SIPLACE SmartFeeder.pdf - 第88页
6 Repairs to SmartFeeder 4 mm X / Xi 6.17 Foil container 88 Service Manual SIPLACE SmartFeeder 4 - 8 mm X / Xi SIPLACE SmartFeeder 2 x 8 mm X / Xi 11/2020 6.17.2 Foil box Spare part required Fig.27: Foil box Feeder modu…
6 Repairs to SmartFeeder 4 mm X / Xi
6.17 Foil container
Service Manual SIPLACE SmartFeeder 4 - 8 mm X / Xi SIPLACE SmartFeeder 2 x 8 mm X / Xi 11/2020 87
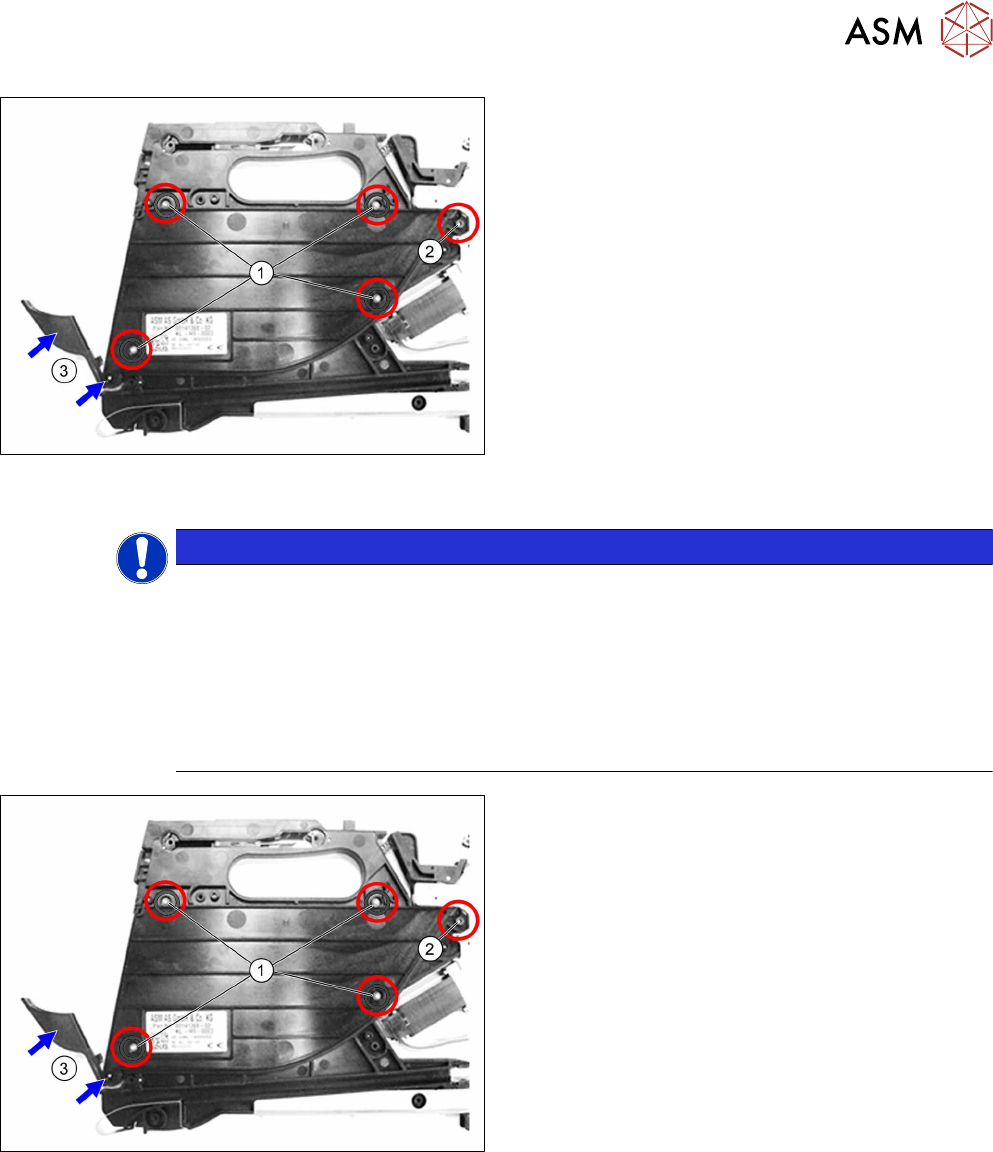
If you want to replace the insertion foil container:
► Remove the 4 TORX screws marked in the dia-
gram. (1)
Use a T8 TORX screwdriver for this.
► Remove the Phillips screw marked in the dia-
gram. (2)
► Remove the cover flap with the shaft.(3)
► Carefully remove the insertion foil container.
If you don't want to replace the insertion foil container:
► Clean the foil container thoroughly and remove
all foil and adhesive residues.
6.17.1.2 Fitting the foil container
NOTICE
Risk of confusion
The "insertion foil container X4Smart V2" has a label with details about the feeder module
(item number, serial number, barcode,…).
When replacing the insertion foil container, you need to create an identical new label and
attach it to the feeder module, so that the feeder module can be clearly identified again
after the replacement.
For a description of how to create new labels, see section 2.5 "Creating new labels for
feeder modules" [}15].
► Carefully place the feeder module with the left
side down on a stable, level and clean surface.
► Inserting the (new) insertion foil container.
► Fasten the insertion foil container with the 4
TORX screws marked in the diagram
(RF‑SN75‑2.5 x 6‑9.8, 03033796‑xx).(1)
Use a TORX screwdriver 0.6Nm, size T8 for this.
► Fasten the Phillips screw (ISO 7045 - M2.5 x 6-
A2-50-H, 03010209‑xx).(2)
► Insert the shaft in the position shown into the in-
sertion foil container, as far as the stop.(3)
► Push the flap onto the shaft.(3)
► Fit the right side cover (see6.3.4 "Fitting the Right Side Cover" [}32]).

6 Repairs to SmartFeeder 4 mm X / Xi
6.17 Foil container
88 Service Manual SIPLACE SmartFeeder 4 - 8 mm X / Xi SIPLACE SmartFeeder 2 x 8 mm X / Xi 11/2020
6.17.2 Foil box
Spare part required
Fig.27: Foil box
Feeder module Item no. Designation
SmartFeeder 4mmX
SmartFeeder 4mmXi
03125663-xx Foil box X4Smart V2
Tools required
●
Phillips screwdriver 0.9Nm
●
TORX screwdriver 0.6Nm, size T8
●
Flat-bladed screwdriver size 1
●
Tweezers
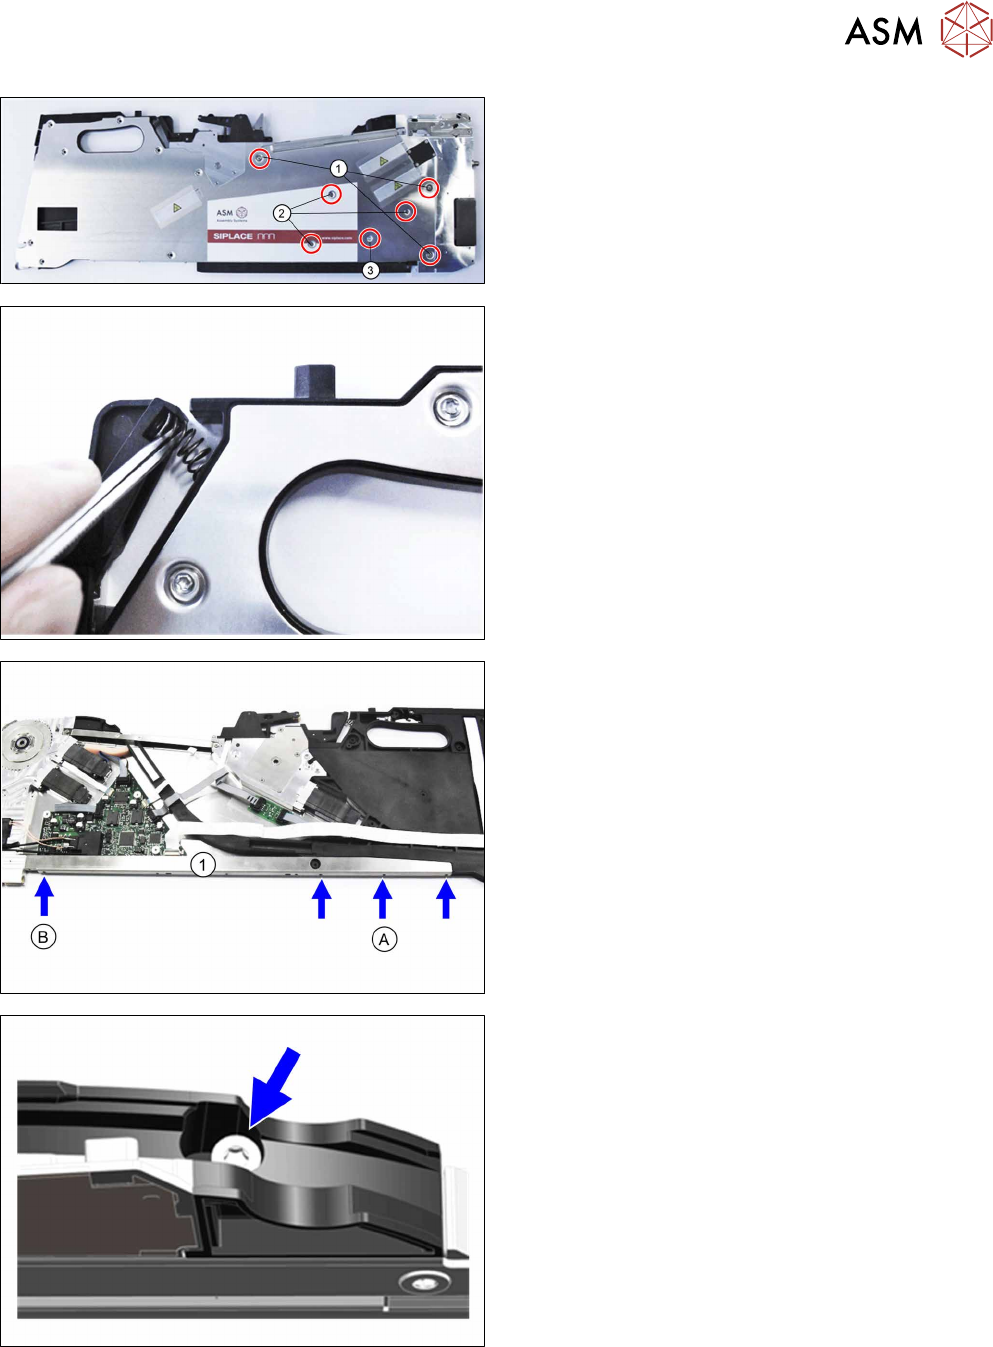
6.17.2.1 Removing the foil box
► Carefully place the feeder module with the left side down on a stable, level and clean surface.
► Remove the right side cover (see 6.3.3 "Removing the Right Side Cover" [}31]).
► Remove the 4 TORX screws marked in the dia-
gram. (1)
Use a T8 TORX screwdriver for this.
► Remove the Phillips screw marked in the dia-
gram. (2)
► Remove the cover flap with the shaft.(3)
► Carefully remove the insertion foil container.
6 Repairs to SmartFeeder 4 mm X / Xi
6.17 Foil container
Service Manual SIPLACE SmartFeeder 4 - 8 mm X / Xi SIPLACE SmartFeeder 2 x 8 mm X / Xi 11/2020 89
► Fasten the right side cover with the marked
screws (see also the notes at 6.3.4
"Fitting the
Right Side Cover" [}32]).
► Carefully place the feeder module with the right
side down on a stable, level and clean surface.
► Remove the spring behind the rocker.
► Remove the left side cover assembly (see 6.3.1
"Removing the Left Side Cover" [}30]).
► Remove the rear sliding guide (see 8.2.1 "Re-
moving the Rear Sliding Guide" [}173]).
► Loosen the screw marked B with a Phillips
screwdriver.
► Loosen the 3 screws marked A with a TORX
screwdriver.
ð The lower stiffener (1) also loosened will be
pulled off the foil box at a later time.
► Remove the TORX screw fastening the filler
piece for the splice sensor.