YSD_Users_E.pdf - 第109页
2-49 2 Basic operation 4 Adjust the sensor le vel when the liquid still remains. 1. Set the syringe full of liquid into the head assembly. c CAUTION If the product label affixed to the syringe is large so that it covers t…
2-48
2
Basic operation
4.1.1 Adjusting the low-liquid sensor
e
1
Press the emergency stop button.
The machine must be in emergency stop to ensure safety during work.
2
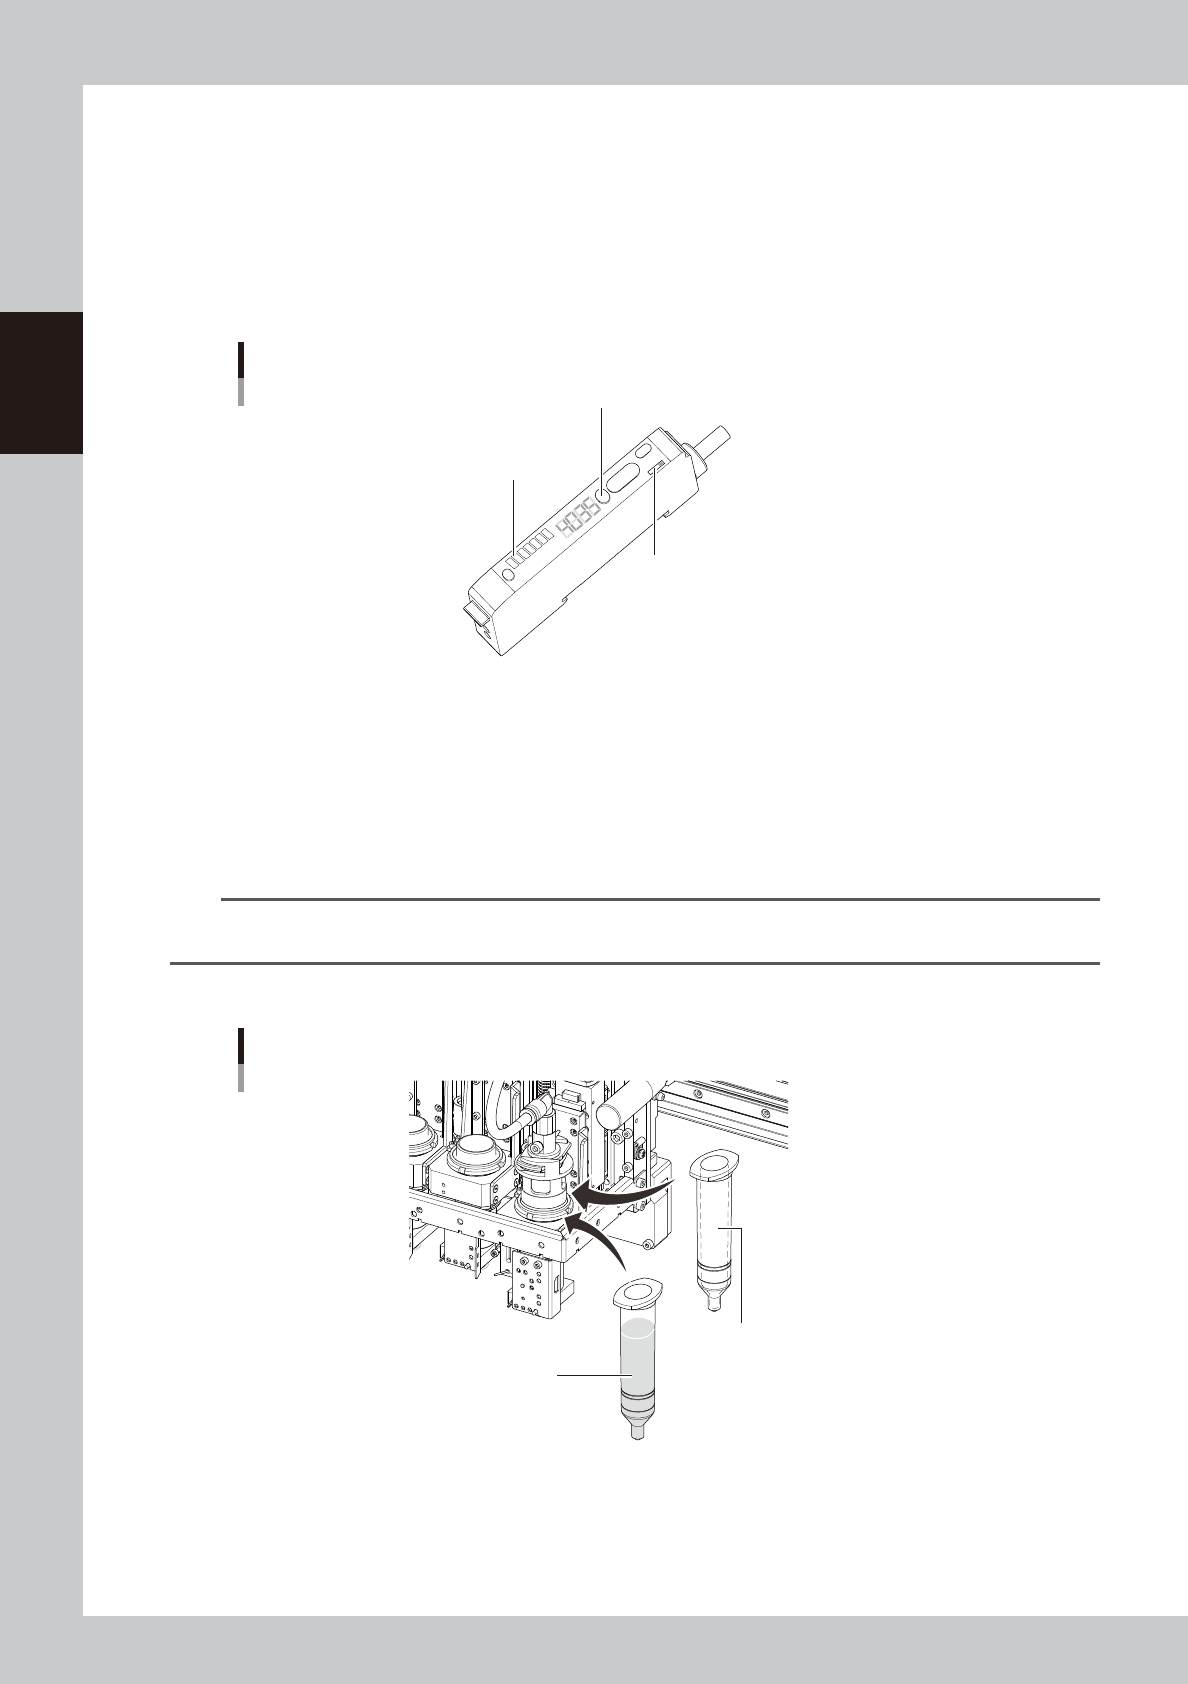
Check the amp signal output setting.
Set the amp output selector switch to the “L_ON” side so that the low-liquid sensor stays on when it is
detecting the dispensing liquid in the syringe.
Low-liquid sensor amp section
Auto SET button
Calibration indicator (orange)
Output selector switch
63212-N7-00
3
Adjust the low-liquid sensor level.
1. Set the empty syringe into the head section.
2. Check that the optical axis of the sensor is at a position 5 mm above the piston in the syringe.
3. Allow the sensor beam to strike the syringe.
The holder in which the syringe is set contains 4 openings. Rotate the R-axis so that the sensor faces
the opening where the highest value is obtained.
n
NOTE
If the sensor height needs to be adjusted, loosen the two bolts holding the sensor bracket and slide the sensor up or
down.
4. Press the Auto SET button on the amp and check that the calibration indicator is lit up.
Setting the syringe
Step 3
Empty syringe
Step 4
Syringe full of liquid
63213-N7-00
2-49
2
Basic operation
4
Adjust the sensor level when the liquid still remains.
1. Set the syringe full of liquid into the head assembly.
c
CAUTION
If the product label affixed to the syringe is large so that it covers the lower part of the syringe, peel it off from the lower
half of the syringe.
If the product label covers the lower part of the syringe, the low-liquid sensor cannot detect whether adhesive has run
out or not.
2. Allow the sensor beam to strike the syringe.
The holder in which the syringe is set contains 4 openings. Rotate the R-axis so that the sensor faces
the opening where the lowest value is obtained.
3. Press the Auto SET button on the amp and check that the calibration indicator turns off.
5
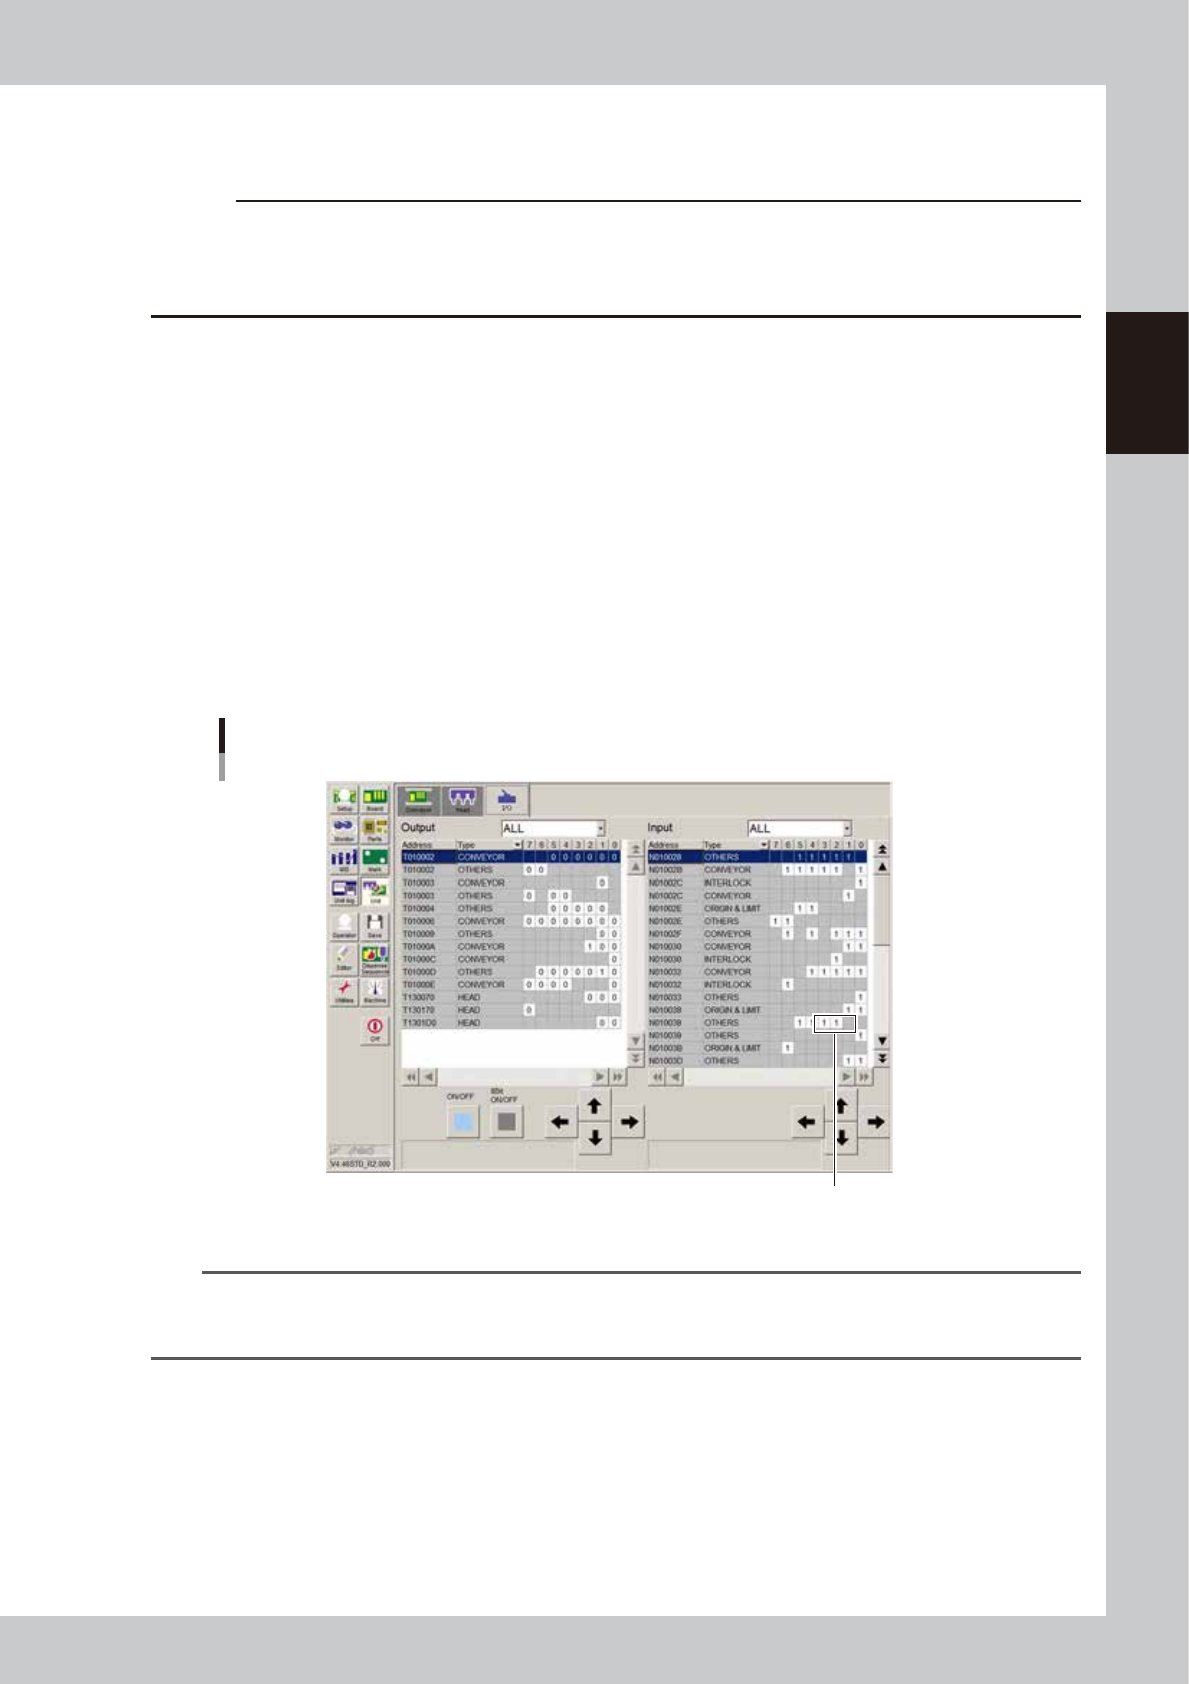
Check the sensor ON/OFF operation.
1. Open the [Unit]-[I/O] tab.
2. Move the piston of the empty syringe up and down across the sensor optical axis, and check that
the I/O monitor for the sensor switches as follows.
Head 1 :N130101
Head 2 :N130102
Head 3 :N130103
When liquid is detected (liquid remains) :1
When no liquid is detected (no liquid remains) :0
Sensor ON/OFF check
Check here.
64242-N7-00
n
NOTE
• When using the low-liquid sensor, set the maximum liquid amount for the dot station to "0".
• When the amp output selector switch is set to “L_ON”, if the sensor cannot correctly detects whether the liquid
remains or not, see “4.1 Remaining amount detection angle setting” in Chapter 3.
2-50
2
Basic operation
4.2 Dot station
4.2.1 Replacing the paper
To replace the predispensing paper in the dot station, use the following procedure.
1
Remove the paper feed unit.
Holding the handles at both ends, remove
the paper feed unit by pulling it to the front.
Removing the paper feed unit
Paper replacement section
Handle
Diffuser section
63214-N7-00
2
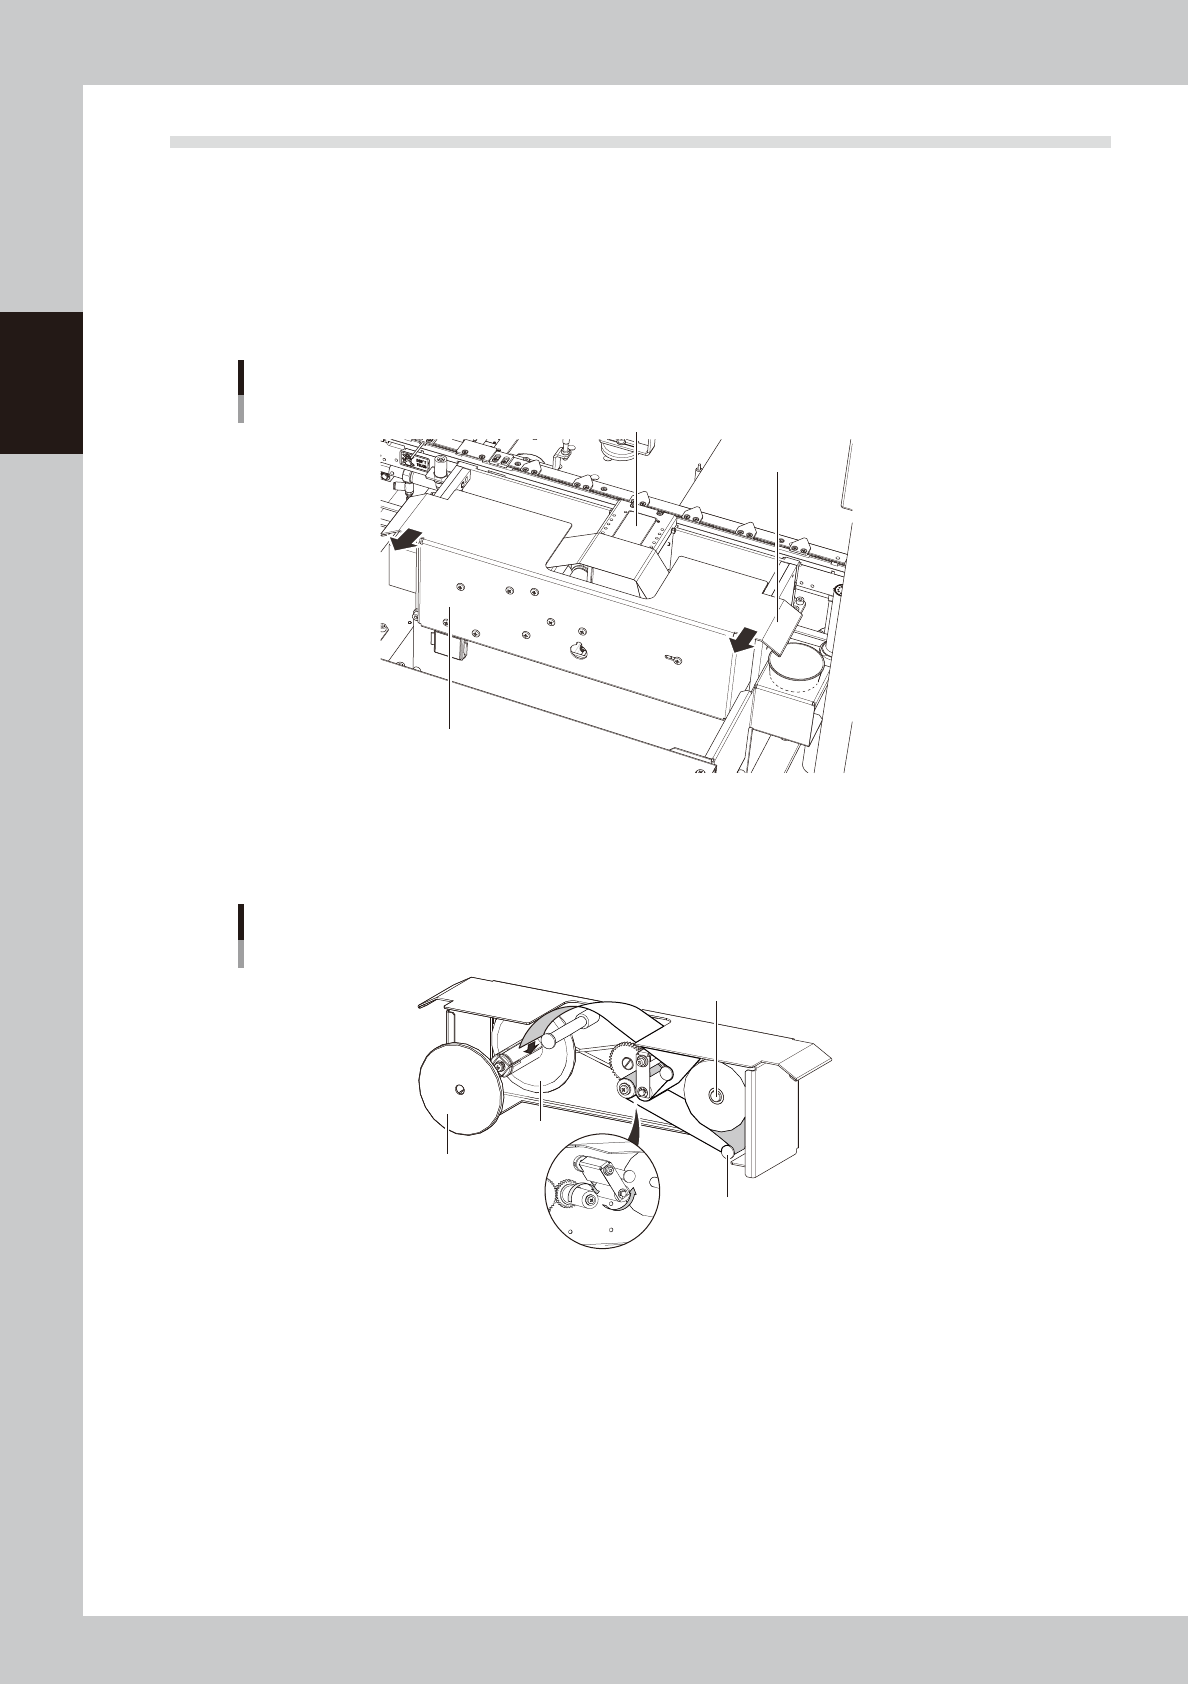
Remove reel 1.
Remove reel 1 on the roll-up side.
Passing the paper through the unit
Paper guide
Reel 1
Roller section
Installation shaft
Reel 2
63215-N7-00
3
Remove the used roll of paper from reel 2.
If it is difficult to remove, cut into the roll with a cutter and remove the used roll.
4
Attach a roll of new paper.
Insert the new paper onto the paper installation shaft as shown above.