YSD_Users_E.pdf - 第274页
6-5 6 Using the advanced functions 4. [Setting] button (fiducial correction) Pressing the [Setting] button displays the dialo g box for "fiducial correction". Y ou can select whether to correct board distortion…
6-4
6
Using the advanced functions
3
Set the trace conditions.
Refer to the following explanations to set the trace conditions.
Teach (trace) condition setting
1
3
Axis move keys
4
2
64403-N7-00
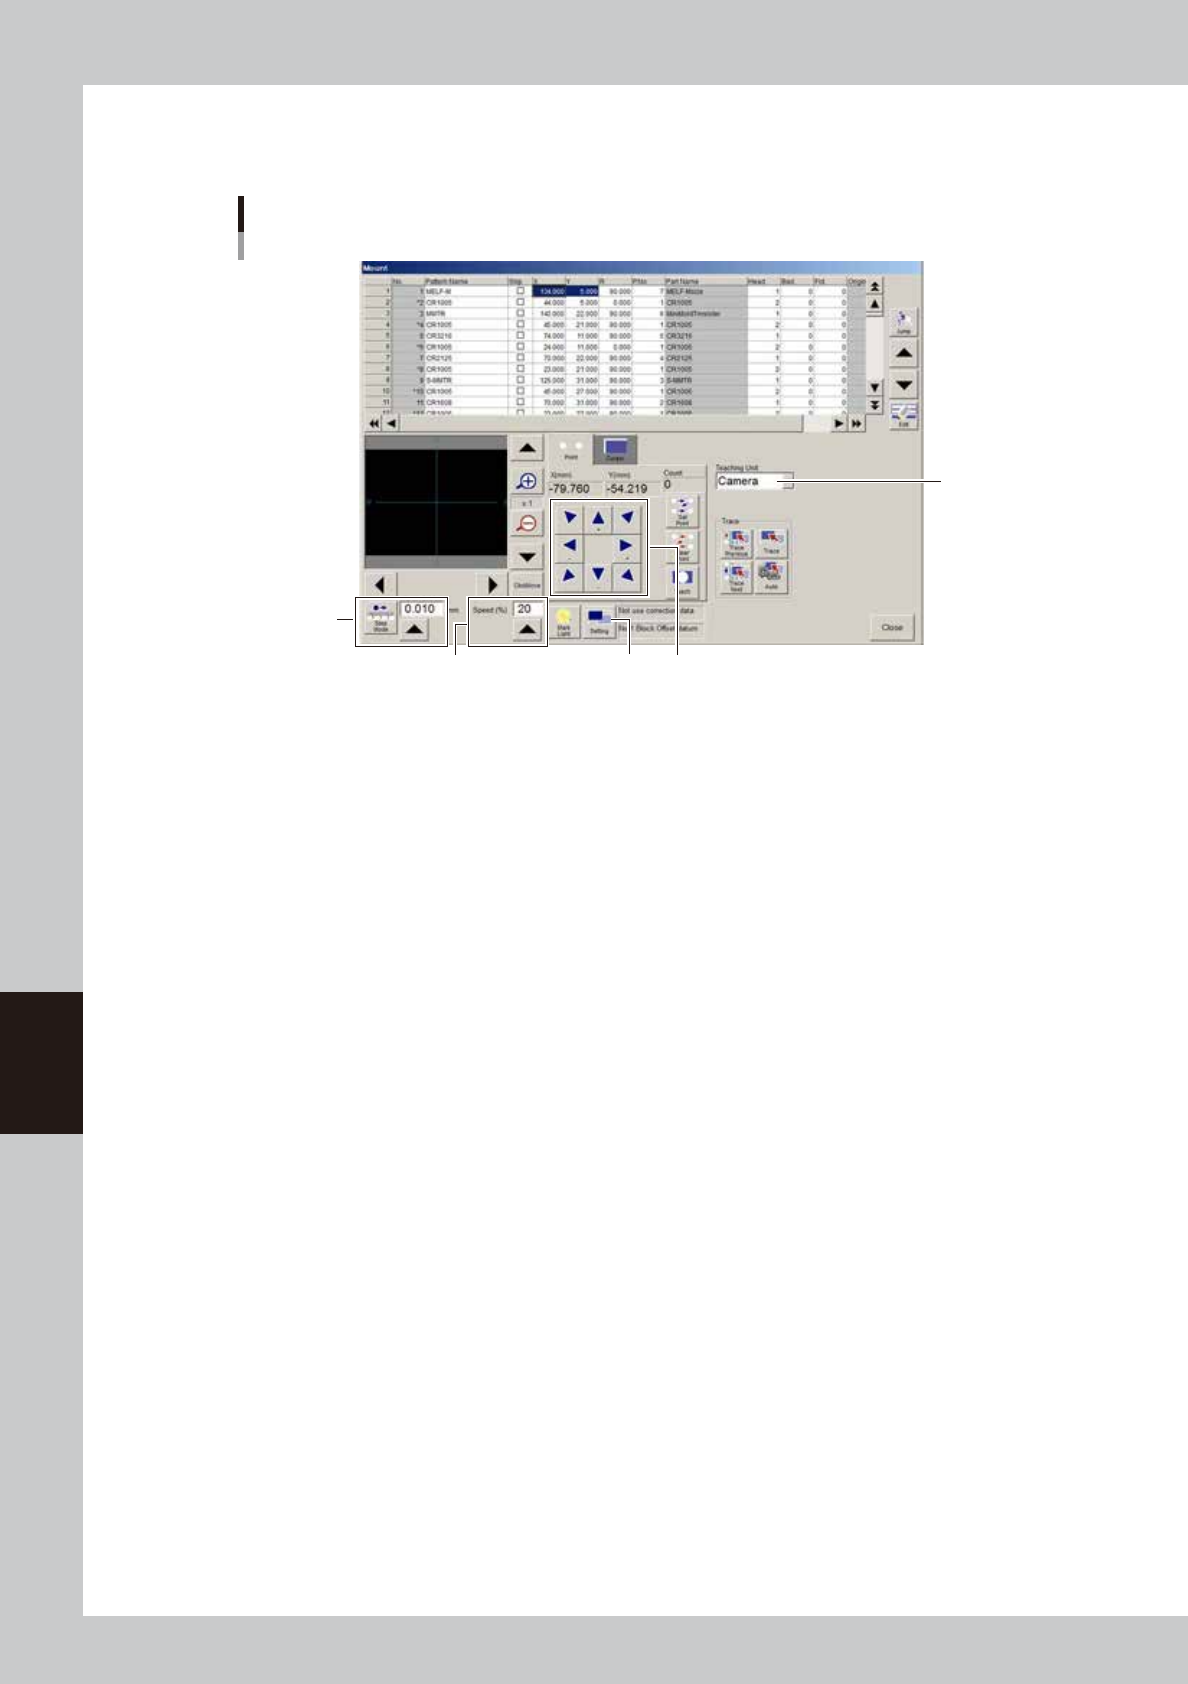
1. Teaching Unit
Select the teaching (trace) unit to move it to a target position, from "Camera", "First Head" or "Last
Head". Normally, select "Camera" to view the trace point on the vision monitor.
2. Step Mode (inching mode)
Use this mode to move the teaching (trace) unit in specified steps (mm). As long as the [Step Mode]
button is depressed, the inching mode takes priority over other motions so that continuous
movement will not change to high-speed movement even if an axis move key is held down.
[Step Mode] button
When this button is depressed, the teaching unit moves a specified distance (mm) each time you
press an axis move key. The inching distance can be set from 0.000 to 10.000 mm.
3. Speed
Set the speed (%) to move the teaching unit. This speed can be set from 1 to 100 by pressing the UP
arrow button. Press an axis move key to start moving the teaching unit at the specified speed.
Holding down the axis move key allows the teaching unit to move at a high speed. Using a slow
speed ("10" or "20") is recommended for safety, although you may at first feel the movement is slow.
6-5
6
Using the advanced functions
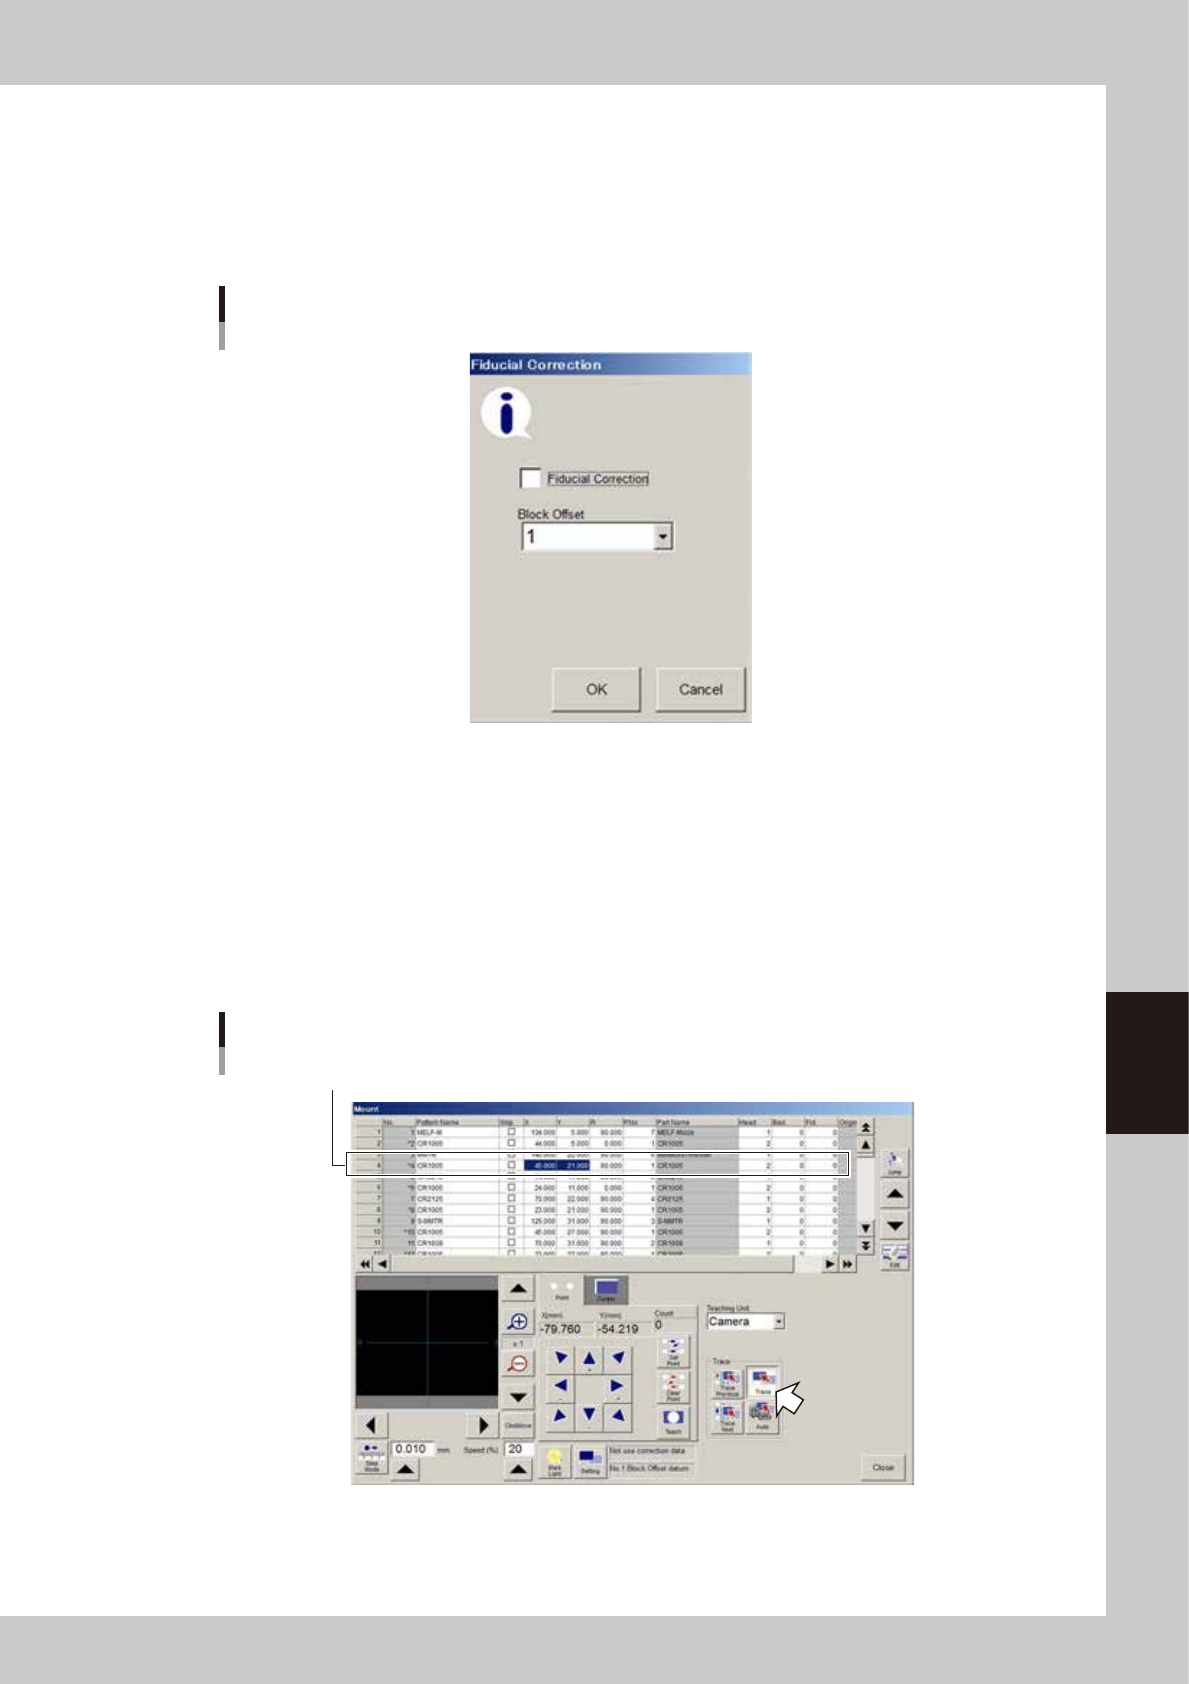
4. [Setting] button (fiducial correction)
Pressing the [Setting] button displays the dialog box for "fiducial correction". You can select whether
to correct board distortions using fiducial marks during trace or teaching. To do this, select the
"Fiducial Adjustment" check box in the dialog box and press the [OK] button. The board fiducial
marks will be automatically recognized to perform more accurate trace or teaching. Note that the
accurate fiducial mark data and coordinates must be set in advance to use this function.
Fiducial correction dialog box
64604-N7-00
4
Select the data to be traced.
Select the data row to be traced.
5
Check the surrounding area for safety.
Upon performing a trace, the teaching (trace) unit will start to move. Stay out of the axis movement
range.
6
Press the [Trace] button.
The teaching (trace) unit moves to the target position specified in step 4.
Performing a trace
Select data row to be traced.
64605-N7-00
6-6
6
Using the advanced functions
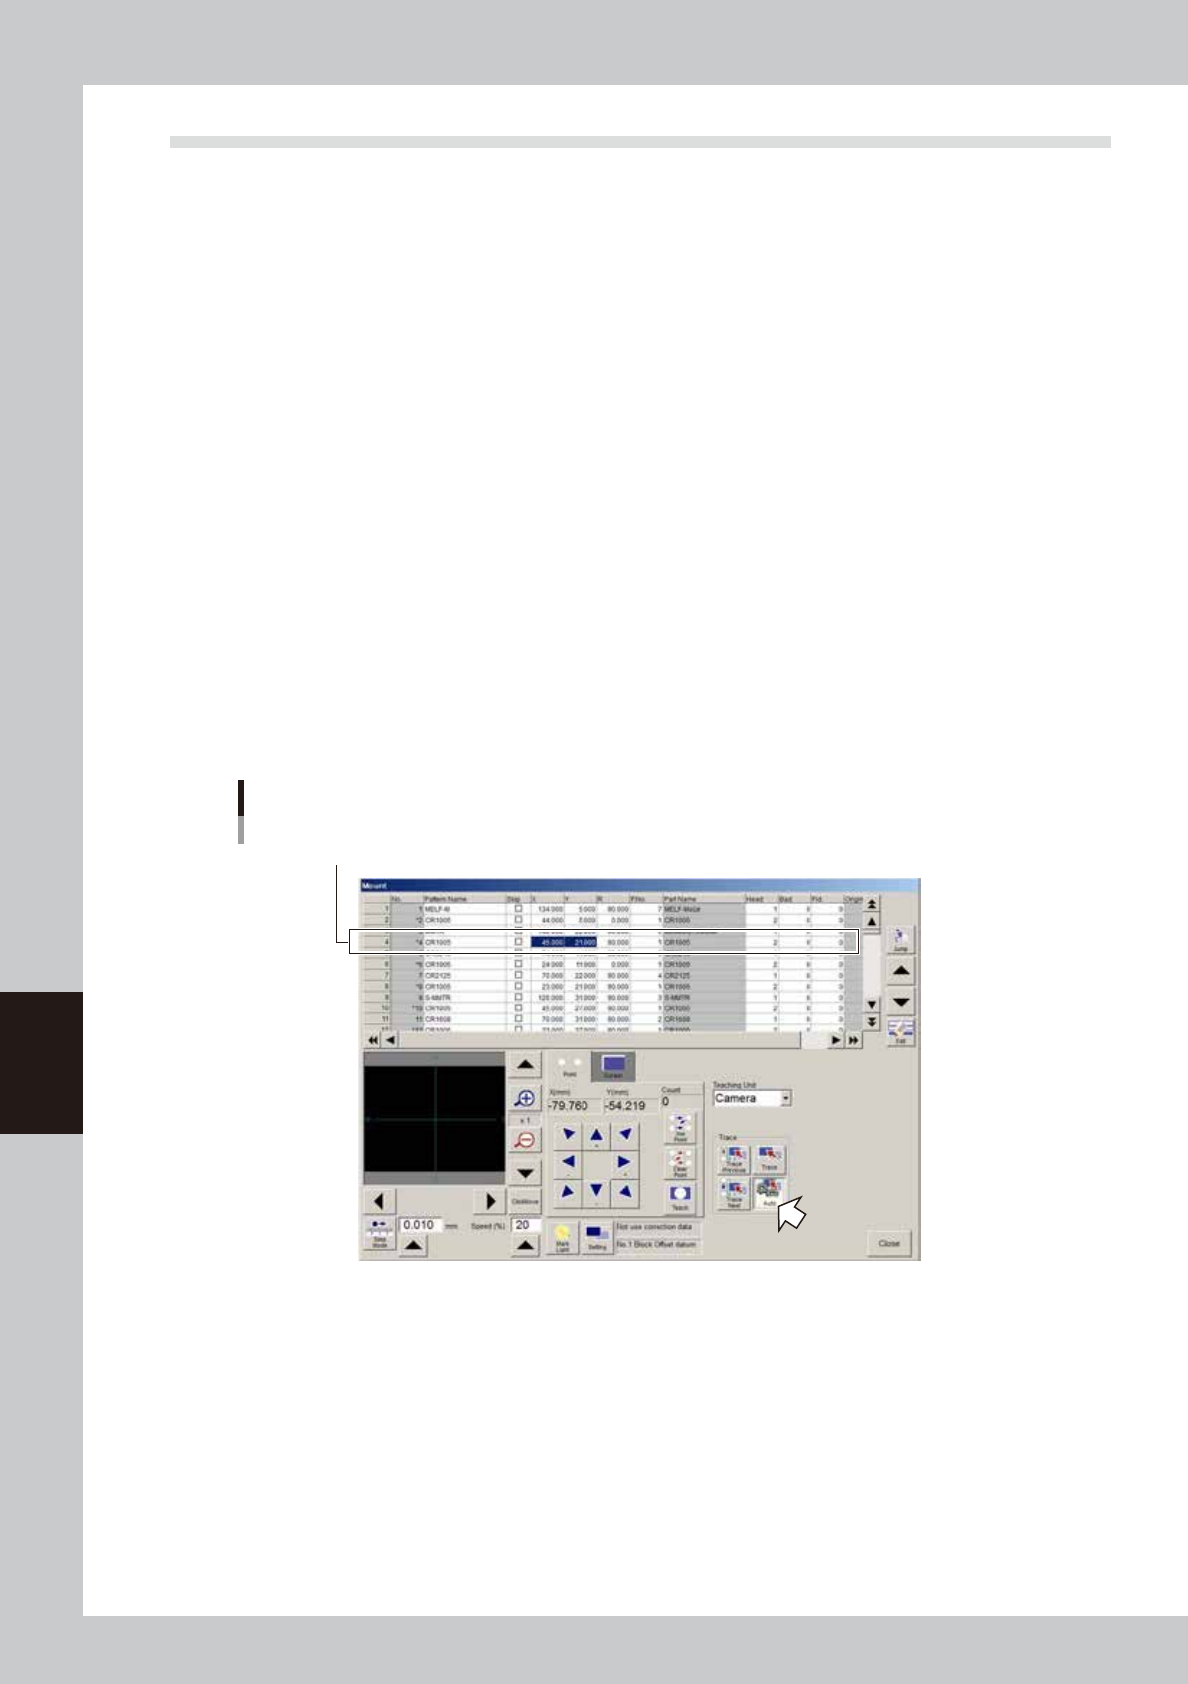
2.2 Auto trace function
This function automatically traces data continuously and can be used with "Mount" data on the Board screen.
When used with "Mount" data, successive mount points are continuously traced.
1
Clamp a board.
Clamp a board on the conveyor.
2
Open the "Mount" data screen, and press the [Teach] button.
3
Set the trace conditions.
Set the "teaching (trace) unit", "speed", and "fiducial correction".
See the previous section "2.1 Trace function" for the setting methods.
4
Specify the data row.
Select the data row from which to start a trace.
5
Check the surrounding area for safety.
Upon performing a trace, the teaching (trace) unit will start to move. Stay out of the axis movement
range.
6
Press the [Auto] button and start a trace.
With the [Auto] button depressed, press the [Trace Next] button to perform continuous trace, starting
from the data row selected in step 4 toward the end of data rows. To stop continuous trace before
reaching the data end, press the [Auto] button.
With the [Auto] button depressed, press the [Trace Previous] button to perform continuous trace,
starting from the data row selected in step 4 toward the top of data rows. To stop continuous trace
before reaching the top data row, press the [Auto] button.
Performing an auto trace
Select data row to start auto trace.
64606-N7-00