YSD_Users_E.pdf - 第277页
6-8 6 Using the advanced functions 5 Adjust the lighting le vels as needed. If the target image is not clearly displayed on the vision monitor , press the [Mark Light] button and adjust the lighting levels. Mark Light sc…
6-7
6
Using the advanced functions
2.3 Teaching function
The teaching function is used to teach the machine position such as XY coordinate values using a teaching unit
(camera or head). There are two teaching methods: "point teaching" and "cursor teaching".
2.3.1 Point teaching
Point teaching is further divided into "one-point input" and "multi-point input". The "one-point input" allows the
teaching data to be directly entered. The "multi-point input" gives the center coordinates in the multiple
positions which are specified by teaching.
1
Clamp a board.
Clamp a board on the conveyor.
2
Set the trace conditions.
Set the "teaching unit", "speed", and "fiducial correction".
See the previous section "2.1 Trace function" for the setting methods.
3
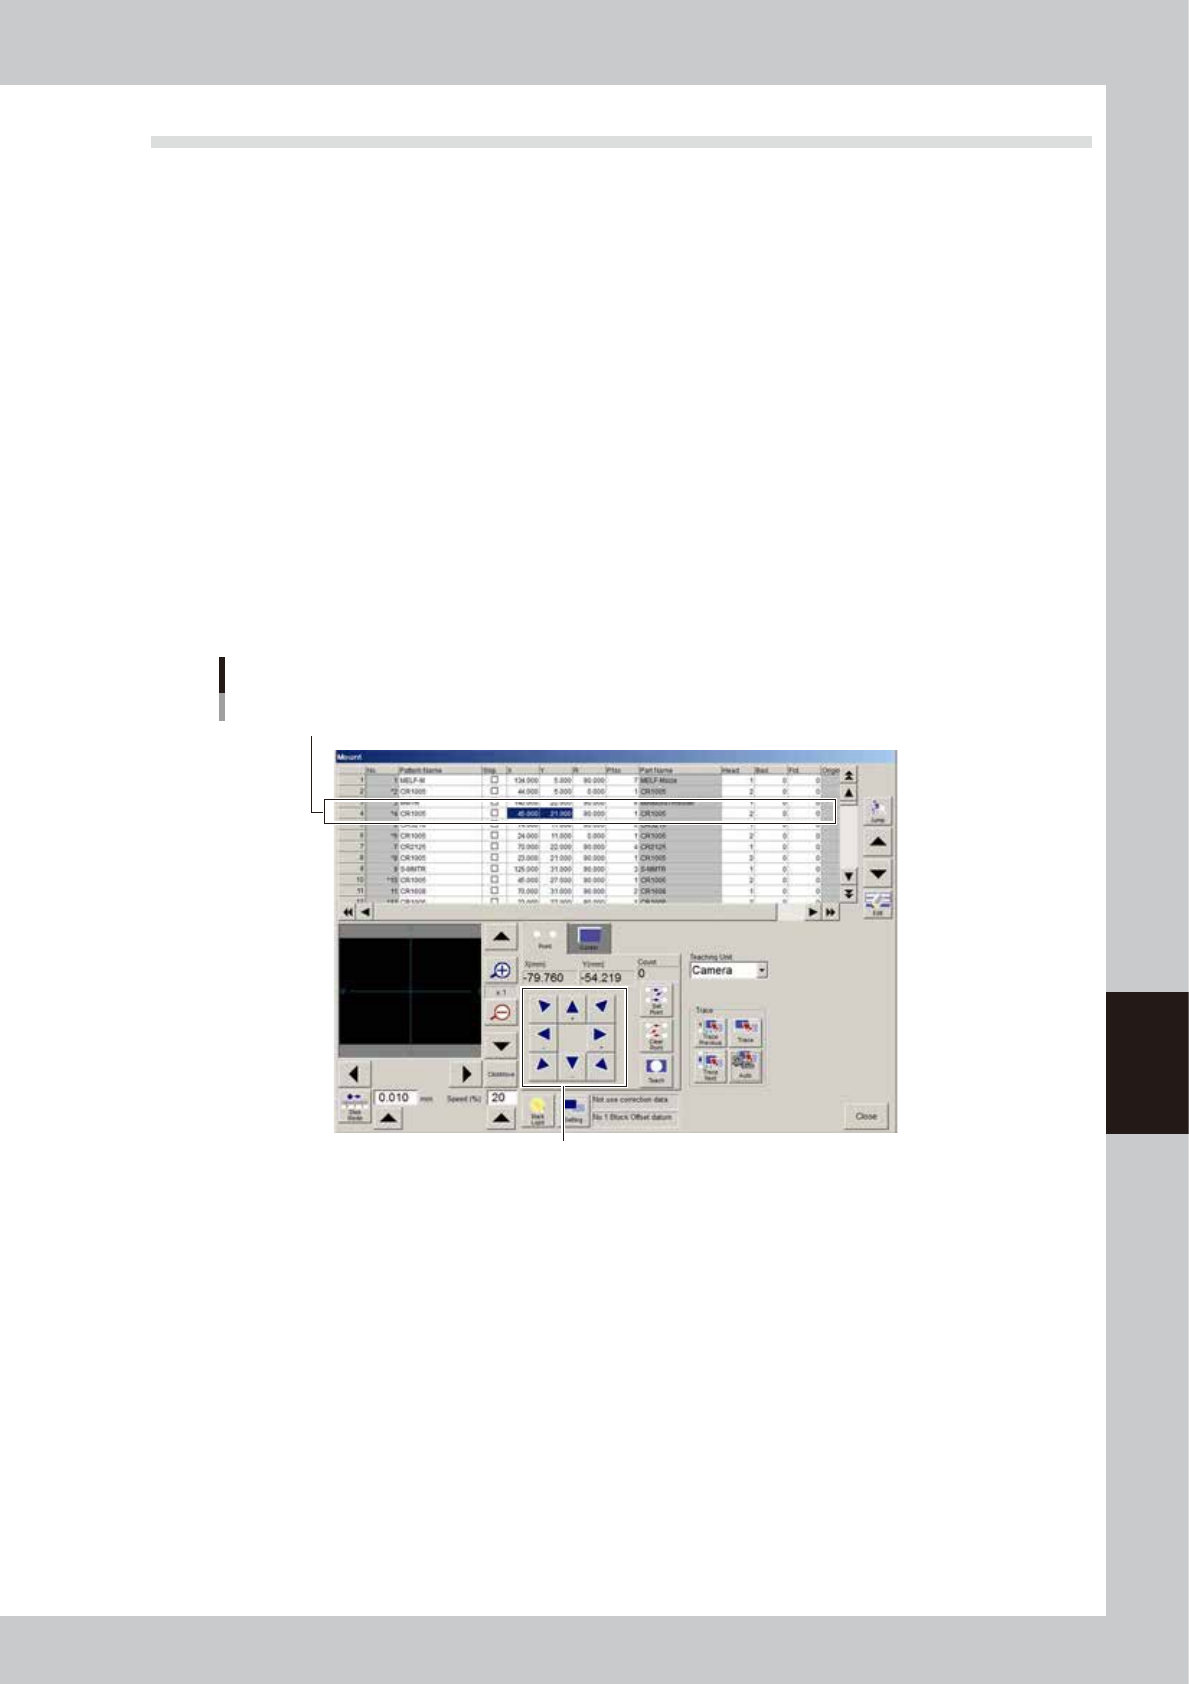
Select the item (data) to perform teaching.
4
Move the teaching unit to the target position.
Stay out of the axis movement range and then move the teaching unit to the target position using the
axis move keys.
Moving the teaching unit
Select data row to perform teaching.
Use the axis move keys to move the
teaching unit to the target position.
64607-N7-00
6-8
6
Using the advanced functions
5
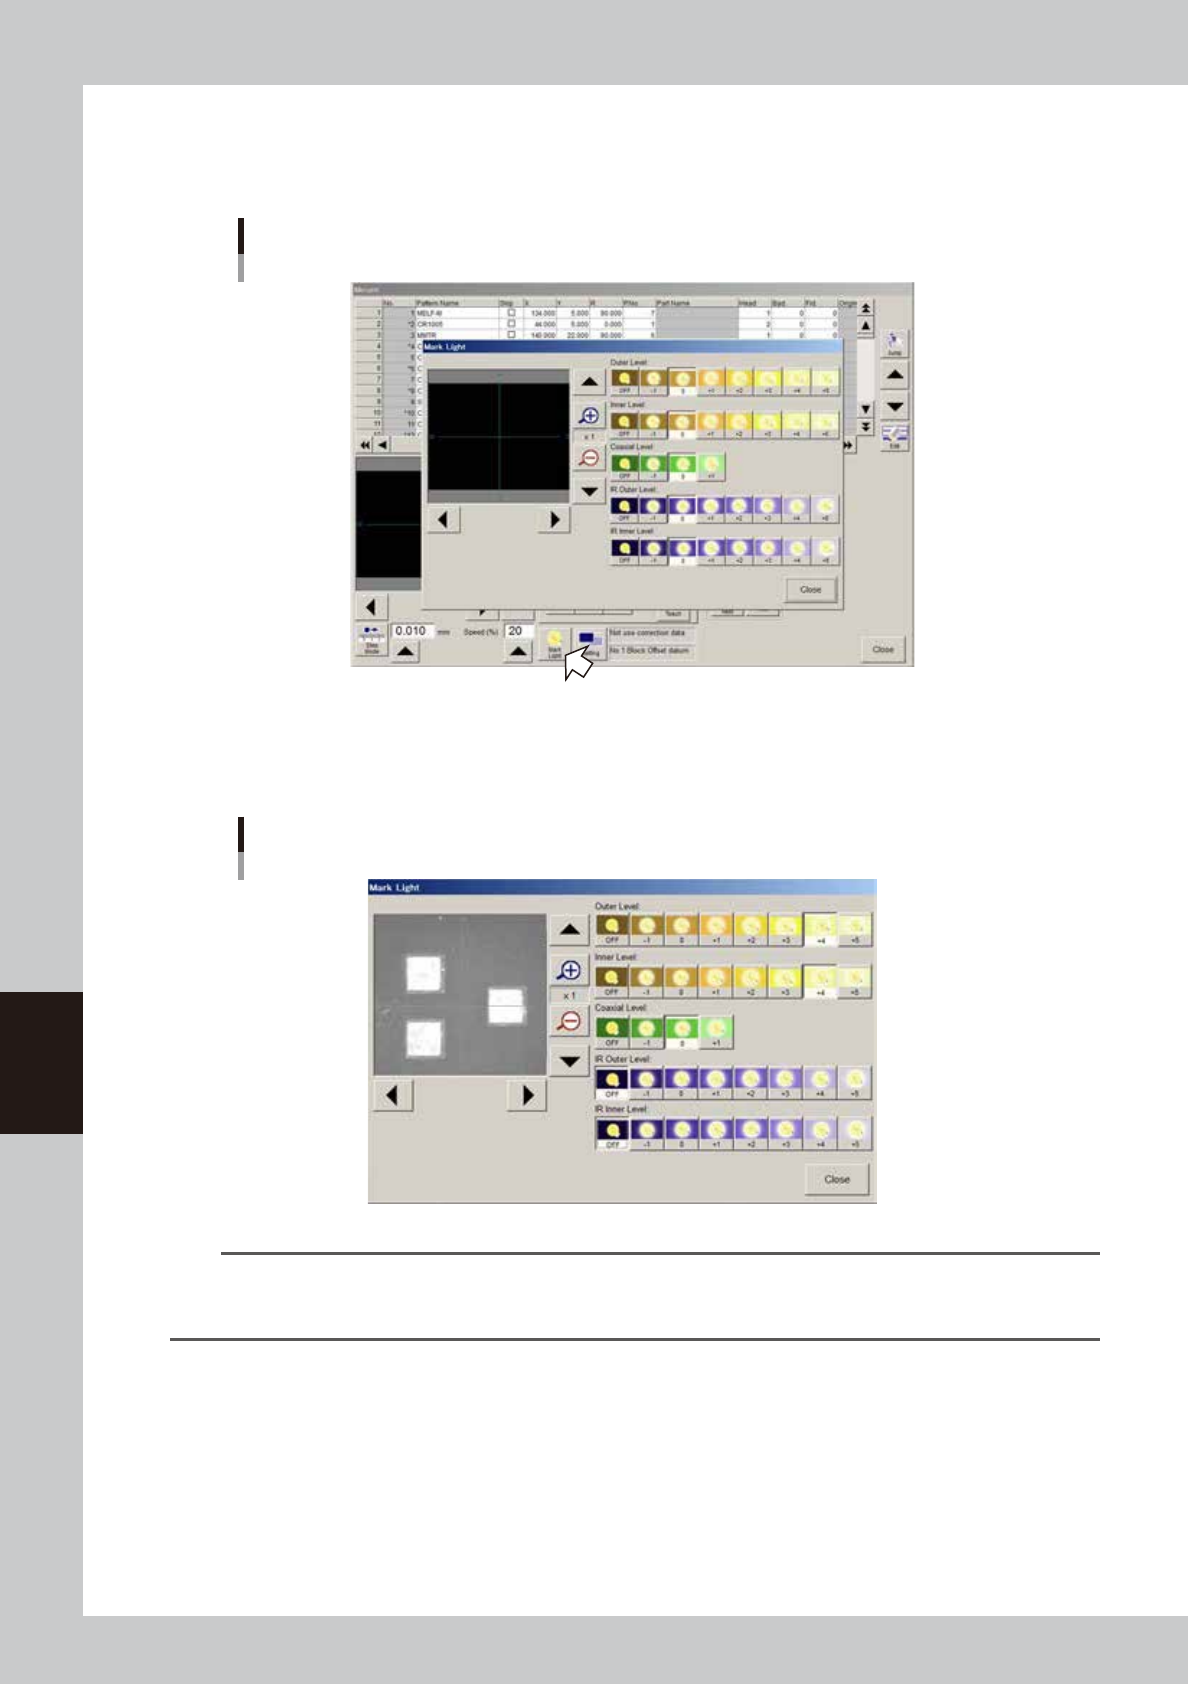
Adjust the lighting levels as needed.
If the target image is not clearly displayed on the vision monitor, press the [Mark Light] button and adjust
the lighting levels.
Mark Light screen
64608-N7-00
If the "Outer Level" and "Inner Level" are OFF or set to "0", increase these lighting levels to about "+4" and
check that the target image is clearly displayed on the vision monitor. The "Coaxial Level" should be set
to "0" in this case.
Lighting level adjustment
64609-N7-00
TIP
The mark lights include the "Outer Level", "Inner Level", and "Coaxial Level". The “Outer Level” and “Coaxial Level” are
used when viewing thick land patterns with a flat surface. Set the lighting levels to an optimum value between "-1"
and "+5" while viewing the image on the vision monitor so that the land patterns are clearly seen.
6-9
6
Using the advanced functions
6
Press the [Teach] button to perform teaching input.
There are two ways to perform teaching input: "one-point input" and "multi-point input".
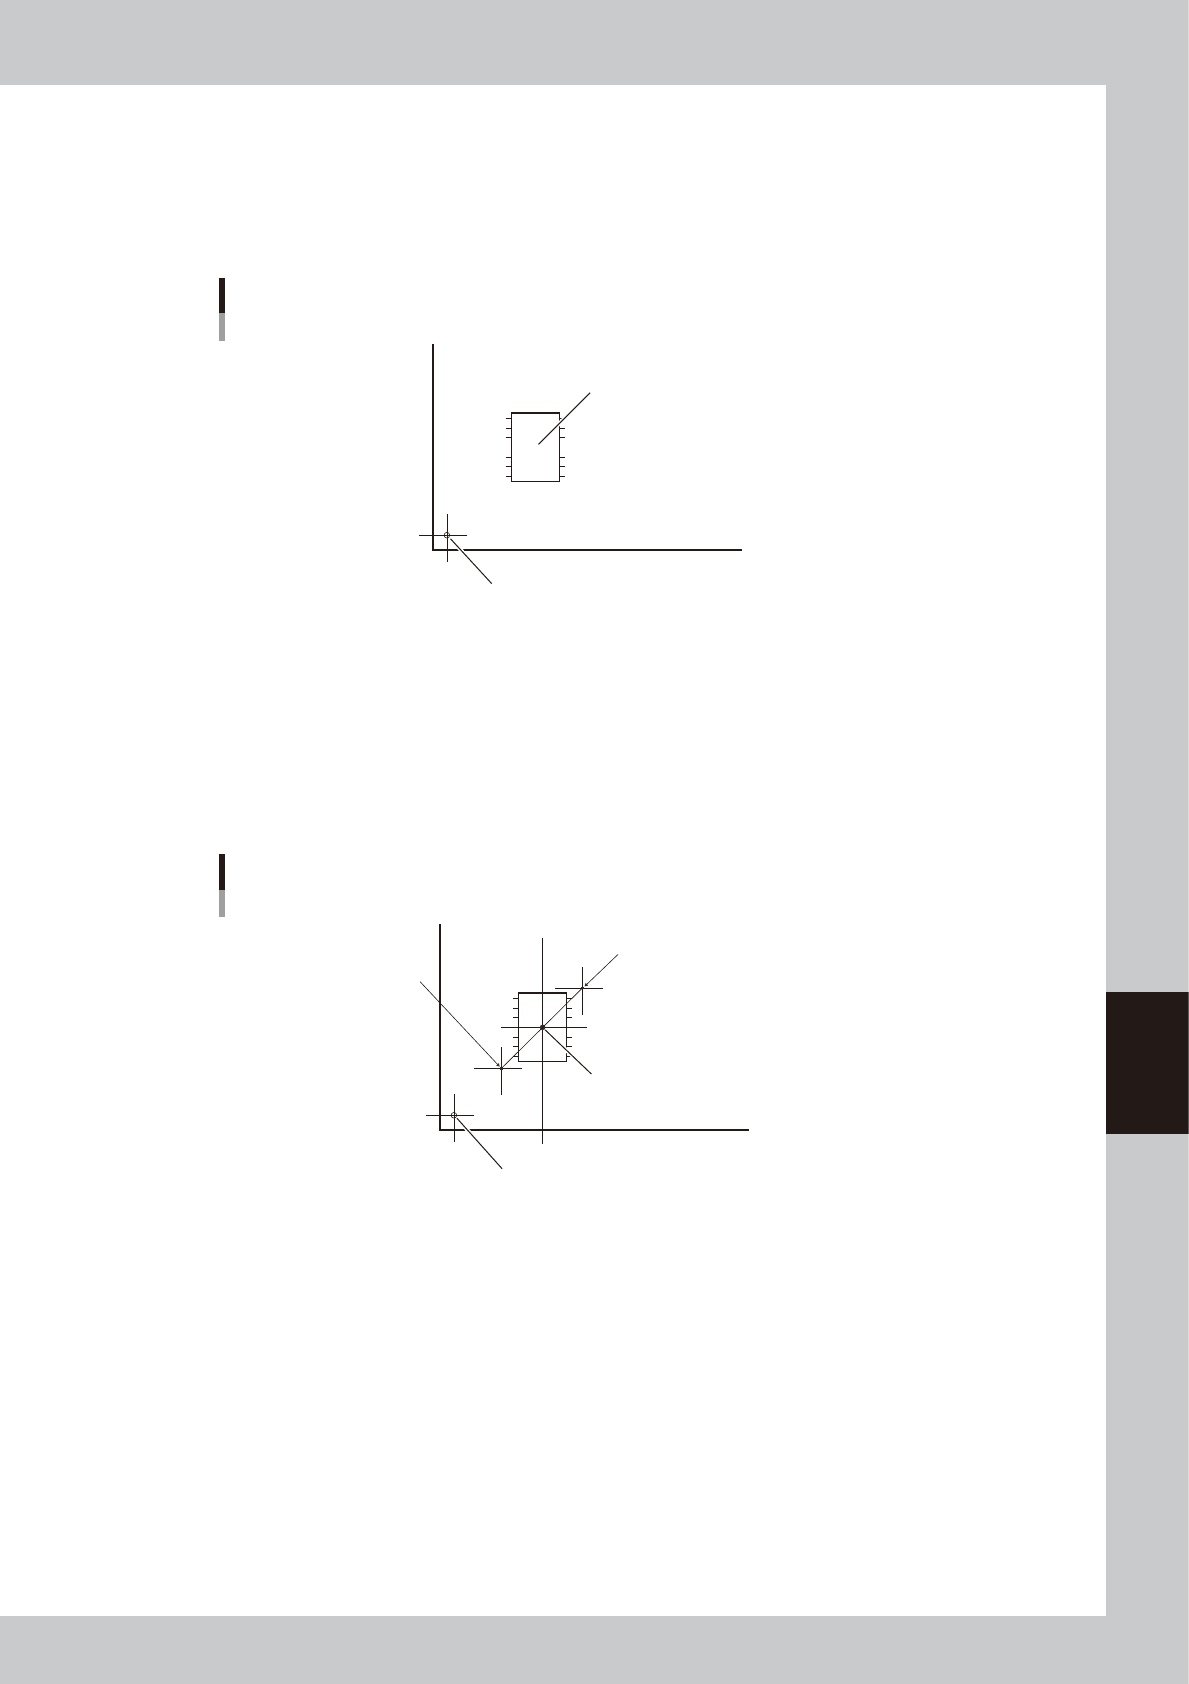
1. One-point input
Check that the target position is aligned with the center of the vision monitor, and then press the
[Teach] button. The teaching data is input to the data item (XY coordinates) you selected in step 3.
Teaching
One-point input
Target teaching position (XY)
Board origin
63601-N7-00
2. Multi-point input
There are two ways to perform multi-point input.
Input method 1:
First move the teaching unit to the first teaching point (1) and press the [Set Point] button. Next
move the teaching unit to the second teaching point (2) and press the [Teach] button. The center
coordinates (XY) of the two points are input to the data item (XY coordinates) you selected in step 3.
The number of teaching points (2 in this case) is shown in the "Count" box.
Teaching
Multi-point input
Center coordinates (XY)
Board origin
1st teaching point
2nd teaching point
1
2
63602-N7-00