YSD_Users_E.pdf - 第278页
6-9 6 Using the advanced functions 6 Pr ess the [ T each] button to per form teaching input. There are two ways to perfor m teaching input: "one-point input" and "multi-point input". 1. One-point inpu…
6-8
6
Using the advanced functions
5
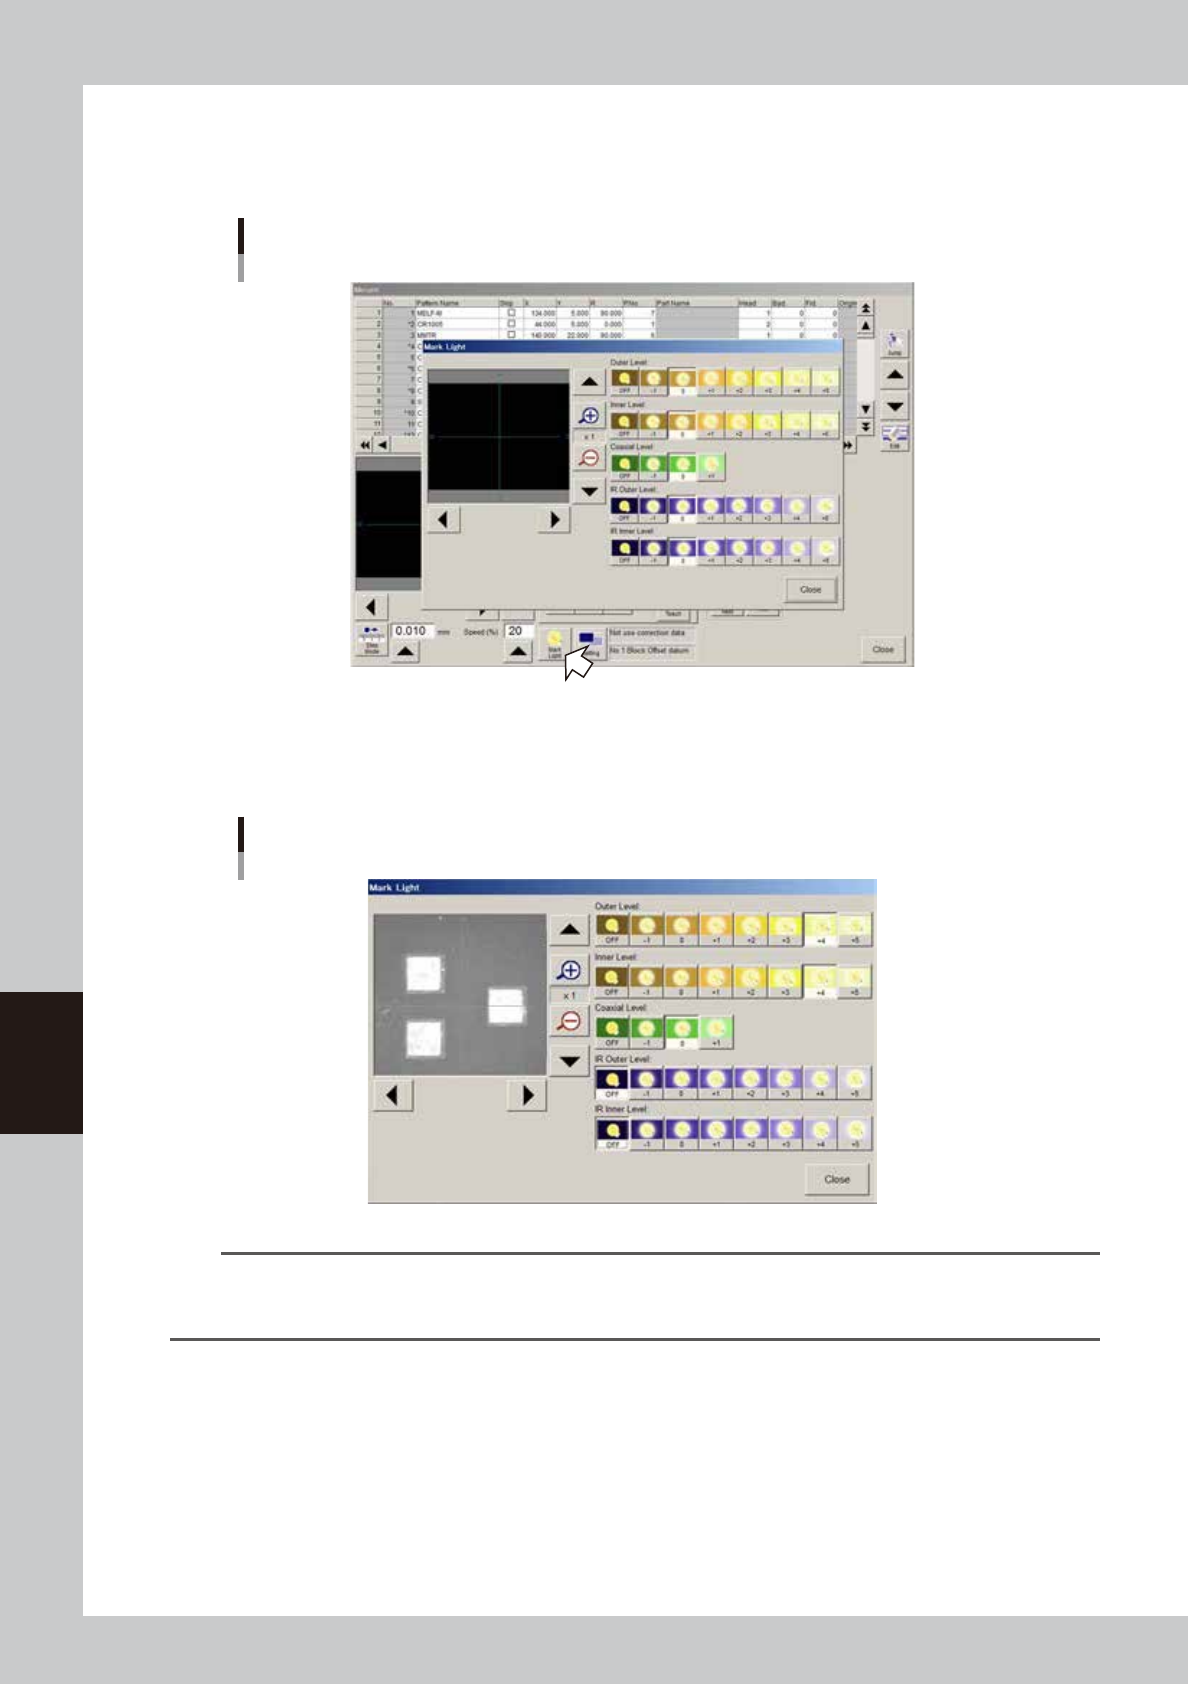
Adjust the lighting levels as needed.
If the target image is not clearly displayed on the vision monitor, press the [Mark Light] button and adjust
the lighting levels.
Mark Light screen
64608-N7-00
If the "Outer Level" and "Inner Level" are OFF or set to "0", increase these lighting levels to about "+4" and
check that the target image is clearly displayed on the vision monitor. The "Coaxial Level" should be set
to "0" in this case.
Lighting level adjustment
64609-N7-00
TIP
The mark lights include the "Outer Level", "Inner Level", and "Coaxial Level". The “Outer Level” and “Coaxial Level” are
used when viewing thick land patterns with a flat surface. Set the lighting levels to an optimum value between "-1"
and "+5" while viewing the image on the vision monitor so that the land patterns are clearly seen.
6-9
6
Using the advanced functions
6
Press the [Teach] button to perform teaching input.
There are two ways to perform teaching input: "one-point input" and "multi-point input".
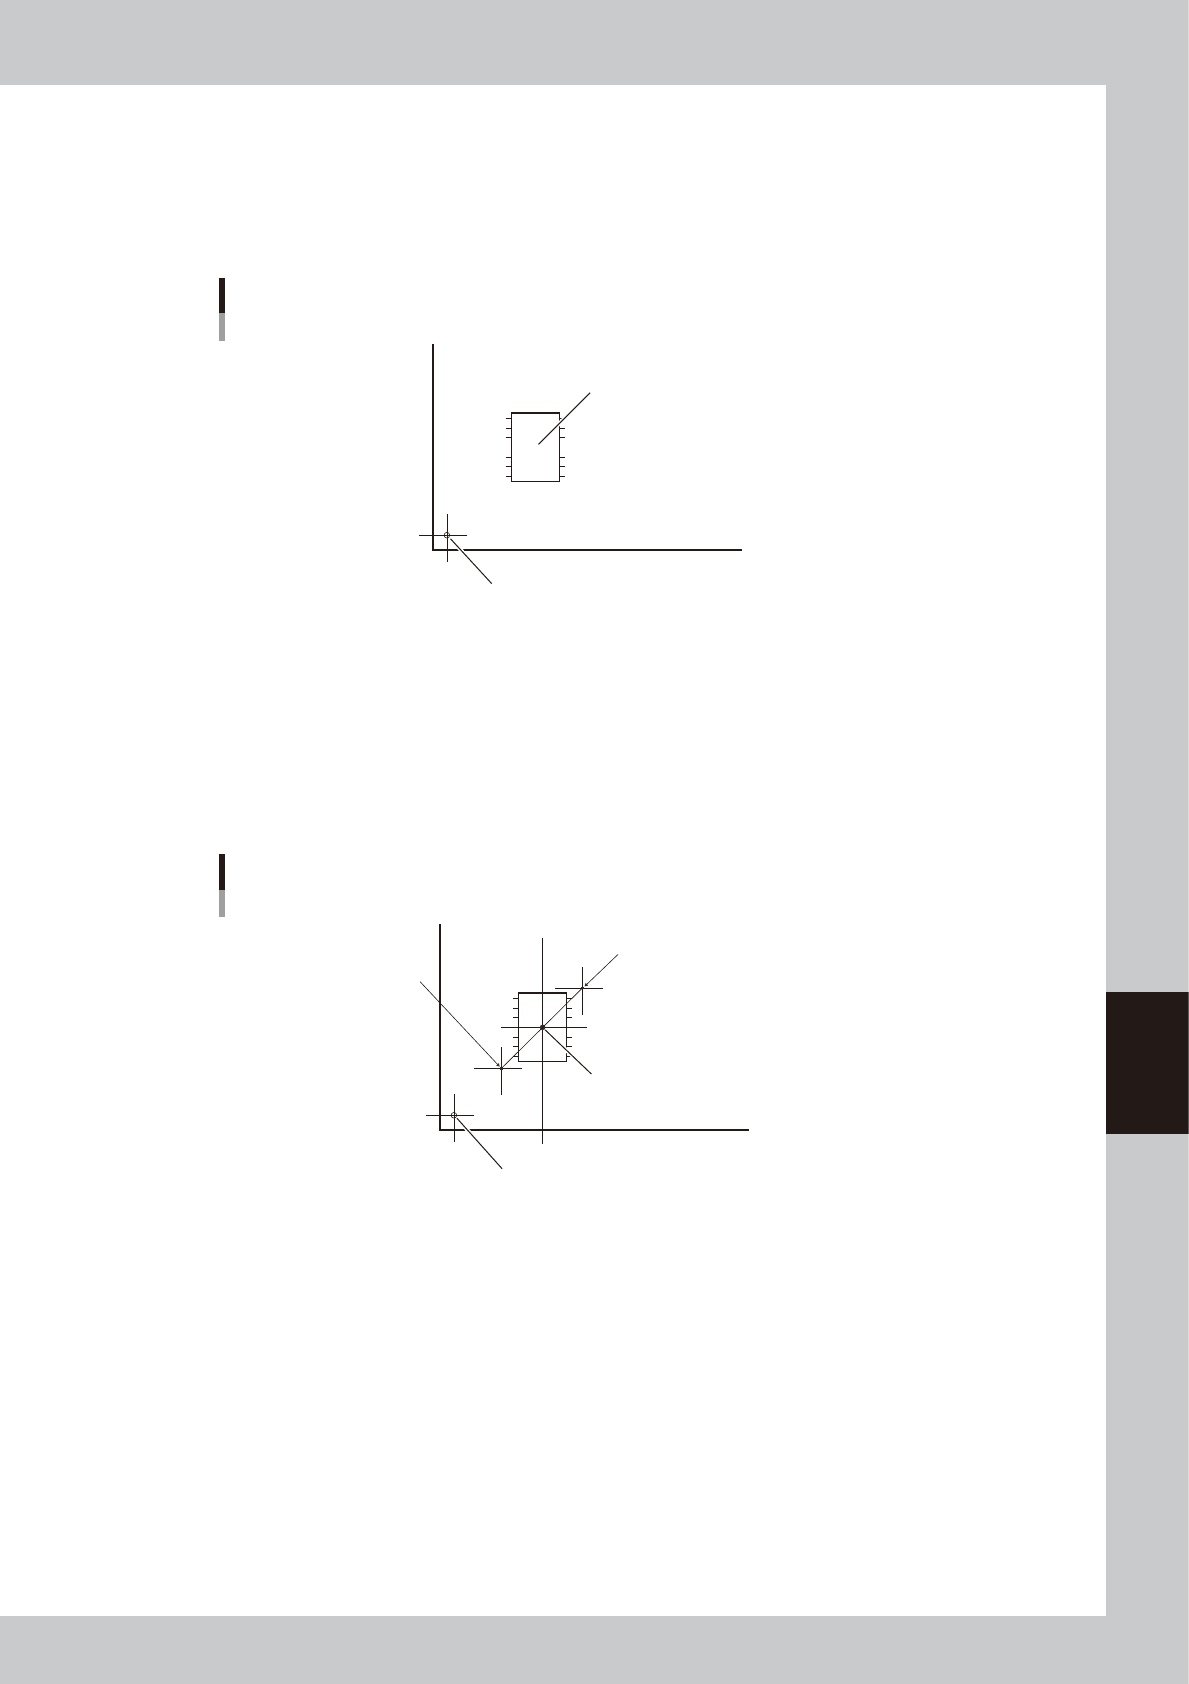
1. One-point input
Check that the target position is aligned with the center of the vision monitor, and then press the
[Teach] button. The teaching data is input to the data item (XY coordinates) you selected in step 3.
Teaching
One-point input
Target teaching position (XY)
Board origin
63601-N7-00
2. Multi-point input
There are two ways to perform multi-point input.
Input method 1:
First move the teaching unit to the first teaching point (1) and press the [Set Point] button. Next
move the teaching unit to the second teaching point (2) and press the [Teach] button. The center
coordinates (XY) of the two points are input to the data item (XY coordinates) you selected in step 3.
The number of teaching points (2 in this case) is shown in the "Count" box.
Teaching
Multi-point input
Center coordinates (XY)
Board origin
1st teaching point
2nd teaching point
1
2
63602-N7-00
6-10
6
Using the advanced functions
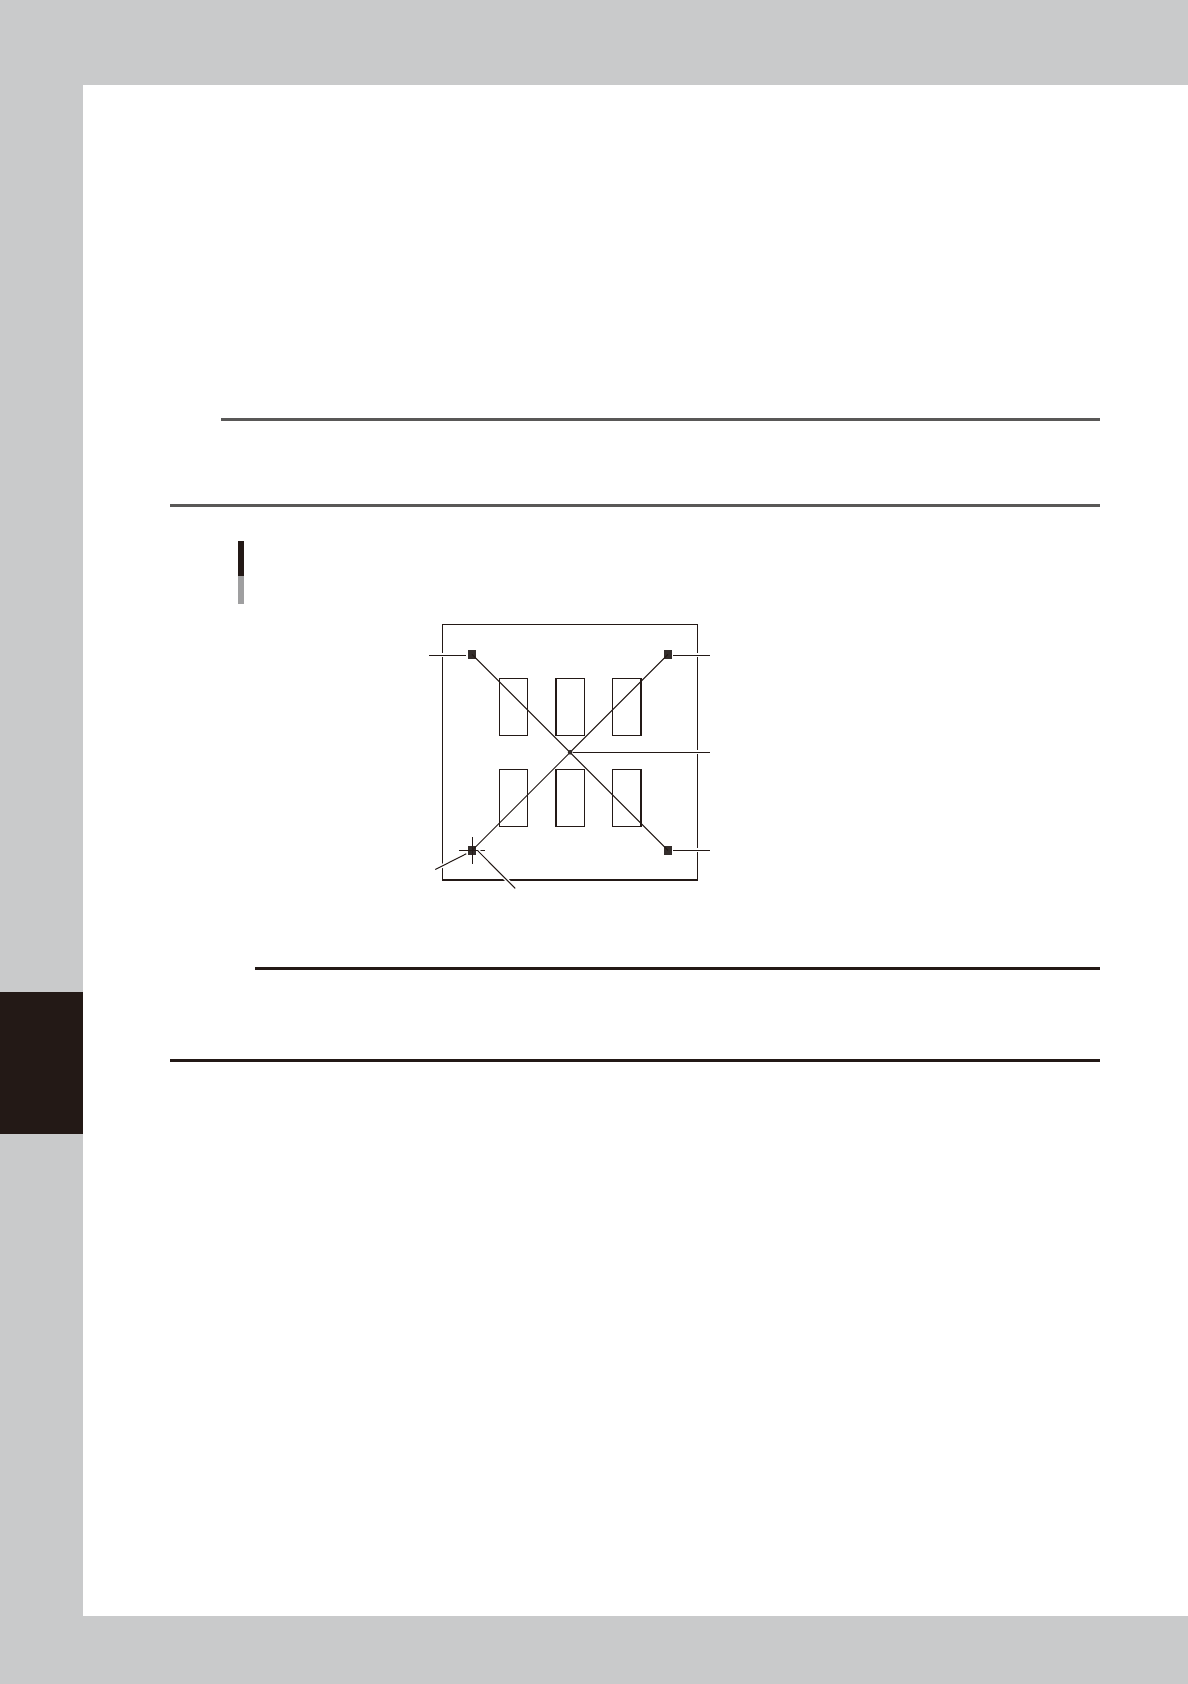
Input method 2:
This method uses the [ClickMove] button at the lower right of the vision monitor and the [Set Point]
button to specify multiple teaching points. All teaching points must be displayed within the vision
monitor.
First move the teaching unit to a position near the center of target patterns so that all teaching
points are displayed within the vision monitor, and press the [ClickMove] button. The mouse pointer
changes to a cross cursor when it is placed on the vision monitor. Then click at the first teaching
point with the mouse and press the [Set Point] button. Next click at the second teaching point with
the mouse and press the [Set Point] button. Repeat this operation at the other teaching points (such
as third and fourth points), and press the [Teach] button after clicking at the last teaching point
(fourth point in the example below). The center coordinates (XY) of the multiple points are input as
the teaching position. The number of teaching points (4 in this case) is shown in the "Count" box.
TIP
When the [Click Move] button is pressed and the mouse pointer is placed within the vision monitor, the mouse pointer
changes to a cross pointer. Place the cross pointer at the position you want to teach and press the left mouse button.
The camera will move to the teaching position to display it in the center of the vision monitor.
Teaching
Multi-point input
3rd teaching point
2nd teaching point
4th teaching point
1st teaching point
Center coordinates (XY)
• Vision monitor
Cross cursor
4 3
1
2
63603-N7-00
c
CAUTION
If you want to cancel the previous teaching point you specified, click the [Clear] button. A previous teaching point is
canceled each time the [Clear] button is pressed. However, the teaching points cannot be canceled once the [Teach]
button is pressed. In this case, redo the teaching from the beginning.