YSD_Users_E.pdf - 第292页
6-23 6 Using the advanced functions • Mark No. Select the mark No. if a dispensed dot is to be recognized as a mark. Among the marks registered in the board data, select the one you w ant to use. • Speed Set the speed at…
6-22
6
Using the advanced functions
4
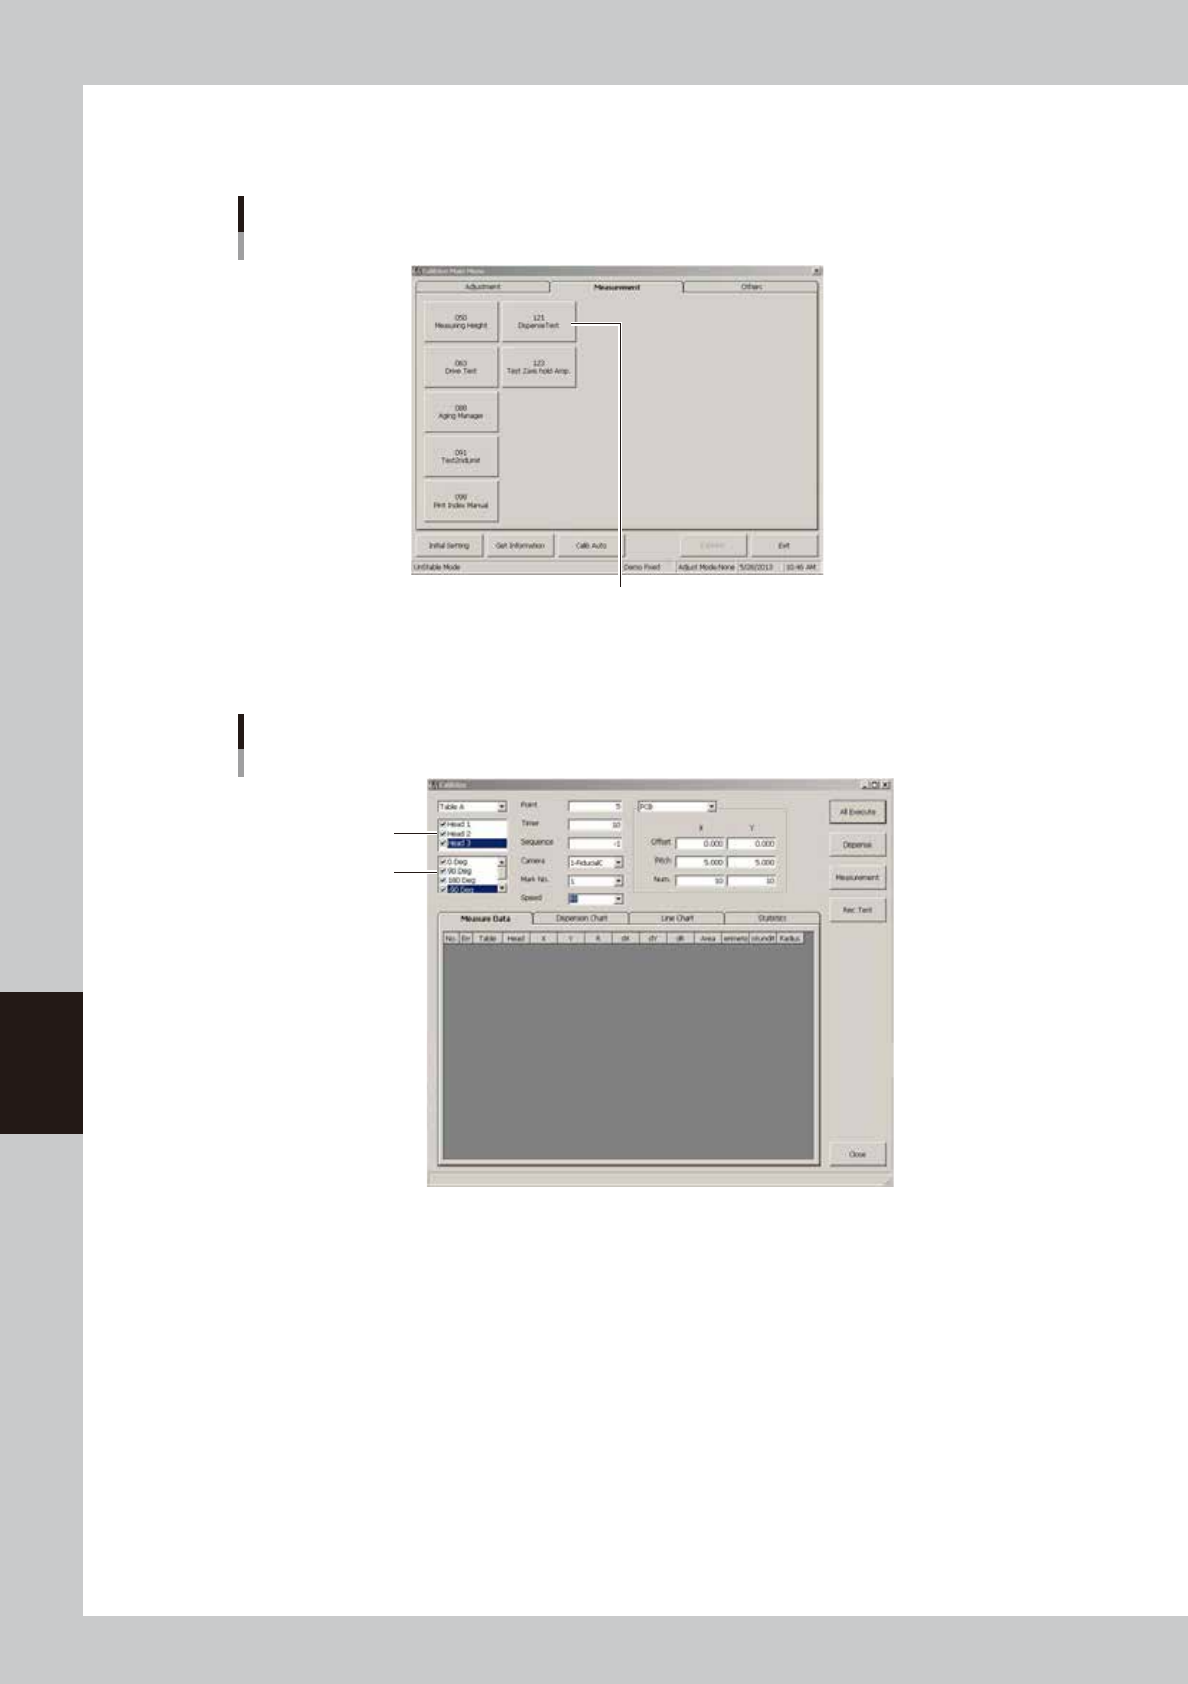
Press the [Dispense Test] button.
The main screen appears.
Machine adjustment program
Main menu screen
Press the [Dispense Test] button.
64624-N7-00
5
Set the dispense head and parameters.
Dispense test screen
Head
Angle
64625-N7-00
• Head
Select the head for which the dispense test is to be performed.
• Angle (degrees)
Set the measurement angle.
• Point
Set the number of dots to be dispensed from one head at one angle.
• Timer
Set the amount of liquid to be dispensed.
• Sequence
When this parameter is set to -1, the dispense sequence will be automatically specified using the selected head, nozzle
and liquid amount.
• Camera
This camera is for the fiducial marks and cannot be changed.
6-23
6
Using the advanced functions
• Mark No.
Select the mark No. if a dispensed dot is to be recognized as a mark.
Among the marks registered in the board data, select the one you want to use.
• Speed
Set the speed at which dispense is to be performed.
n
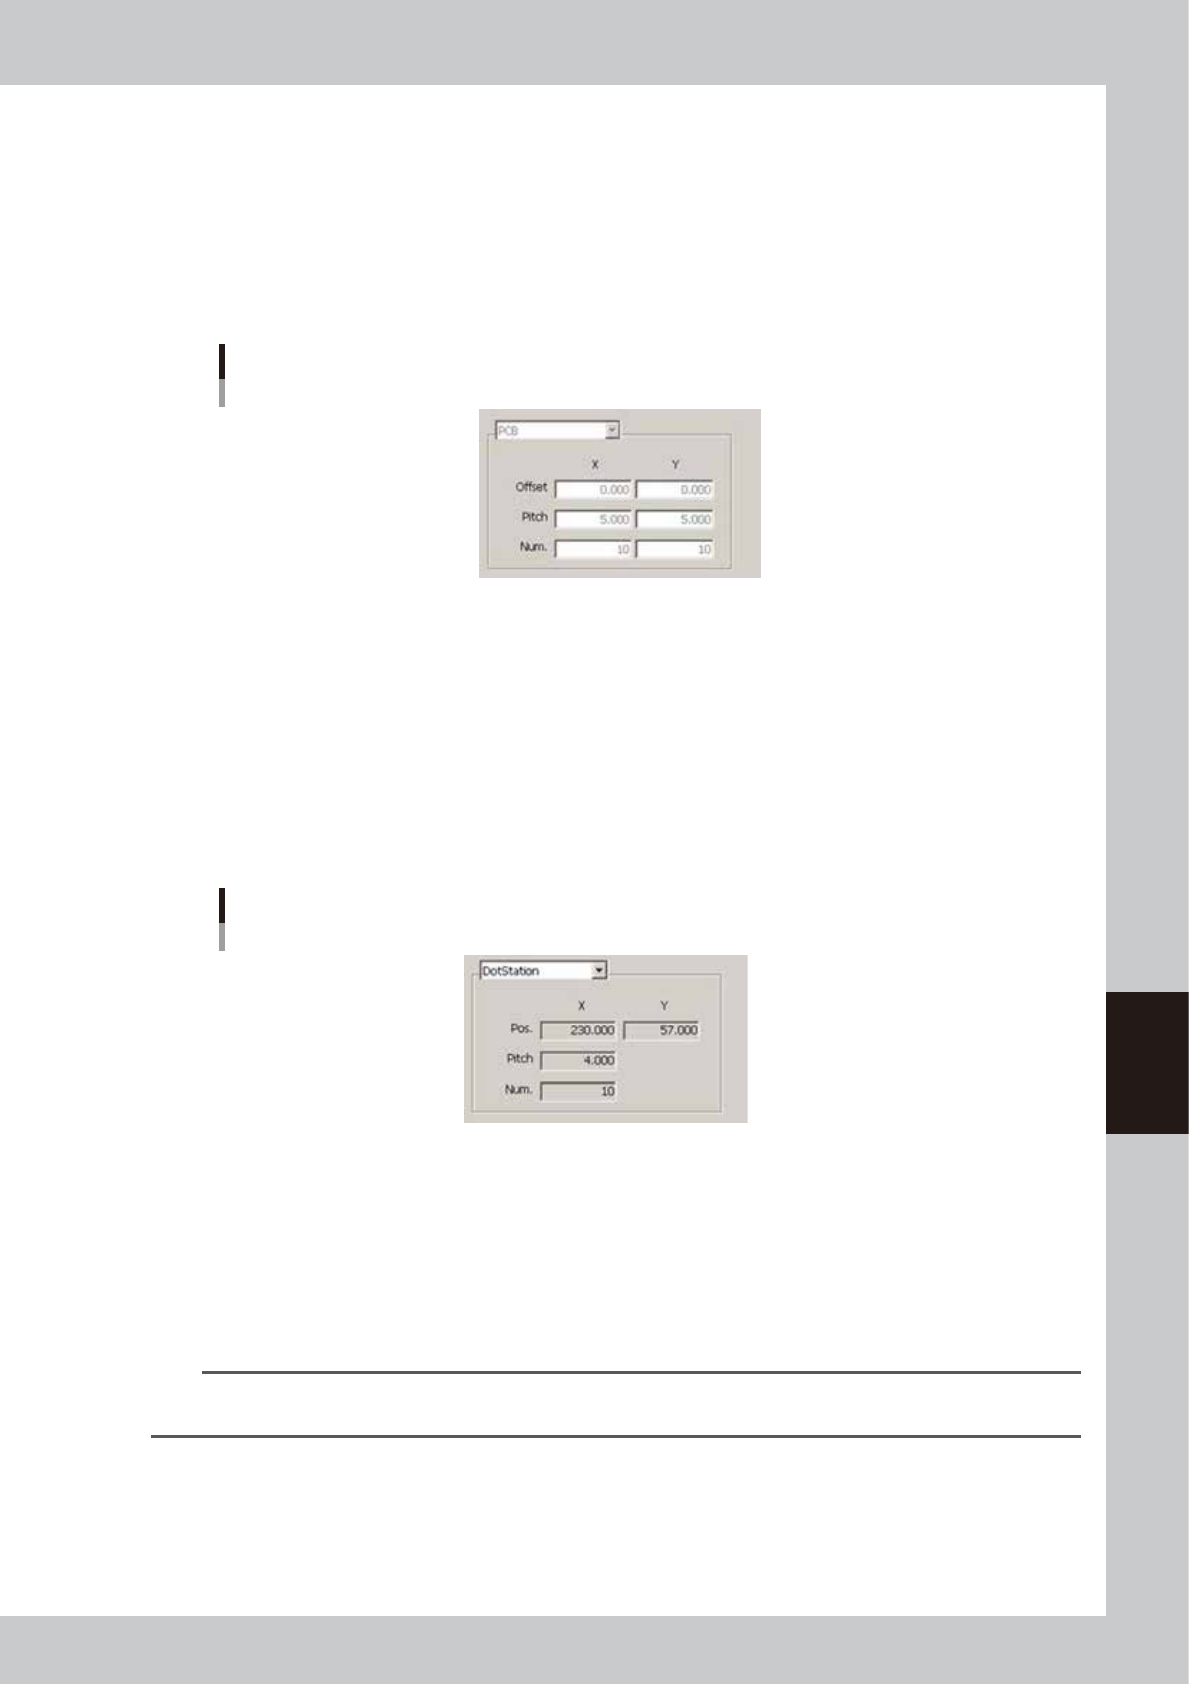
Dispensing dots on board
Dispensing dots on board
64626-N7-00
• Offset XY
Set the XY position offset from the board reference position.
• Pitch (mm)
Set the dot intervals in millimeters at which dispense will be performed.
• Num.
Set the number of dots that will be dispensed in the X and Y directions.
n
Dispensing dots on dot station
Dispensing dots on dot station
64627-N7-00
• Pos.
Shows the dot reference position. The first dot will be dispensed at this position on the dot station.
• Pitch (mm)
Shows the pitch between dots to be dispensed.
• Num.
Shows the number of dots to be dispensed in a row on the dot station.
n
NOTE
When dispensing dots on the dot station, the above parameters will be automatically entered and you do not have
to set them.
6-24
6
Using the advanced functions
6
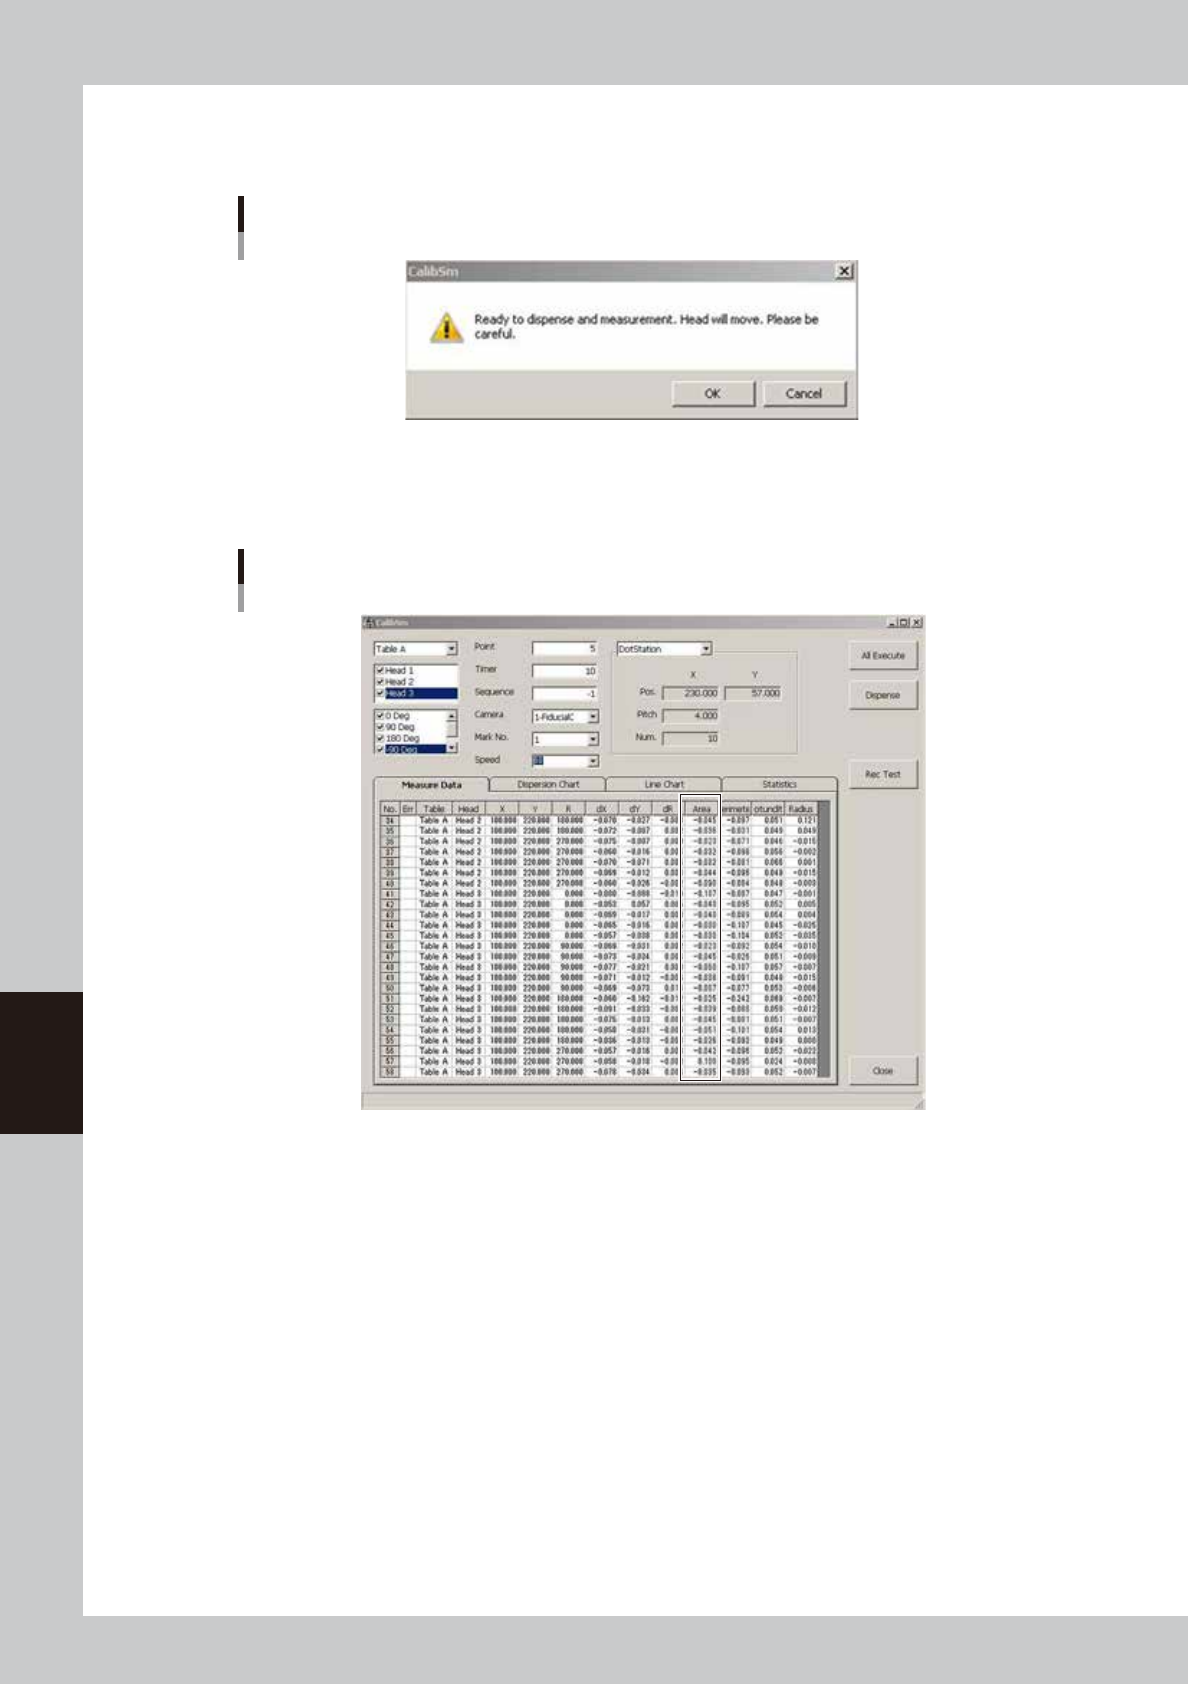
Press the [Dispense] button.
When the following dialog appears, check the safety and press the [OK] button. Dispense test will start.
Dispense test start confirmation
64628-N7-00
7
Check the results.
Check the values shown in the “Area” column. Use these values as the standard area.
Measurement results
64629-N7-00
dx, dy : Shows the positional deviation of each dispensed dot.
This value will be larger if the dispense test is performed on the dot station.
dR : Shows how much each dispensed dot is angled.
This value will be larger if the dispense test is performed on the dot station.
Area : Shows the area of each dispensed dot.
Perimeter : Shows the perimeter of each dispensed dot.
Rotundity : Shows the roundness of each dispensed dot.
Radius : Shows the radius of each dispensed dot.
8
Make adjustment as needed.
If the dispensed dots are outside the standard area, make adjustment using the dispense pressure
adjustment knob while visually checking the dispensed dots.
Repeat steps 6 and 7 until the dispensed dots fall within the standard range.