YSD_Users_E.pdf - 第296页
7-2 7 Editing the board data 1.2 Editor window T he Editor window consists of the following elements when board data is loaded. Editor window Board tab showing board data setting Menu bar T oolbar Item icon Ta b T ree vi…
7-1
7
Editing the board data
1. Using the Editor
The Editor allows you to edit board data or create new board data. This section explains how to use the
Editor available with the YGD operation software.
1.1 Starting the Editor
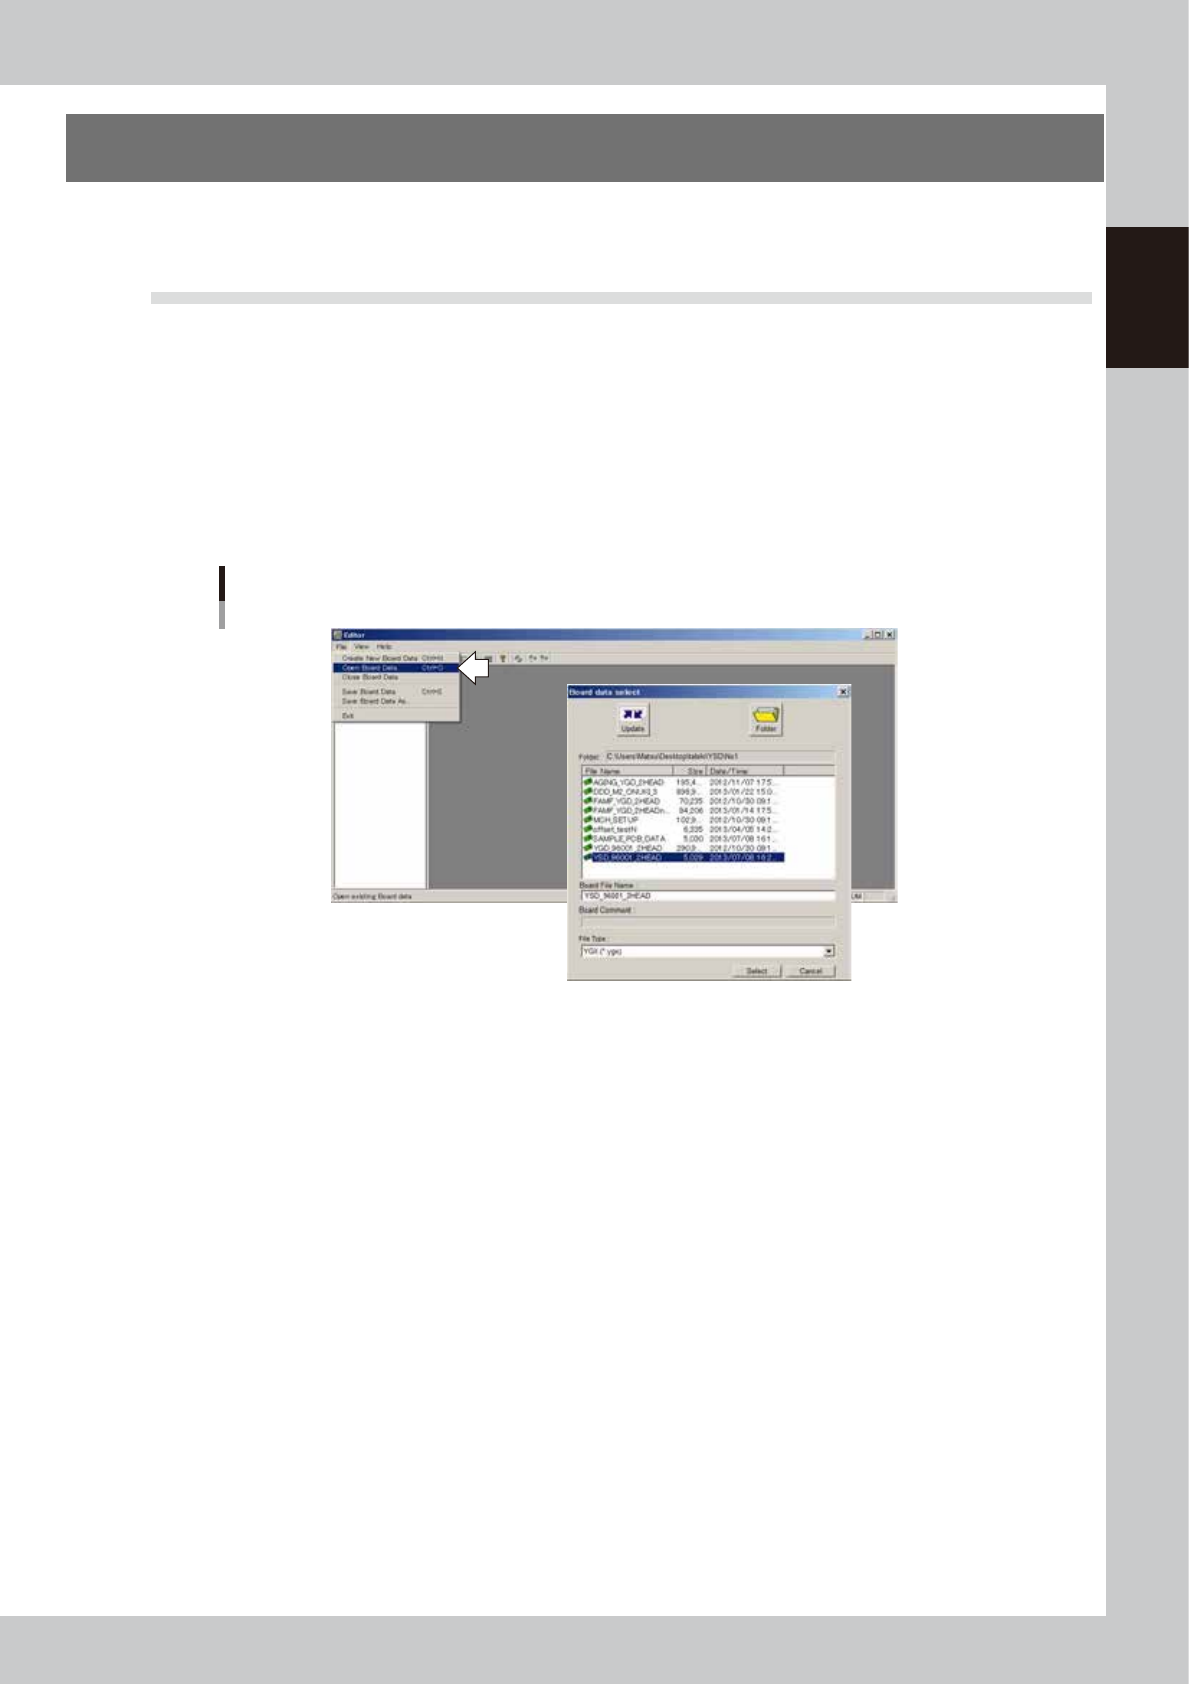
1
Press the [Editor] button to start the Editor.
The Editor window appears.
2
Select the board data you want to edit.
1. Select "Open Board Data" from the File menu or click the "Open Board Data" button on the toolbar.
The "Board select data" dialog box then appears.
2. Select the board data and click the [Select] button.
The selected board data is loaded and displayed in the Editor window.
Selecting the board data
64700-N7-00
7-2
7
Editing the board data
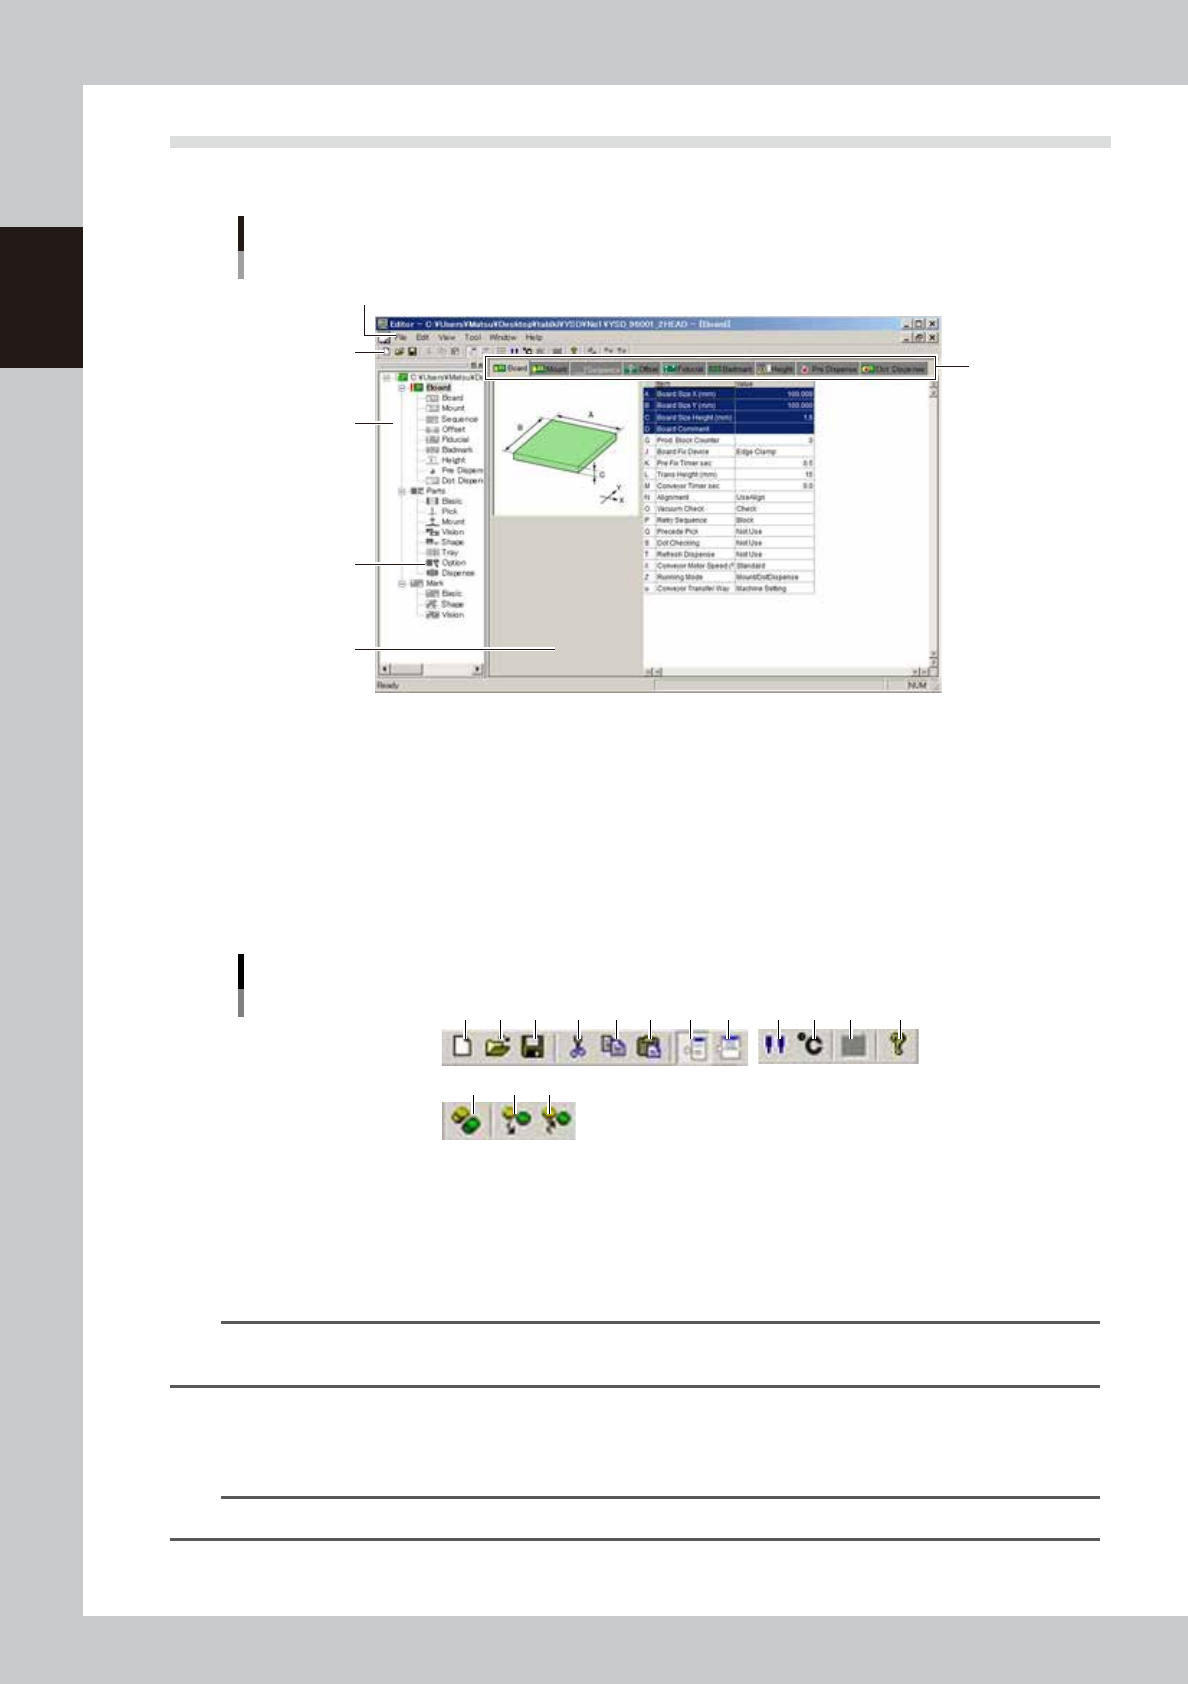
1.2 Editor window
The Editor window consists of the following elements when board data is loaded.
Editor window
Board tab showing board data setting
Menu bar
Toolbar
Item icon
Tab
Tree view
Main view
64701-N7-00
Menu bar
The menu bar at the top of the Editor window contains pull-down menus with commands grouped by function.
Toolbars
Among the Editor functions, those frequently used are registered as the toolbar buttons. There are "Standard toolbar",
"Database toolbar" and "Library toolbar".
Each toolbar can be hidden or redisplayed by selecting it from the "Toolbar" submenu on the View menu.
Toolbars
Standard toolbar
Database toolbar
1 2 3
1 2 3
4 5 6 7 9 10 11 128
64702-N7-00
Standard toolbar
1. [New Board Data] button
Click this button to create new board data.
The initial data is loaded for creating new board data.
TIP
The [New Board Data] button performs the same function as the "Create New Board Data" command in the File
menu.
2. [Open Board Data] button
Click this button to load board data that is already registered.
The "Board data select" dialog box appears. Select the board you want to load in the Editor window.
TIP
The [Open Board Data] button performs the same function as the "Open Board Data" command in the File menu.
7-3
7
Editing the board data
3. [Save Board Data] button
Saves the currently edited board data over the original board data.
TIP
The [Save Board Data] button performs the same function as the "Save Board Data" command in the File menu.
4. [Cut] button
Cuts and removes the selected range or item.
The data that was cut is stored in the clipboard. The contents previously stored in the clipboard are overwritten.
TIP
The [Cut] button performs the same function as the "Cut" command in the Edit menu.
5. [Copy] button
Copies the selected range or item into the clipboard. The contents previously stored in the clipboard are overwritten.
Reference
The [Copy] button performs the same function as the "Copy" command in the Edit menu.
6. [Paste] button
Pastes the contents currently stored in the clipboard into the selected place.
TIP
The [Paste] button performs the same function as the "Paste" command in the Edit menu.
7. [Toggle Tree View] button
Shows or hides the tree view in the left pane of the Editor window.
TIP
This button performs the same function as the "Tree View" command in the View menu.
8. [Toggle Detail View] button
Shows or hides the detail view of board data that appears in the lower part of the main view.
TIP
This button performs the same function as the "Detail View" command in the View menu.
9. [Nozzle Information] button
Opens the "Nozzle Information" dialog box showing information on the currently used nozzles.
TIP
This button performs the same function as the " Nozzle Information " command in the Edit menu.
10. [Temperature Setting] button
Opens the "Temperature Setting" dialog box that allows you to set the syringe temperature. Set the syringe temperature
within the specified upper limit.
TIP
This button performs the same function as the "Temperature Setting" command in the Edit menu.
11. [Data Check] button
Displays the "Data Check" dialog box to check the board data that is currently open.
TIP
The [Data Check] button performs the same function as the "Data Check" command in the Tool menu.
12. [About] button
Displays the information and version of the Editor.
TIP
The [About] button performs the same function as the "About YgEditor" command in the Help menu.