YSD_Users_E.pdf - 第305页
7-11 7 Editing the board data 4. In the "V alue" box in the "Replace with" group box, specify the character string or value to replace the target item. 5. To distinguish between uppercase and lowercas…
7-10
7
Editing the board data
3. In the "Find value" box, specify the character string or value to find.
4. To distinguish between uppercase and lowercase letters, select the "Match Case" check box to
place a check mark.
5. Select the direction to perform search.
Click the "To Up" radio button to perform search backward (toward the beginning of the data rows),
starting from the row you selected in step 2.
Click the "To Down" radio button to search forward (toward the end of the data rows), starting from
the row you selected in step 2.
6. Click the [Find] button to start a search.
When the target item is found, the row of the target item is highlighted. When you want to continue
to search under the same conditions, click the [Find] button again.
If no target item has been found, a message dialog box appears. Click the [OK] button to close the
message dialog box, and change the search conditions in the "Find" dialog box.
4
Close the "Find" dialog box.
Click the [Close] button to close the "Find" dialog box.
1.5.2 Replace
To find a data item in the main view and replace it with the specified content, proceed as follows.
1
Display the data grid in the main view where you want to perform a replace.
2
Click any row in the main view.
3
Perform replace.
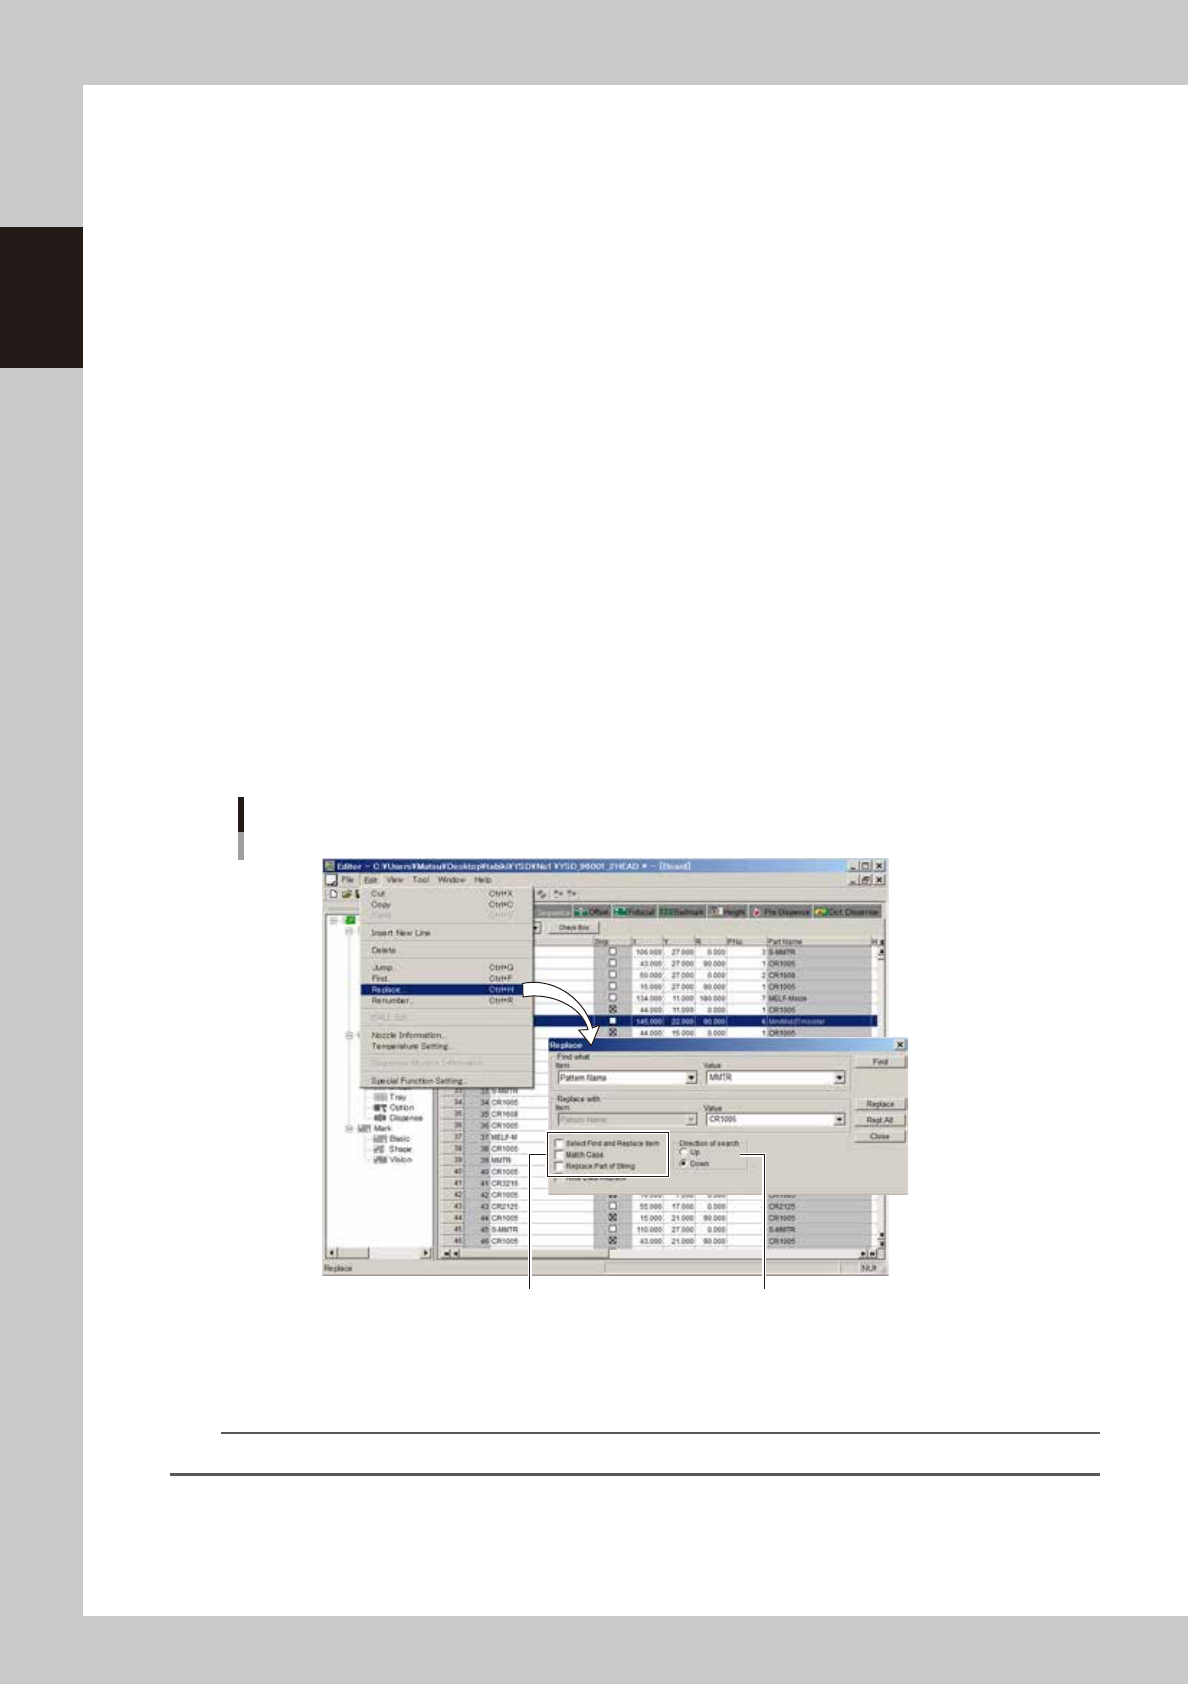
1. Select "Replace" from the Edit menu.
The "Replace" dialog box appears.
Selecting the "Replace" command
Select the direction to perform search.Select these options as needed.
64511-N7-00
2. From "Item" drop-down box in the "Find what" group box, select the item to find.
3. In the "Value" box in the "Find what" group box, specify the character string or value find.
n
NOTE
Select "ALL" if you want to find the target value or character string from among all items.
7-11
7
Editing the board data
4. In the "Value" box in the "Replace with" group box, specify the character string or value to replace
the target item.
5. To distinguish between uppercase and lowercase letters, select the "Match Case" check box to
place a check mark.
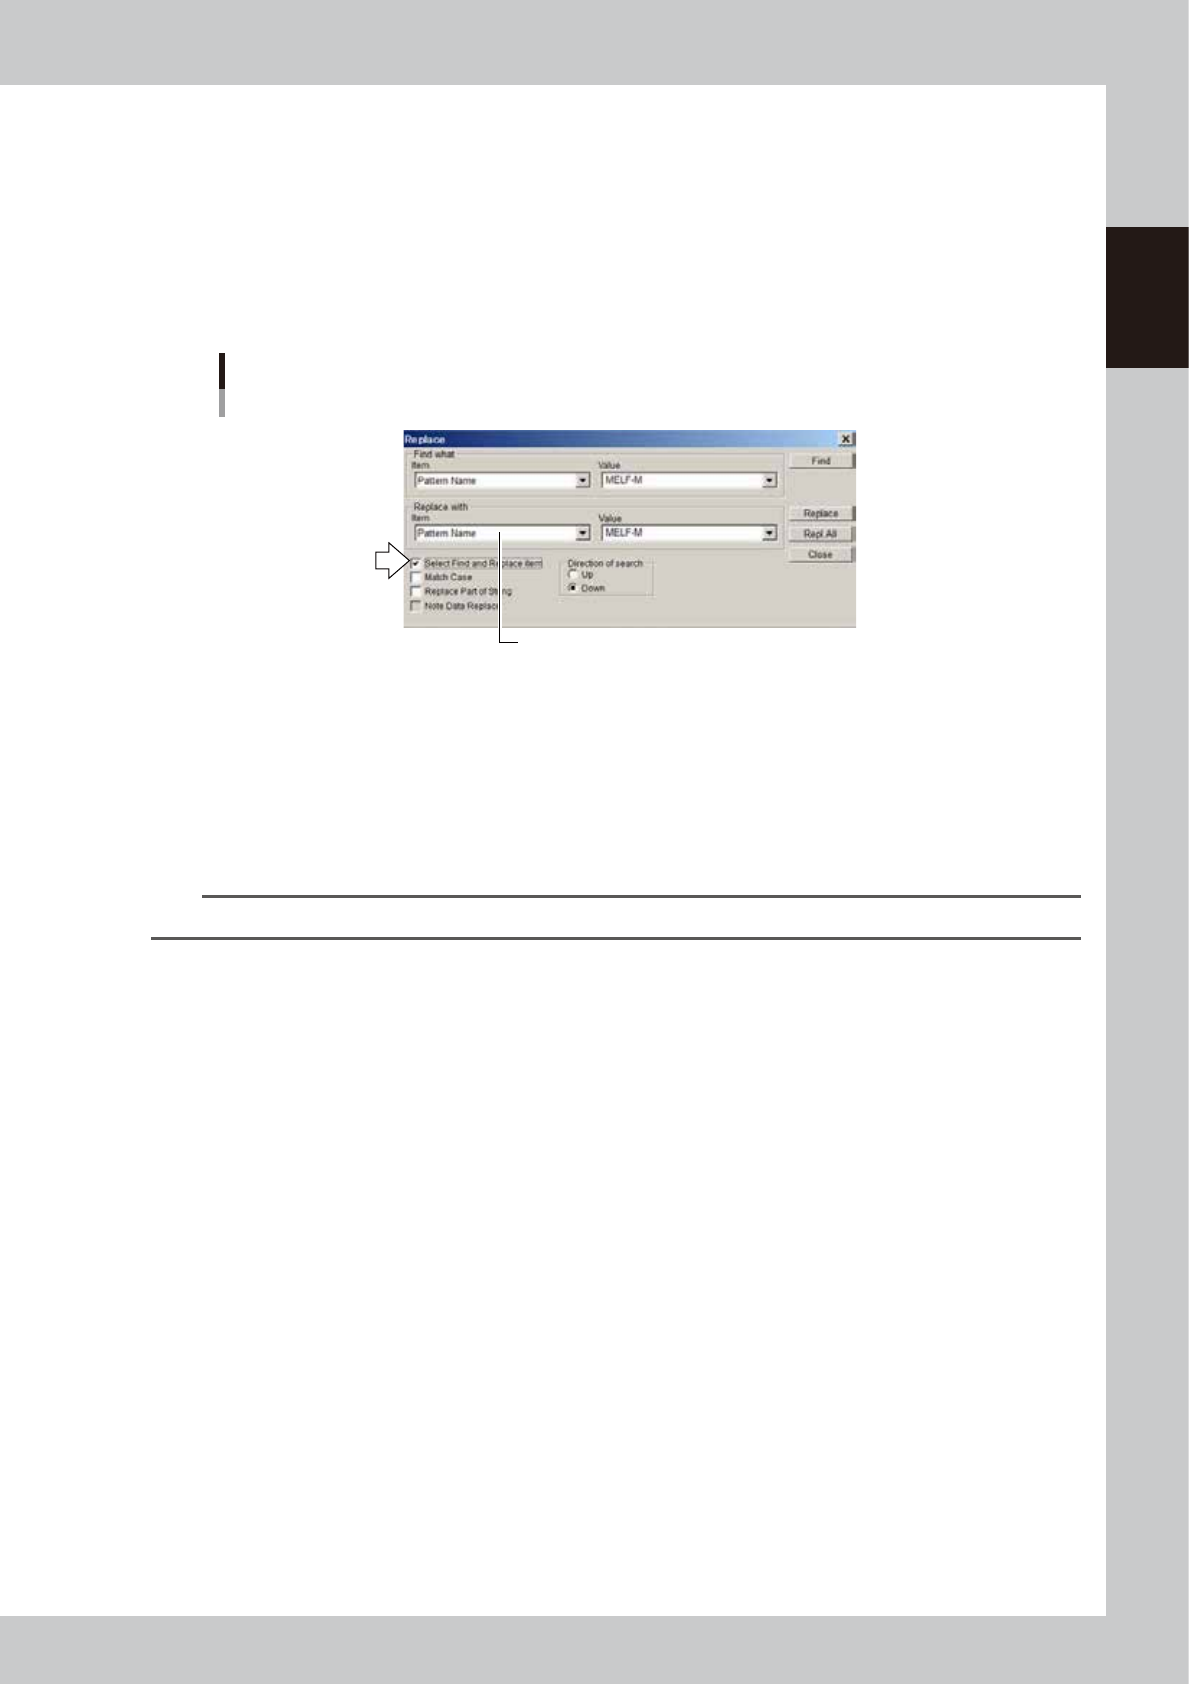
6. If you want to replace a part of the character string, select the “Replace Part of String” check box
to place a check mark.
7. If you want to specify the "Item" box in the "Find what" and "Replace with" group boxes separately,
select the "Select Find and Replace item" check box to place a check mark.
"Replace" dialog box
"Select Find and Replace" check box
The desired item can also be selected from this "Item" box.
64512-N7-00
8. Select the direction to perform search.
Click the "To Up" radio button to perform search backward (toward the beginning of the data rows),
starting from the row you selected in step 2. Click the "To Down" radio button to search forward
(toward the end of the data rows), starting from the row you selected in step 2.
9. To search and replace the target items one by one, click the [Find] button.
When the target item is found, the row of the target item is highlighted. Click the [Replace] button
to perform replace. If no target item is found, a message dialog box will appear.
n
NOTE
If you want to replace all the found targets at once, click the [Repl. All] button.
4
Close the "Replace" dialog box.
Click the [Close] button to close the "Replace" dialog box.
7-12
7
Editing the board data
1.6 Renumbering the parts number
Parts data not used in the mount information can be deleted to renumber the parts data currently being used.
1
Select the "parts" icon in the tree view to display the parts data in the
main view.
2
Click any row in the main view.
3
Renumber the parts data.
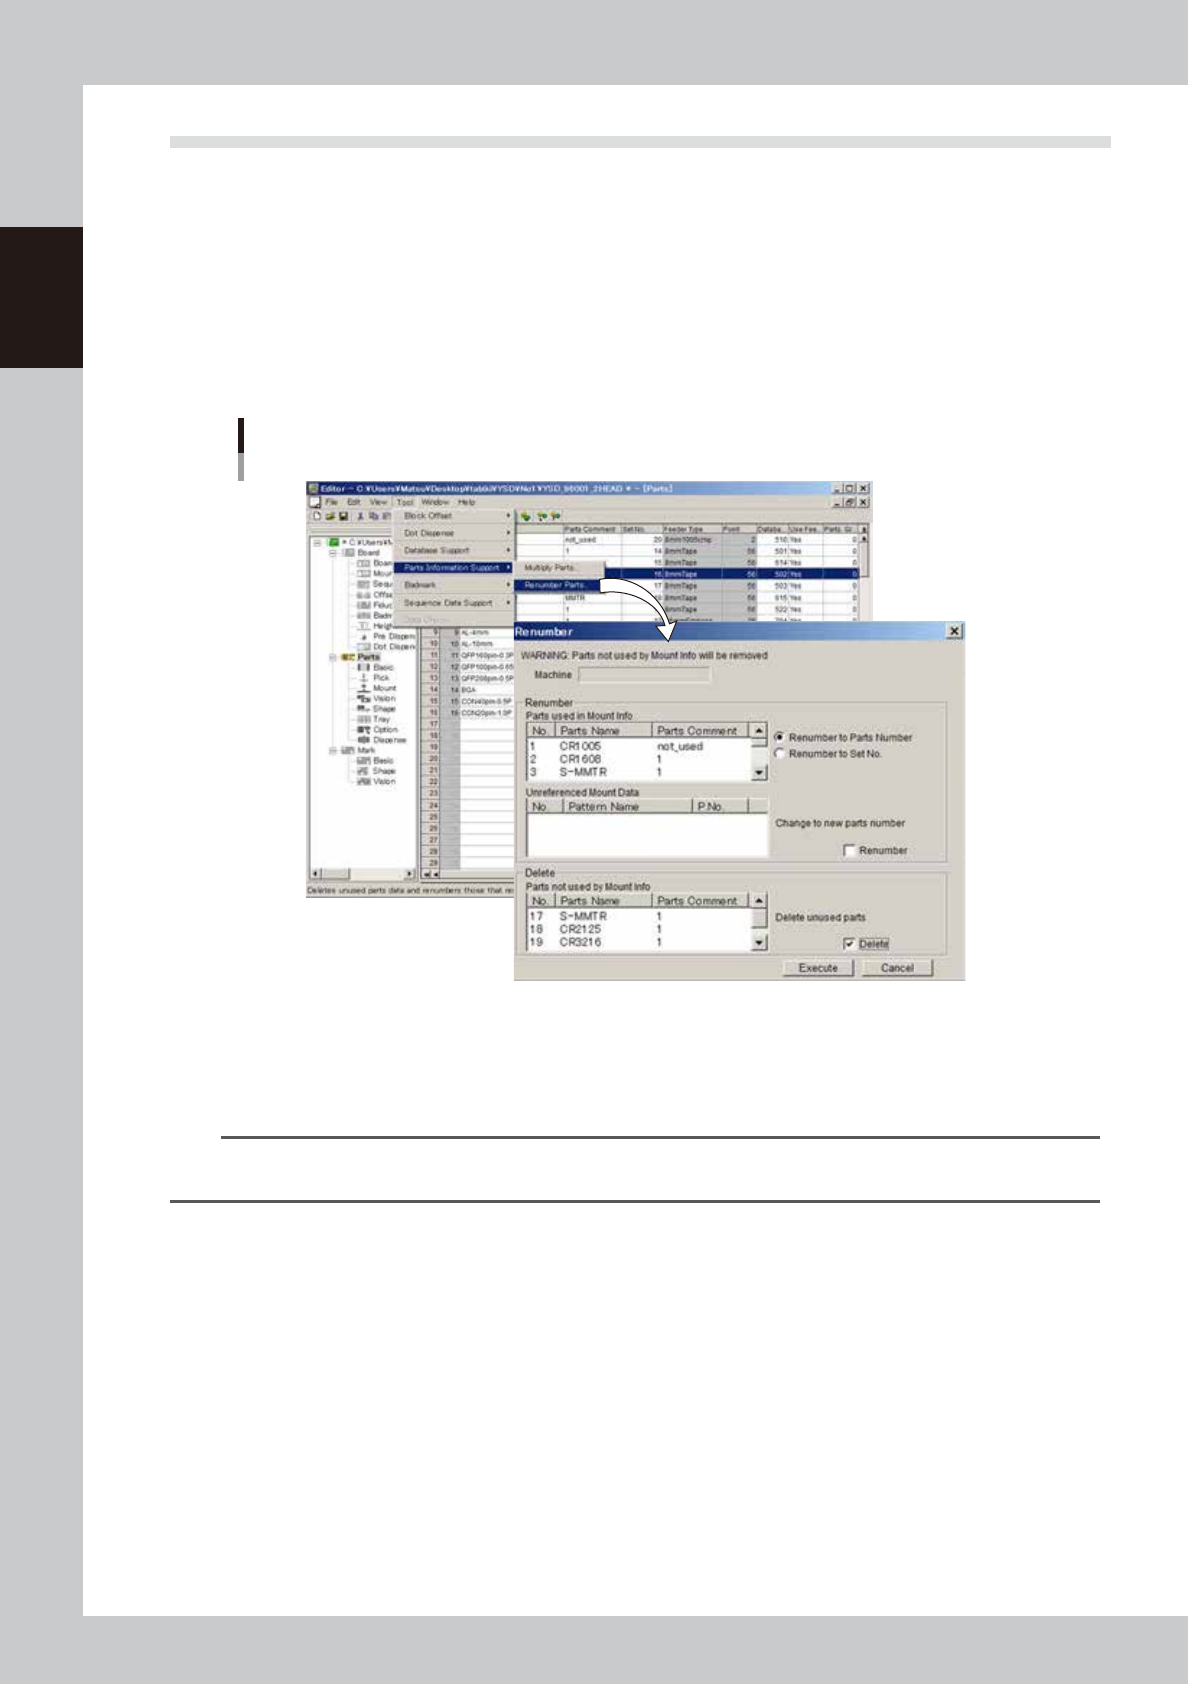
1. From the Tool menu, select "Parts information support"-"Renumber Parts".
The "Renumber" dialog box appears.
"Renumber" dialog box
64713-N7-00
2. Select the "Renumber to parts number" or "Renumber to feeder set number" radio button.
3. Select the "Renumber" check box.
At this point, a check mark is automatically placed in the "Delete" check box. Clear this check box
when you do not want to delete the parts data even if they are not used.
TIP
If you only want to delete the parts data not currently used. Select the "Delete" check box only. (Leave the
"Renumber" check box cleared.)
4. Check the setting and the click the [Execute] button.
5. When a dialog box appears indicating the task is complete, click the [OK] button.