YSD_Users_E.pdf - 第313页
7-19 7 Editing the board data 2.2.2 Returning to the block of fset data Data that has undergone block offset distribution can be returned to the original offset data. c CAUTION This function is available only when the &q…
7-18
7
Editing the board data
3
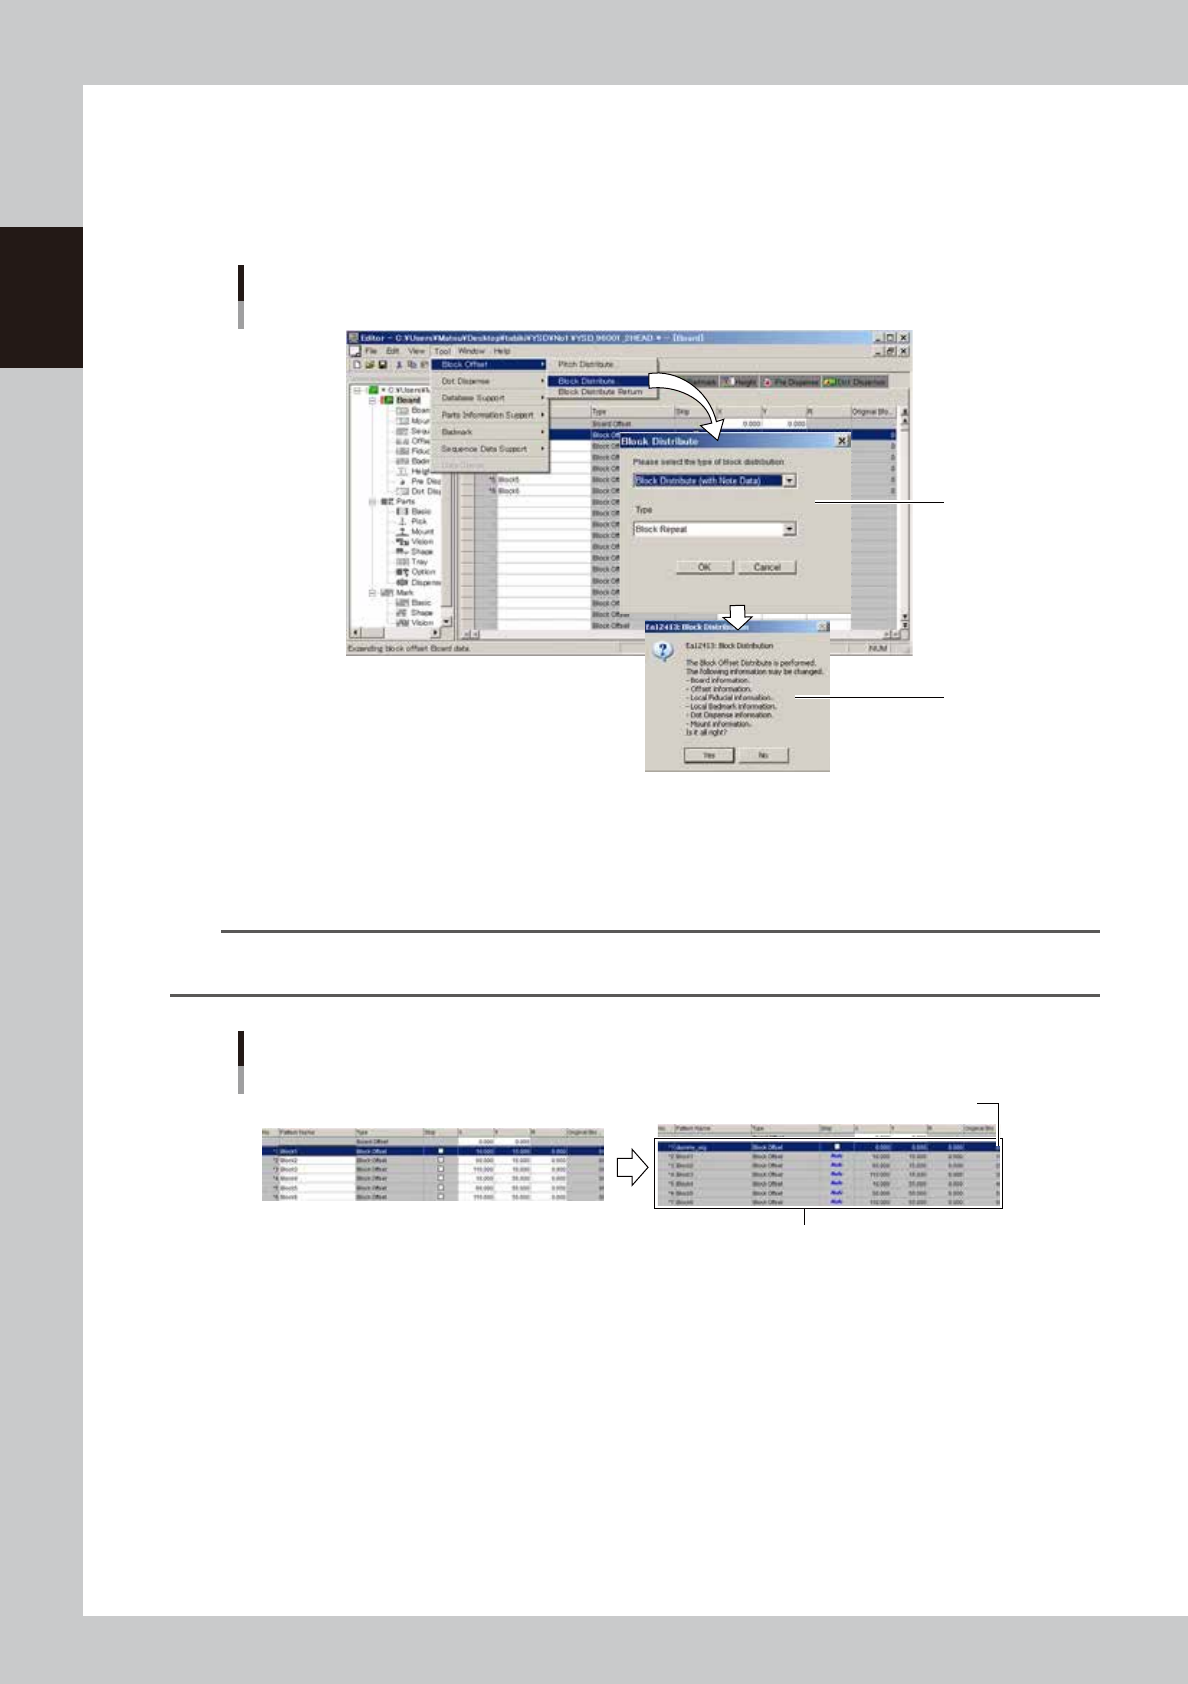
Perform block offset distribution.
When the "Block Distribution" dialog appears, check the contents and click the [Yes] button.
4
Check the message and click the [OK] button.
A dialog box appears when the block offset distribution is complete. Click the [OK] button to finish.
Block offset
Distribution
Step2
Step3
64719-N7-00
5
Check the distributed result.
When "Block Distribute (with Note Data)" was selected, check that the original data remains as "Note"
data.
n
NOTE
When "Block Distribute (with Note Data)" is performed, block No. is allocated to each distributed block and is
displayed in the "Original Block No." column.
Block offset distribution
“Block Distribute (with Note Data)”
Original data remains as “Note” data.
Block No. is allocated to each block
64720-N7-00
6
Save the board data.
7-19
7
Editing the board data
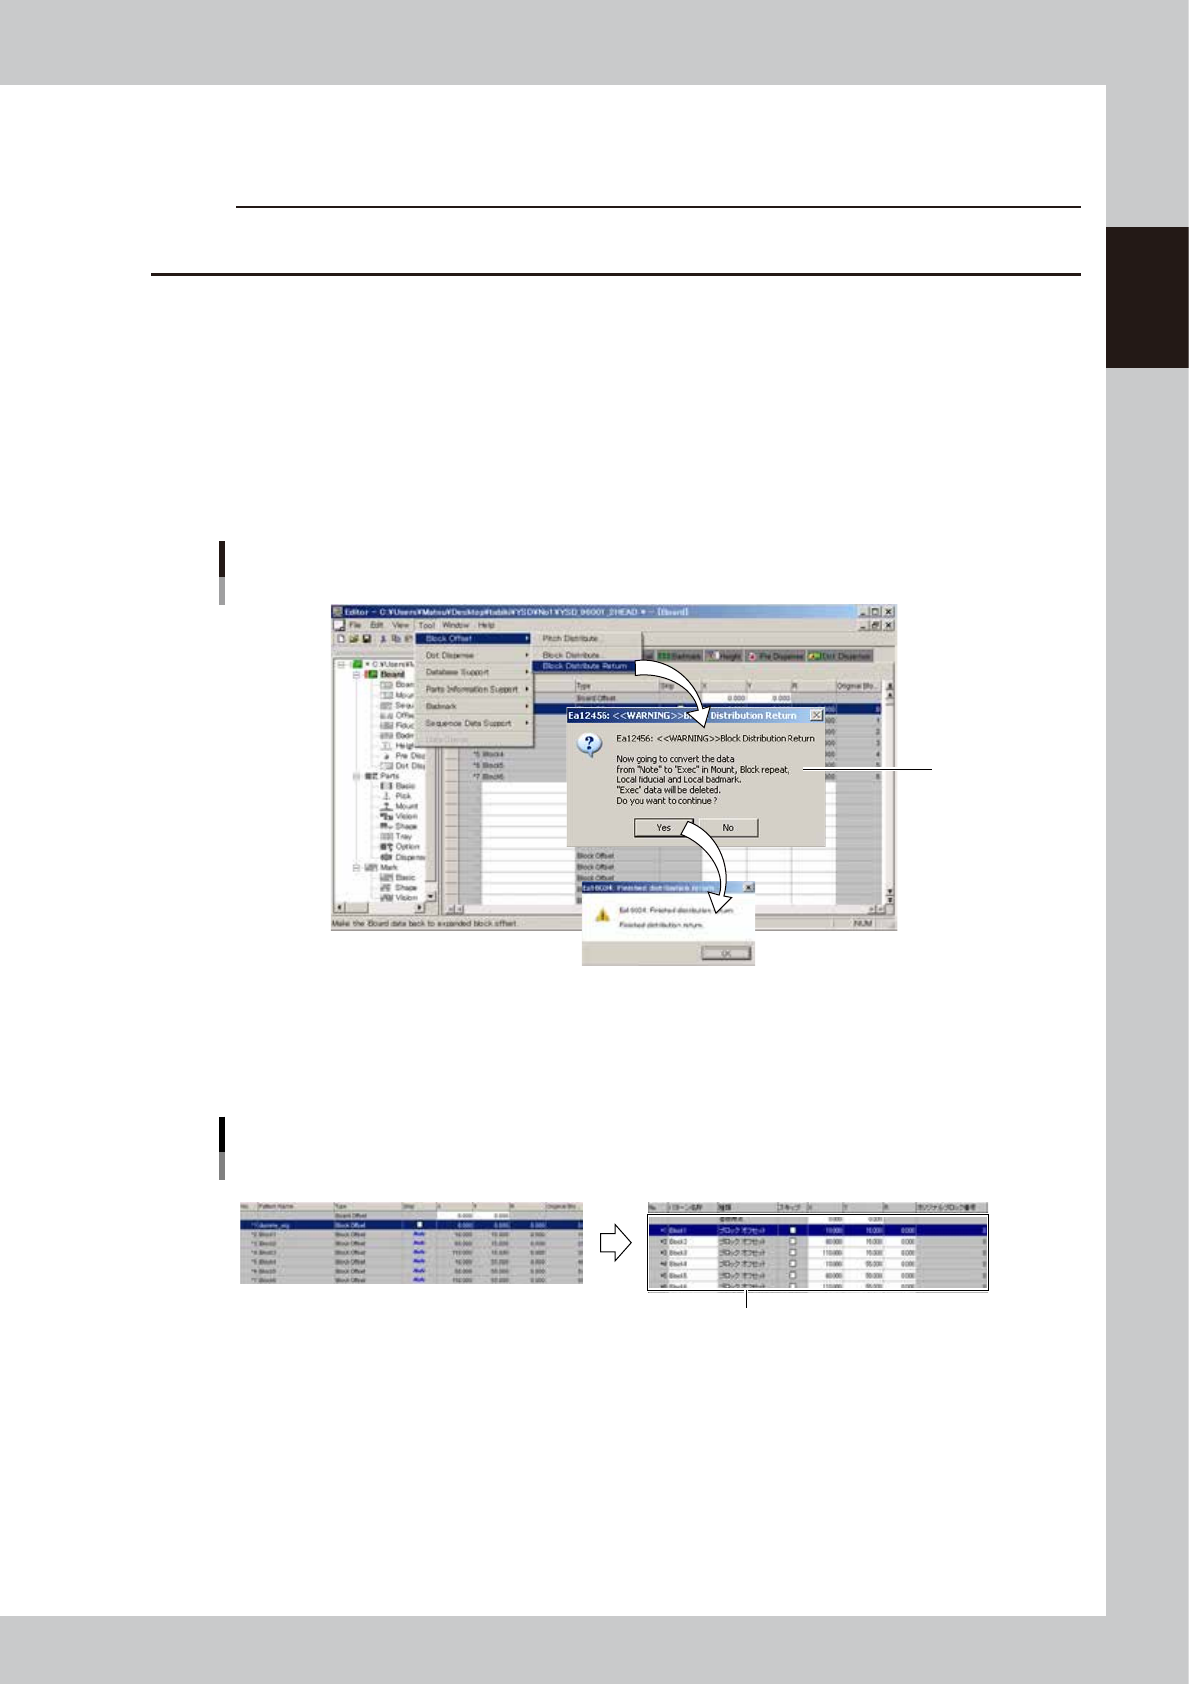
2.2.2 Returning to the block offset data
Data that has undergone block offset distribution can be returned to the original offset data.
c
CAUTION
This function is available only when the "With Note Data" check box was selected before executing block offset
distribution.
1
Execute block distribution return.
From the Tool menu, select "Block Offset" and then click "Block Distribute Return".
2
Check the message that appears.
A confirmation dialog box appears. Check the message and click the [Yes] button.
3
Check the message that appears and click the [OK] button.
A dialog box appears when block distribution return is complete. Check the message and click the [OK]
button.
Block offset
Return
Step2
64721-N7-00
4
Check that the original block offset data has been restored.
Check that "Note" in the Skip column has disappeared and the original block offset data is now
displayed.
Block offset distribution
Example of return
Original data is restored.
64722-N7-00
5
Save the board data.
7-20
7
Editing the board data
3. Board file format conversion
This section explains the procedure to perform data conversion between VIOS format board data and XML
format board data.
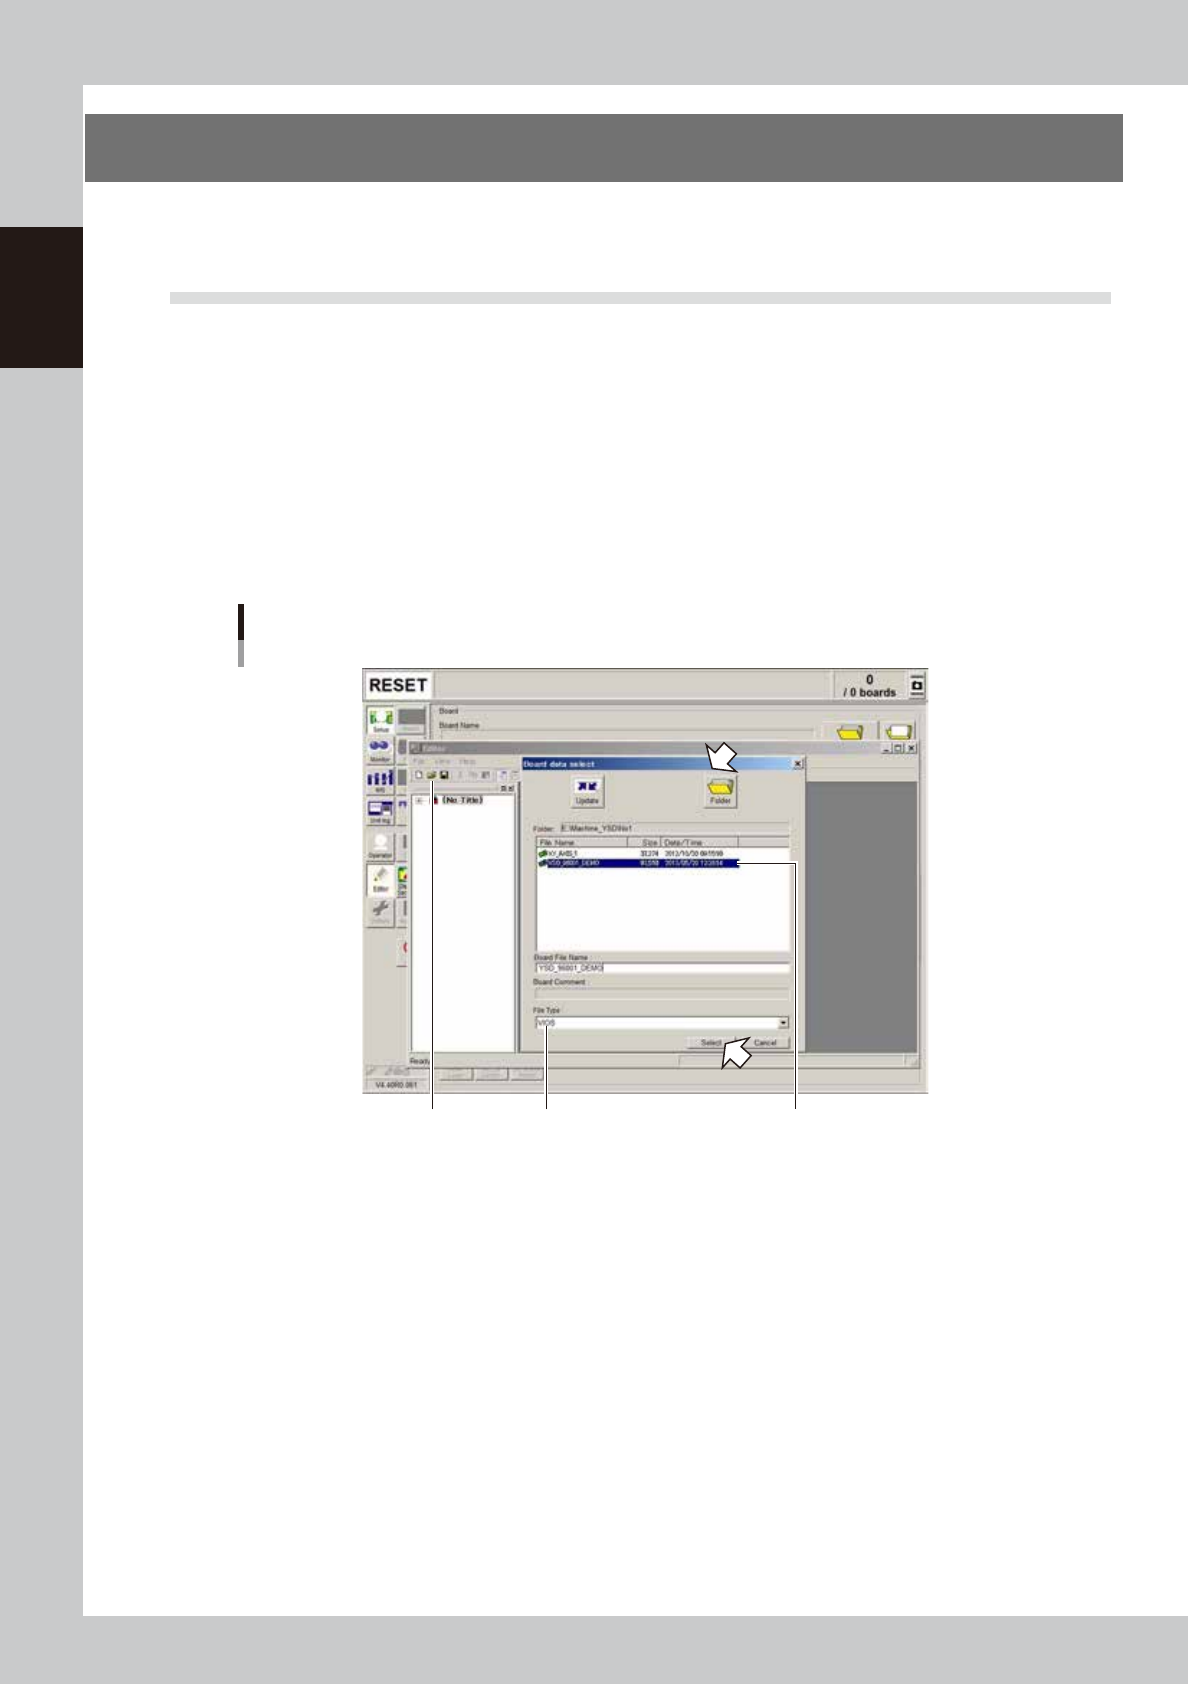
3.1 Converting VIOS data into YGX data
1
Open the VIOS board data.
1. Select "Open Board Data" from the File menu or click the [Open Board Data] button on the toolbar.
The "Board data select" dialog box appears.
2. Select "VIOS" from the File Type drop-down list.
3. Check that the "Folder" box shows the path to the folder ("No 1" folder) that contains the VIOS board
data you want to select. If not, press the [Folder] button and specify the folder containing the VIOS
board data and press the [OK] button.
4. Select the board data and click the [Select] button.
The selected board data is loaded and displayed in the Editor window.
[Open Board Data] button
Opening the "VIOS" board data
Select "VIOS". Select the board data
you want to convert.
64723-N7-00