YSD_Users_E.pdf - 第317页
7-23 7 Editing the board data 2 Sav e the board data in VIOS format. 1. Select "Save Board Data As" from the File menu. A dialog box appears to let you save the board data. 2. Select "VIOS" from the F…
7-22
7
Editing the board data
3.2 Converting YGX data into VIOS data
1
Open the YGX board data.
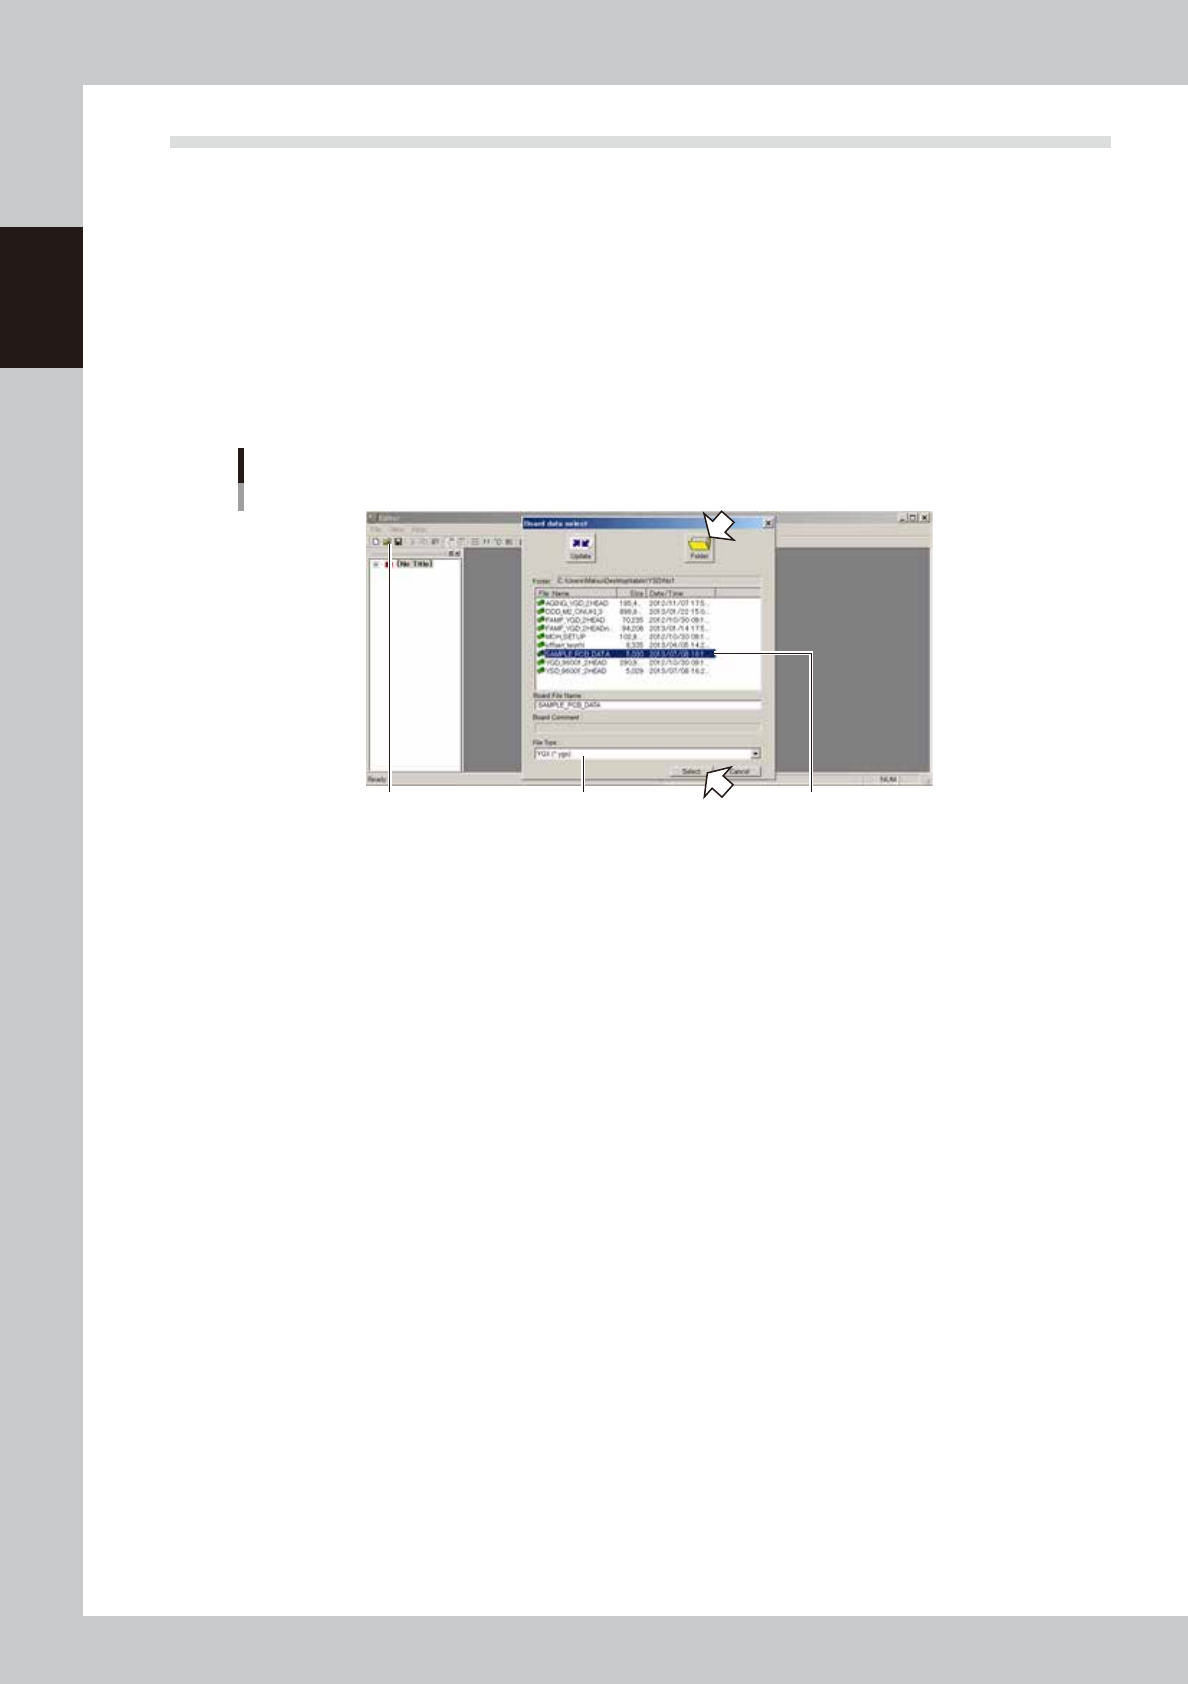
1. Select "Open Board Data" from the File menu or click the [Open Board Data] button on the toolbar.
The "Board data select" dialog box appears.
2. Select "YGX" from the File Type drop-down list.
3. Check that the "Folder" box shows the path to the folder ("No 1" folder) that contains the YGX board
data you want to select. If not, press the [Folder] button and specify the folder containing the YGX
board data and press the [OK] button.
4. Select the board data and click the [Select] button.
The selected board data is loaded and displayed in the Editor window.
[Open Board Data] button Select the board data
you want to convert.
Opening the "YGX" board data
Select "YGX".
64725-N7-00

7-23
7
Editing the board data
2
Save the board data in VIOS format.
1. Select "Save Board Data As" from the File menu.
A dialog box appears to let you save the board data.
2. Select "VIOS" from the File Type drop-down list and enter the file name in the Data Name text box to
save the board data.
3. Check that the "Folder" box shows the path to the folder where you want to save the board data. If
not, press the [Folder] button and specify the destination folder ("No 1" folder) and press the [OK]
button.
4. Click the [Save] button.
Enter the file name
to save the board data.
Select "VIOS".
Saving board data in VIOS format
64726-N7-00
c
CAUTION
VIOS format board data can only be used only when they are stored in the folder "No 1".
c
CAUTION
If a file format other than “YGX” is selected, part of information may not be saved, making the relevant functions
unusable.
7-24
7
Editing the board data
4. Adding or deleting the dispensing points
If you want to add or delete the dispensing points in existing board data when creating the dot dispense
information, use the procedures described below. There are two different procedures depending on whether
the parts information and mount information are available or not. When available, perform a dispense
distribution of the parts information and mount information to create the dot dispense information. When not
available, create the dot dispense information without performing a dispense distribution.
4.1 Adding the dispensing points
n
Using a dispense distribution
1
Add the parts.
Open the Parts screen and add the parts information. For details, see “5. Creating the parts information”
in Chapter 5.
2
Add the mount parameters.
Open the [Board]-[Mount] screen, and add the parameters at the end of the list. For details, see “4.2
Mount parameters” in Chapter 5.
3
Save the board data.
Press the [Save] button to open the “Board data save" dialog box and save the board data.
4
Execute the “All Setting Dialog” command.
Press the [Edit] button to open the Editor screen. From the “Tool” menu, select “Dot Dispense” – “All
Setting Dialog”, and make the “Distribute” and “Sort” settings. Then execute the “All Setting Dialog”
command. For more details, see “
n
All Setting Dialog command” in “7.2 Dispense distribution” in Chapter
5.
n
Not using a dispense distribution
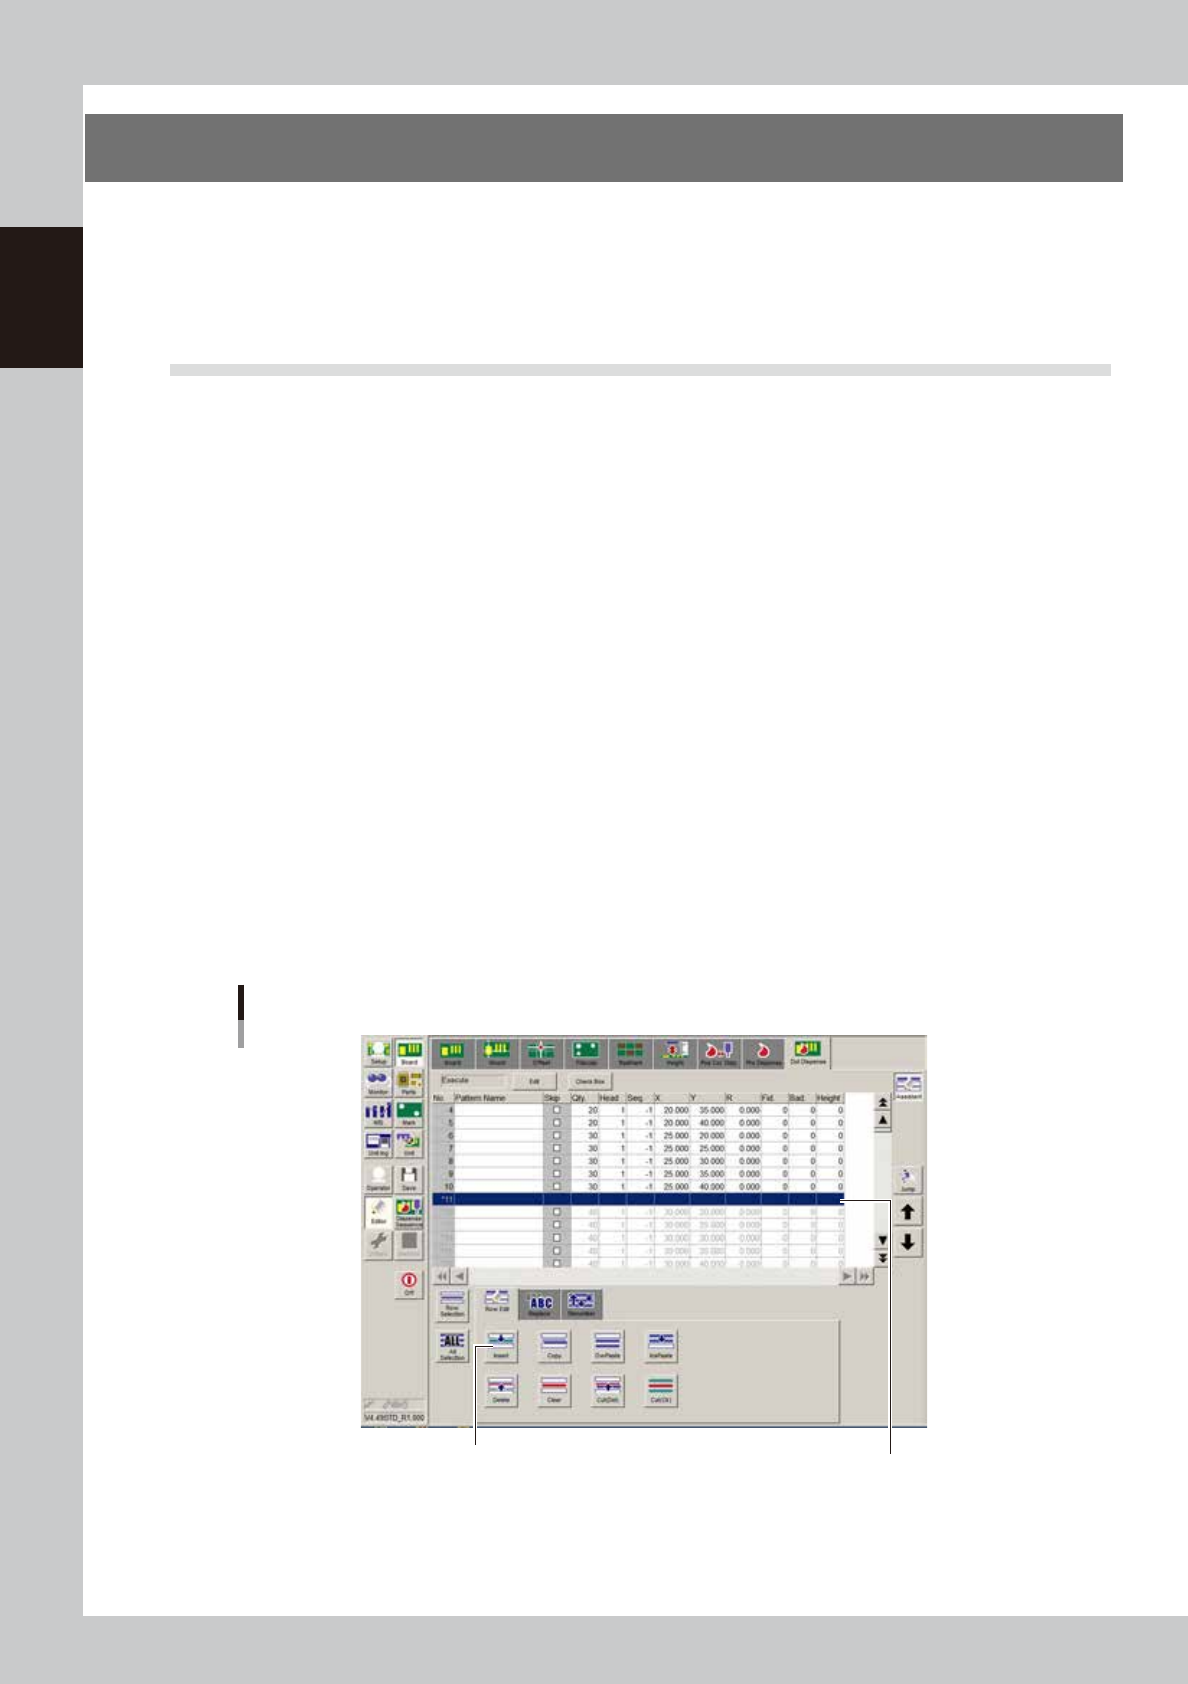
Add the dot dispense parameters.
Open the [Board]-[Dot Dispense] screen and press the [Assistant] button. Select the row where you want
to add the dispensing point and press the [Insert] button. Enter the parameters in the empty fields to
add them. For details on each parameter, see “4.9 Dot dispense parameters” in Chapter 5.
Adding the parameters
[Insert] button
Enter the parameters.
64727-N7-00