YSD_Users_E.pdf - 第319页
7-25 7 Editing the board data 4.2 Deleting the dispensing points n Using a dispense distribution 1 Delete the mount par ameters. Open the [Board]-[Mount] screen and press the [Assis tant] button. Press the “Part Name” la…
7-24
7
Editing the board data
4. Adding or deleting the dispensing points
If you want to add or delete the dispensing points in existing board data when creating the dot dispense
information, use the procedures described below. There are two different procedures depending on whether
the parts information and mount information are available or not. When available, perform a dispense
distribution of the parts information and mount information to create the dot dispense information. When not
available, create the dot dispense information without performing a dispense distribution.
4.1 Adding the dispensing points
n
Using a dispense distribution
1
Add the parts.
Open the Parts screen and add the parts information. For details, see “5. Creating the parts information”
in Chapter 5.
2
Add the mount parameters.
Open the [Board]-[Mount] screen, and add the parameters at the end of the list. For details, see “4.2
Mount parameters” in Chapter 5.
3
Save the board data.
Press the [Save] button to open the “Board data save" dialog box and save the board data.
4
Execute the “All Setting Dialog” command.
Press the [Edit] button to open the Editor screen. From the “Tool” menu, select “Dot Dispense” – “All
Setting Dialog”, and make the “Distribute” and “Sort” settings. Then execute the “All Setting Dialog”
command. For more details, see “
n
All Setting Dialog command” in “7.2 Dispense distribution” in Chapter
5.
n
Not using a dispense distribution
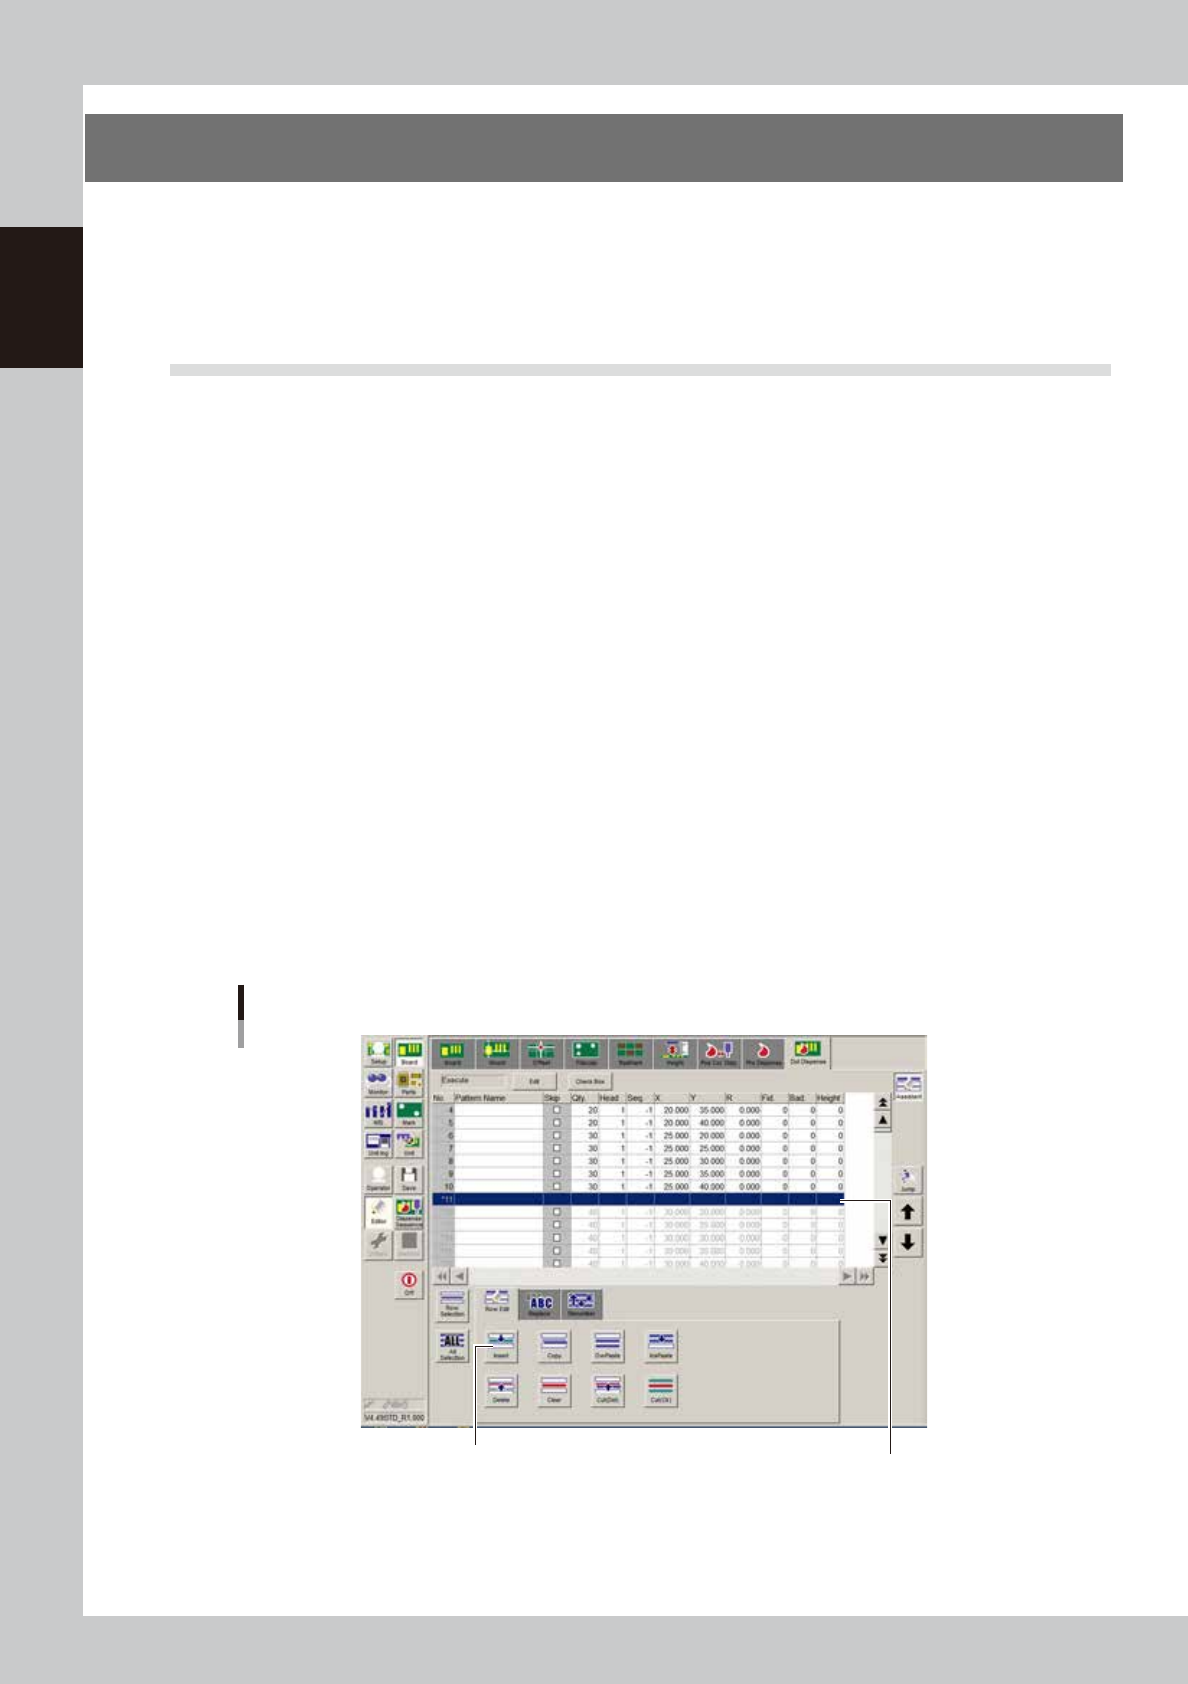
Add the dot dispense parameters.
Open the [Board]-[Dot Dispense] screen and press the [Assistant] button. Select the row where you want
to add the dispensing point and press the [Insert] button. Enter the parameters in the empty fields to
add them. For details on each parameter, see “4.9 Dot dispense parameters” in Chapter 5.
Adding the parameters
[Insert] button
Enter the parameters.
64727-N7-00
7-25
7
Editing the board data
4.2 Deleting the dispensing points
n
Using a dispense distribution
1
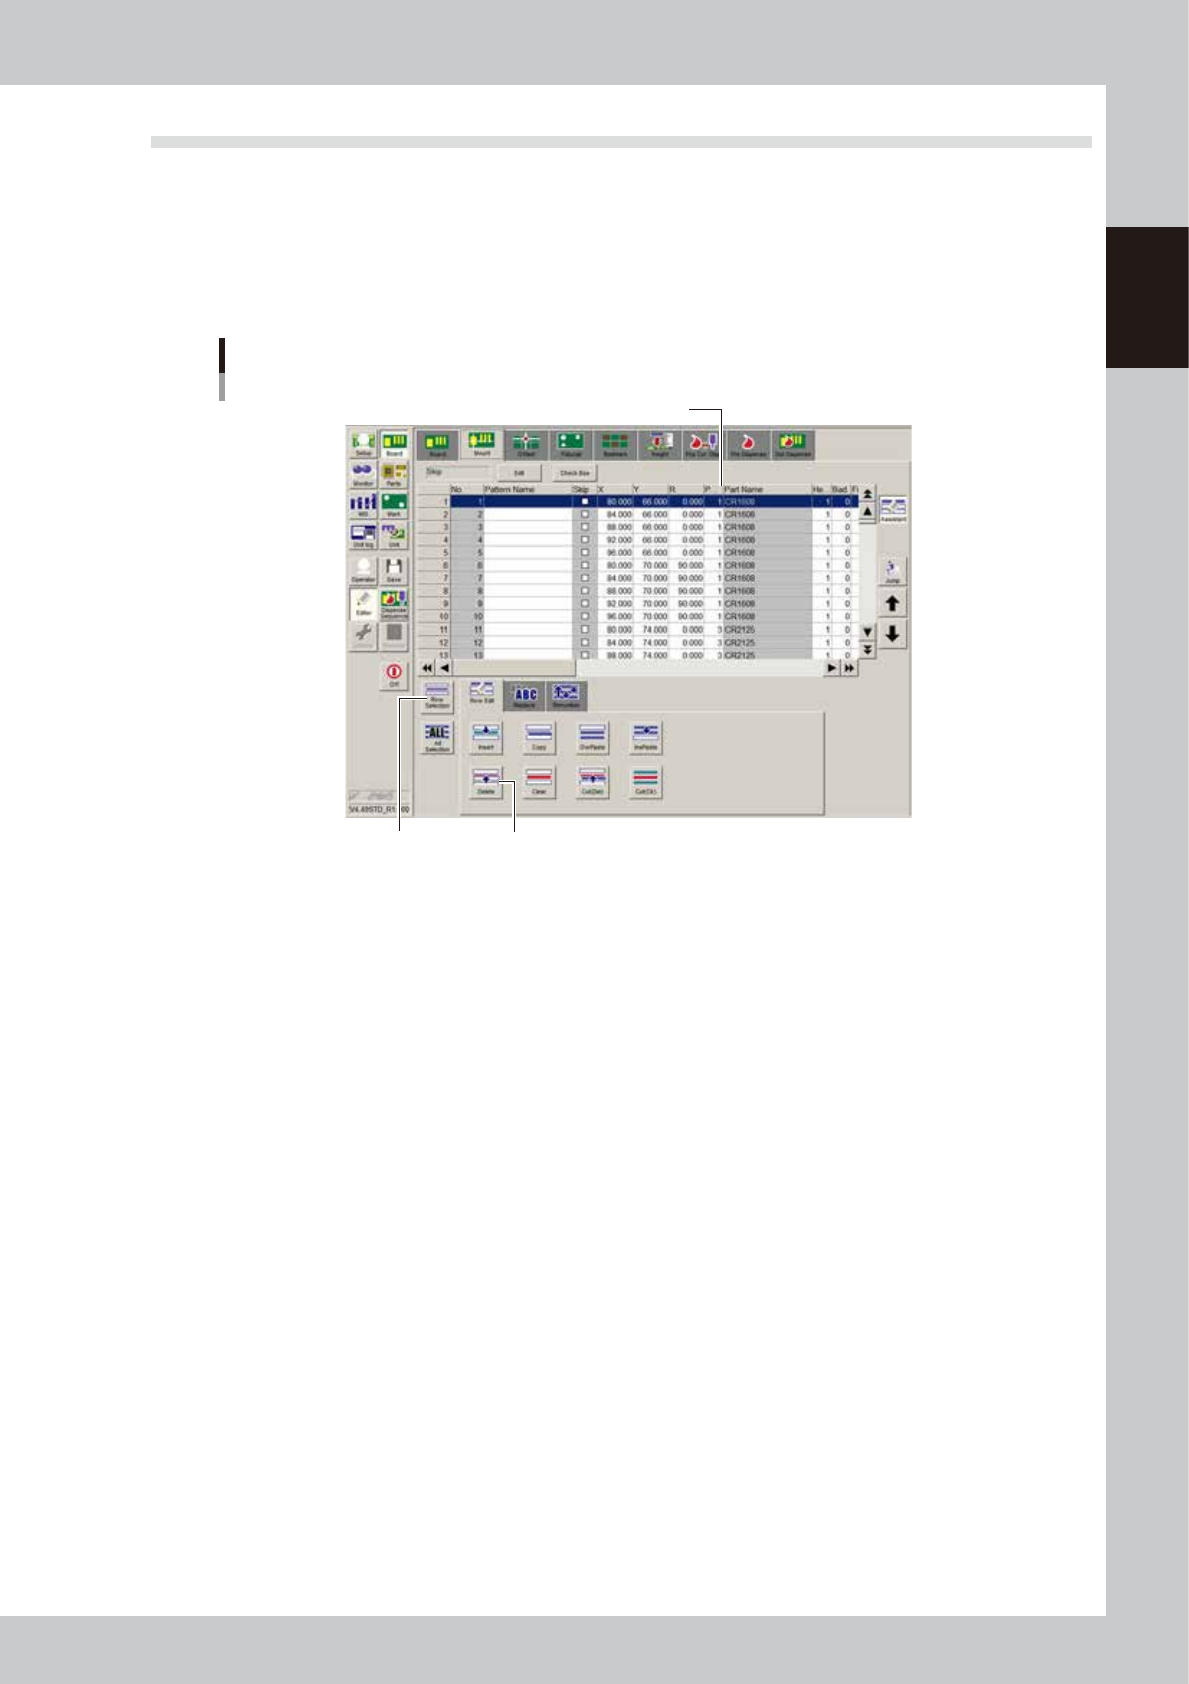
Delete the mount parameters.
Open the [Board]-[Mount] screen and press the [Assistant] button. Press the “Part Name” label to sort in
order of the part name. Select the row of the target part and press the [Delete] button. If you want to
delete two or more rows, select the [Row Select] button, select the rows, and press the [Delete] button.
Deleting the mount parameters
[Delete] button[Row Select] button
Press “Part Name” to sort by part name.
64728-N7-00
2
Save the board data.
Press the [Save] button to open the “Board data save" dialog box and save the board data.
3
Execute the “All Setting Dialog” command.
Press the [Edit] button to open the Editor screen. From the “Tool” menu, select “Dot Dispense” – “All
Setting Dialog”, and make the “Distribute” and “Sort” settings. Then execute the “All Setting Dialog”
command. For more details, see “
n
All Setting Dialog command” in “7.2 Dispense distribution” in Chapter
5.
n
Not using a dispense distribution
Delete the dot dispense parameters.
Open the [Board]-[Dot Dispense] screen and press the [Assistant] button. Select the row of the parts you
want to delete and press the [Delete] button.

Chapter 8 Managing the data
Contents
1. Data backup 8-1
1.1 Making a backup of board data 8-1
1.1.1 Backing up onto a USB flash drive 8-2
1.2 Copying and moving the board data 8-7
1.3 Making a backup of system data 8-10
1.3.1 System backup settings 8-11
1.3.2 Making a backup 8-13
1.4 Restoring the system data 8-17
1.4.1 Restoring a system backup 8-17
1.4.2 Restoring a system full backup 8-20
2. Creating the user database 8-23
2.1 Registering data into the user database 8-23
3. Production log management 8-25
3.1 Production log types 8-25
3.1.1 Production log (MIS) 8-25
3.1.2 Operation log (Unit Log) 8-27
3.1.3 Other operations 8-29
3.2 Production and operation log settings 8-31
3.2.1 Setting to store production logs per board data 8-31
3.2.2 Specifying the auto-save destination 8-32
3.2.3 History Utility 8-35