YSD_Users_E.pdf - 第75页
2-15 2 Basic operation n Manual I/O operation [Unit] – [I/O] screen 1 2 3 64234-N7-00 Button name Function 1 Select output display group Select the output group for display in the "Output" status list. The foll…
2-14
2
Basic operation
n
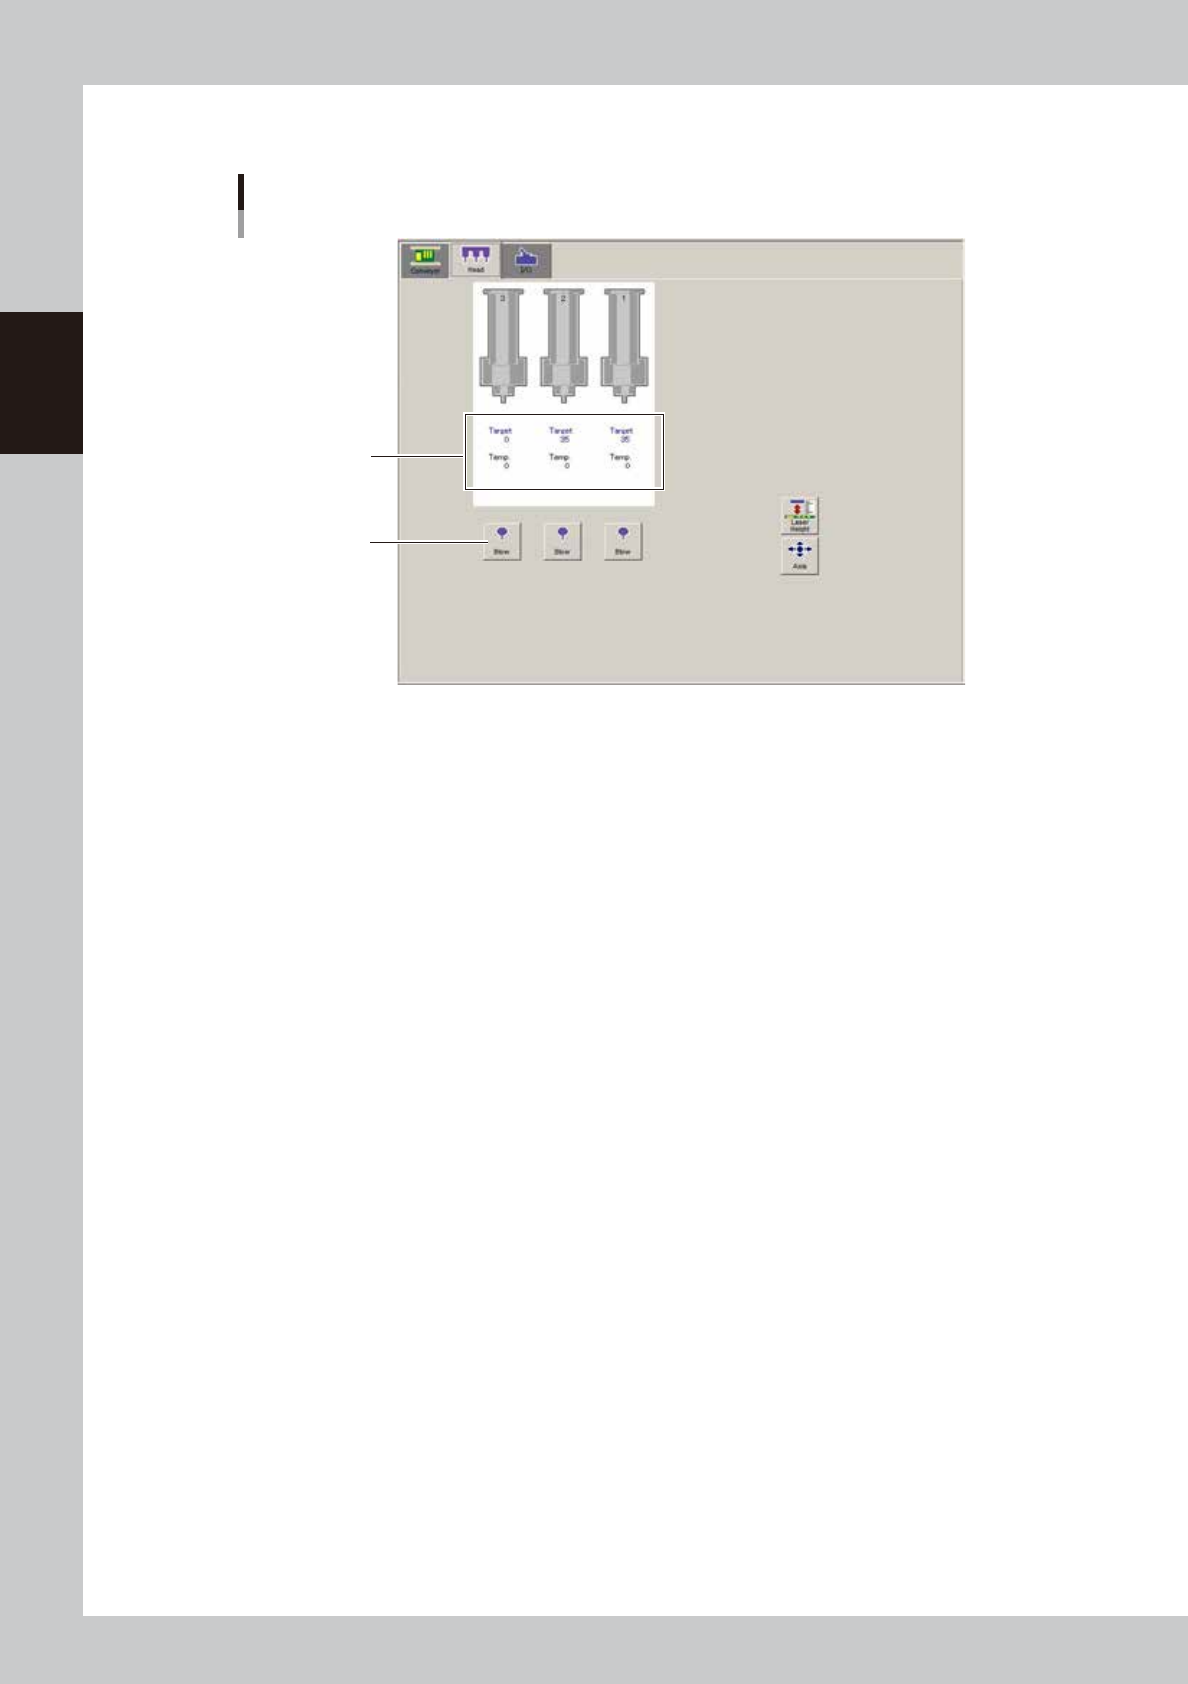
Manual head operation
[Unit] – [Head] screen
1
Target temperature
and current temperature
64233-N7-00
1. [Blow] button
Pressing each button dispenses adhesive. To stop dispensing, press the button again.
2-15
2
Basic operation
n
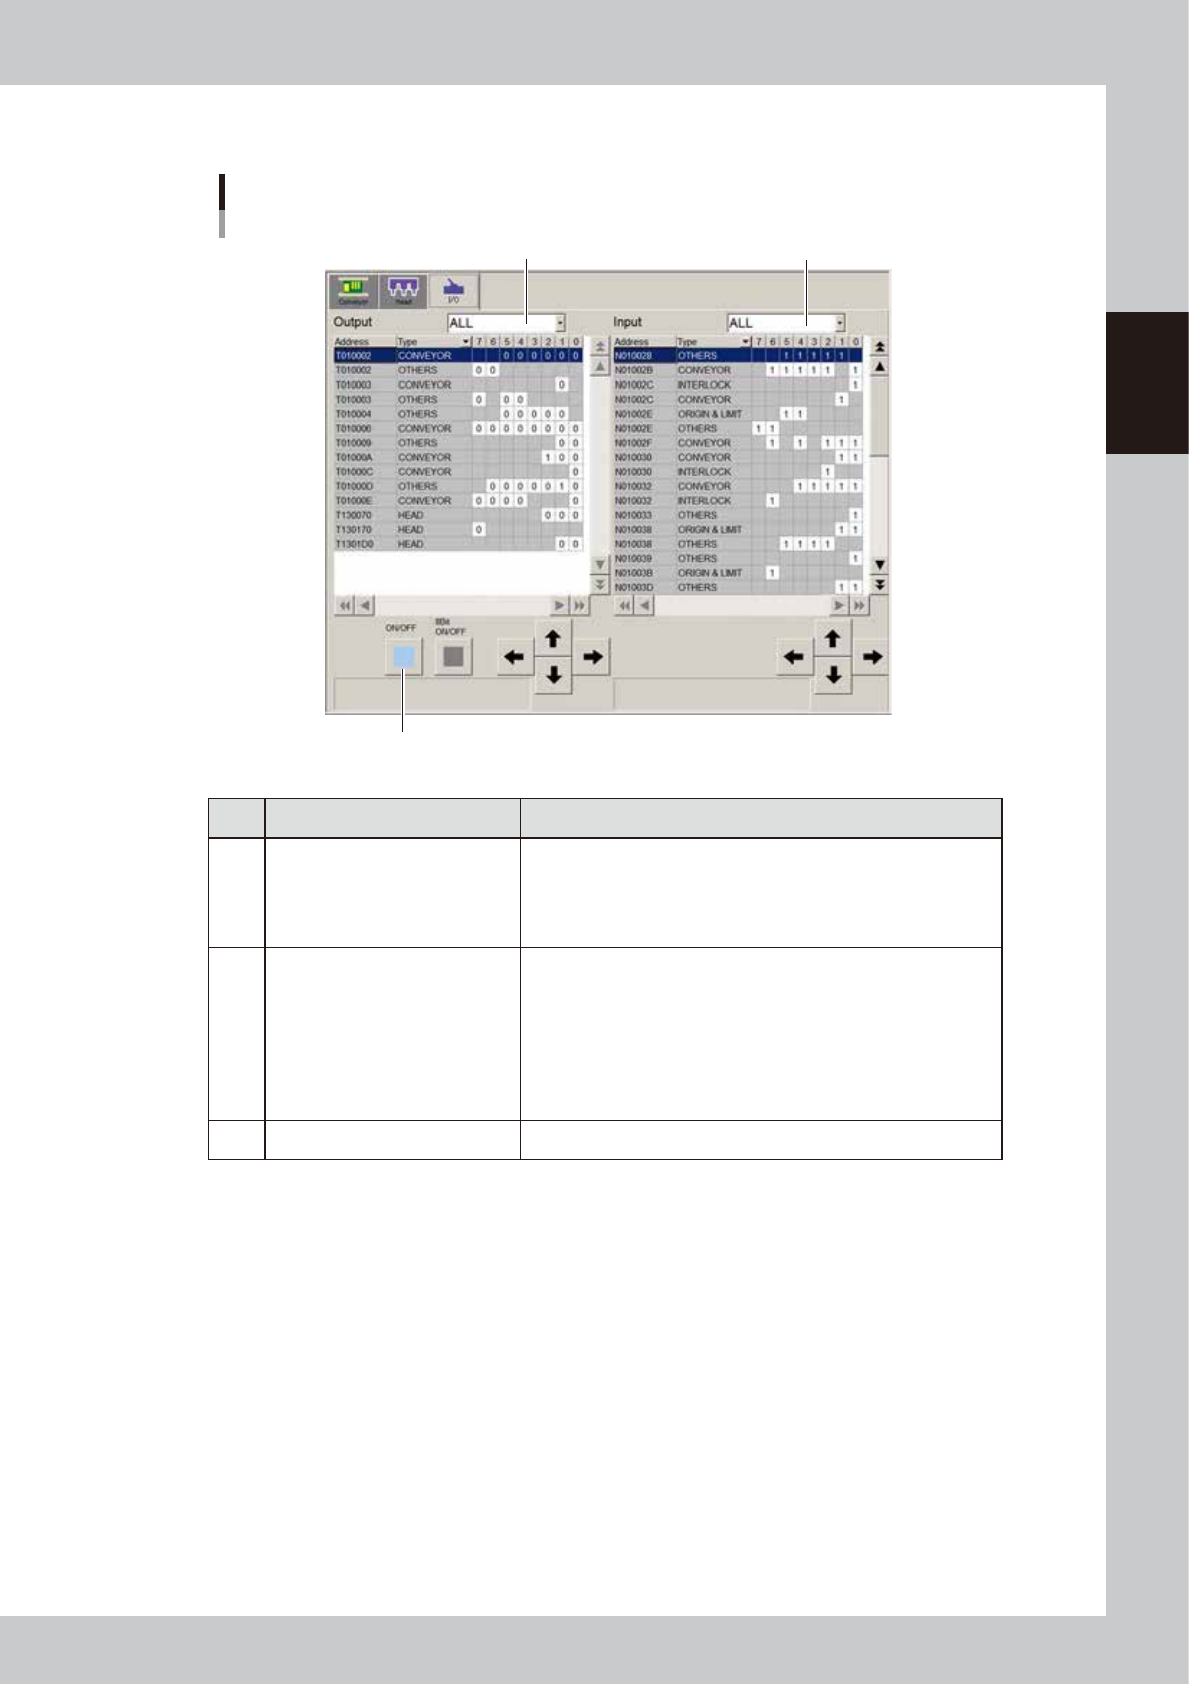
Manual I/O operation
[Unit] – [I/O] screen
1
2
3
64234-N7-00
Button name Function
1 Select output display group
Select the output group for display in the "Output" status list. The
following groups can be selected:
• CONV (conveyor)
• HEAD
• OTHERS
2 Select input display group
Select the input group for display in the "Input" status list. The
following groups can be selected:
• INTLCK (interlock)
• CONV (conveyor)
• HEAD
• SPARE
• SRV (servo origin limit)
• OTHERS
3 ON/OFF Turns the selected valve on or off.
2-16
2
Basic operation
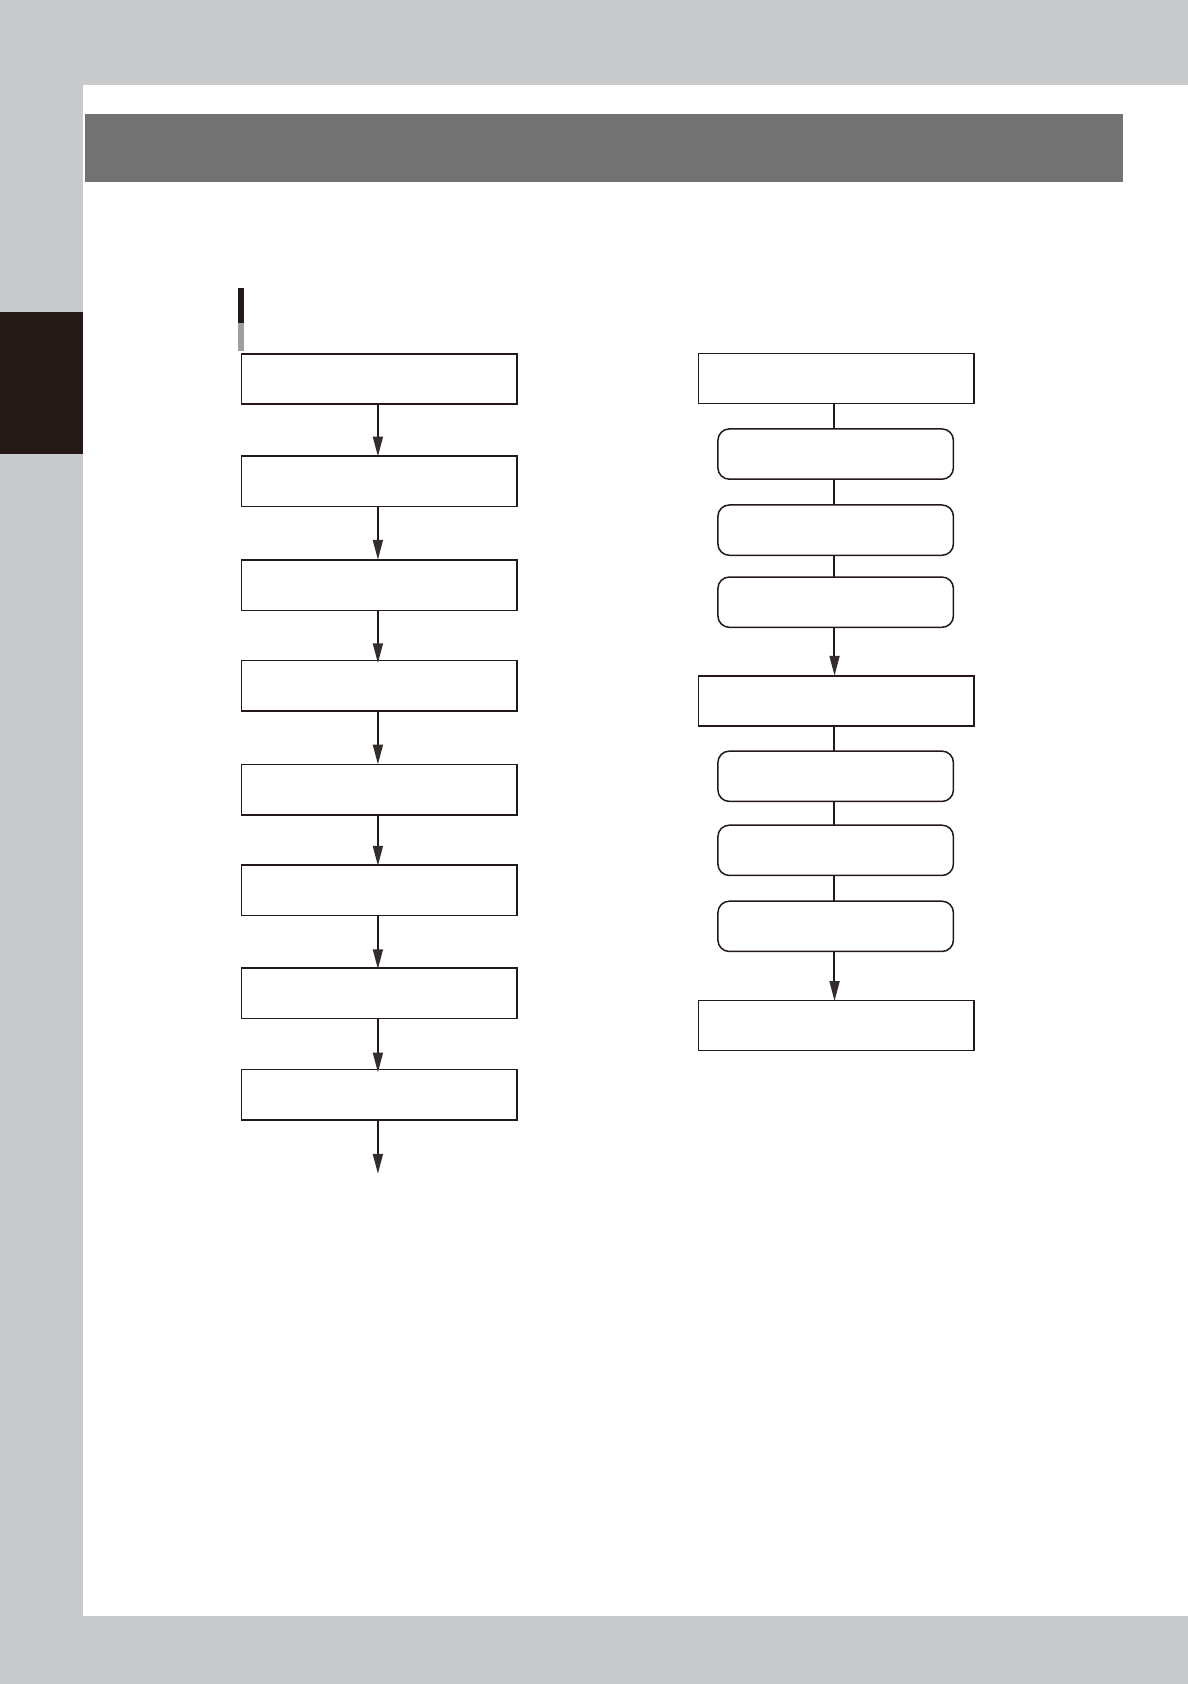
3. Machine operation from start to finish
The following is the basic flow of the machine operation from start to finish. Since the title of each step is the
same as the heading of each section in this manual, refer to the table of contents to find the information on the
steps you want to know.
Flow of machine operation from start to finish
3.6 Bleeding the nozzle air
1.1 Starting the machine
3.1 Pre-operation check
3.2 Selecting the board data
3.5 Starting and warming up the machine
3.4 Setting up the head unit
Optimum pressure setting
Do this just before starting board production
3.7 Performing a dispensing test
3.3 Changing the conveyor unit setup
3.8 Starting board production
To the step for “Starting board production”
Remove syringes
Dispense for position correction
Predispense
Remove back-up pins
Clean nozzles
1.4 Turning off the machine power
Dispense on board
3.10 Finishing board production
Temperature regulator ON
Power ON
Power OFF
63201-N7-10