YSD_Users_E.pdf - 第90页
2-30 2 Basic operation e 3 Open the safety cov er . 1. After the head moves frontward, press the emergency stop button and open the safety cover . 2. Prepare a rag to use when dispensing adhesive. 4 Check how adhesiv e i…
2-29
2
Basic operation
3.6 Bleeding the nozzle air
To optimize the pressure in a syringe, the air in the nozzle must be bled out.
Use the following procedure to dispense adhesive from the head to bleed the air. Do this just before starting
production.
c
CAUTION
When temperature setting is used, allow at least 15 minutes after installing the syringe before bleeding the air so that
the temperature of the temperature regulator unit is sufficiently transmitted to the syringe.
1
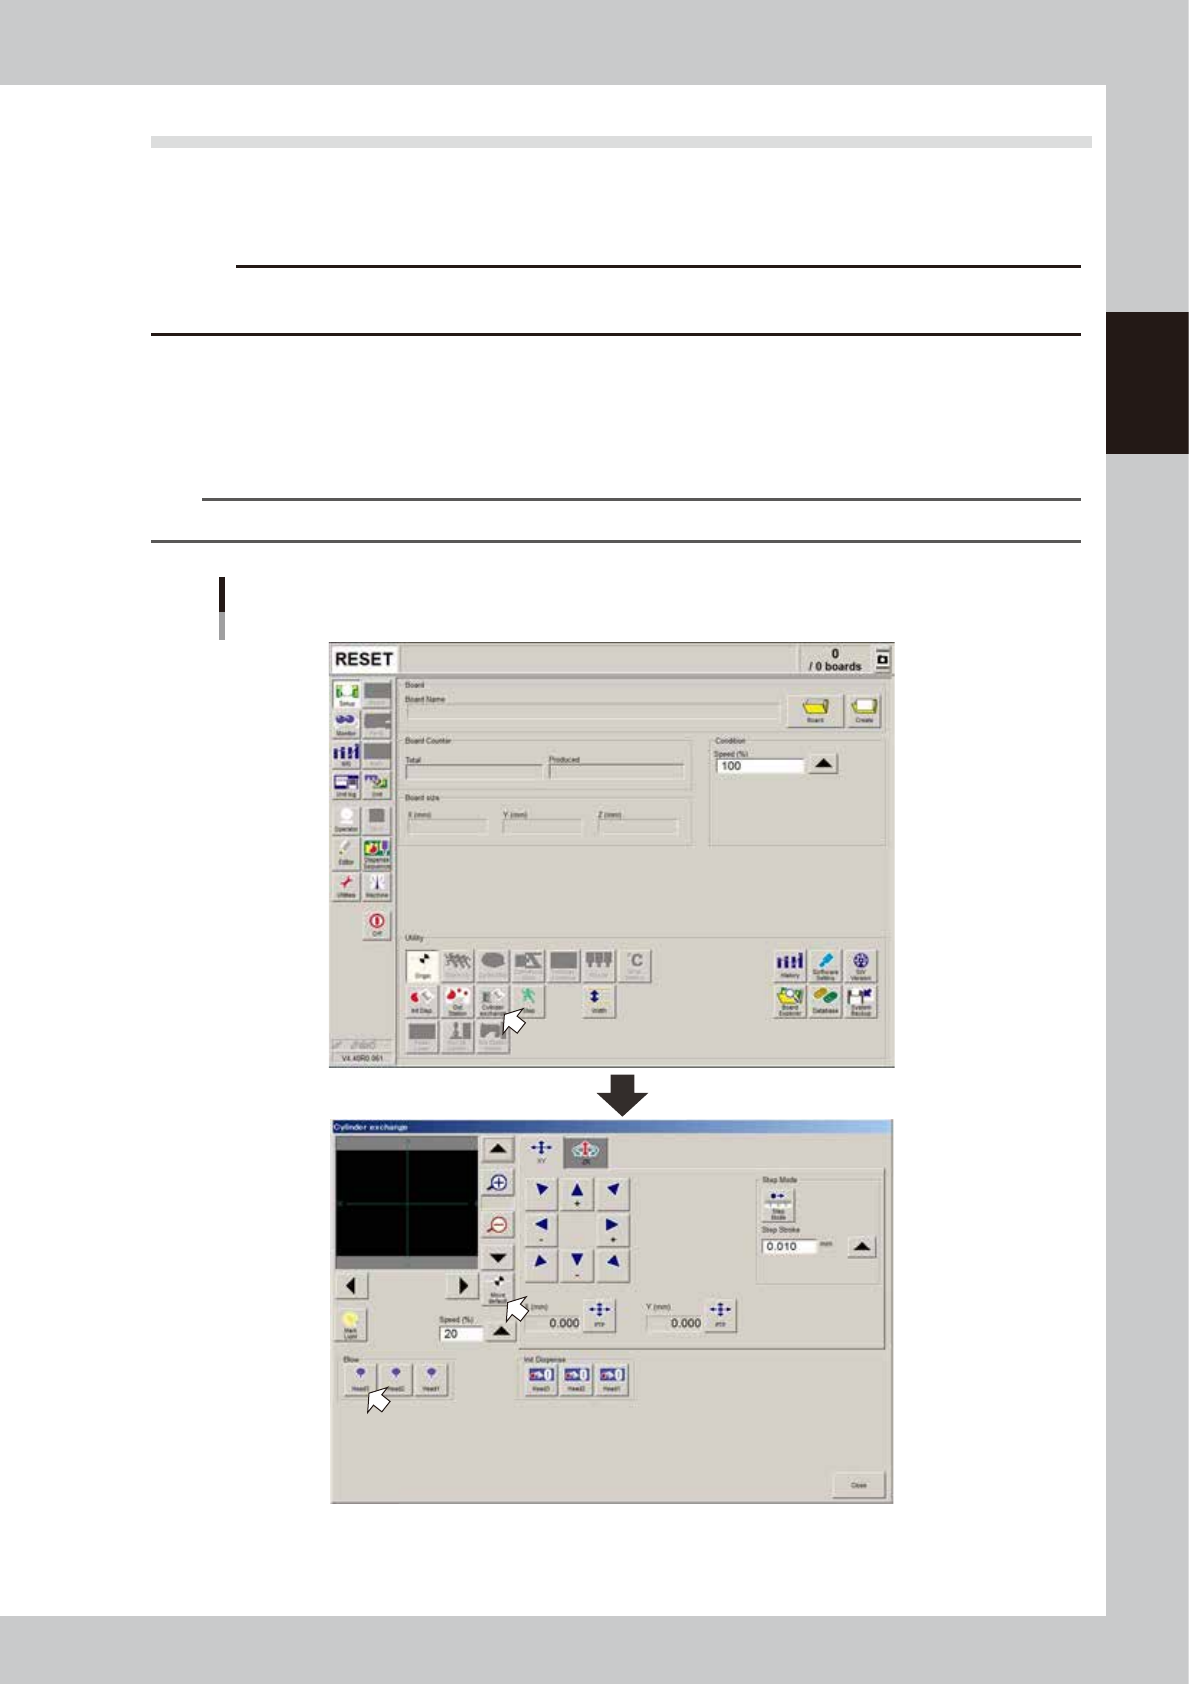
Press the [Cylinder exchange] button.
The “Cylinder exchange” window appears.
2
Move the head to the syringe replacement position.
Press the [Move default] button to move the head to the syringe replacement position.
TIP
You may press the emergency stop button and then move the head by hand to the syringe replacement position.
“Move axis” window
64205-N7-00
2-30
2
Basic operation
e
3
Open the safety cover.
1. After the head moves frontward, press the emergency stop button and open the safety cover.
2. Prepare a rag to use when dispensing adhesive.
4
Check how adhesive is dispensed.
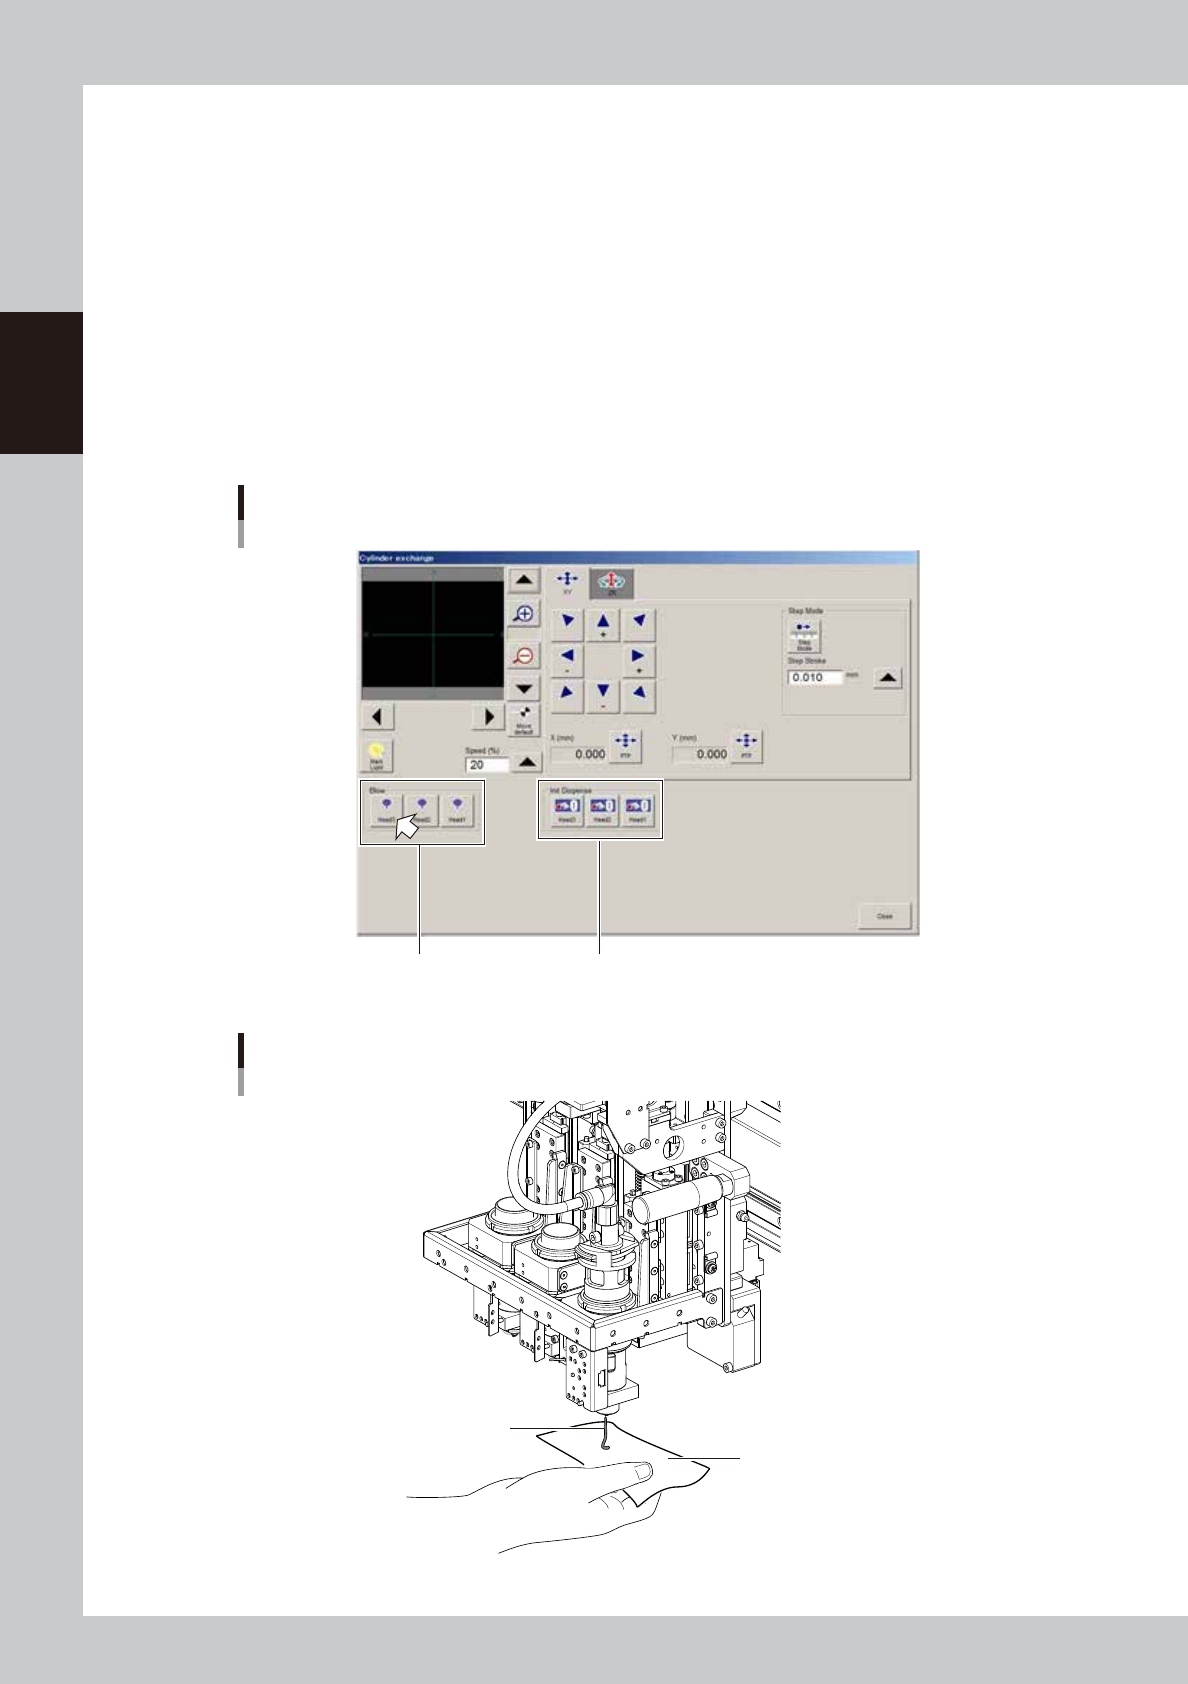
1. Press the [Cylinder exchange] button on the Setup screen.
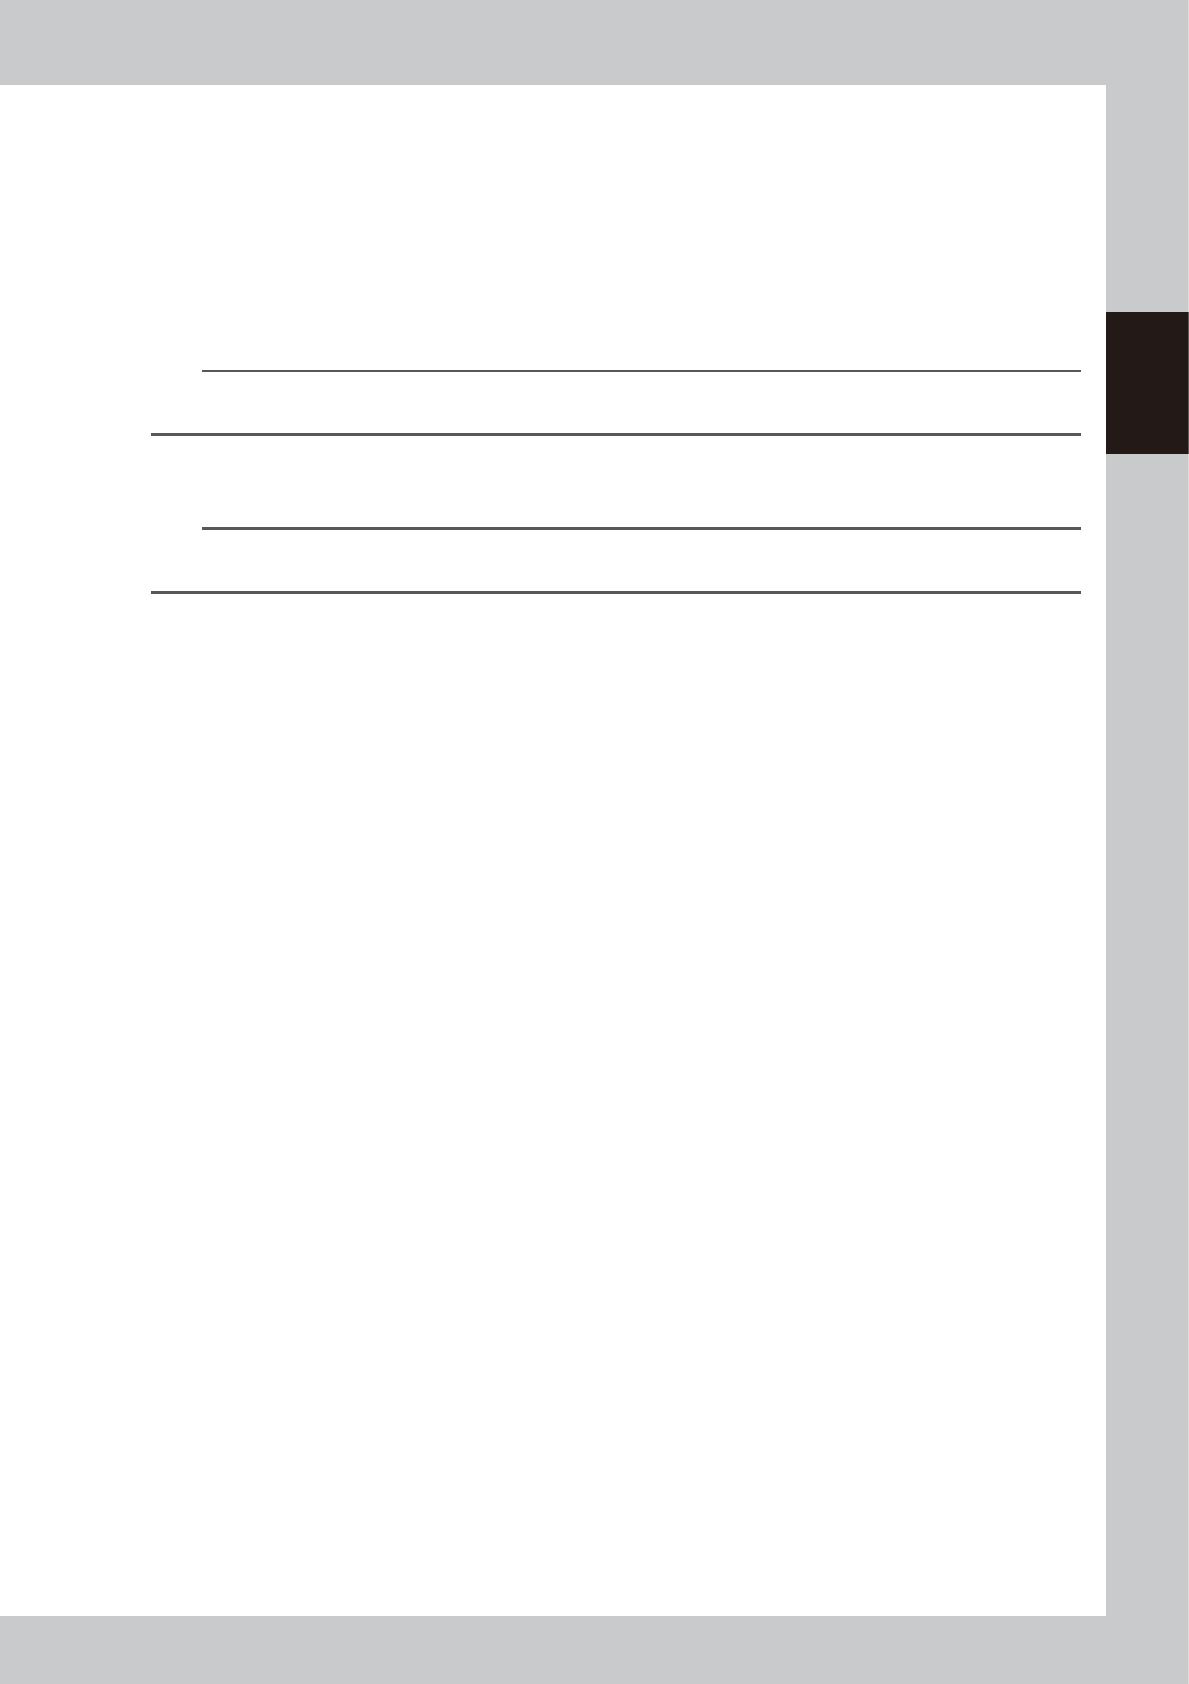
2. Place a rag beneath the head and press the [Blow] button for the applicable head.
3. Check that the adhesive is dispensed smoothly.
• After replacing the head or syringe, blow for a period long enough to bleed the air.
• Nozzles for Type111, 112, 114 will dispense adhesive 10 centimeters or more from the nozzle tip.
• Nozzles with large diameter holes other than the above will dispense adhesive approximately 5
centimeters from the nozzle tip.
“Cylinder exchange” window
“Blow” group box “Init Dispense” group box
64226-N7-00
Check for adhesive dispensing
Adhesive
Rag
63209-N7-00
2-31
2
Basic operation
n
If adhesive dispensing from nozzle is poor, then check for:
• Clogged or soiled nozzles
• Low dispensing pressure
• Incorrectly clamped syringe adapter
• Incorrectly set nozzle
• Wrong heater temperature
• Old adhesive
• Air in syringe
n
NOTE
To replace the syringe when the liquid in that syringe has run out, press the corresponding head button in the “Init
Dispense” group box to initialize the liquid amount.
5
Finish the task.
Press the [Close] button to close the "Cylinder exchange" window.
TIP
The above check can also be carried out by opening the [Unit]-[Head] tab and pressing the [Blow] button of each
head to dispense adhesive.