YSD_Users_E.pdf - 第92页
2-32 2 Basic operation 3.7 Per forming a dispensing test After bleeding air from the nozzle, perform a dispensing test to chec k the dispensing state. T he dispensing test will be performed based on the predispense infor…
2-31
2
Basic operation
n
If adhesive dispensing from nozzle is poor, then check for:
• Clogged or soiled nozzles
• Low dispensing pressure
• Incorrectly clamped syringe adapter
• Incorrectly set nozzle
• Wrong heater temperature
• Old adhesive
• Air in syringe
n
NOTE
To replace the syringe when the liquid in that syringe has run out, press the corresponding head button in the “Init
Dispense” group box to initialize the liquid amount.
5
Finish the task.
Press the [Close] button to close the "Cylinder exchange" window.
TIP
The above check can also be carried out by opening the [Unit]-[Head] tab and pressing the [Blow] button of each
head to dispense adhesive.
2-32
2
Basic operation
3.7 Performing a dispensing test
After bleeding air from the nozzle, perform a dispensing test to check the dispensing state. The dispensing test will be
performed based on the predispense information in the board data. This section describes how to perform a dispensing test.
For more details, see “2. Dispensing test function” in Chapter 4.
1
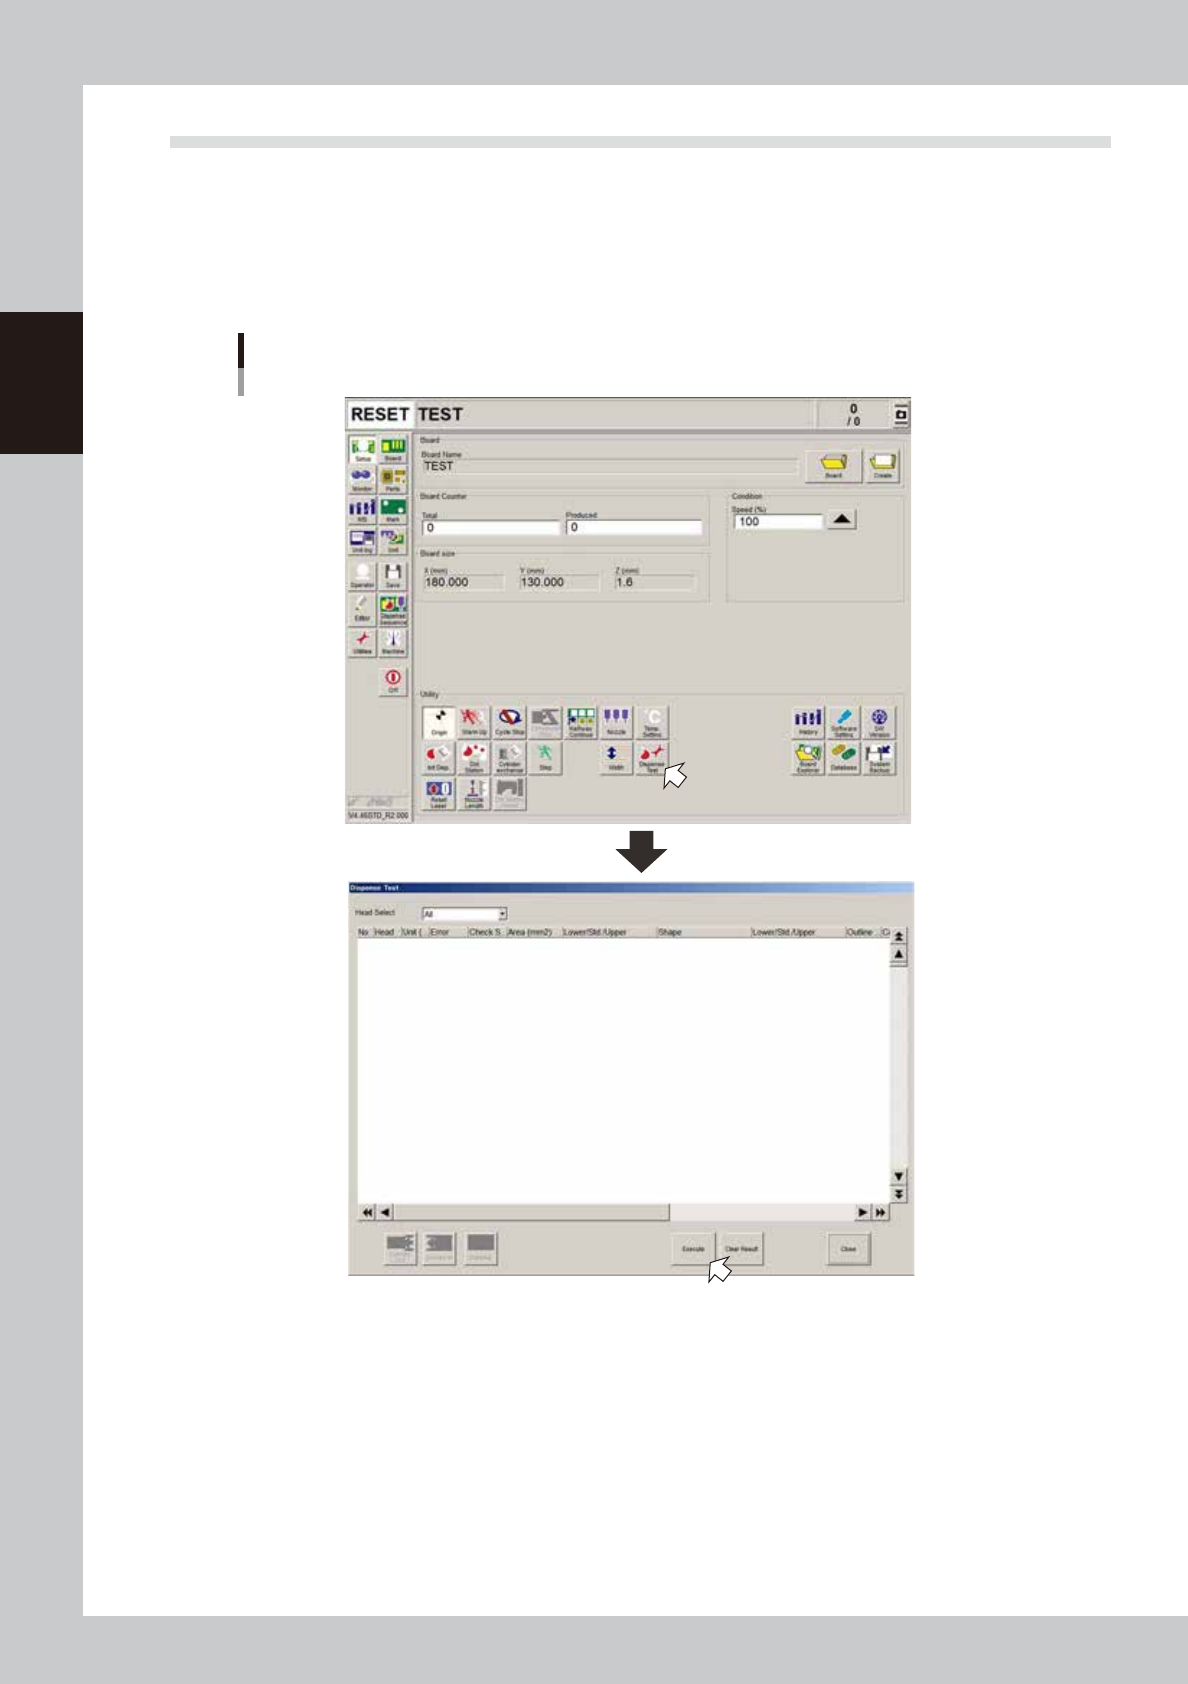
On the Setup screen, press the [Dispense Test] button.
The “Dispense Test” window appears.
”Dispense Test” window
64237-N7-00
2
Press the [Execute] button.
A dispensing test will be performed.
To perform a dispensing test on a board, press the [Conveyor in] button to set the board on the
conveyor and then press the [Execute] button.
2-33
2
Basic operation
3
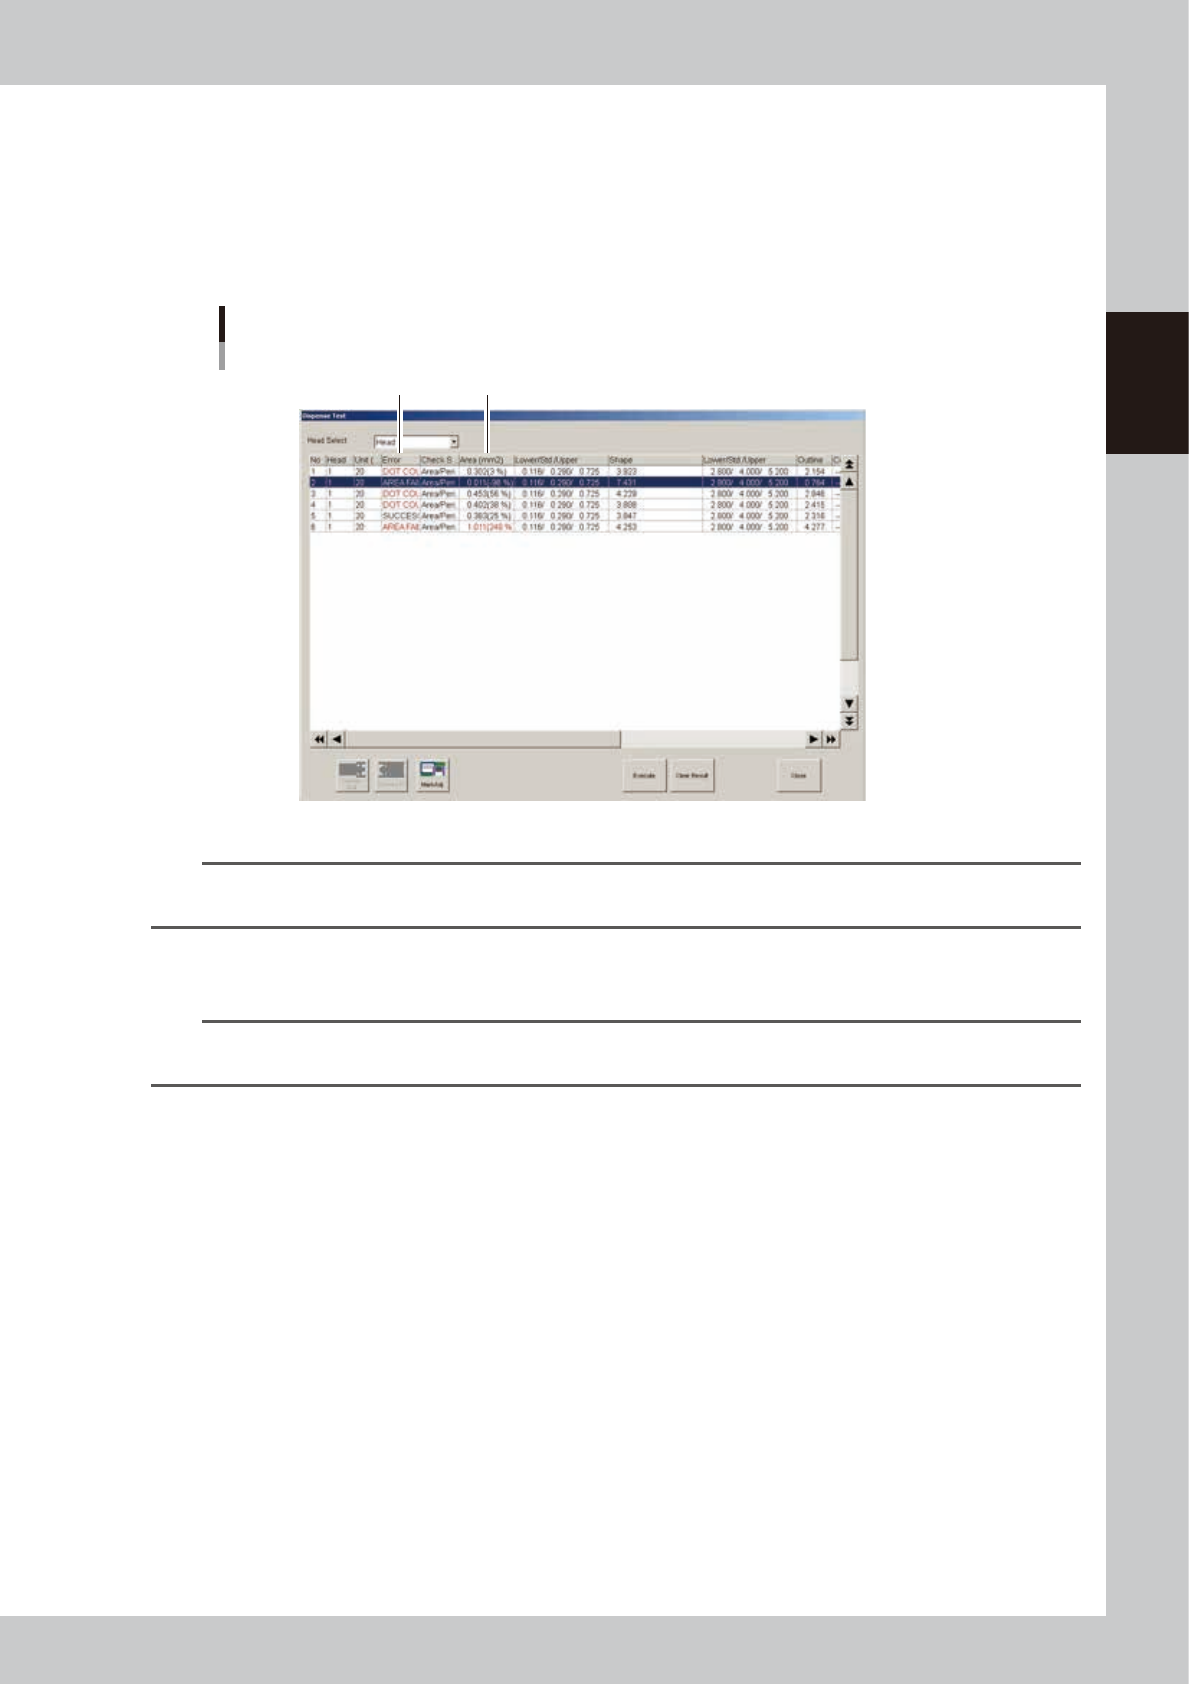
Check the test results and adjust the air pressure.
Check that the “Error” column shows “Success”. When an error is issued, check the dispensing state. If
the dispensed amount is low, the air pressure should be increased so that the test result will be
“Success”. To adjust the air pressure, check the percentage values in the “Area (mm2)” column. Raise
the air pressure for a minus value or lower the air pressure for a plus value. After adjusting the air
pressure, press the [Execute] button again to perform a dispensing test. Check the test results and adjust
the air pressure as needed until the percentage values are within ±20%.
Dispense test results
Error
Area (mm
2
)
64238-N7-00
n
NOTE
The “A: Check Shape” parameter in the [Mark]-[Shape] information should be set to “Area/Peri.”. In this case, an error
will be issued when “D: Area Tol. (%)” or “E: Shape Tol. (%)” with respect to “B: Std. Area (mm2)” is exceeded.
4
Finish the task.
Press the [Close] button to close the “Dispense Test” window.
TIP
To check the dispensing state with the camera, specify the head from the “Head Select” drop-down list, select the
dispensing No. you want to view, and press the [Mark Adj] button.