cp45电脑部分判断.pdf - 第6页
6. PC Ver. Date CP45 CP45NEO 00 2004/11 O O 6-1 6-1-2) HDD Replacement Procedure Preparation : HDD, Windows 98 Setup CD, DAO.exe file, M MI Setup F ile(CP45NEO:USB Memor y,CP45:CD-ROM) 6-1-2-1 ) Install F ormatted HDD in…

6. PC
Ver. Date CP45
CP45NEO
00 2004/11 O O
6-1
1-8) Primary/Secondary IDE connection (40pin)
1-9) USB Connector (5pin)
6. PC
Ver. Date CP45
CP45NEO
00 2004/11 O O
6-1
6-1-2) HDD Replacement Procedure
Preparation : HDD, Windows 98 Setup CD,
DAO.exe file, MMI Setup File(CP45NEO:USB Memory,CP45:CD-ROM)
6-1-2-1) Install Formatted HDD in Equipment, and Connect Power Cable and Data Cable
6-1-2-2) Insert Windows98 Setup CD in CD-Driver, and Turn On the Power of Equipment to Install
Windows98
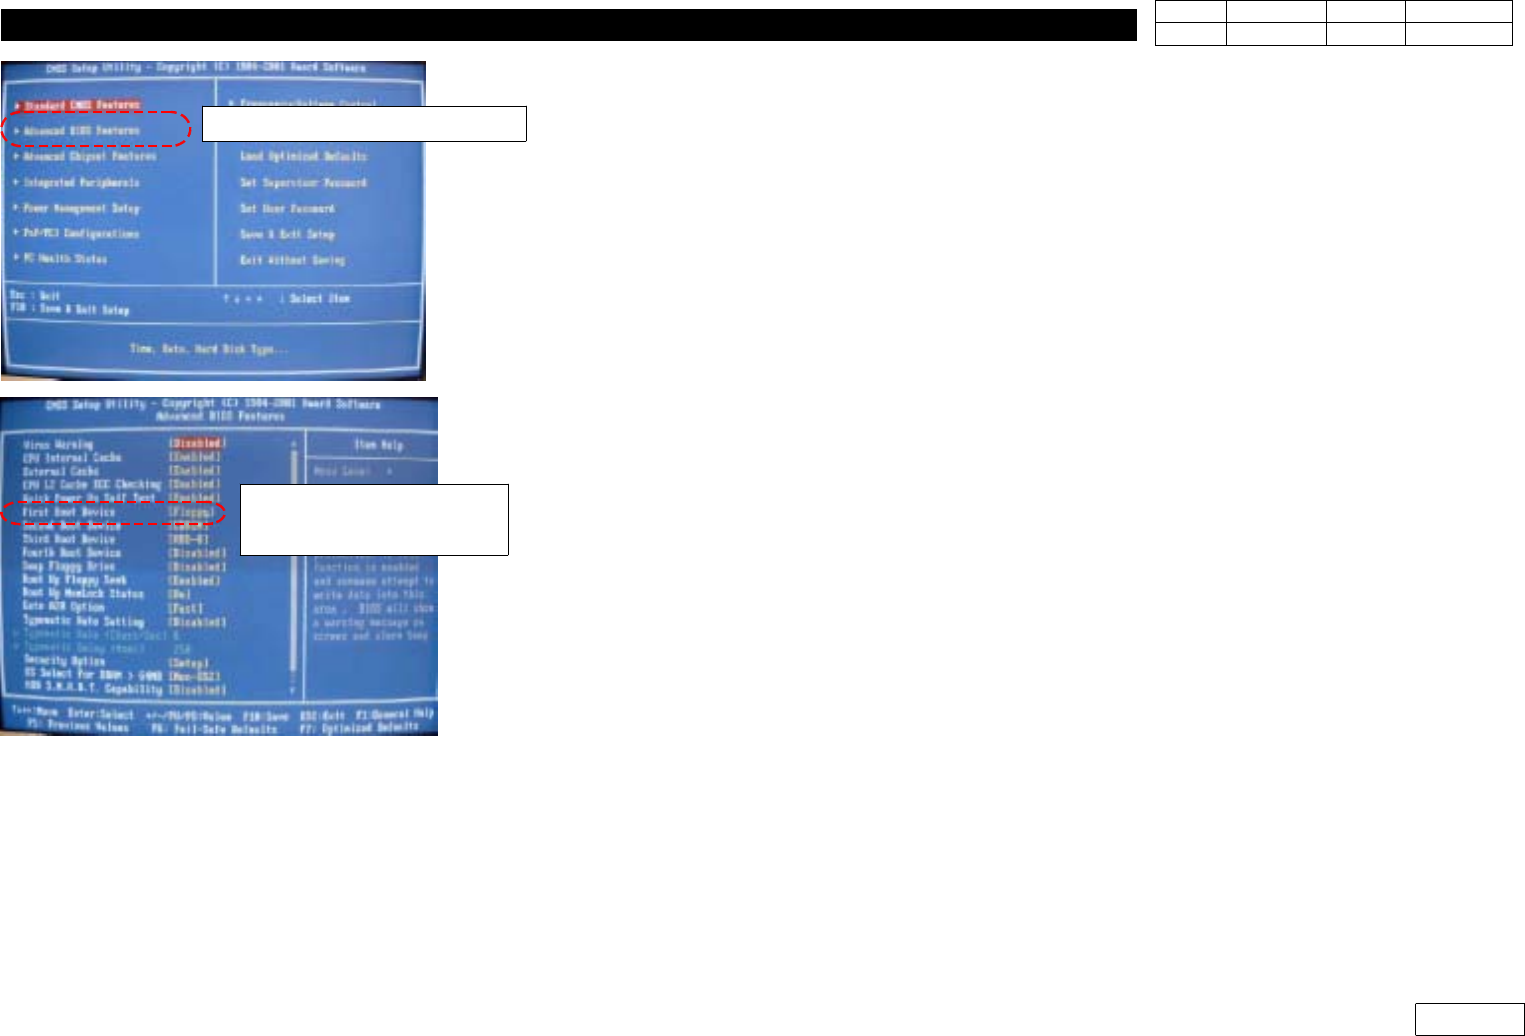
(Note : CDROM Should be Selected in 'Advanced BIOS Features' => 'First Boot Device' of
PC C-MOS Setup (Ref. Fig 6-1-2-1)
6-1-2-3) Install DAO
- DAO Software can be Downloaded from SGSS(www.samsungtechwin.com)
- Find the Path to DAO.exe with Windows Explorer and Click to Unzip
- Click Setup.exe and Start Installation
- Installation is Completed Safely when the Message that DAO Successfully Installed Pops Up.
6-1-2-4) Install MMI
-SaveMMISetupFileinUSBMemoryStick(CP45NEO) or CD(CP45) to Use
- If the Name of Setup File is 'CP-45MMI_V2470.exe' for Example, V2.470 Means Version
- Open Windows Explorer, Move to CP45 Setup.exe and Double-click
- Select Installation Language(Korean/English)
- Input User Name and Company Name
- Set Installation Path (C:\Mark3)
- Select Installation Type
MMI Only : Only Install CP45 Software
MMI + TSG : CP45 + 3D trouble Shooting Image
OPTION (IT) : CP45 + Intelligent SW.
- Select Yes(Y) if Installing Program in Real Equipment
- Re-check if Installation Information is Right and Click Next(N)
- Completed
Advanced BIOS Features
First Boot Device
=> CDROM
Fig.6-1-2-1 CMOS setting for CDROM booting.
6. PC
Ver. Date CP45
CP45NEO
00 2004/11 O O
6-1
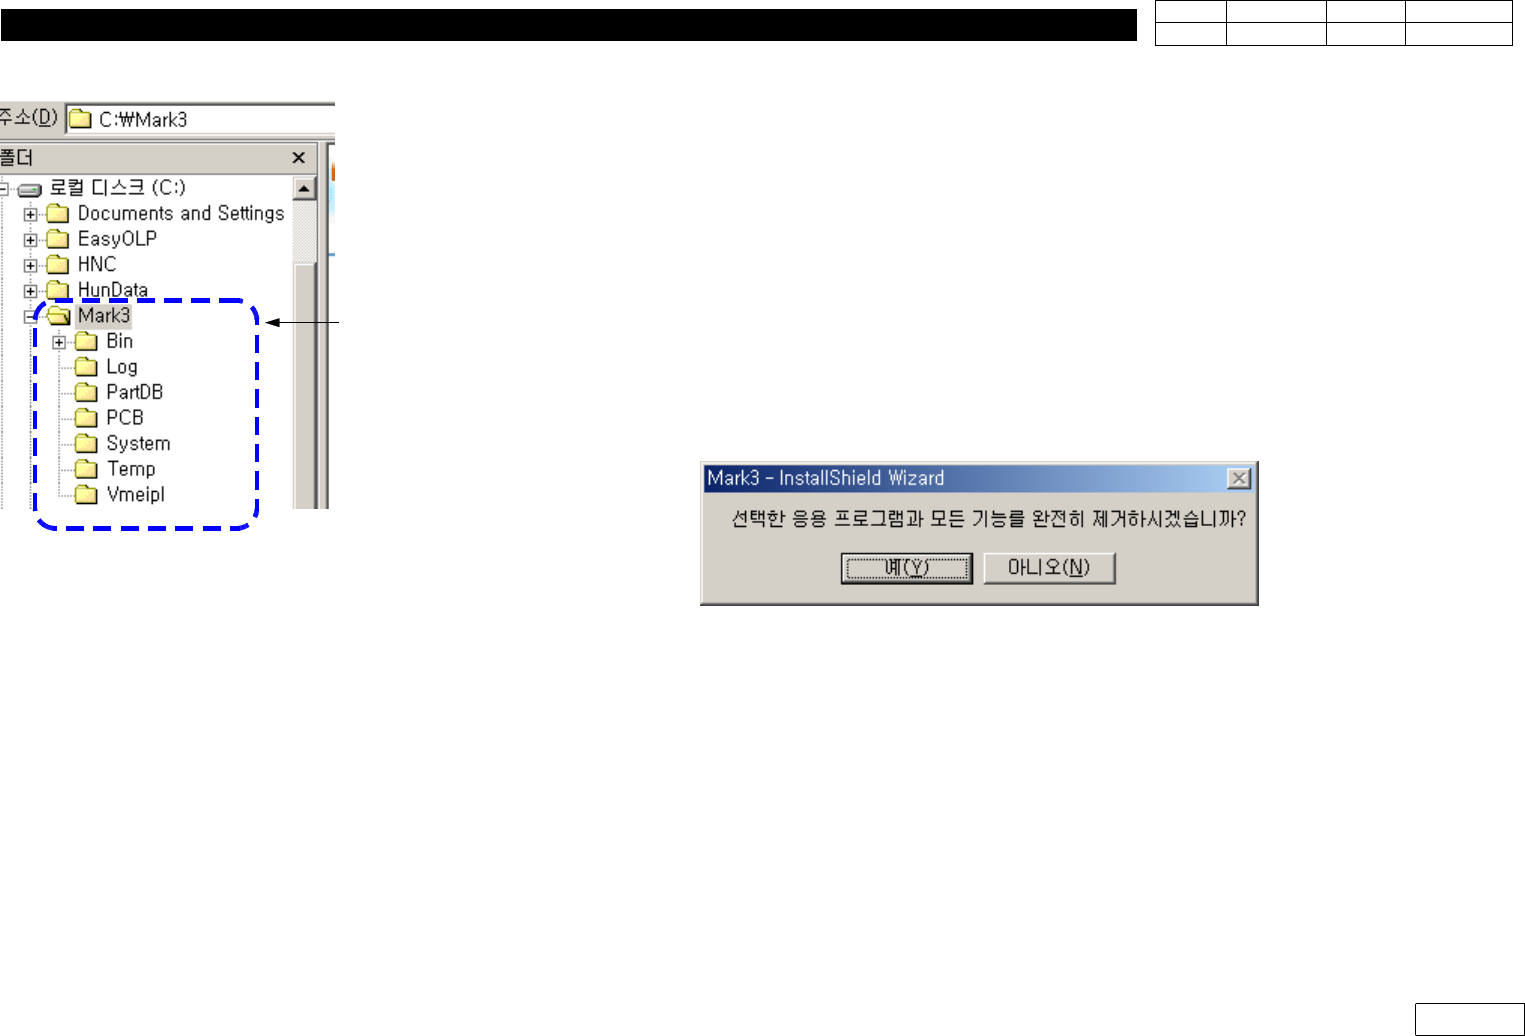
6-1-2-5) Copy System Data from Original File
*InCaseofCreatingNewHDD
: Back Up All C:\Mark3 Folder from Original File(Existing HDD)
InstallNewMMIinHDDandOverwriteMark3FolderofBackUpFileinNewHDD
*InCaseofUpgradingMMI
(1) Back Up Existing Mark3 (for the Case of Original Recovery)
(2) Before Upgrade, Check if There is Change in Constant
If There is no Change, just Checking Constant Value after Installing New Version is
Enough.
But If There is Change, Record the Value of Present Equipment(before Upgrade)
(3) Asked Remove when Selecting Installation, Select Yes
(4) Select Installation Again to Install New Version
(5) When the Installation is Completed, Turn OFF-ON Equipment, Run Mark3 and Home
If Home is Completed, Compare with the Constant Value Recorded before and
Re-input Necessary Part
(6) After MMI Upgrade, Read Component Library with 'Merge Part Library' Function
For Copy, Some Data can be Incompatible by Version Difference
Fig.6-1-2-2 System file copy folder for
HDD exchange
for HDDexchange