00198228-02_IM-MaterialSetupAssistant_DE_EN - 第60页
Installing the SIPLACE Order Mana ger Order Manager Server Installation 60 SIPLACE Material Setup Assistant 2.2 SIPLACE Material Setup Assistant 2 .2 2.2 2 . 2 O r d e r M a n a g e r S e r v e r I n s t a lla t io n Ord…
Installing the SIPLACE Order Manager
Starting the Installation - First Steps
SIPLACE Material Setup Assistant 2.2 SIPLACE Material Setup Assistant 2.2 59
2
2 Installing the SIPLACE Order Manager
Installing the SIPLACE Order Manager
Installation of the SIPLACE Order Manager includes the following packages:
Order Manager Client Components
▪ Module: Production Order Manager
▪ Module: Monitoring
Order Manager Server Components
▪ OIB connections
– OIB core computer
– OIB TCP port
– OIB Callback port
▪ SIPLACE Order Manager Service
▪ Database (if not already present)
2.1
2.1 Starting the Installation - First Steps
Starting the Installation - First Steps
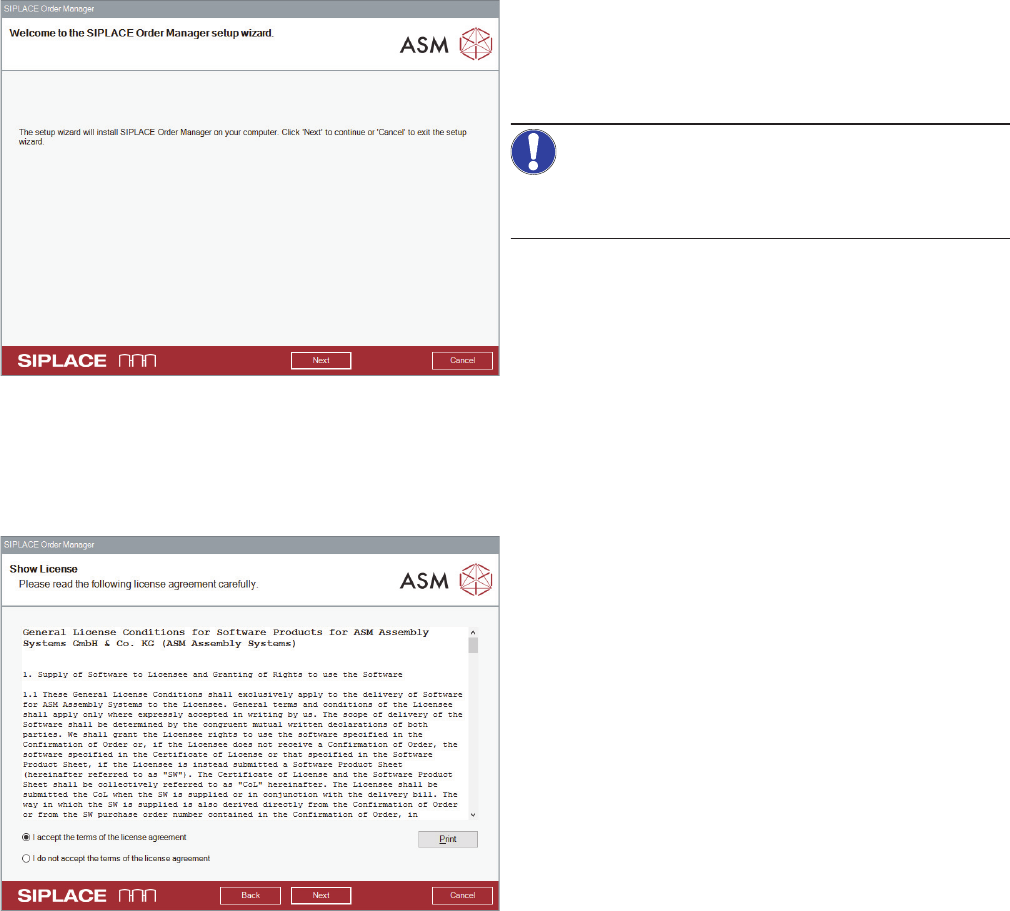
► Insert the installation CD in the CD drive of the com
-
puter on which you want to install the SIPLACE Order
Manager components.
⇨ The installation will start automatically.
NOTICE!
If you were not yet registered as administrator, perform
the action as administrator.
► If the Windows autostart function is disabled, start the
installation with a double click on the SiplaceOrder
-
ManagerBundle.exe file in the root directory of the
CD.
⇨ The start screen of the installation program will be
displayed.
► Click on Next.
⇨ The End-User License Agreement dialog box will be
shown.
► Read the license agreement and enable the option I
accept the terms in the License Agreement, to con
-
firm that you agree with the license conditions.
► Click on Next.
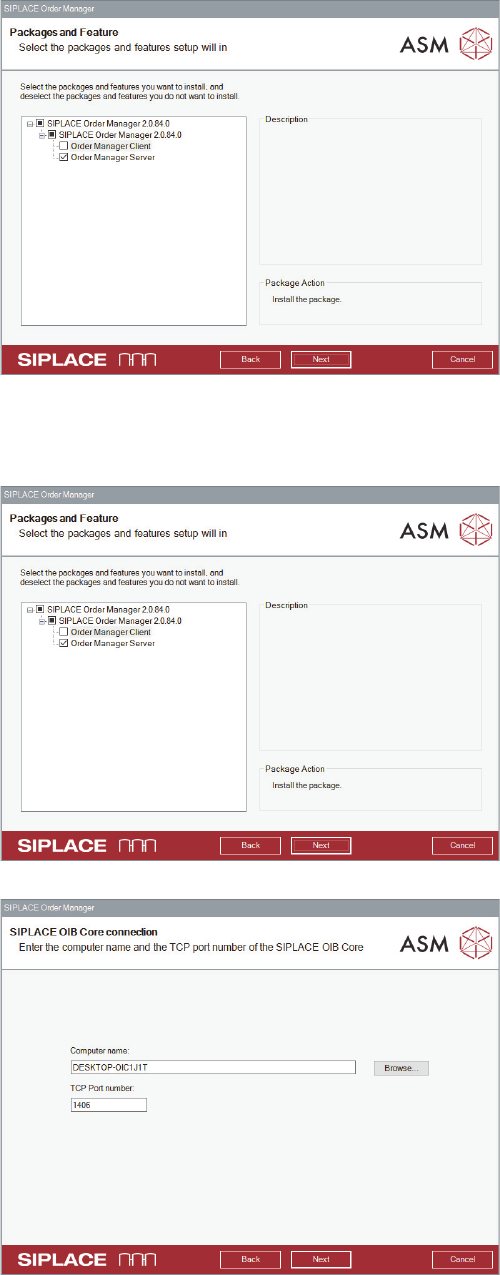
⇨ The Packages and Feature dialog box opens.
Installing the SIPLACE Order Manager
Order Manager Server Installation
60 SIPLACE Material Setup Assistant 2.2 SIPLACE Material Setup Assistant 2.2
2.2
2.2 Order Manager Server Installation
Order Manager Server Installation
► Select the required packages and functions and click
on Next.
This package installs the server components for the
SIPLACE Order Manager on one computer.
► Perform the steps at "2.1 Starting the Installation -
First Steps" [ ➙ 59].
► Select Order Manager Server.
► Click on Next.
⇨ The SIPLACE OIB Core connection dialog box
opens.
► Define the settings for the connection to the OIB core.
Default values or names have already been entered.
Computer name:
Name of the computer on which the OIB core is installed.
TCP Port number:
Number of the port that is to be used for the communica
-
tion with the OIB server. The entered port must be the
same as in the OIB server configuration.
► Click on Next.
⇨ The accessibility of the OIB core on the specified
computer is checked. If the OIB core cannot be
reached, the installation stops at this dialog and you
can correct the computer name.
⇨ If the connection is successfully established, the SQL
Server Login for „SiplaceScheduler“ database dialog
box opens.
Installing the SIPLACE Order Manager
Order Manager Server Installation
SIPLACE Material Setup Assistant 2.2 SIPLACE Material Setup Assistant 2.2 61
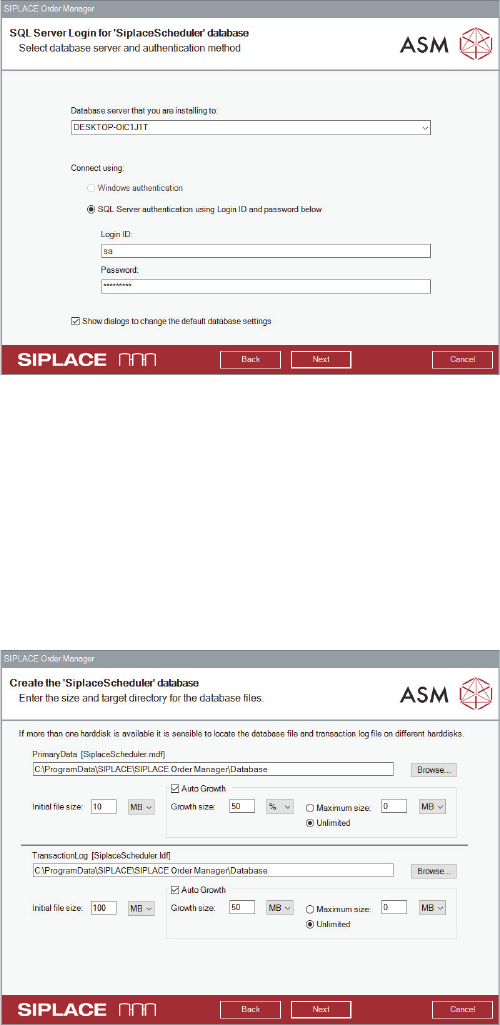
► Select the server that you want to use as host for the
SIPLACE Order Manager database from the drop-
down list.
► Select the required connection.
► Enter the password for the SA user (administrator).
The password field is pre-filled with the default pass
-
word.
► Click on Next.
⇨ The installation program tries to establish a connec
-
tion to the defined SQL server.
⇨ If you enabled the Show dialogs to change default da
-
tabase settings option, the „SiplaceScheduler“ data
-
base maintenance dialog box opens at a later point in
the installation process.
⇨ If a connection has been successfully established,
the installation program checks whether a SIPLACE
Order Manager database already exists on this SQL
server. In this case the database will be updated, if
necessary.
► Click on Next.
⇨ If no SIPLACE Order Manager is present on the re
-
quired SQL server, the Create the „SiplaceSchedul
-
er“ database dialog box opens.
If there is no SIPLACE Order Manager database present
on the specified SQL server, this will be created. The Da
-
tabase initialization dialog box will be shown. Default
paths or values have already been entered.
► Go to PrimaryData: and specify the folder in which
you want to install the SIPLACE Order Manager da
-
tabase.
► Go to TransactionLog file: and specify the folder in
which the log files are to be saved.
► Specify the size of the database file (GB, MB or kB)
at Initial File size:.
► Click on Next.
⇨ The Backup directory of „SiplaceScheduler“ data
-
base dialog box opens.