YS24X_Mainte_E - 第120页
4-1 4 Maintenance of options 1. Ionizer As the ionizer is used for a long time, the discharge needle (electrode) is worn out and deteriorates. Additionally , the periodic cleaning work is needed to maintain the static el…

Chapter 4 Maintenance of options
Contents
1. Ionizer 4-1
1.1 Cleaning the ionizer discharge needle (Monthly) 4-2
1.2 Replacing the ionizer discharge needle (2 year) 4-3
2. UPS (Uninterruptible Power Supply) 4-4
2.1 Replacing the UPS battery (3 year) 4-4
3. Nozzle station 4-5
3.1
Checking the nozzle station status and cleaning the nozzle station (1 year)
4-5
4-1
4
Maintenance of options
1. Ionizer
As the ionizer is used for a long time, the discharge needle (electrode) is worn out and deteriorates.
Additionally, the periodic cleaning work is needed to maintain the static elimination effect and ion balance.
c
CATION
The tip of the ionizer discharge needle is sharp and the voltage is applied. The power supply to the ionizer is stopped
by opening the safety cover. However, make sure not to touch the tip of the ionizer discharge needle when
performing maintenance in the machine.
n
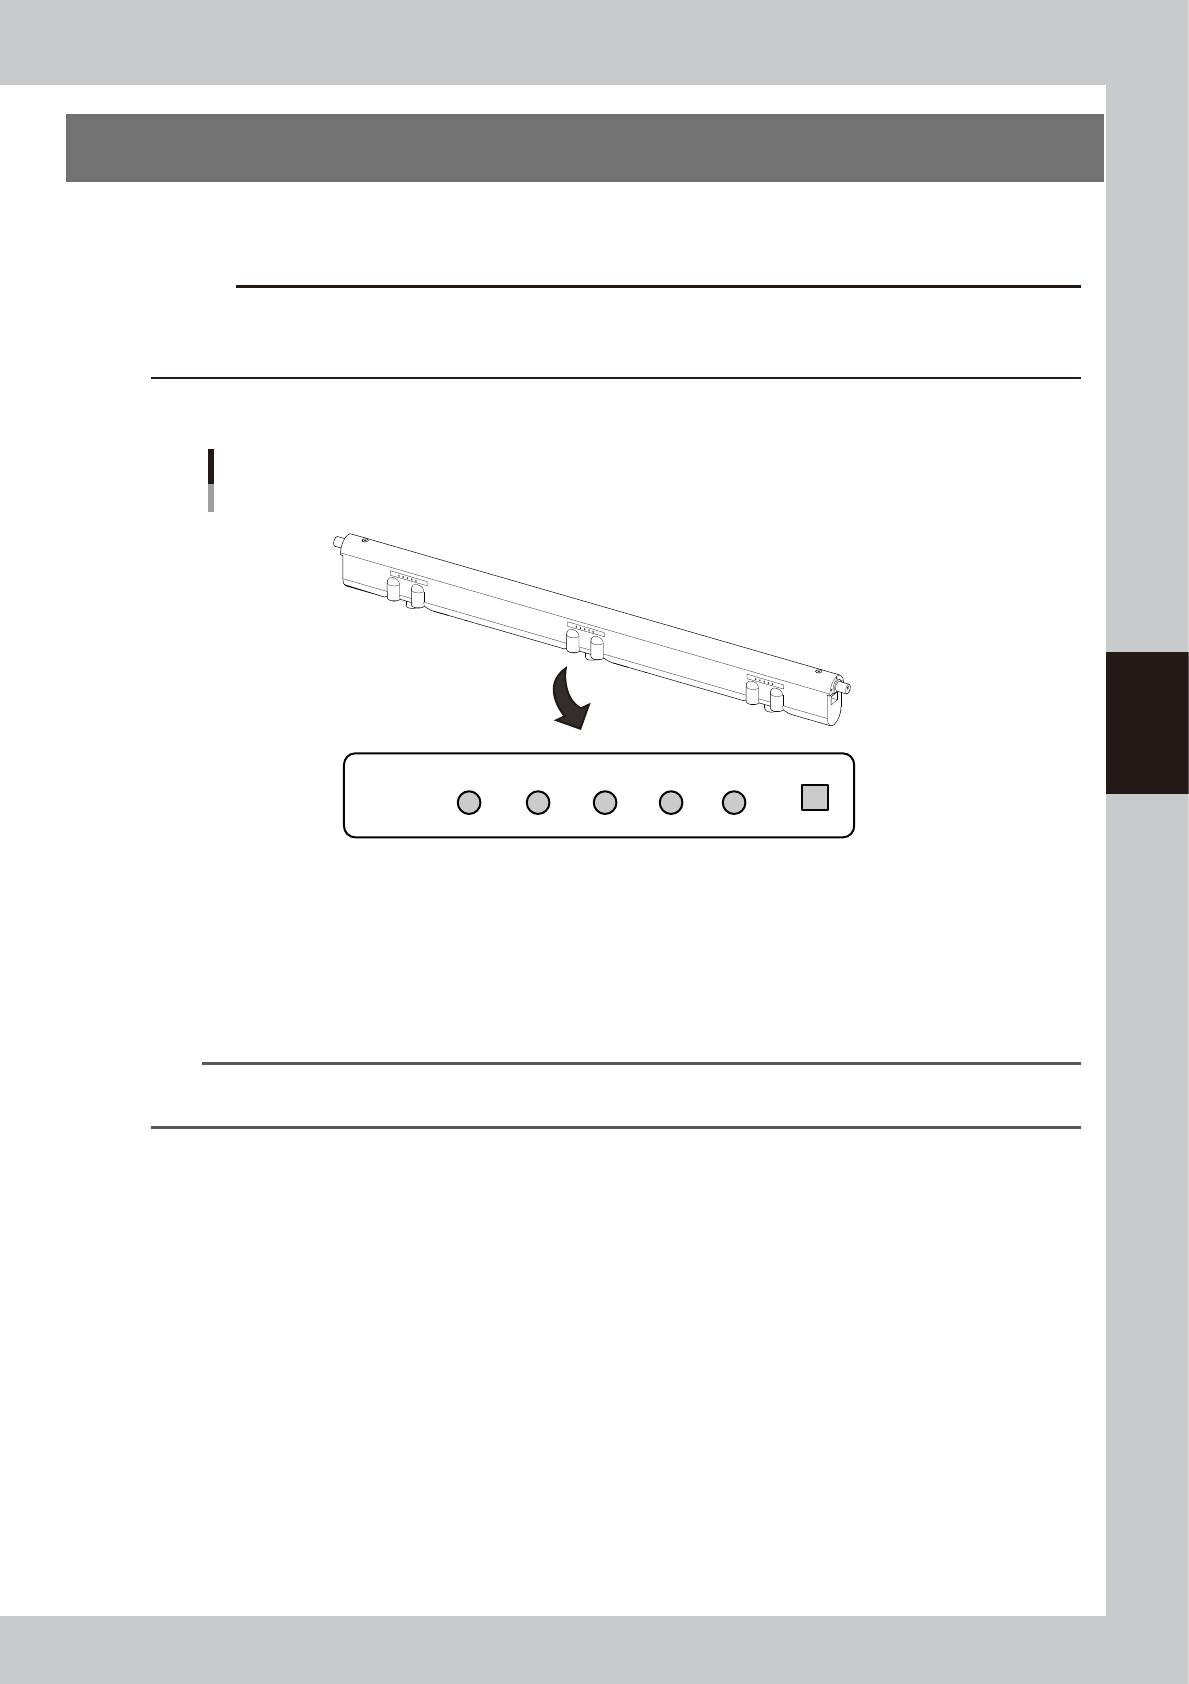
LED display on ionizer main unit
+ -
Trinc
ERR PREC
GOOD
PREC
ERR
LED display is provided at three locations of each ionizer.
Ionizer
Contents of LED display
53419-L4-00
• Normal operation (GOOD): Lit in blue.
• Large ion balance correction amount (+PREC, -PREC): Lit in green.
The contamination of the discharge needle advances. The discharge needle needs to be cleaned.
• Ion balance error (+ERR, -ERR) : Flashes in red.
The discharge needle may be contaminated or deteriorate significantly. The relevant error is also given on the machine side.
n
NOTE
The discharging performance of the ionizer changes depending on the material and shape of board and parts. The
discharge performance is not guaranteed.
4-2
4
Maintenance of options
1.1 Cleaning the ionizer discharge needle (Monthly)
Perform this work monthly or if the LED (+ PREC or - PREC) on the ionizer main unit is lit in green.
e
1
Power off the ionizer.
1. Press the emergency stop button and
open the machine safety cover to stop
the power supply to the ionizer.
2. Check all LED on the ionizer are OFF.
w
WARNING
A VOLTAGE REMAINS ON THE DISCHARGE NEEDLE
IMMEDIATELY AFTER TURNING OFF THE POWER. BE AWARE
THAT TOUCHING THE DISCHARGE NEEDLE IMMEDIATELY
AFTER TURNING OFF THE POWER IS HAZARDOUS.
2
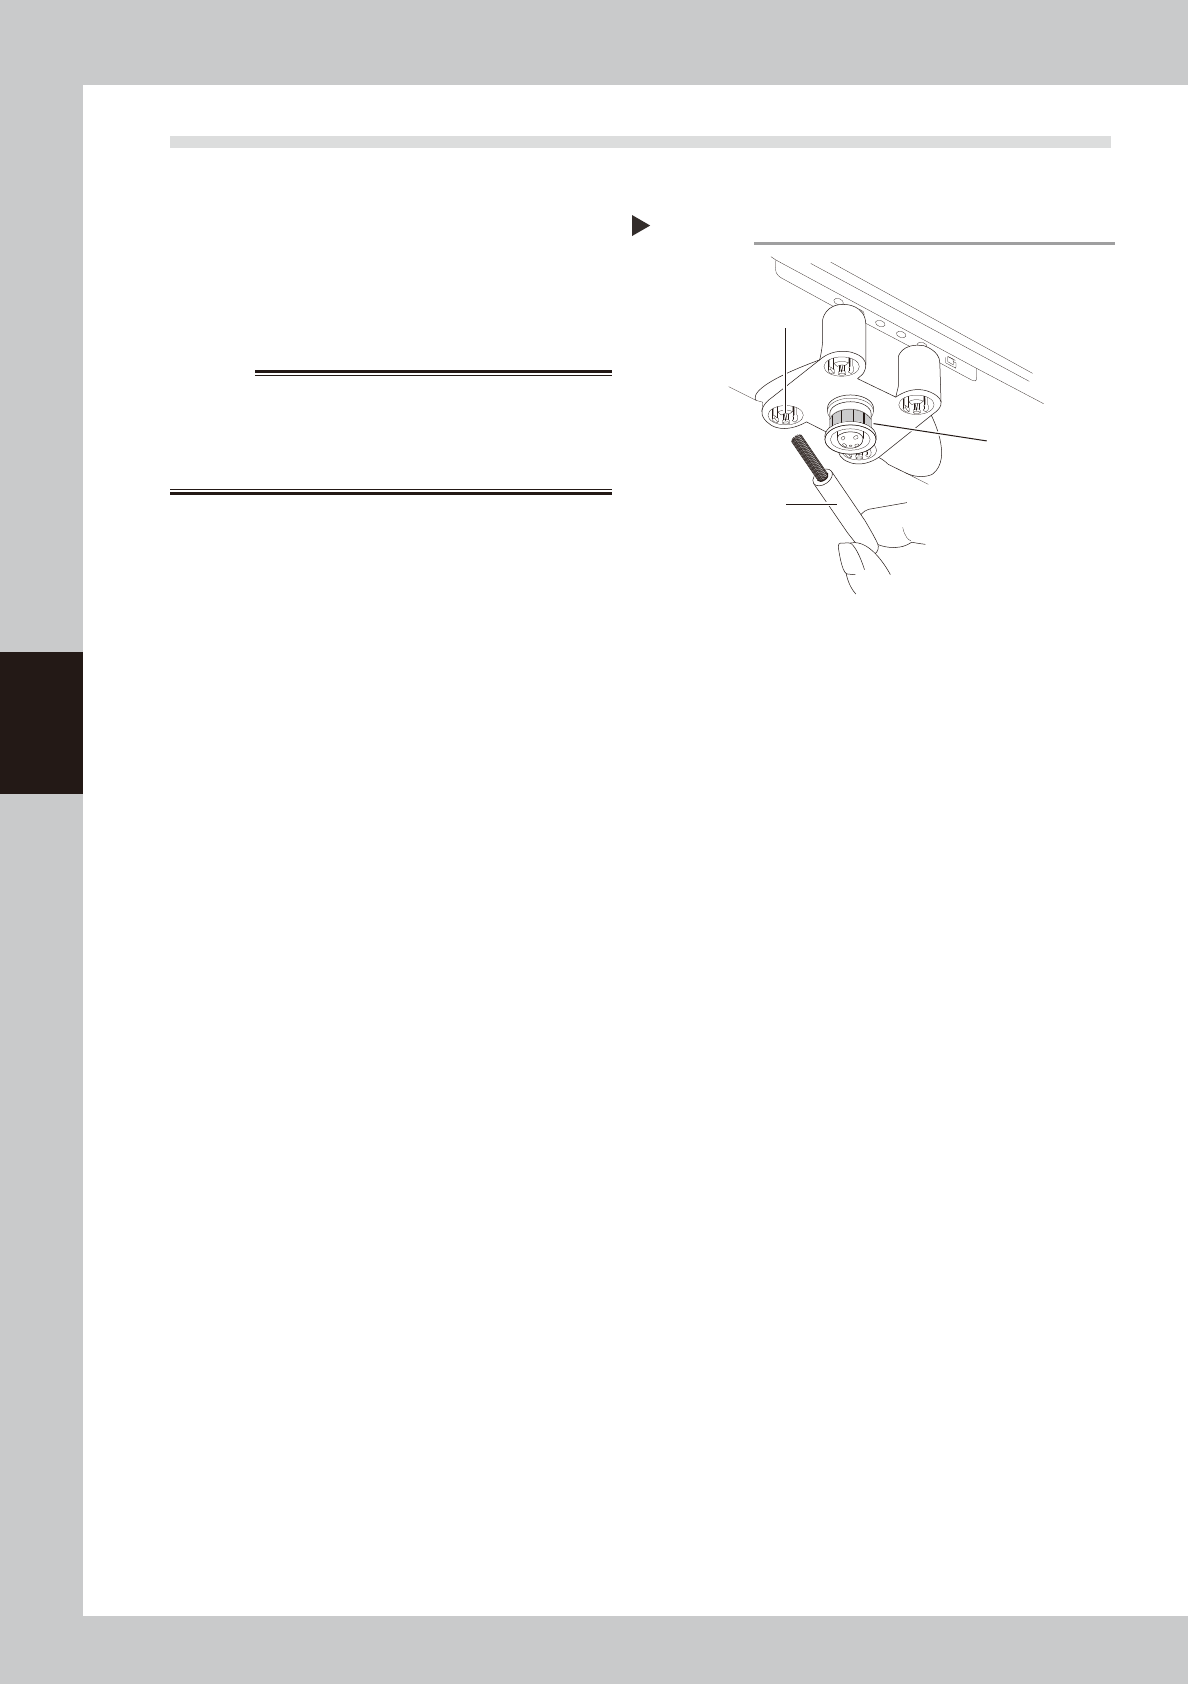
Clean the discharge needle.
1.
Remove contaminants from the discharge
needle and sensor tips with a brush or
cotton swab supplied with the ionizer.
2.
If contaminants are difficult to remove,
immerse a cotton swab in a small amount
of IPA, and then wipe off contaminants
and perform the cleaning work.
53401-L4-10
Cleaning the discharge needle
Accessory brush
Clean this area
of the sensor
Discharge needle
Step 2