YS24X_Mainte_E - 第143页
6-7 6 How to replace consumable parts 3.3 Replacing the cleaning blow valve 1 T urn OFF the air supply and power OFF the machine. 1. Quit the software and power OFF the machine. 2. Turn the air supply/exhaust switch insi…
6-6
6
How to replace consumable parts
3.2 Replacing a valve (solenoid valve)
1
Turn OFF the air supply and power
OFF the machine.
1. Quit the software and power OFF the
machine.
2. Turn the air supply/exhaust switch inside
the panel at lower left of the machine
clockwise to turn the air supply OFF.
53606-L4-10
2
Move the head (table) to a
convenient position for replacement
work.
1. For the work on the B-table, enter your
hand from a portion above the XA-axis.
2. For the work on the A-table, move to the
rear of the machine and perform the
work from a portion above the XB-axis.
3
Remove the connector.
1. Place a square cloth below the head.
2. Remove the connector of the valve
(solenoid valve) to replace.
53610-L4-00
4
Remove the valve (solenoid valve)
to be replaced.
Use a precision Phillips screwdriver to loosen
the two screws securing the valve (solenoid
valve) and then remove the valve (solenoid
valve).
53611-L4-00
5
Attach a new valve (solenoid valve).
c
CAUTION
A gasket is attached on the back of the valve. Be
careful not to drop and pinch the gasket when
replacing with a new valve.
6
Reconnect the harness.
1. Place the connector of the replaced
valve (solenoid valve) to its original
place.
2. Remove the square cloth.
7
Supply air to the machine and
power on the machine.
When the machine has started, perform
return-to-origin.
8
Check the operation.
On the [Unit] - [Head] screen, press the
[Vacuum] and [Blow] buttons to check that
no abnormal values appear.
Disconnecting the Connector
Step 3
Connector
Removing the valve (solenoid valve)
Step 4
Precision Phillips screwdriver
Valve (solenoid valve)
Gasket
Step 1
Shutting off the air supply
Air supply/exhaust switch

6-7
6
How to replace consumable parts
3.3 Replacing the cleaning blow valve
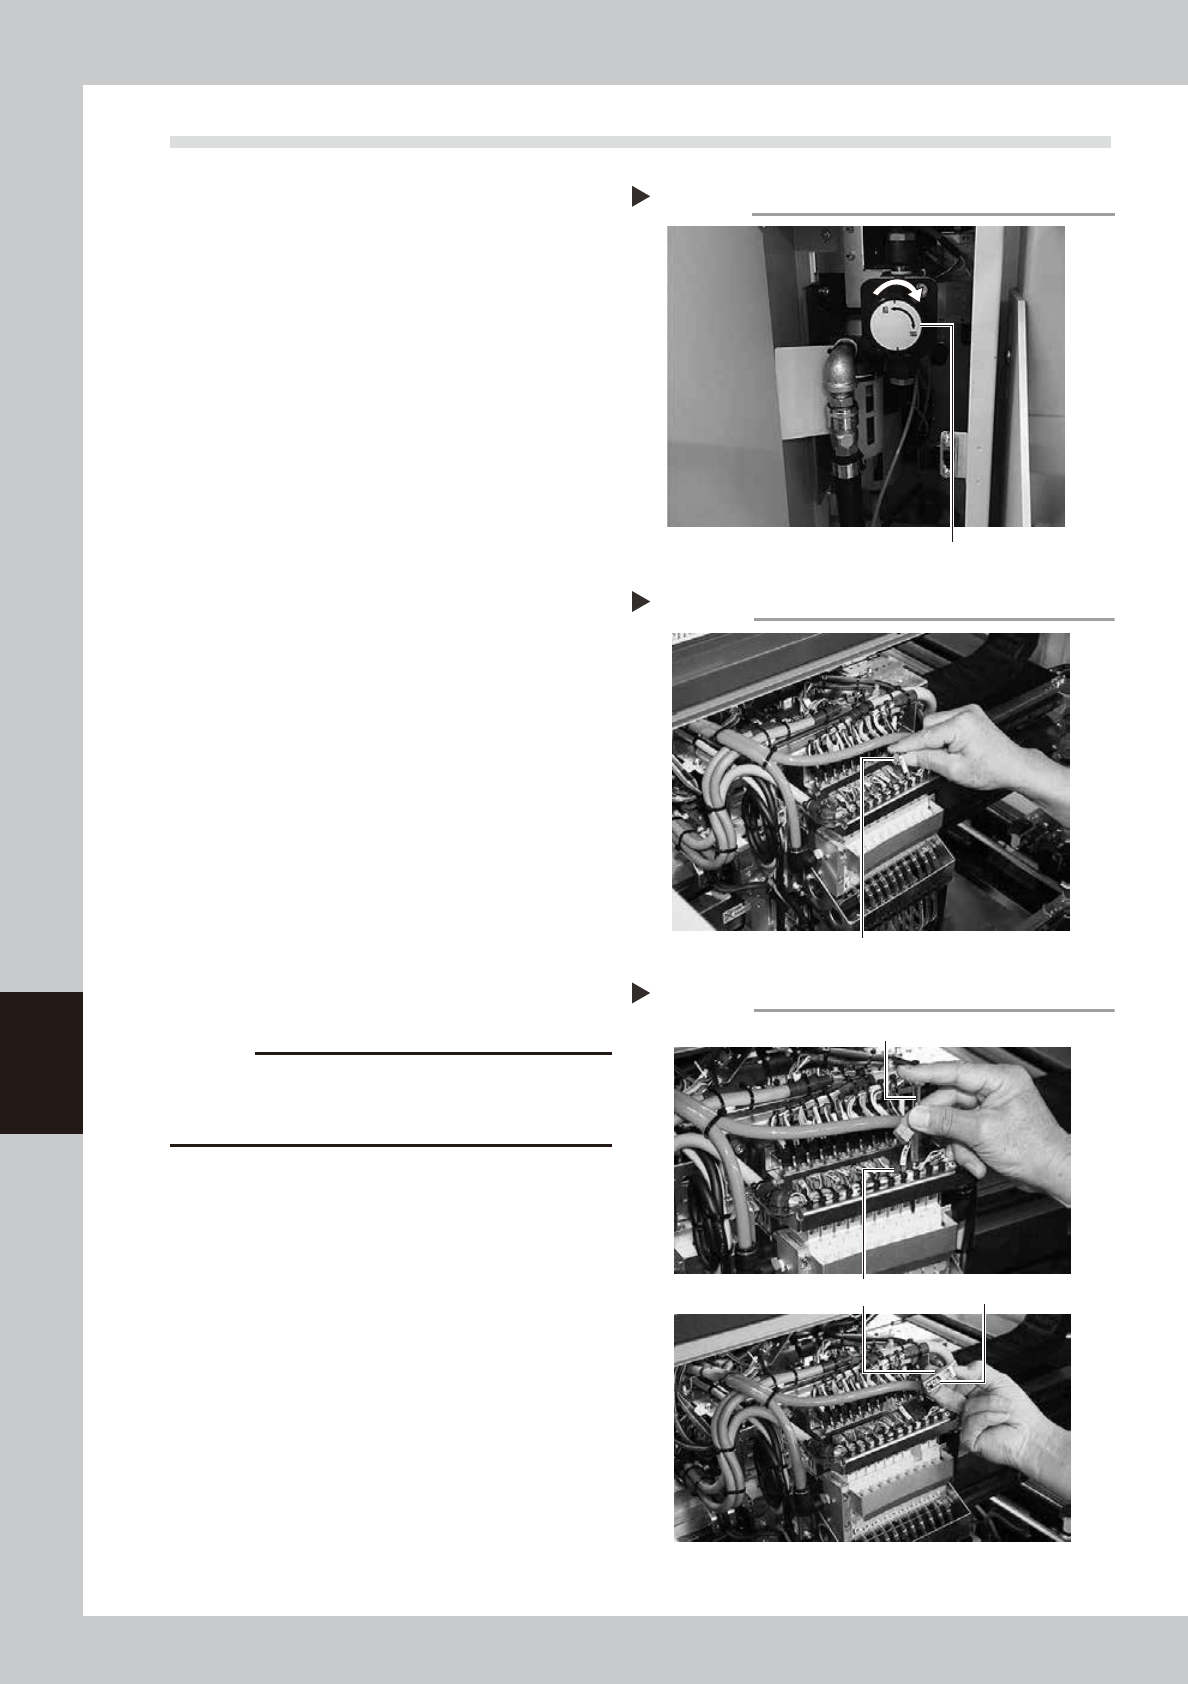
1
Turn OFF the air supply and power
OFF the machine.
1. Quit the software and power OFF the
machine.
2. Turn the air supply/exhaust switch inside
the panel at lower left of the machine
clockwise to turn the air supply OFF.
53606-L4-10
2
Move the head (table) to a
convenient position for replacement
work.
1. For the work on the B-table, enter your
hand from a portion above the XA-axis.
2. For the work on the A-table, move to the
rear of the machine and perform the
work from a portion above the XB-axis.
3
Remove the connector.
1. Place a square cloth below the head.
2. Remove the connector of the valve to
replace.
53613-L4-00
4
Remove the cleaning blow valve.
Use a precision Phillips screwdriver to loosen
the two screws securing the cleaning blow
valve and then remove the blow valve.
53614-L4-00
5
Attach a new
cleaning blow valve
.
Also, reconnect the connectors to their
original positions.
c
CAUTION
A gasket is attached on the back of the valve. Be
careful not to drop and pinch the gasket when
replacing with a new valve.
6
Reconnect the connector.
1. Place the connector of the replaced
valve to its original place.
2. Remove the square cloth.
7
Supply air to the machine and
power on the machine.
When the machine has started, perform
return-to-origin.
8
Check the operation.
Follow the same procedure as described in
chapter 3,"4.3 Operation check of head
blow valve and cleaning blow valve" to
check the valve operation.
Disconnecting the Connector
Step 3
Connector
Cleaning blow valve
Removing the cleaning blow valve
Step 4
Gasket
Cleaning blow valve
Step 1
Shutting off the air supply
Air supply/exhaust switch
6-8
6
How to replace consumable parts
4. Conveyor
If significant looseness, contamination, or scuffing is found in the conveyor belt when performing the work
steps stated in"3.3 Inspecting and cleaning the conveyor belt" of Chapter 3, the conveyor belt needs to be
replaced. Follow the steps below to replace the conveyor belt.
Note that the conveyor belt replacement for dual-stage type machines differs partly depending on the
conveyor belt location. Also single-lane type machines and dual-lane type machines share the same belt
replacement procedure.
4.1 Replacing the conveyor belt
n
Dual stage specification : Replacing the conveyor belt other than that of W2-axis
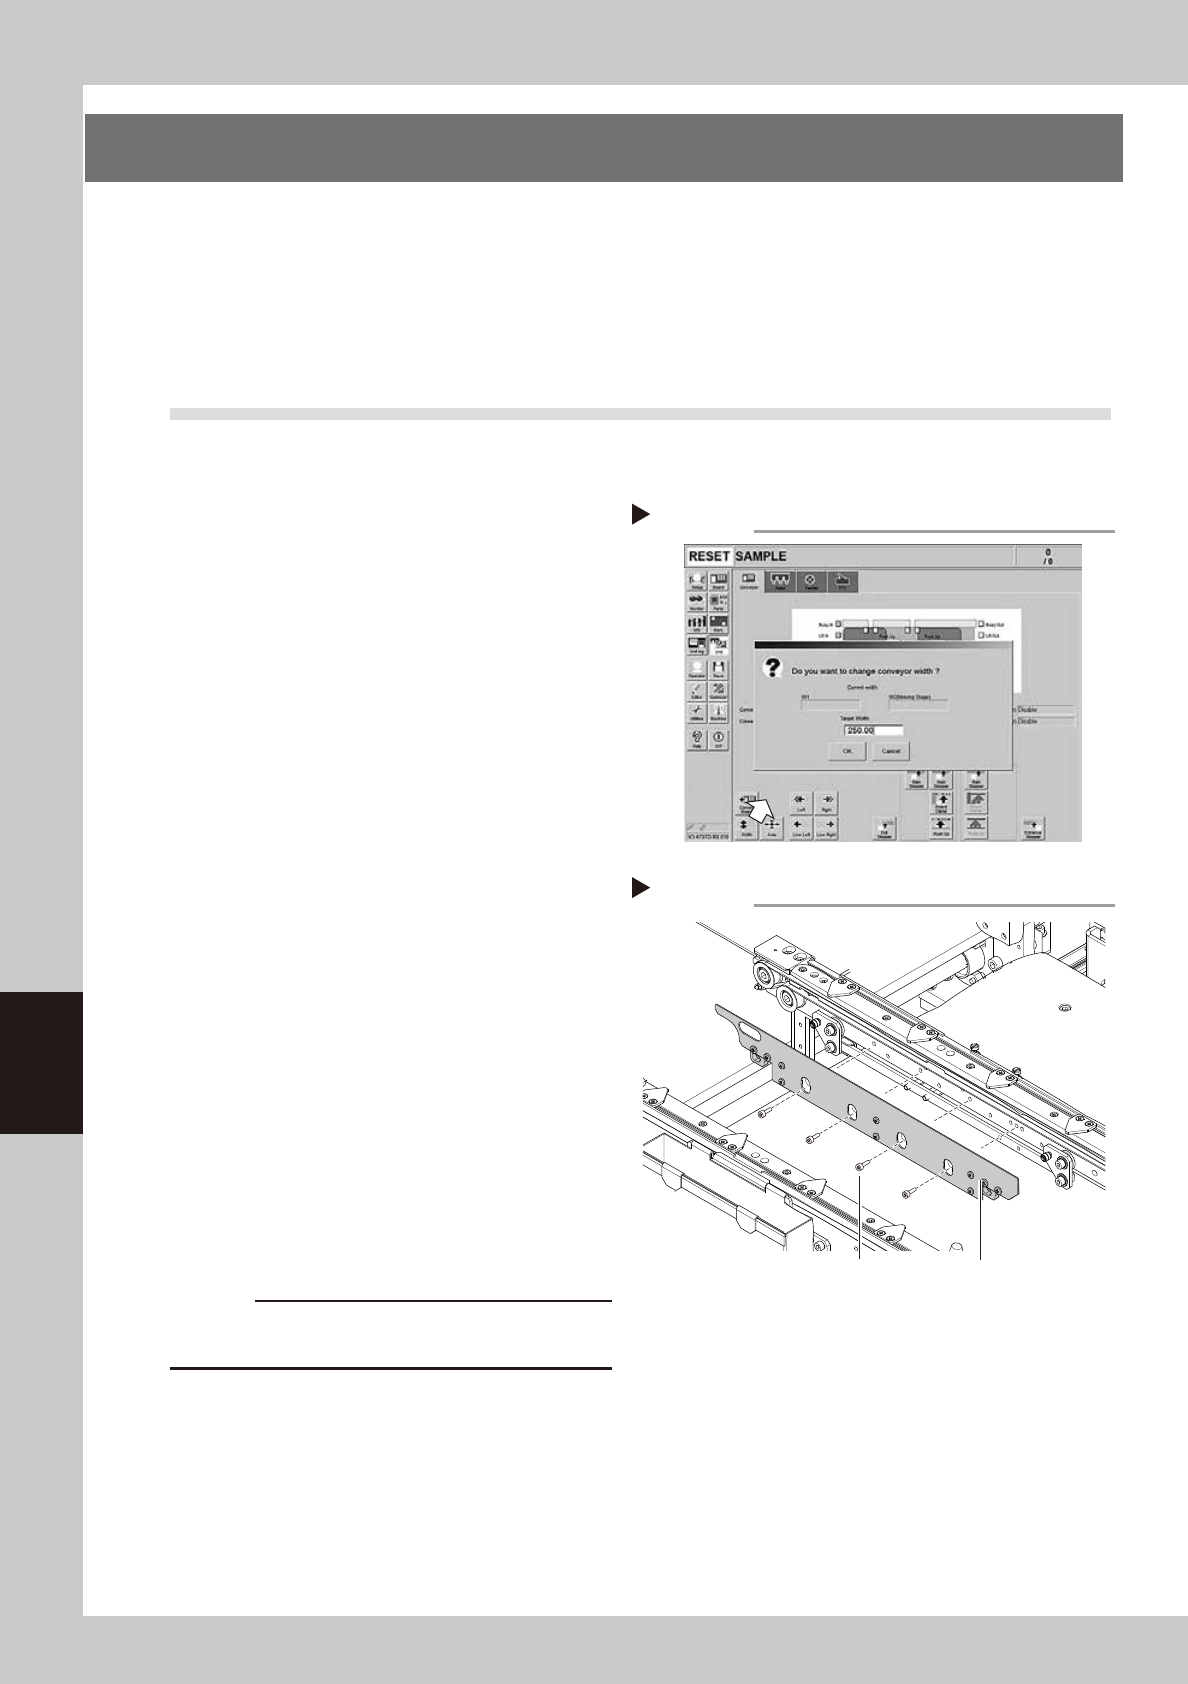
1
Change the conveyor width to a
convenient width for maintenance
work.
1. On the [Unit] - [Conveyor] screen, press
the [Width] button to display the
"Conveyor Width" screen.
2. Enter a width wide enough for a hex
wrench to be inserted (about 200 mm) in
the "Target Width" box and press the [OK]
button. The conveyor is changed to the
specified width.
54601-L4-10
2
Make the preparation for cleaning.
e
1. Remove all items that are affected by
magnetism, such as a watch and ID
card.
2. Press the emergency stop button and
then open the machine safety cover.
3. If the machine is equipped with a
carriage, remove the carriage to allow
you to easily access the conveyor.
4. Place a square cloth on the push-up
plate.
3
Remove the board clamp plates.
Use a hexagon wrench (3) to remove the 4
board clamp bolts, then remove the board
clamp plate.
53615-L4-00
c
CAUTION
Do not remove any bolts other than the 4 bolts shown in
the figure at right.
Removing the board clamp plate
Step 3
Board clamp plateBoard clamp plate securing bolts
Changing the conveyor width
Step 1