YS24X_Mainte_E - 第147页
6-11 6 How to replace consumable parts 5 L oosen the belt. 1. Use two hex wrenches to loosen the mounting bolt of the belt tensioner pulley. Hex wrench size on pulley side : 5mm Hex wrench size on bolt side : 4mm 2. For …
6-10
6
How to replace consumable parts
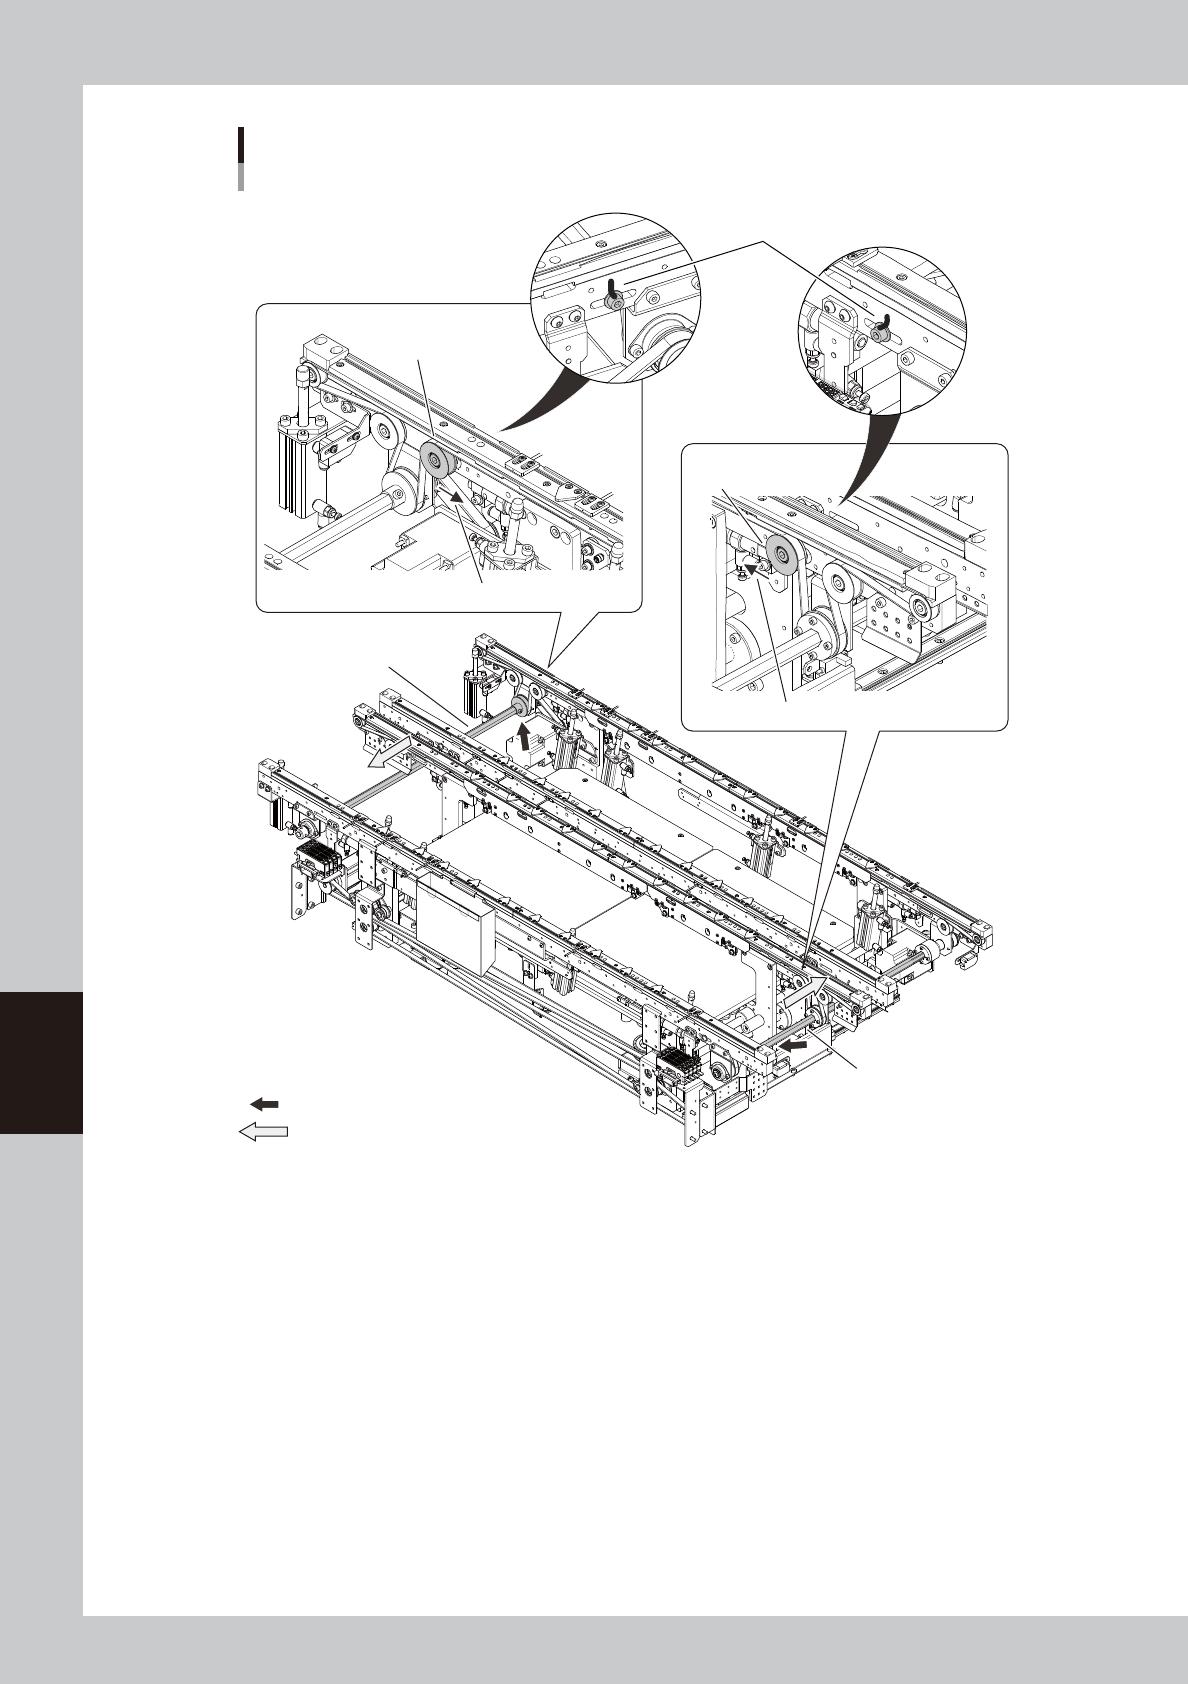
Replacing the conveyor belt
Dual-lane
: Place where the shaft is separated from the pulley.
: Shaft pull-out direction
■ Lane 1
■ Lane 2
Put a mark at the pulley mounting
bolt with permanent marker.
Lane 1 side conveyor
Loosen this pulley.
Lane 2 side conveyor
Loosen this pulley.
Direction to move the pulley
Direction to move the pulley
53617-L4-00
6-11
6
How to replace consumable parts
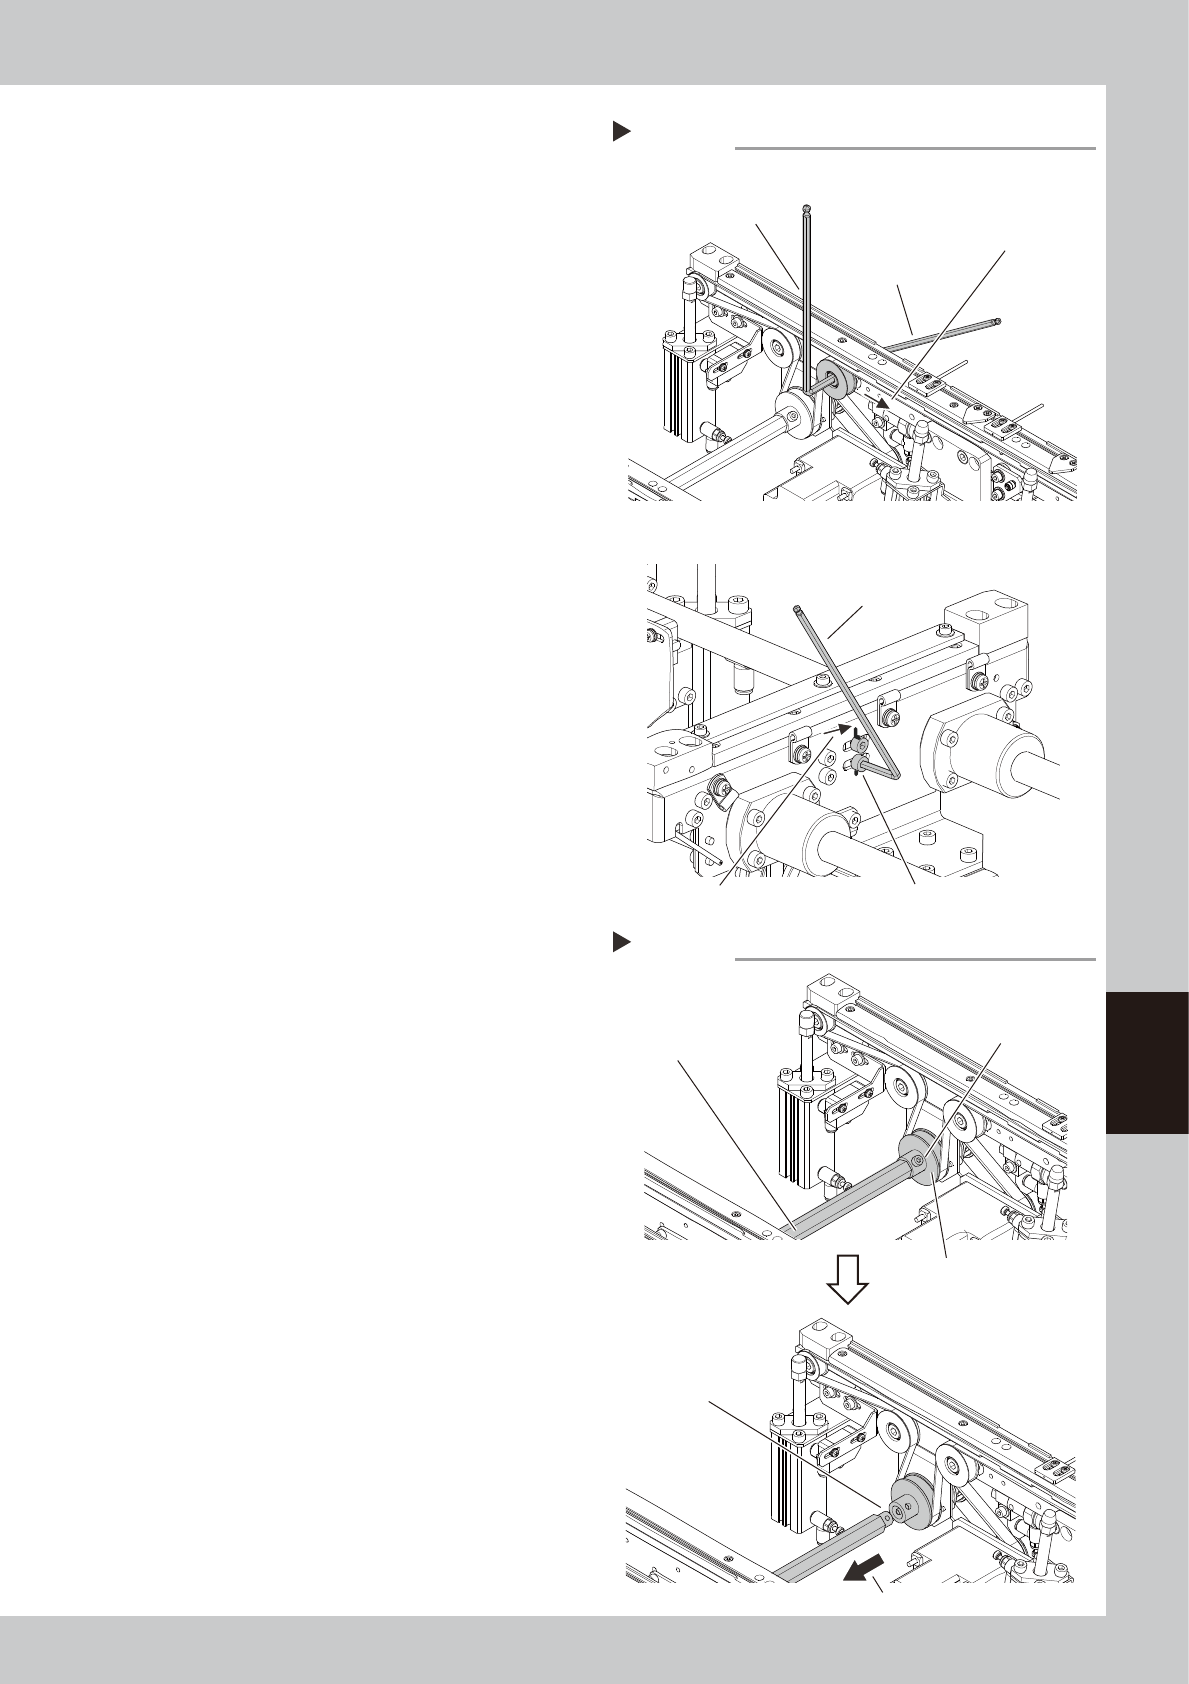
5
Loosen the belt.
1. Use two hex wrenches to loosen the
mounting bolt of the belt tensioner
pulley.
Hex wrench size on pulley side : 5mm
Hex wrench size on bolt side : 4mm
2. For the dual-stage exit conveyor :
Use a hex wrench (3) to loosen the bolts
(2 locations) that secure the pulley
bracket.
3. Move the belt tensioners (pulley/pulley
bracket) to the end of the tension
adjusting slots (in the loosening
direction).
53623-L4-00
6
Separate the shaft.
Remove the bolt (see the figure in Step 4 for
its location) that secures the shaft with the
hex wrench (3), and pull out the spline shaft
from the driving pulley.
53624-L4-00
Loosening the belt
Step 5
Dual-stage Exit conveyor (W3-axis)
Dual-lane Lane 2
Hex wrench (5)
Move the tensioner to
loosen the belt.
Move the tensioner to loosen the belt.
Pulley bracket mounting bolt
Hex wrench (4)
(Mounting bolt side)
Hex wrench (3)
Pulling out the shaft from the drive pulley
Step 6Step
Remove the belt through
this clearance.
Shaft mounting bolt
Drive pulley
Pull out the shaft.
Shaft
6-12
6
How to replace consumable parts
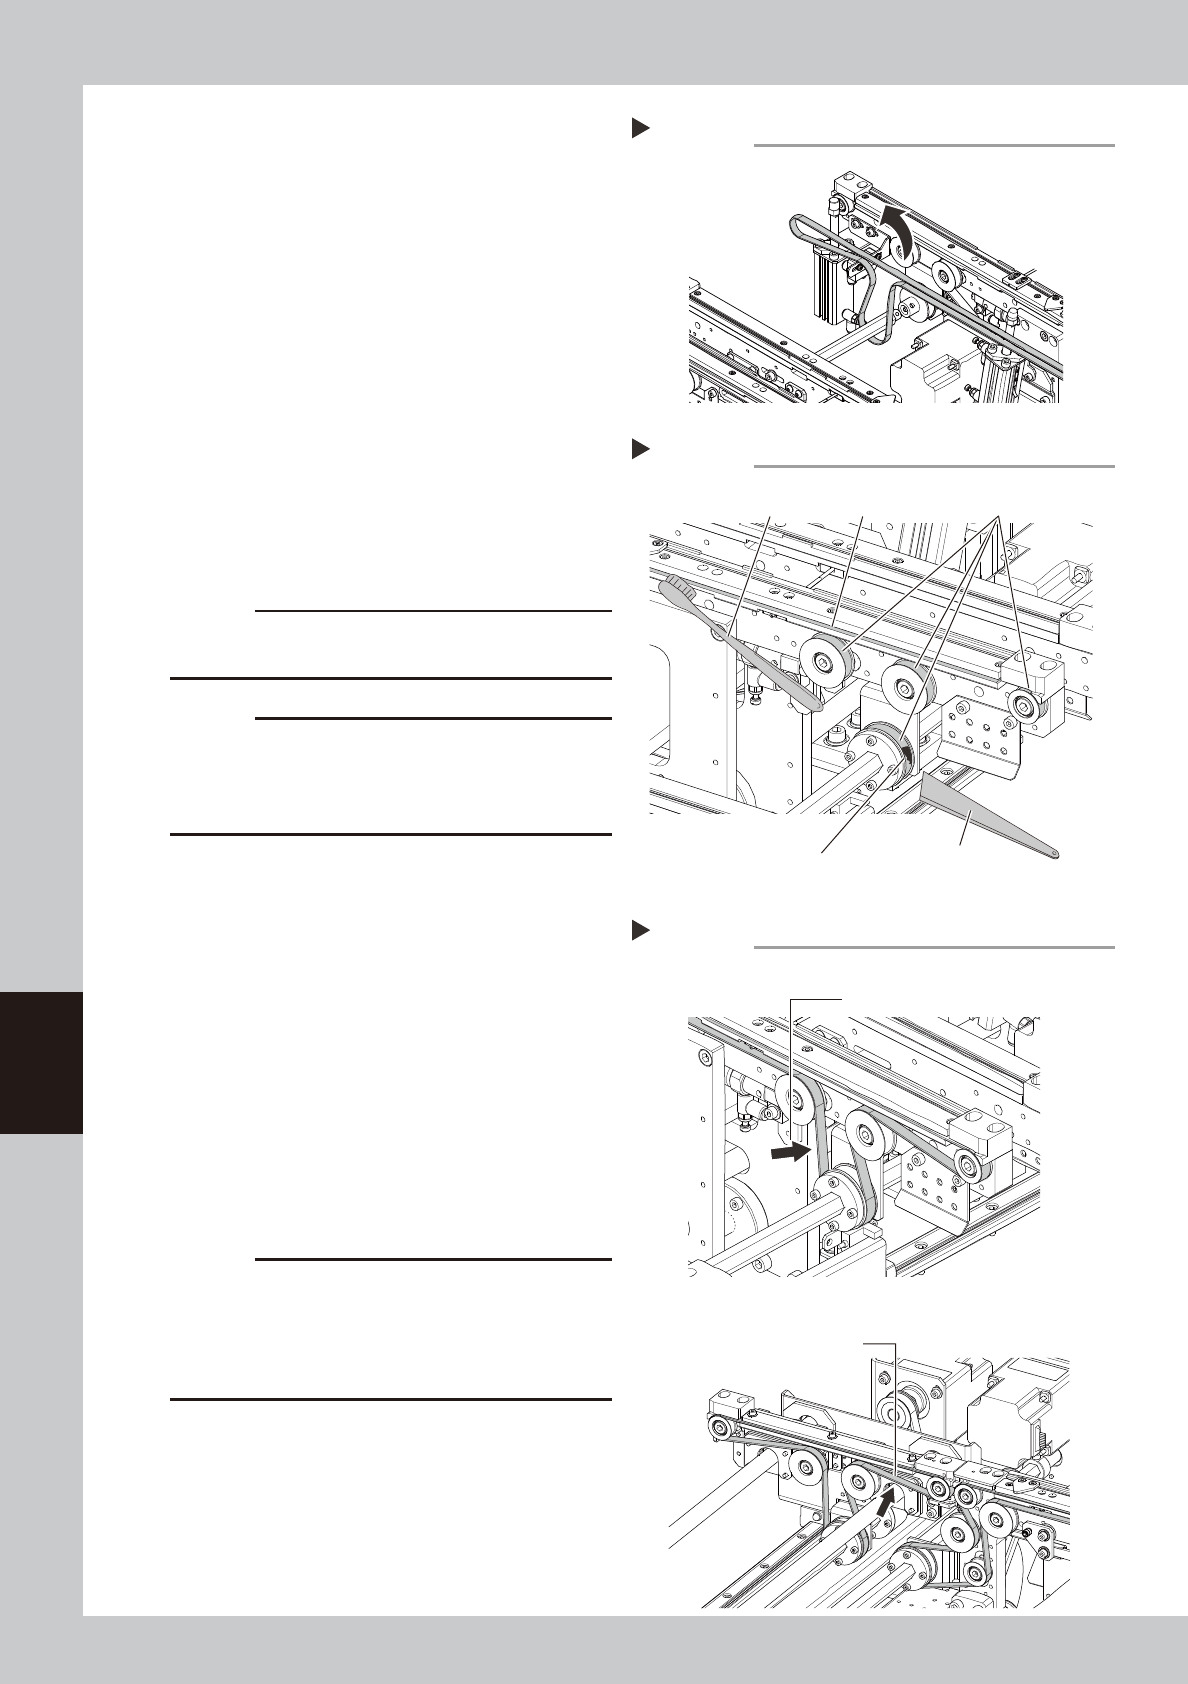
7
Remove the belt from the conveyor.
Detach the conveyor belt through the
clearance between the shaft and drive
pulley.
53625-L4-00
8
Clean the guides and pulleys.
1. Use a vacuum assembly (option) to
suction the belt wear debris on the belt
guides and sensors, etc.
2. Use a plastic spatula or similar tool to
remove the belt wear debris adhering to
the outer peripheral surface of the
pulleys.
3. Use a brush or similar tool to remove the
belt wear debris caught in the belt
guides.
53626-L4-00
c
CAUTION
Use a plastic spatula and brush to avoid scratching the
pulleys and guides.
c
CAUTION
Do not use a solvent (IPA, etc.) unless the guides and
pulleys are excessively dirty. If using a solvent, be
careful not to spill the solvent on the bearing in the
pulleys during cleaning.
9
Replace the conveyor belt.
1. Attach a new belt temporarily while
putting it on the pulley.
2. Tighten to secure the spline shaft with the
shaft fixing bolt.
3. Move the tensioner (pulley/pulley
bracket) that tension is applied to the
marked location in Step 4, and tighten
the bolt.
4. If looseness of the belt is found, adjust
the position of the tensioner (pulley/
pulley bracket) to apply necessary
tension.
53627-L4-00
c
CAUTION
Tighten the mounting bolts of the pulley and pulley
bracket to the following torques:
• Pulley mounting bolt : 5.5N•m.
• Pulley bracket mounting bolt : 3.8N•m.
Be careful not to tighten the bolts excessively.
Detaching the conveyor belt
Step 7
Cleaning the guide and pulleys
Step 8
Brush
Belt guides
Belt wear debris
sticking to pulley
Spatula
(made of plastic)
Outer peripheral surface
of pulley
Tension measurement point
Step 9
■ Single-lane/Dual-lane, Dual-stage W1
■ Exit conveyor
Tension measurement point
Exit conveyor
Tension measurement point