YS24X_Mainte_E - 第153页
6-17 6 How to replace consumable parts q Clean the guides and pulley s. 1. Use a vacuum assembly (option) to suction the belt wear debris on the belt guides and sensors, etc. 2. Use a plastic spatula or similar tool to r…
6-16
6
How to replace consumable parts
8
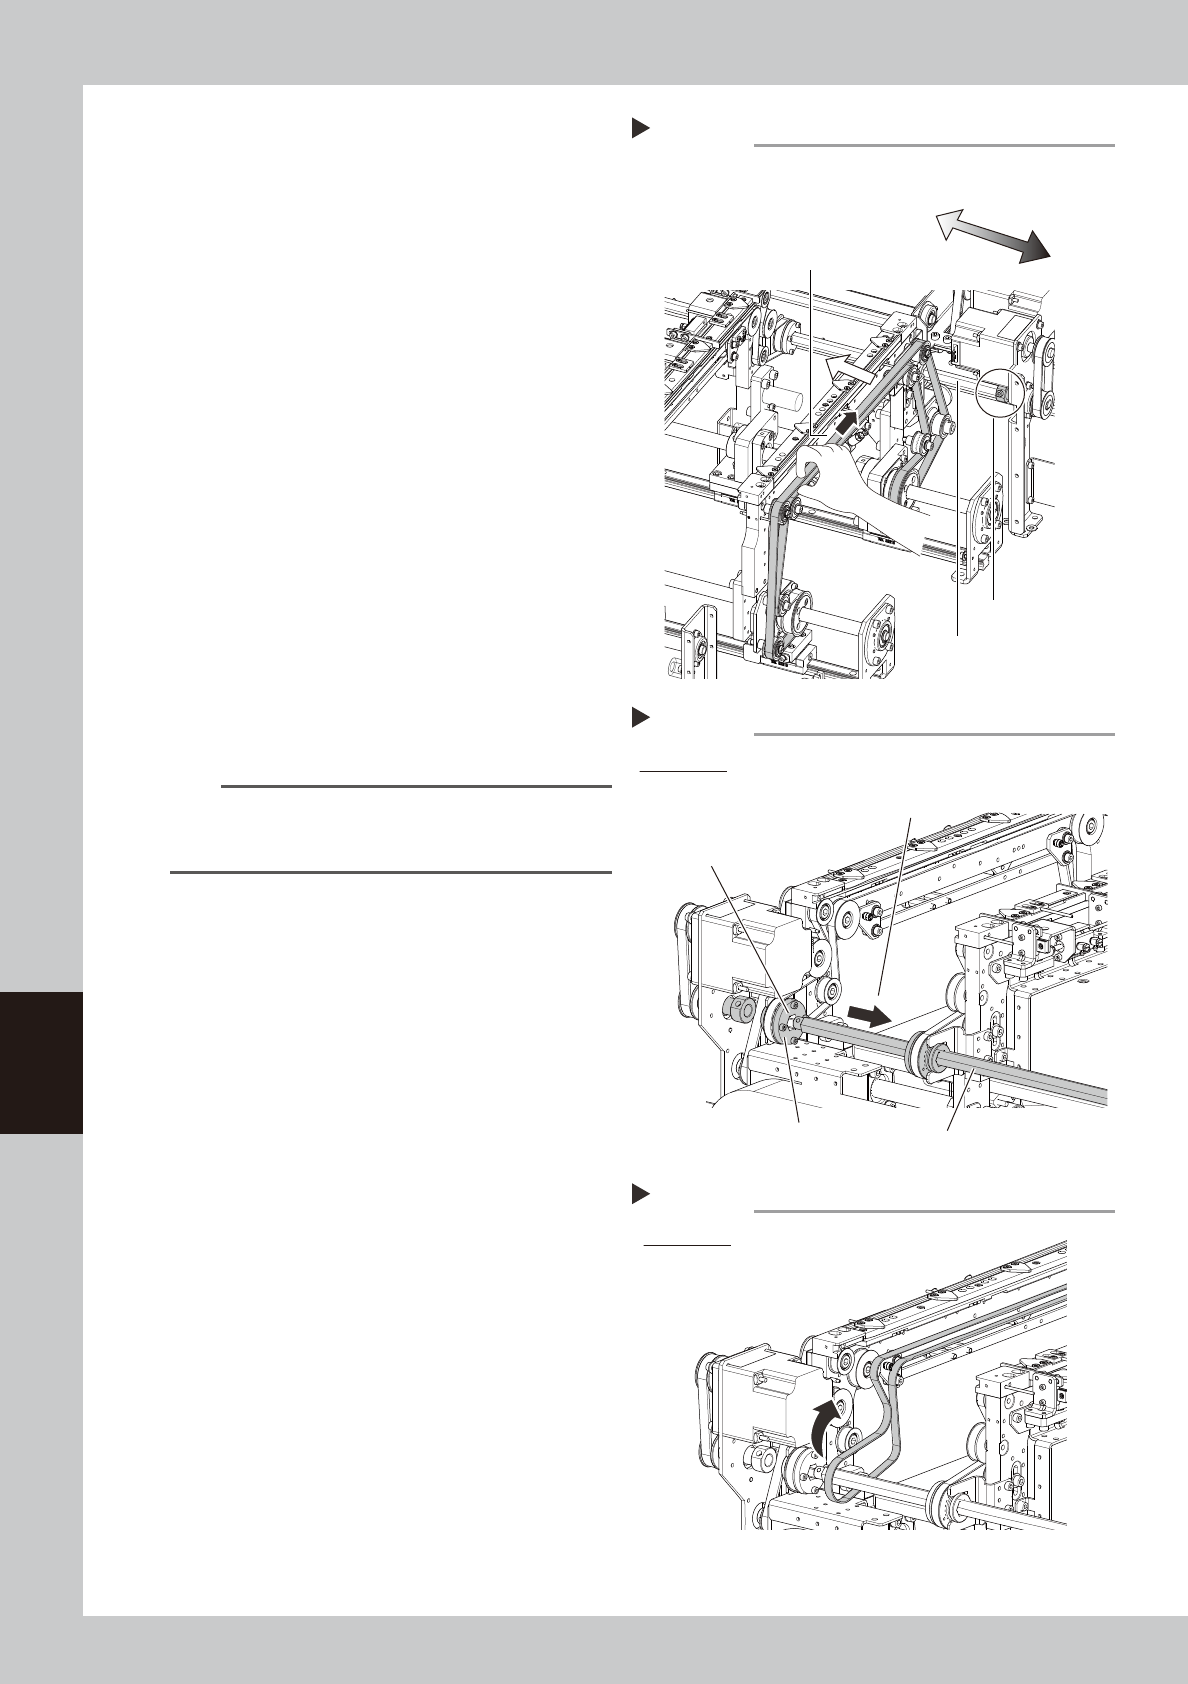
Remove the bolt securing the shaft.
1. Open the safety cover at the rear of the
machine.
2. When moving the W axis belt of the W2
far side conveyor rail to the right of the
person facing, the conveyor rail moves
to the front side of the machine. Push the
conveyor rail forward about 100 mm,
and the bolt securing the spline shaft
can be accessed.
3. Remove the bolt securing the shaft with
the hex wrench (3). Turn the hex spline
shaft to face the bolt to your side, it
becomes easy to access.
4. Turn the W axis belt to the opposite
direction from 2, and move the far side
conveyor rail all the way to the end of
machine.
53620-L4-10
9
Pull out the shaft from the belt
drive pulley.
Pull the shaft toward the front to pull it out
from the drive pulley completely.
53621-L4-00
n
NOTE
When pulling out the shaft, the drive pulley is easy to
come off. Pull out the shaft while holding the pulley by
hand.
0
Remove the belt from the conveyor.
Detach the conveyor belt through the
clearance between the shaft and drive
pulley.
53622-L4-00
Drive pulley
Pull the shaft toward front side of machine.
Pulling out the shaft from the drive pulley
Step 8
Remove the belt through
this clearance.
W2 conveyor
Hex spline shaft
Removing the belt
Step 9
W2 conveyor
Step 8
Removing the bolt securing the shaft
W2 conveyor (Figure from the rear side)
Move the W axis belt with your hand
Shaft securing bolt
Hex spline shaft
Far side of the
machine
Front of the
machine
6-17
6
How to replace consumable parts
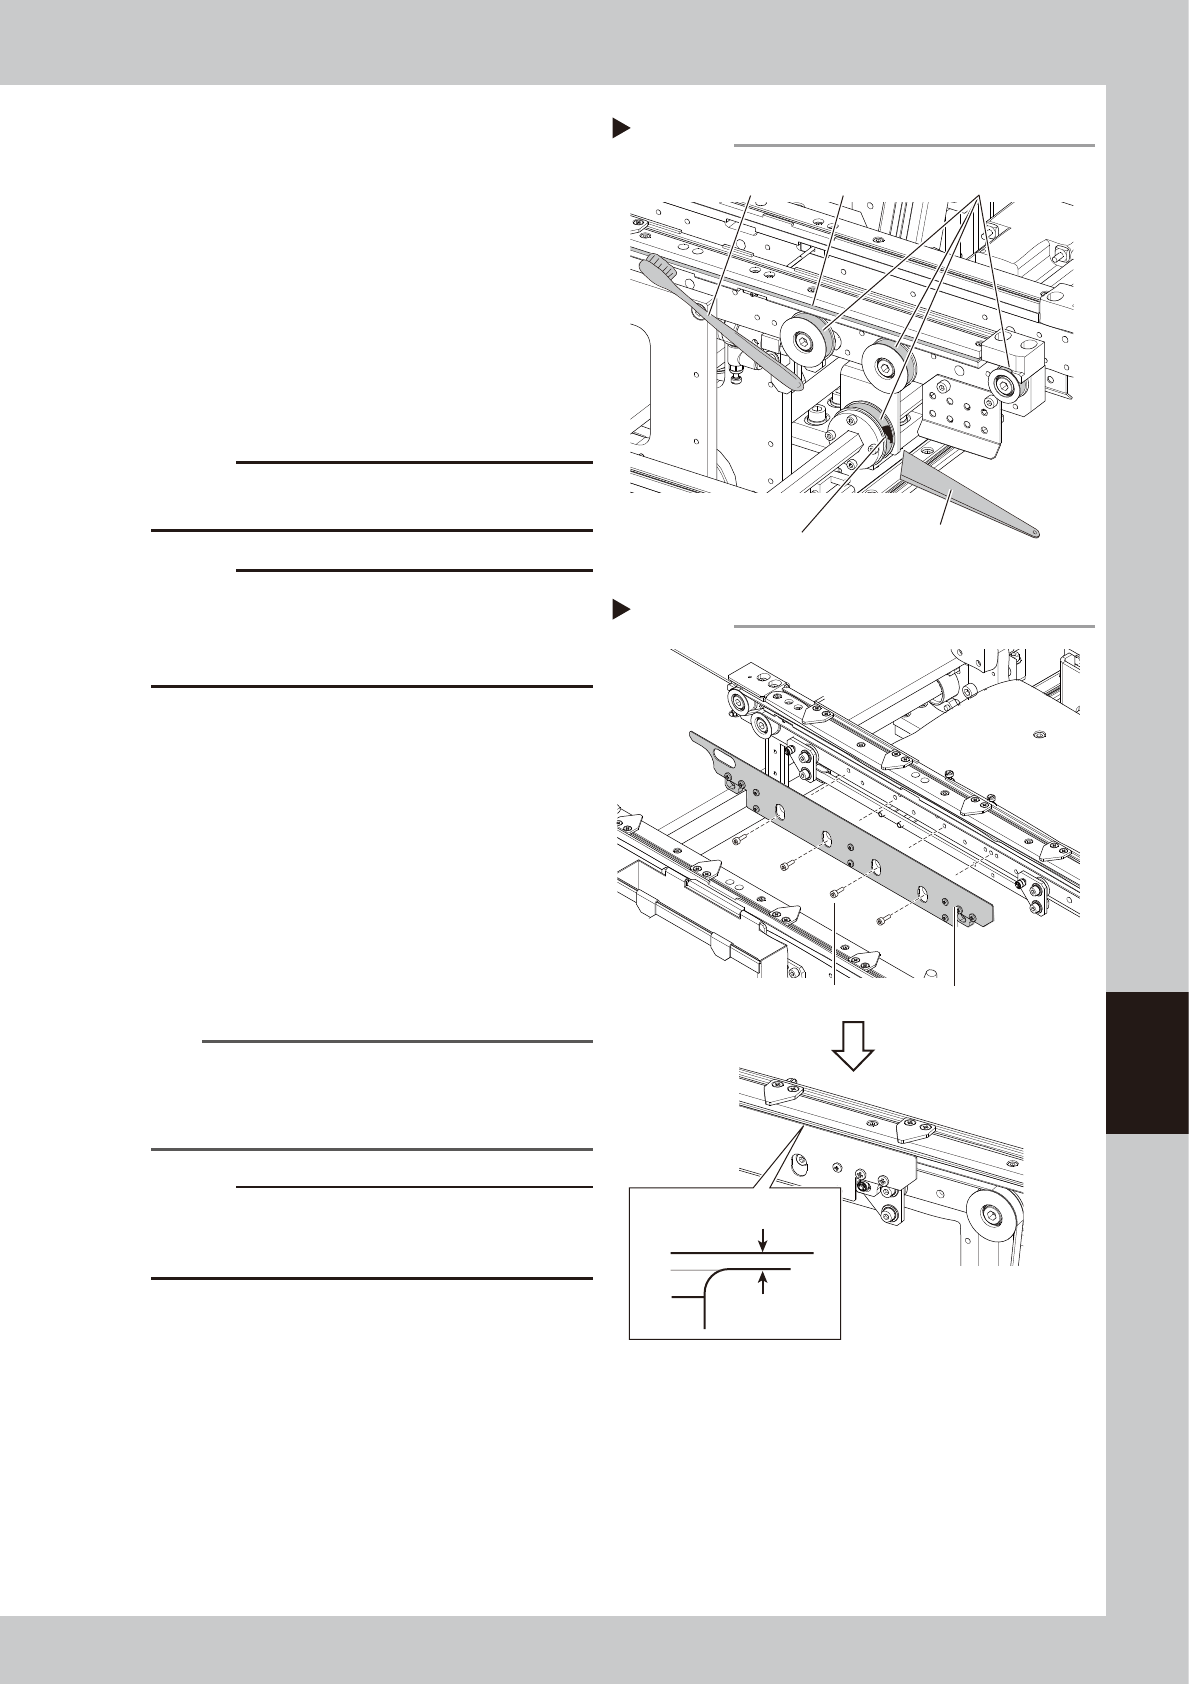
q
Clean the guides and pulleys.
1. Use a vacuum assembly (option) to
suction the belt wear debris on the belt
guides and sensors, etc.
2. Use a plastic spatula or similar tool to
remove the belt wear debris adhering to
the outer peripheral surface of the
pulleys.
3. Use a brush or similar tool to remove the
belt wear debris caught in the belt
guides.
53630-L4-00
c
CAUTION
Use a plastic spatula and brush to avoid scratching the
pulleys and guides.
c
CAUTION
Do not use a solvent (IPA, etc.) unless the guides and
pulleys are excessively dirty. If using a solvent, be
careful not to spill the solvent on the bearing in the
pulleys during cleaning.
w
Attach the conveyor belt.
1. Temporarily attach the new conveyor
belt by hooking to the pulley.
2. Insert the shaft through the driving pulley.
3. Tighten to secure the spline shaft with the
fixing bolt.
4. Move the pulley that tension is applied
to the position marked in Step 4, and
tighten the fixing bolt.
5. When the belt is loose, adjust the position
of the pulley to apply belt tension.
n
NOTE
For the tension measurement position and tension
standard of the machine’s conveyor belt, see the figure
in Step 9 of "
n
Dual stage specification : Replacing the
conveyor belt other than that of W2-axis".
c
CAUTION
The tightening standard of the securing bolt of pulley
that tension is applied is 5.5N·m. Be cautious not to
tighten too hard.
e
Attach the board clamp plate.
1. Fit the board clamp plate into its original
position and tighten the board clamp
plate mounting bolts with a hex wrench
(3).
2. Remove the square cloth on the push-up
plate.
53632-L4-00
Cleaning the guide and pulleys
Step 11
Brush
Belt guides
Belt wear debris
sticking to pulley
Spatula
(made of plastic)
Outer peripheral surface
of pulley
Step 13,14
Mounting the board clamp plate
Board clamp plateBoard clamp plate mounting bolt
0.5 mm
Board clamp
Belt upper surface
6-18
6
How to replace consumable parts
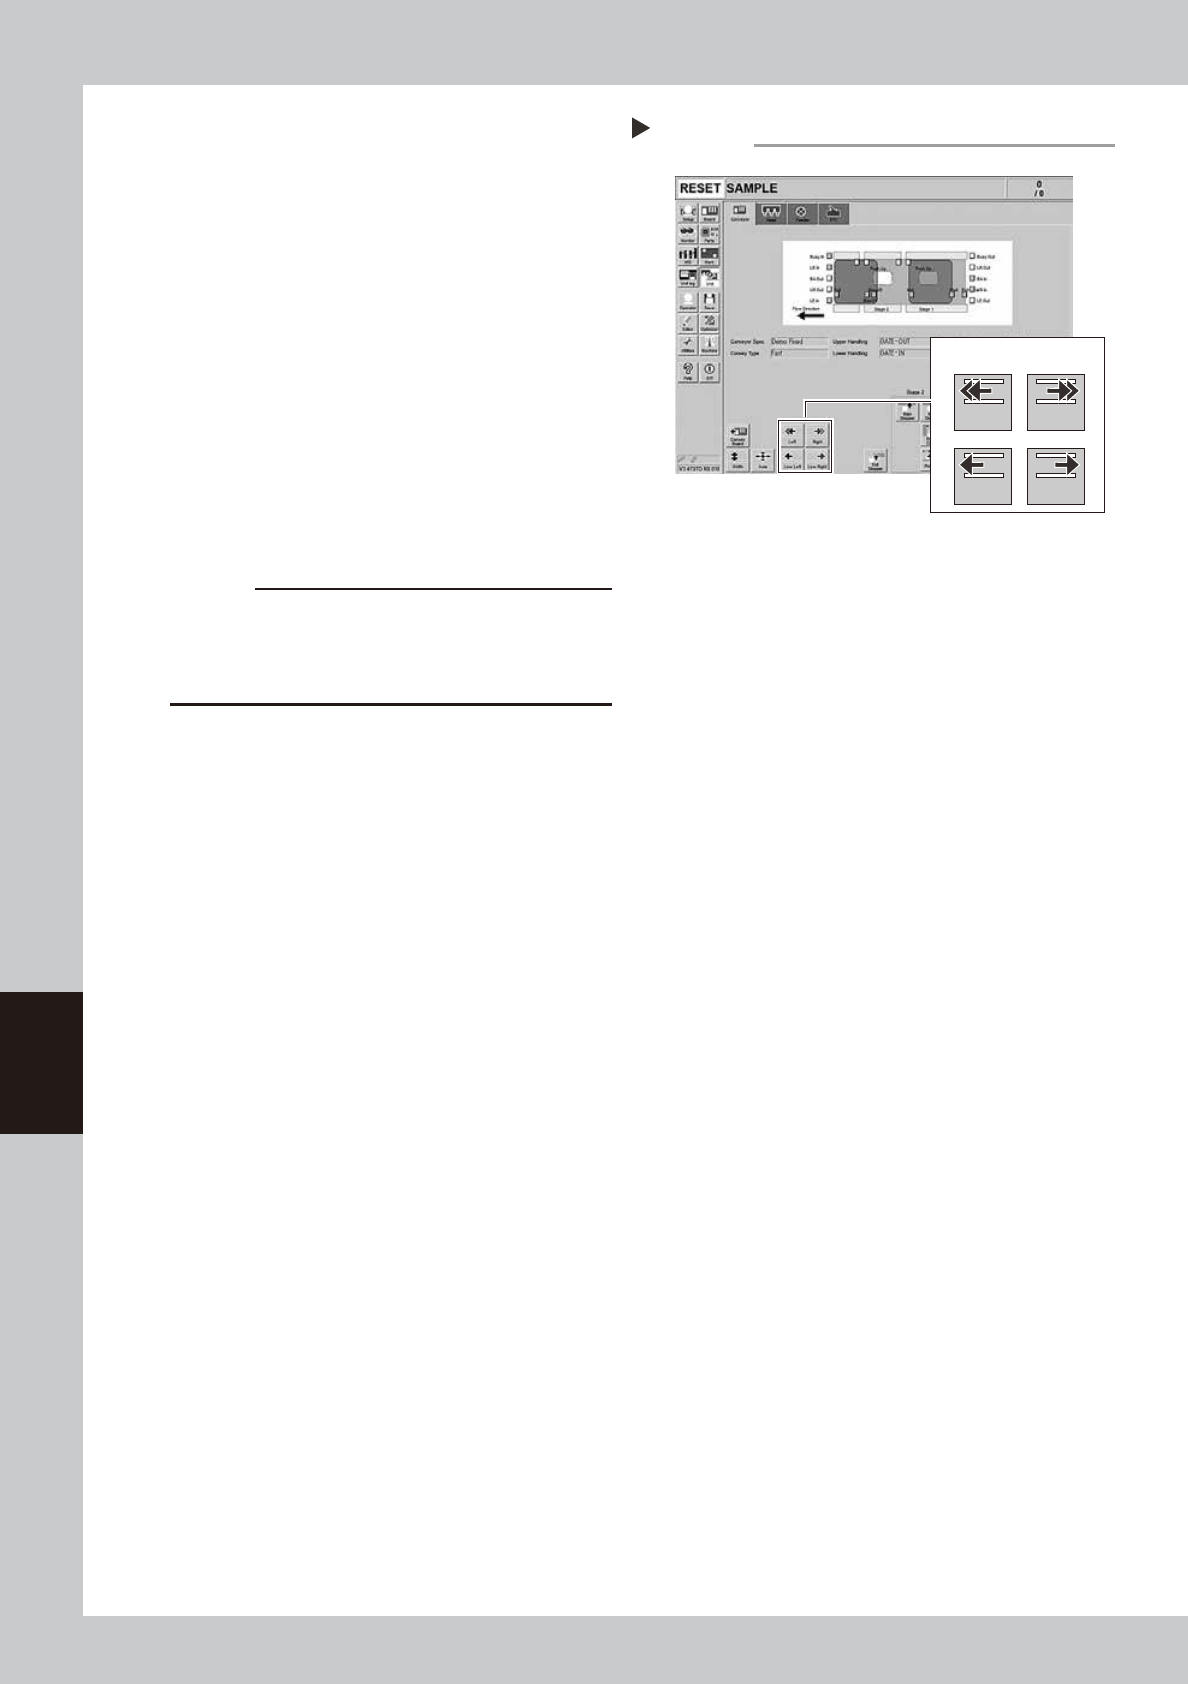
r
Check the belt rotating condition.
1. Make sure that the board clamp top
surface is approx. 0.5mm lower than the
belt upper surface.
2. Close the machine’s safety cover, and
cancel the emergency stop. If the
machine could be equipped with a
carriage, set the carriage.
3. On the [Unit] - [Conveyor] screen, press
the [Conveyor In] button or [Conveyor
Out] button to turn on the conveyor
motor and check the belt rotation.
4. If the rotation speed fluctuates or there is
slack in the belt, adjust the position of
the pulley that tension is applied, and
adjust the pulley’s position again.
54603-L4-00
c
CAUTION
When the difference between the belt upper surface
and board clamp top surface is very little, the board
transfer error may occur easily. In this case, contact
YAMAHA sales representative.
Conveyor operation check
Step 14
Conveyor drive buttons
Left Right
Low Left Low Right