YS24X_Mainte_E - 第76页
3-9 3 Periodic maintenance items 5 Check the sensor status. Change the conveyor width again and check that no error message appears. 6 Check the portion around the sensor . If the error message still appears, the light r…
3-8
3
Periodic maintenance items
1.4 Checking the conveyor sensor condition and operation
This machine uses a transmission type fiber sensor as the conveyor sensor.
As the conveyor width changes, the distance between the light emitting and light receiving sensors also
changes. Accordingly, the light receiving status of the sensor may change.
Therefore, a conveyor sensor tuning function is provided on this machine that stores the sensor light receiving
status after the conveyor rail width has been changed and automatically rewrites the sensor threshold value.
By changing the conveyor rail width periodically, you can check that the conveyor sensors and conveyor sensor
tuning operate correctly.
Checking the conveyor sensor condition and operation
Light emitting
Light receiving
53304-L4-10
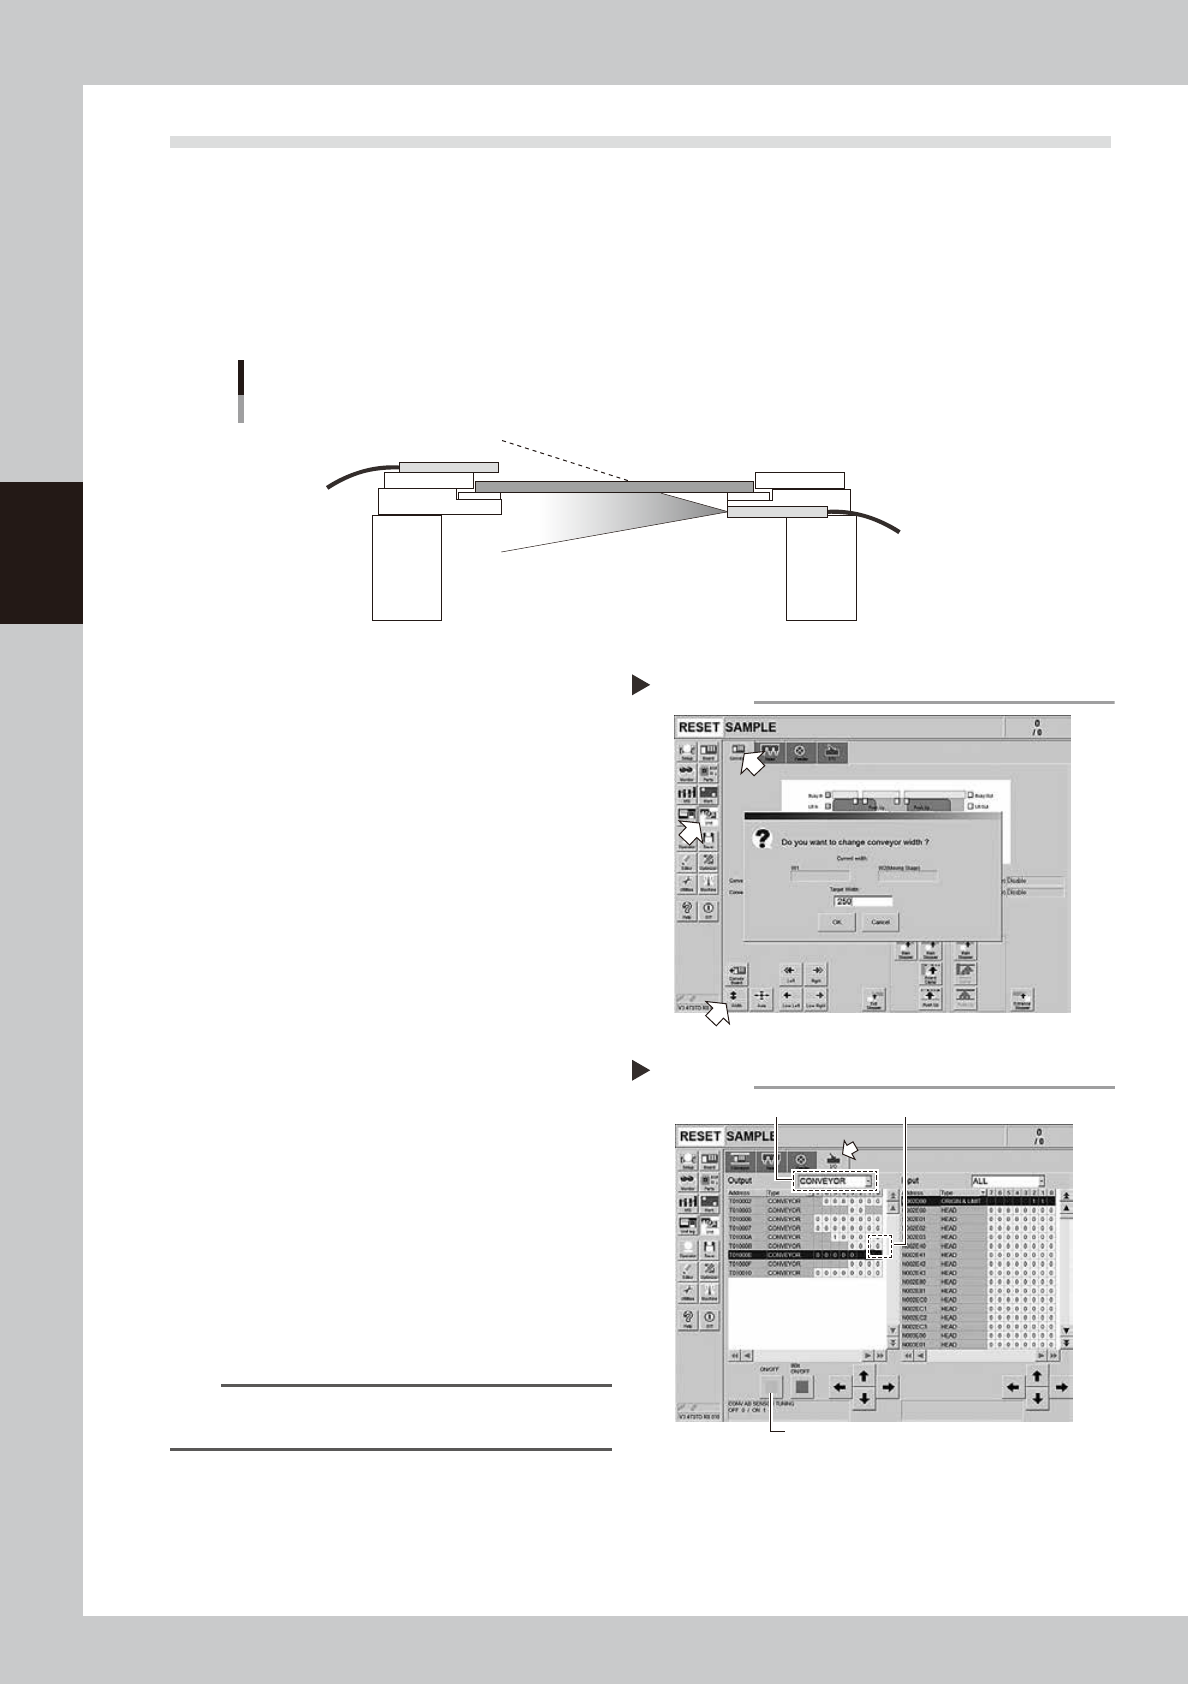
1
Opzen the [Unit] – [Conveyor]
screen.
2
Press the [Width] button to change
the conveyor width.
In the "Conveyor Width" screen that
appears, enter a conveyor width and press
[OK] button.
The conveyor is changed to the width that
was just entered.
3
Check whether an error has
occurred.
The conveyor sensor is operating properly
unless an error message appears when the
conveyor width is changed. No further
check is necessary.
If an error occurred, perform "Conveyor
sensor tuning" from Step 4.
54300-L4-10
4
Perform the conveyor sensor
tuning.
1. Open the [Unit] – [I/O] screen.
2. From the "Output" drop-down list, select
"CONVEYOR".
3. Select "CONV SENSOR TUNING" (T01000E1)
in the output I/O list.
n
NOTE
In dual-lane machines, "T01000E1" corresponds to Lane
1, and "T01000E3" to Lane 2.
4. Press the [ON/OFF] button to switch the I/
O status from "0" (OFF)
→
"1" (ON)
→
"0"
(OFF) to perform auto tuning.
54301-L4-10
Checking the conveyor sensor
Step 1-3
Conveyor sensor tuning
2
3
4
Step 4

3-9
3
Periodic maintenance items
5
Check the sensor status.
Change the conveyor width again and
check that no error message appears.
6
Check the portion around the
sensor.
If the error message still appears, the light
receiving status around the sensor may be
poor, the sensor (amplifier) may be
malfunction, or the fiber may be broken.
First, remove contaminant or dust from the
sensor. Then perform the conveyor sensor
tuning again.
3-10
3
Periodic maintenance items
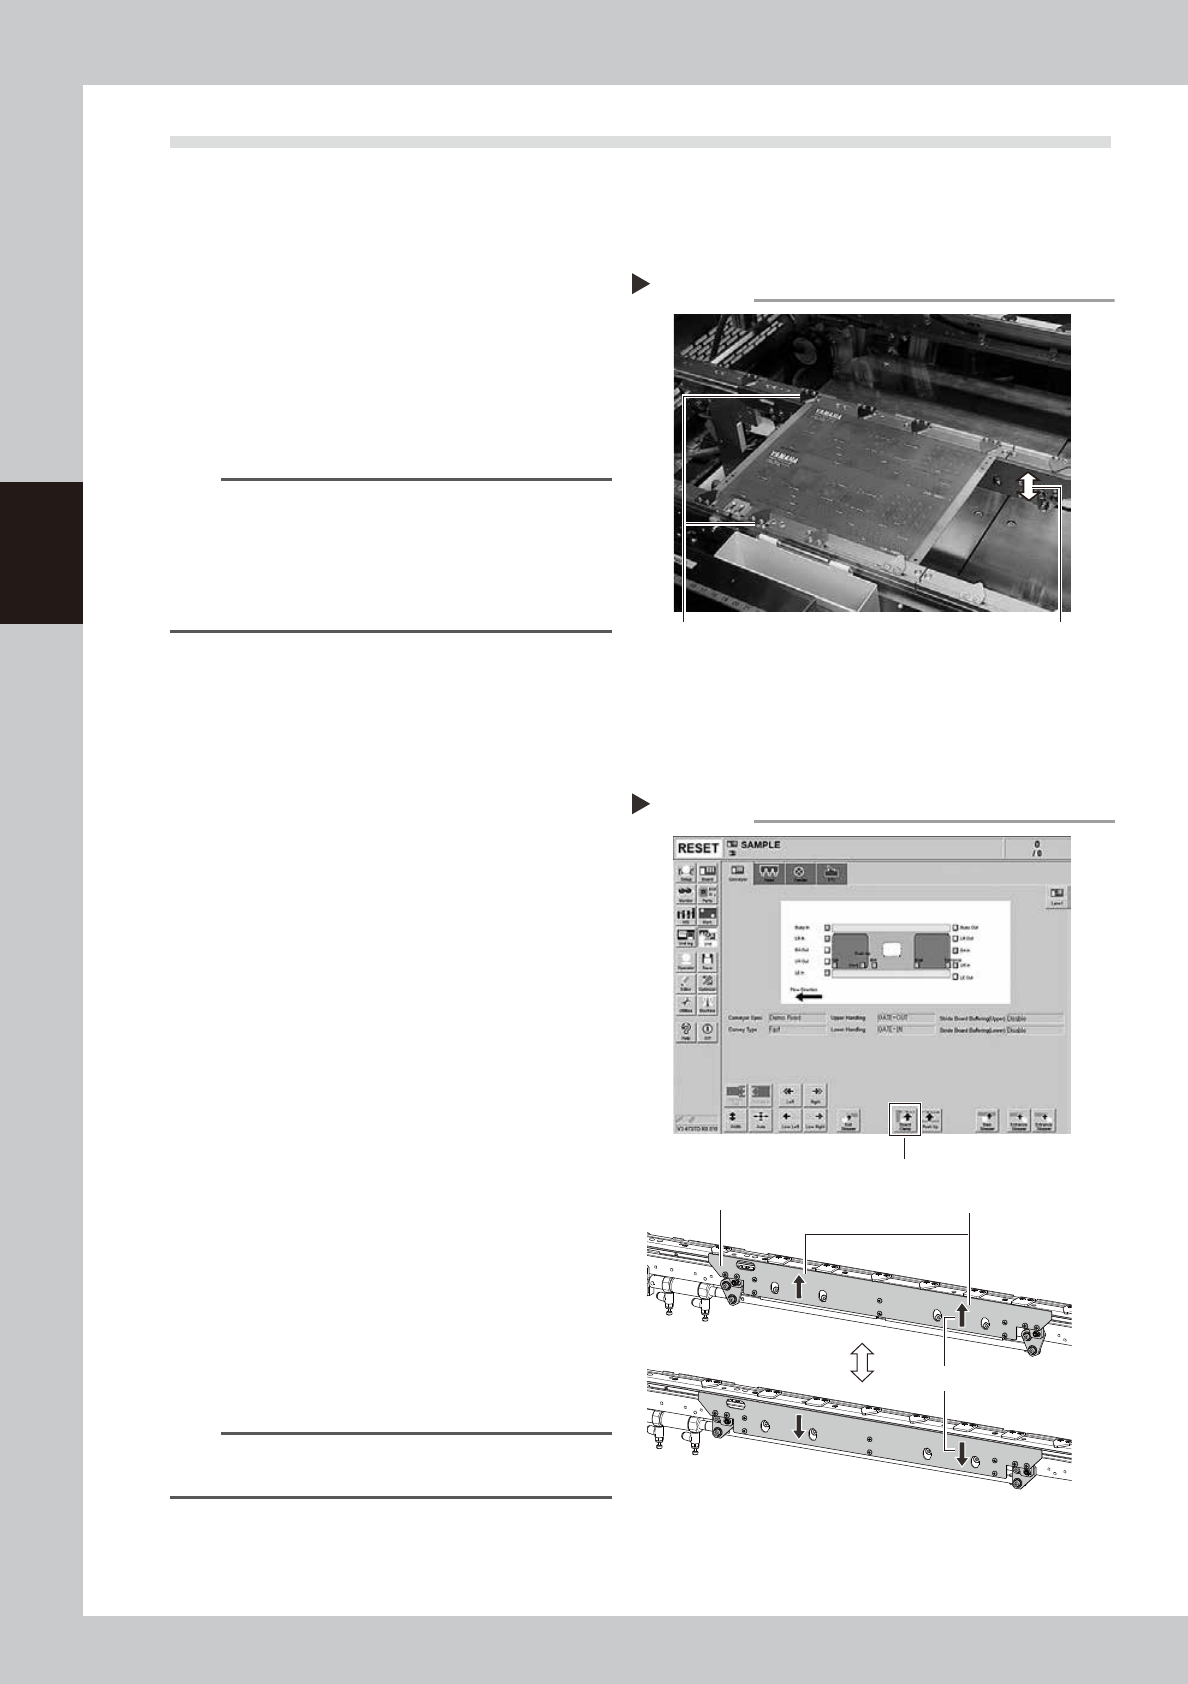
1.5 Checking the board clamp condition and operation
1.5.1 Checking the board clamp condition
Check the board clamp condition at least once a week when a production type is changed or even when a
production type change is not performed.
1. When the board is clamped, no backlash is found.
2. There is no clearance between the board and the
board hold plate when the board is clamped.
3. The board is flush with the upper surface of the
conveyor rails when the board is clamped.
4. The board clamp unit moves smoothly.
53306-L4-00
n
NOTE
If either of 1 to 3 or all of 1 to 3 are result in failure,
check that the board hold plate, the push-up pin
quantity and positions are correct. If the mounting
screws of the board hold plate are loosened, tighten
them. If 4 is result in failure, check the clamp unit
operation with the procedure on the next.
1.5.2 Checking the board clamp operation
e
1
Prepare for maintenance work.
1. Press the emergency stop button and
then open the machine safety cover.
2. If the machine is equipped with a
carriage, remove the carriage for easy
access to the conveyor.
2
Move the clamp board up.
1. While there is no board in the conveyor,
press the [Board Clamp] button in the
[Unit] – [Conveyor] screen.
2. Visually check the clamp board moves
up smoothly without deviation.
54320-L4-00
3
Move the clamp board down.
1. Press the [Board Clamp] button again to
move the clamp board down.
2. Visually check the clamp board moves
down smoothly without deviation.
4
Repeat the clamp operation.
Repeat Step 2 and 3 to check the clamp
operation is stable.
n
NOTE
If an error is found in board clamp operation, contact
YAMAHA sales representative.
Checking the clamp condition
Check that there is no clearance
between the board and board hold
plate and also that the board is flush
with the conveyor rails.
Clamp and unclamp the
board to check the
movement.
Checking the board clamp operation
Step 2-4
[Board Clamp] button
Shall move up and down smoothly
Shall be no deviation between
right and left
Board clamp plate