YS24X_Mainte_E - 第78页
3-1 1 3 Periodic maintenance items 1.6 Cleaning the Y -axis linear scale If the Y -axis linear scale (scale tape) is dirty , an error ma y occur when reading the linear scale. T o prevent suc h an error , the linear scal…
3-10
3
Periodic maintenance items
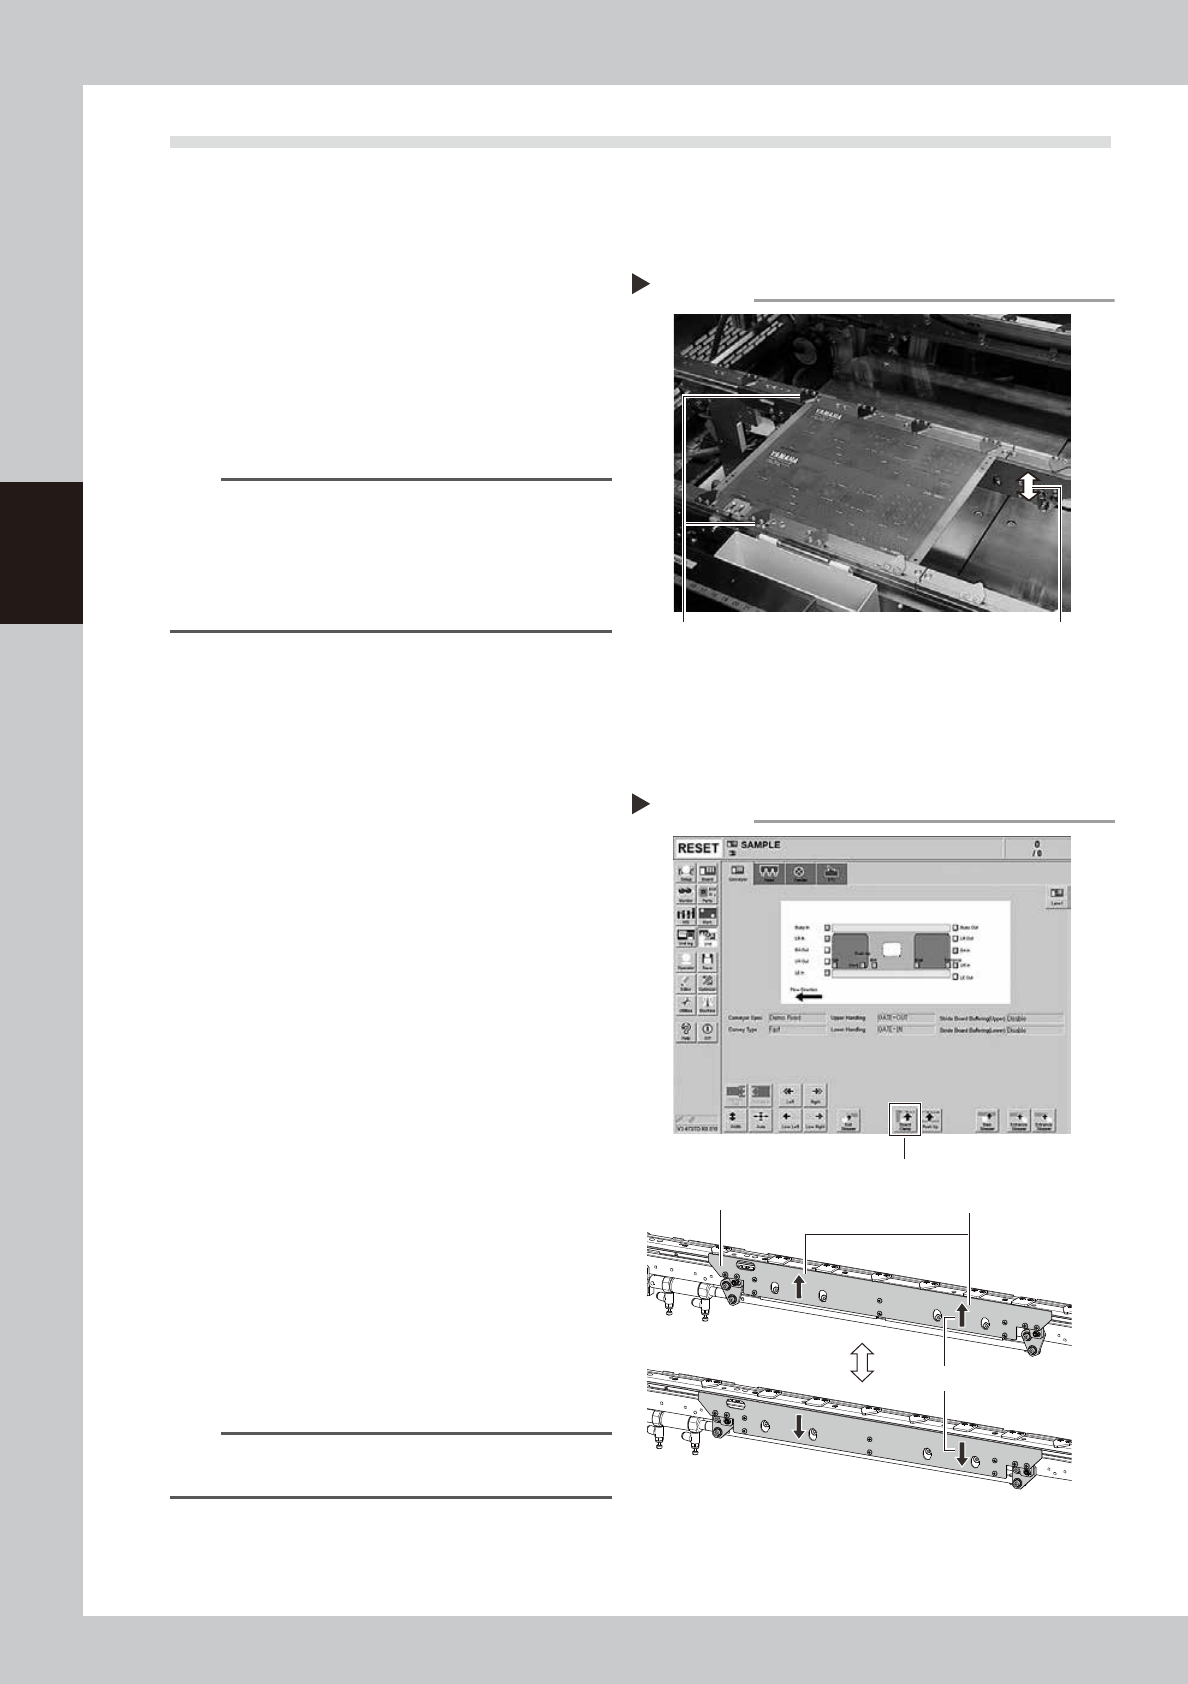
1.5 Checking the board clamp condition and operation
1.5.1 Checking the board clamp condition
Check the board clamp condition at least once a week when a production type is changed or even when a
production type change is not performed.
1. When the board is clamped, no backlash is found.
2. There is no clearance between the board and the
board hold plate when the board is clamped.
3. The board is flush with the upper surface of the
conveyor rails when the board is clamped.
4. The board clamp unit moves smoothly.
53306-L4-00
n
NOTE
If either of 1 to 3 or all of 1 to 3 are result in failure,
check that the board hold plate, the push-up pin
quantity and positions are correct. If the mounting
screws of the board hold plate are loosened, tighten
them. If 4 is result in failure, check the clamp unit
operation with the procedure on the next.
1.5.2 Checking the board clamp operation
e
1
Prepare for maintenance work.
1. Press the emergency stop button and
then open the machine safety cover.
2. If the machine is equipped with a
carriage, remove the carriage for easy
access to the conveyor.
2
Move the clamp board up.
1. While there is no board in the conveyor,
press the [Board Clamp] button in the
[Unit] – [Conveyor] screen.
2. Visually check the clamp board moves
up smoothly without deviation.
54320-L4-00
3
Move the clamp board down.
1. Press the [Board Clamp] button again to
move the clamp board down.
2. Visually check the clamp board moves
down smoothly without deviation.
4
Repeat the clamp operation.
Repeat Step 2 and 3 to check the clamp
operation is stable.
n
NOTE
If an error is found in board clamp operation, contact
YAMAHA sales representative.
Checking the clamp condition
Check that there is no clearance
between the board and board hold
plate and also that the board is flush
with the conveyor rails.
Clamp and unclamp the
board to check the
movement.
Checking the board clamp operation
Step 2-4
[Board Clamp] button
Shall move up and down smoothly
Shall be no deviation between
right and left
Board clamp plate
3-11
3
Periodic maintenance items
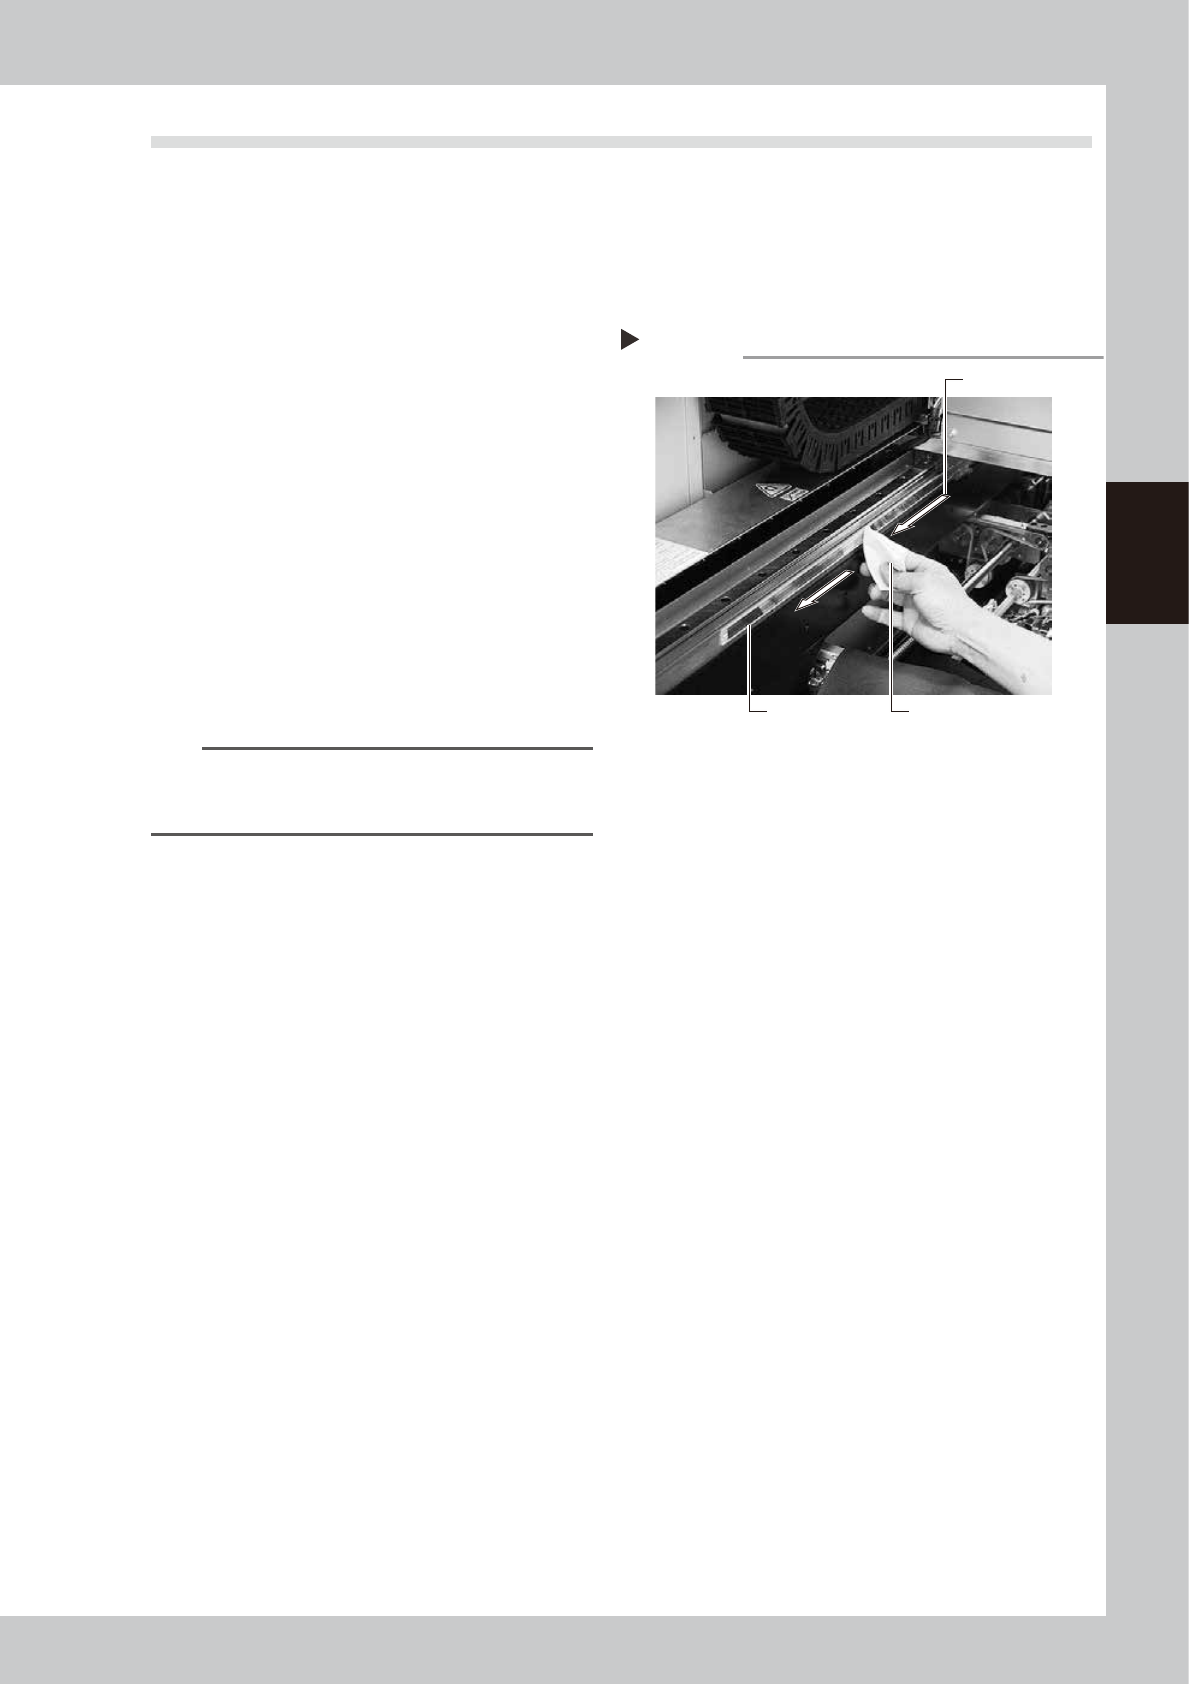
1.6 Cleaning the Y-axis linear scale
If the Y-axis linear scale (scale tape) is dirty, an error may occur when reading the linear scale. To prevent such
an error, the linear scale must be cleaned periodically.
1
Move the head unit to the rear of
the machine.
1. Take off all accessories susceptible to the
magnetic fields, such as a wristwatch
and/or magnetic ID card.
e
2. Press the emergency stop button to open
the machine safety cover.
3. If the machine is equipped with a
carriage, remove the carriage to access
the Y-axis easily.
4. Move the head unit to the rear of the
machine.
2
Clean the scale tape.
Wipe the scale tape in one direction using a
lint-free cloth that does not raise dust
moistened with isopropyl alcohol (absolute
ethanol).
53307-L4-00
n
NOTE
To remove moistened dust, wipe the scale surface at
intervals of about 200 mm while changing the wiping
surface of the lint-free cloth.
3
Wipe the scale surface with a dry
lint-free cloth.
Before the scale surface you wiped in step 2
dries completely, wipe it with a dry lint-free
cloth that does not raise dust.
4
Clean the linear scale on the rear
side.
Open the safety cover at the rear of the
machine, move the head unit to the front,
and clean the rest of the scale.
Step 2
Cleaning the scale tape
Wipe in one direction.
Scale tape Paper wipe
3-12
3
Periodic maintenance items
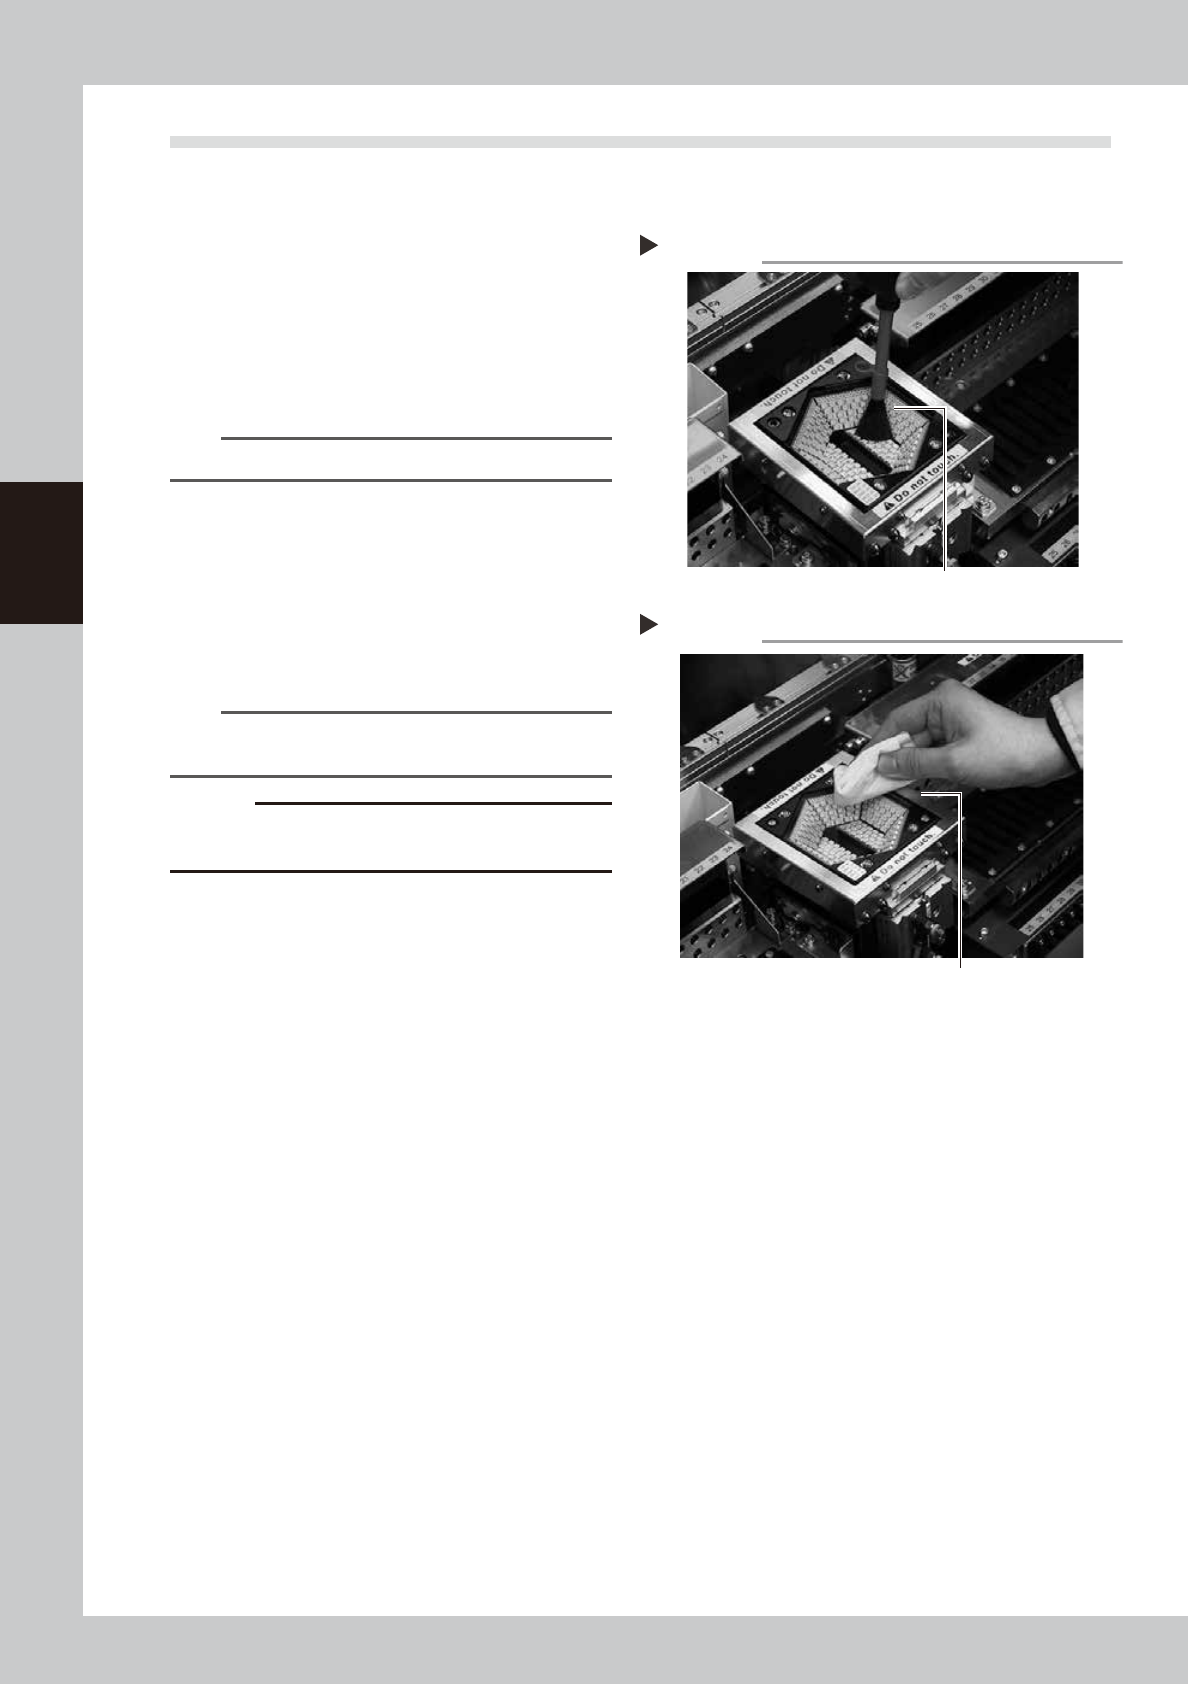
1.7 Cleaning the camera protective glass
Adhered dust, etc., on the multi-camera lighting's protective glass can cause component recognition errors.
To prevent this, it is recommended to inspect and clean the cover in a periodic manner.
e
1
Blow off dust on the lighting's
protective glass.
1. Press the emergency stop button to open
the machine safety cover.
2. Remove the dust on the lighting's
protective glass with a blower brush.
53389-L4-00
TIP
A lens blower brush is an optional purchase part.
2
Wipe the protective glass with a
cloth or cleaning paper.
Apply a few drops of lens cleaner to a
lint-free cleaning cloth or cleaning paper
that does not raise dust, and wipe the
protective glass.
53390-L4-00
n
NOTE
A lens cleaner and cleaning paper are optional
purchase parts.
c
CAUTION
Do not use other than the lens cleaner optionally
supplied, such as IPA or acetone.
Blowing off dust with blower brush
Step 1
Lens blower brush
Wiping the transparent cover
Step 2
Lent-free cleaning cloth or paper wiper