YS24X_Mainte_E - 第89页
3-22 3 Periodic maintenance items 3.1.3 Cleaning and greasing the Y -axis guide 1 Make the prepar ations for the cleaning and greasing work. 1. Take off all accessories susceptible to the magnetic fields, such as a wrist…

3-21
3
Periodic maintenance items
7
Perform a warm-up.
1. Remove the square cloth.
2. Close the machine’s safety cover, and
cancel the emergency stop. If the
machine could be equipped with a
carriage, set the carriage.
3. Open the Warm-up screen, and perform
the warm-up operation for approximately
8 minutes.
e
8
Check the grease condition.
1. After stopping warming up, push the
emergency stop button, and open the
machine’s safety cover. If the machine is
equipped with a carriage, remove the
carriage.
2. Wipe the grease that was accumulated
on the guide and the end side of the
guide.
c
CAUTION
Repeat Step 7 and 8 until grease accumulations no
longer occur. Beginning production with grease
accumulations present could cause the grease to
splatter.
3-22
3
Periodic maintenance items
3.1.3 Cleaning and greasing the Y-axis guide
1
Make the preparations for the
cleaning and greasing work.
1. Take off all accessories susceptible to the
magnetic fields, such as a wristwatch
and/or magnetic ID card.
e
2. Press the emergency stop button and
then open the machine safety cover.
3. If the machine is equipped with a
carriage, remove the carriage.
4. Place a square cloth on the push-up
plate.
2
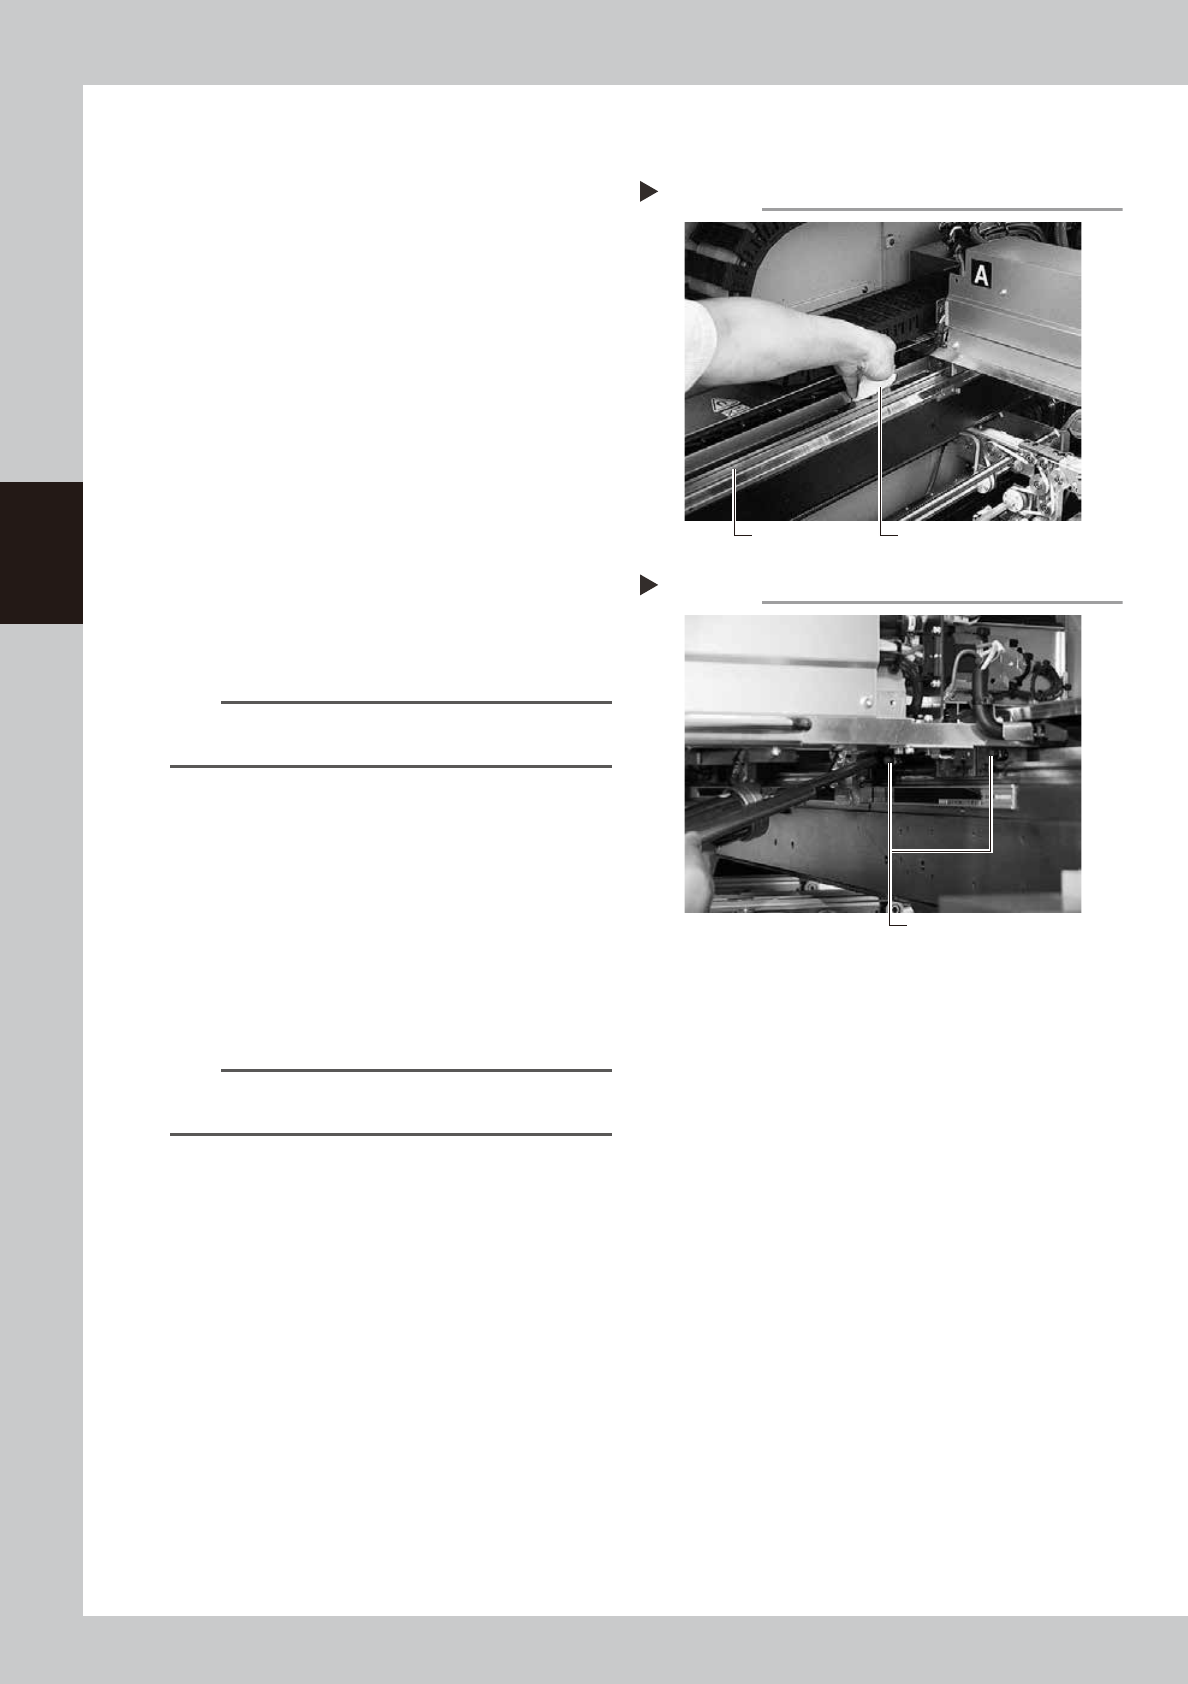
Clean the guide.
1. After moving Y-axis to the edge, clean
the whole guide with a lint-free cloth that
does not raise dust.
2. Next, move the Y-axis to the opposite
side, then wipe the opposite-side guide.
53322-L4-10
n
NOTE
Wipe away thoroughly the old grease in the grooves of
the guide rails.
3
Apply new grease to the guide rails.
Use the grease gun (standard nozzle) to
supply the specified grease (NSL) through
the grease nipples for the Y-axis guide (two
places each, eight places in total).
53323-L4-10
4
Spread the grease.
Move the Y-axis back and forth several times
by hand to spread the grease.
n
NOTE
The grease you have injected through the nipple oozes
to the guide when moving the axis.
5
Wipe off the excess grease.
Wipe off the excess grease from both ends
of the guide.
6
Apply the grease again.
Repeat Steps 3 to 5 twice again.
After that, visually check that the grease is
applied to the entire guide.
7
Perform a warm-up.
1. Remove the square cloth.
2. Close the machine’s safety cover, and
cancel the emergency stop. If the
machine could be equipped with a
carriage, set the carriage.
3. Open the Warm-up screen, and perform
the warm-up operation for approximately
8 minutes.
Cleaning the Y-axis guide
Step 2
Guide rail Cleaning cloth
Greasing the Y-axis guide
Step 3
Grease nipple (2 places)

3-23
3
Periodic maintenance items
e
8
Check the grease condition.
1. After stopping warming up, push the
emergency stop button, and open the
machine’s safety cover. If the machine is
equipped with a carriage, remove the
carriage.
2. Wipe the grease that was accumulated
on the guide and the end side of the
guide.
c
CAUTION
Repeat Step 7 and 8 until grease accumulations no
longer occur. Beginning production with grease
accumulations present could cause the grease to
splatter.
9
Clean the linear scale.
1. Check there is no grease spattered on
the linear scale area.
2. When grease and dirt are present, see
"1.6 Cleaning the Y-axis linear scale" in
this chapter, and perform cleaning.
c
CAUTION
Do not dry-wipe the linear scale strongly.