Micron Technical Reference V9 Volume 1.pdf - 第250页
SQUEEGEE MODULE CALIBRATIONS 9.22 Technical Reference Manual Chapter Issue 6, Ju l 16

SQUEEGEE MODULE
CALIBRATIONS
Chapter Issue 6, Jul 16 Technical Reference Manual 9.21
11. Select Squeegees.
12. Select Calibrate Heights.
13. The following machine sequence is carried out:
a. The rails are checked for the presence of a board.
b. The rising table is driven to print height.
c. The board clamps are closed.
d. The print carriage drives the front squeegee over the front rail.
e. The front and rear squeegees are driven down by the stepper motor to
dwell height.
14. Select Calibrate Front Squeegee.
15. The front squeegee is driven down to the current reference height position.
16. Select Jog.
17. Open the front printhead cover.
18. Using a 0.1mm shim placed between the front rail and the front squeegee,
check that the shim moves with a small amount of friction.
19. If the gap is correct, go to Step 29.
20. For adjustment, select the appropriate Jog Up/Jog Down button on the
monitor.
21. Using the two button controls simultaneously, jog the squeegee in the
chosen direction.
22. Recheck the gap.
23. Repeat Steps 20 to 22 until the correct gap is achieved.
24. Close the front printhead cover.
25. Press the System button.
26. Select Back.
27. Select Save.
28. Go to Step 31.
29. Close the front printhead cover.
30. Press the System button.
31. Select Back.
32. Select Calibrate Rear Squeegee.
33. The rear squeegee is driven down to the current reference height position.
34. Repeat Steps 16 to 31 for the rear squeegee.
35. Select Back.
36. Select Back.
37. Select Back.

SQUEEGEE MODULE
CALIBRATIONS
9.22 Technical Reference Manual Chapter Issue 6, Jul 16
PROACTIV
OVERVIEW
Chapter Issue 5, Jan 15 Technical Reference Manual 10.1
CHAPTER 10 PROACTIV
OVERVIEW
Introduction ProActiv™ is an active squeegee module. The ProActiv mount assembly (which
is similar to the standard squeegee mount and shares common functionality and
construction), houses the active squeegees. The difference is apparent when
using ProActiv during a print stroke, the squeegee blade is activated, this
provides additional forces in the print direction; it modifies the rheology of the
solder paste increasing its fluidity.
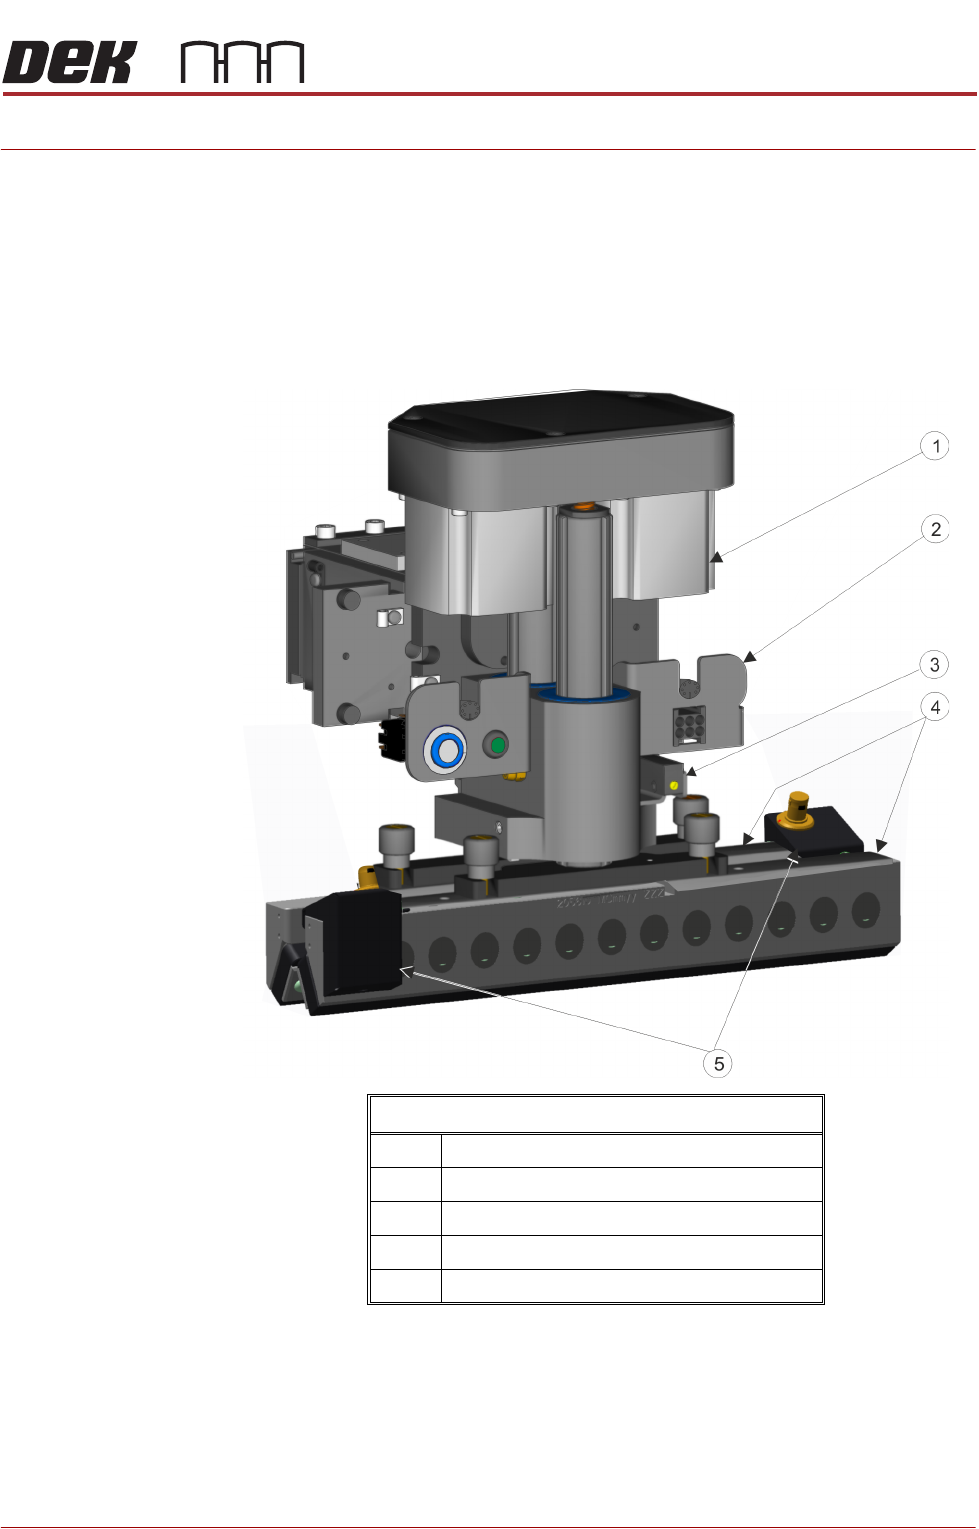
ProActiv Mechanism
1 ProActiv Mount Assembly
2 Electrical Connector Bracket
3 Proximity Sensors
4 ProActiv Squeegee Mounts
5 ProActiv Connector Mounts