JANETS_INM.pdf - 第100页
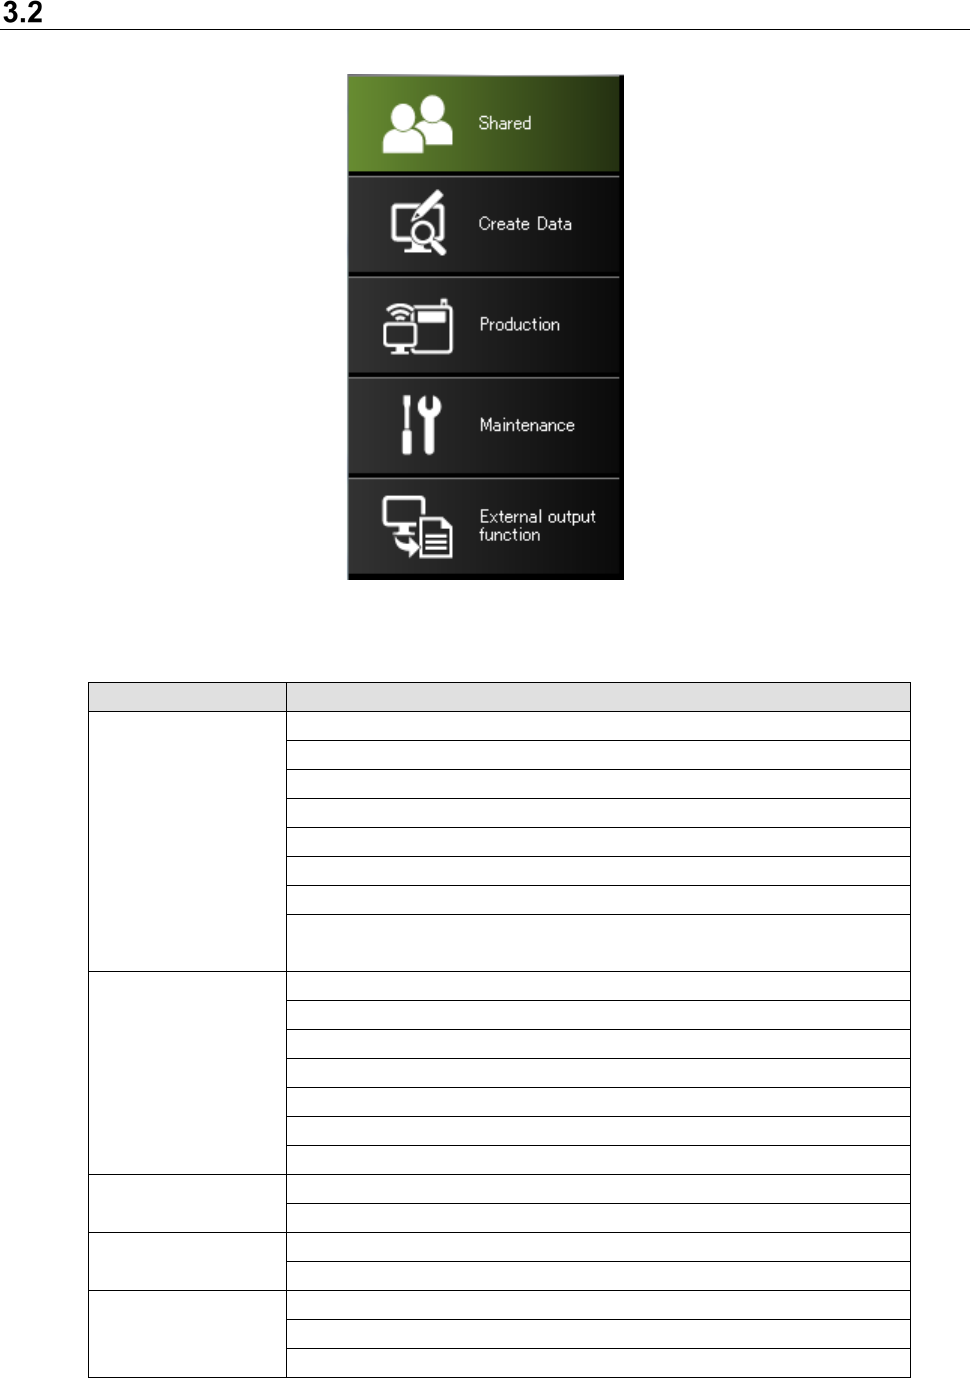
JaNets Instr ucti on Man ual 3. Launcher 3-5 Tab Items Figure 3.2 -1 T ab items Ta b l e 3.2 - 1 Descrip tion of each tab item Tab item Function of ea ch tab item Shared User Man agement User c hange Shopfloor Setup Vers…
JaNets Instruction Manual 3. Launcher
3-4
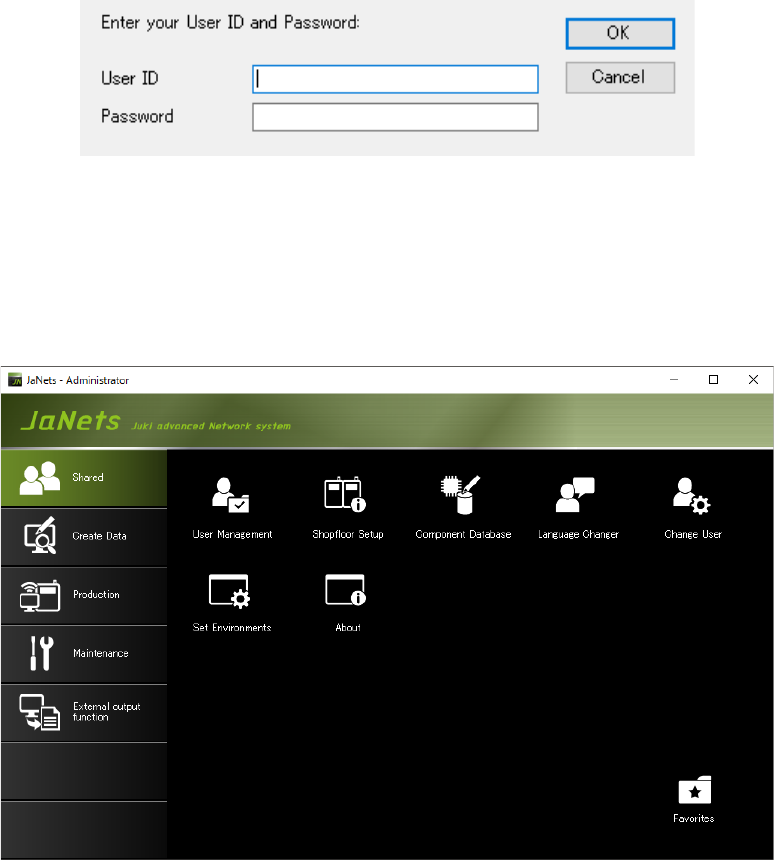
After the Launcher starts up, the “Login” dialog box appears on the screen.
Enter the user ID and the password.
* When you install the newly, you can use the following default user ID and password:
User ID: “administrator” Password: “Administrator”
Figure 3.1-1 Launcher – Dialog box for entering the password
The Launcher initial screen appears.
On the initial screen subsequent to the first time, the last indicated tab is displayed for each
user.
Figure 3.1-2 Launcher screen
JaNets Instruction Manual 3. Launcher
3-5
Tab Items
Figure 3.2-1 Tab items
Table 3.2-1 Description of each tab item
Tab item
Function of each tab item
Shared
User Management
User change
Shopfloor Setup
Version information
Environment setting
Language Changer
Component Database (* The Data Manager is required.)
TraceMonitor
(* Enable TraceMonitor on the “Set Environments” dialog box.)
Create Data
Program Editor
Job Optimizer (* Line Manager is required.)
FlexLineCAD (* Additional option)
Machine Program Relater (* Line Manager is required.)
Mark Database (* Line Manager is required.)
Feeder Set Database (* Line Manager is required.)
Tact simulation (* Line Manager is required.)
Production
Program Downloader (* Line Manager is required.)
Nozzle Data Viewer (* EquipmentManager is required.)
Maintenance
Snapshot Tool
Log Control Tool
External output
External output monitor (* Line Manager is required.)
External output environment setting (* Line Manager is required.)
Component stock control tool (* Line Manager is required.)
JaNets Instruction Manual 3. Launcher
3-6
The applications can be sorted by dragging them.
Figure 3.2-2 Sorting of applications
The arrangement of applications can be set for each user.
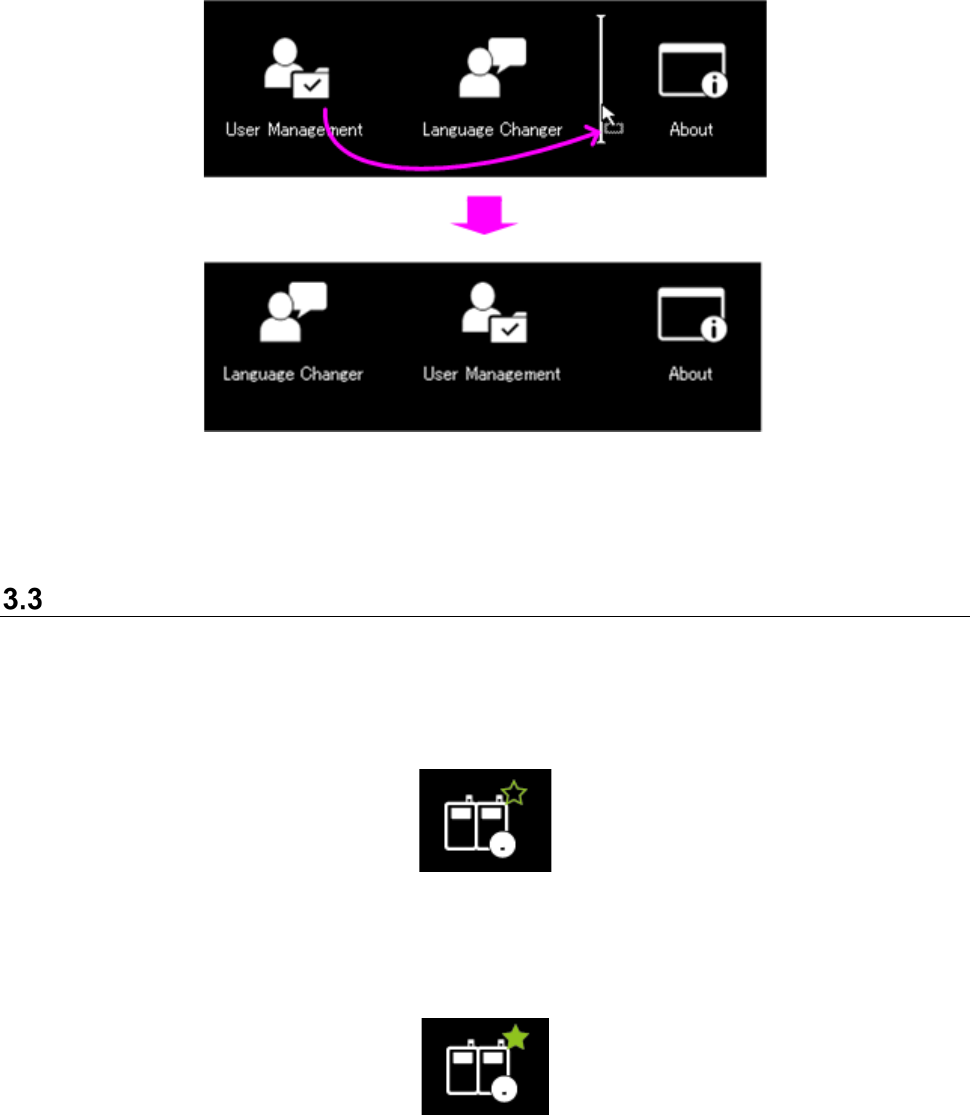
Favorite
The applications to be used frequently can be arranged in one group by registering the application
of each tab into “Favorite.”
The Favorite button is displayed on the upper right side of the icon by single-clicking an application
icon.
Figure 3.3-1 Favorite button (not registered)
An application can be registered as a favorite by clicking the Favorite button. Favorite can be
reset by the Favorite button of a registered application. Favorite can be set for each user.
Figure 3.3-2 Favorite button (registered)