JANETS_INM.pdf - 第111页
J aN et s Inst r ucti on Manual 4. User Manage ment 4-3 4.2.1 Adding a use r Cl ic k the < Add> b utton on the “ Us er M anag em ent” s cr een. Figure 4.2 -2 “A dd Us e r” dialog box – Basic in format io n ent ry s…

JaNets Instruction Manual 4. User Management
4-2
4.2 User Management
This function allows you to add a user or change the settings of the existing user.
Figure 4.2-1 “User Management” screen
* If there is not any group, you cannot add a user.
If you do not have the operational privilege, “Edit user/groups,” you cannot operate the screen
above. You can display the list only.
* The maximum number of users/groups you can register is 100 including the default user
“Administrator” and the default group “Administrators.”
Select this icon.
Setting item
display area
List display area
JaNets Instruction Manual 4. User Management
4-3
4.2.1 Adding a user
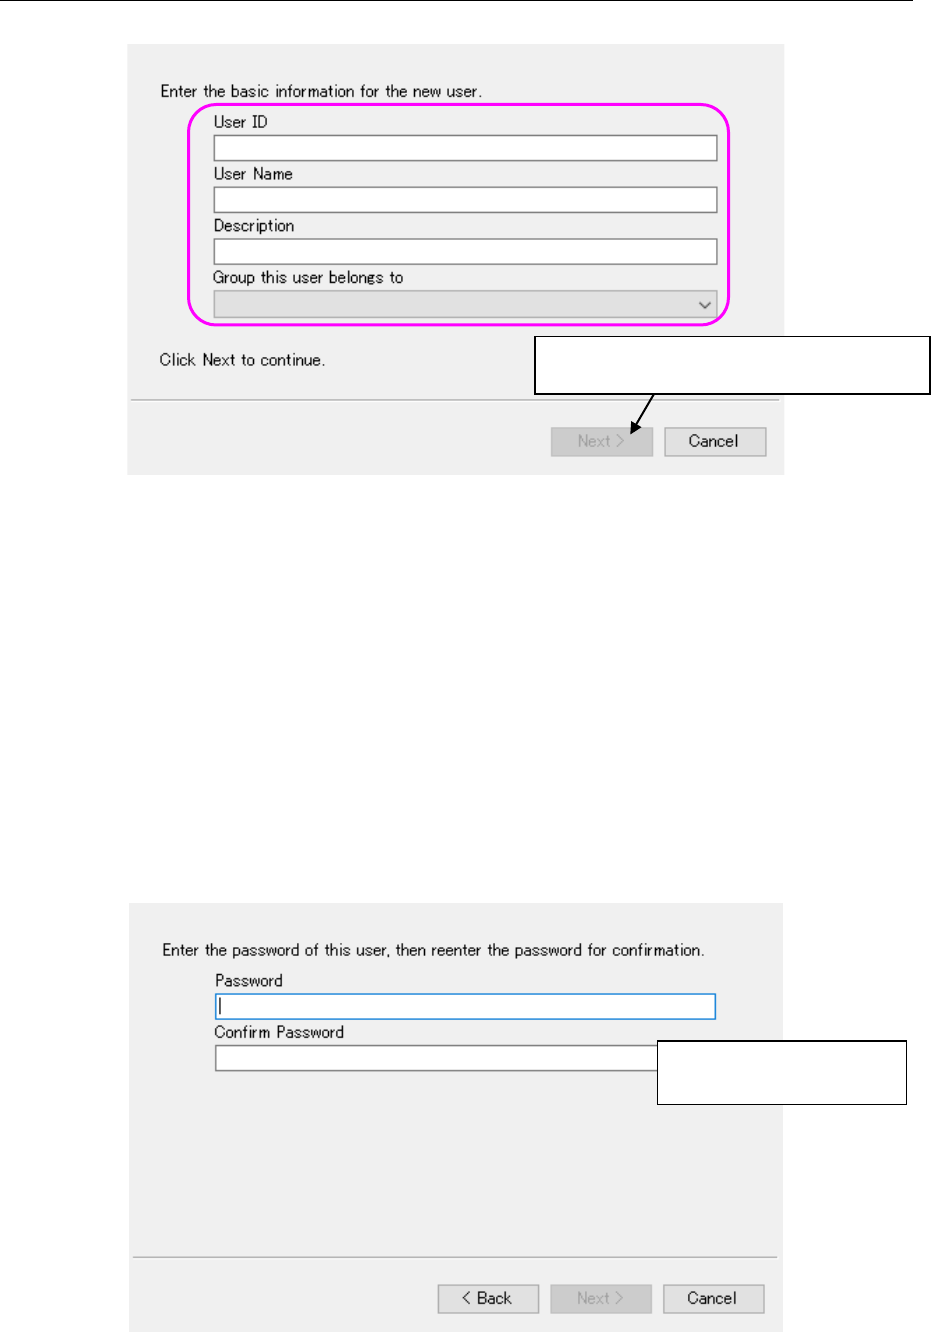
Click the <Add> button on the “User Management” screen.
Figure 4.2-2 “Add User” dialog box – Basic information entry screen
User ID : Enter the user ID here (this is a required item). You can specify up to 64
half-width (one byte) characters as a user ID, and you can use all characters
except for the following: double-width (two-bytes) characters, “ / ¥ [ ] :
(colon) ; (semicolon) | = , (comma) + * ? < > . (period) and a user ID
specified with blank characters only.
User Name : You can specify up to 64 half-width characters as a user name.
Description : You can specify up to 256 half-width characters.
Group this user belongs to : You have to specify this field. Select a group name
registered for a group from the combo box.
When you select the <Next> button on the screen above, the system checks the entered user ID.
Enter the password.
Figure 4.2-3 “Add User” dialog box – Password setting screen
You can specify up to 16
half-width characters.
* When you enter data in each field above,
the <Next> button is enabled.
JaNets Instruction Manual 4. User Management
4-4
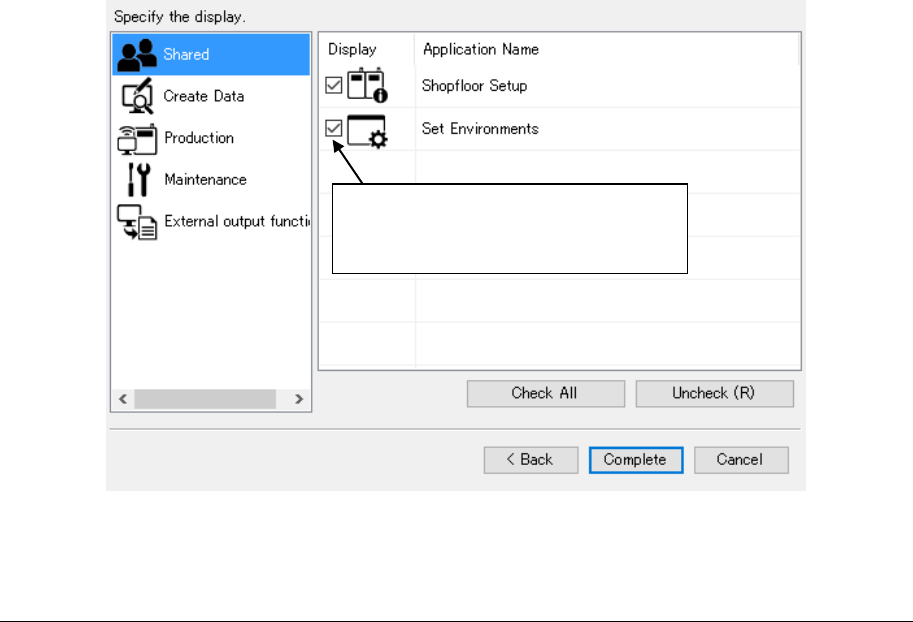
The application display is set by selecting “Next” on the above screen.
The user can select an application to be displayed on the launcher after the display setting.
The applications to be set are displayed for each of the group setting in which the user belongs
and the user setting.
Figure 4.2-4 Addition of users – Display setting screen
4.2.2 Deleting a user
When you select the <Delete> button on the “User Management” screen, you can delete a user.
However, if you select “Administrator” or if you select a name of a user who logged in the system,
the <Delete> button is displayed in gray and you cannot delete the selected user.
* The application is displayed by
checking off. It is not displayed by
removing a displayed check-off mark.