JANETS_INM.pdf - 第157页
JaNets In structio n Manual 5. Shopflo or Setu p 5- 37 MDB setting When you ad d a Data Ma nager opt ion to the sy stem and select t he “Use” ra dio but ton of the “Server” for the “J aNets Config uratio n” of the Laun c…
JaNets Instruction Manual 5. Shopfloor Setup
5-36
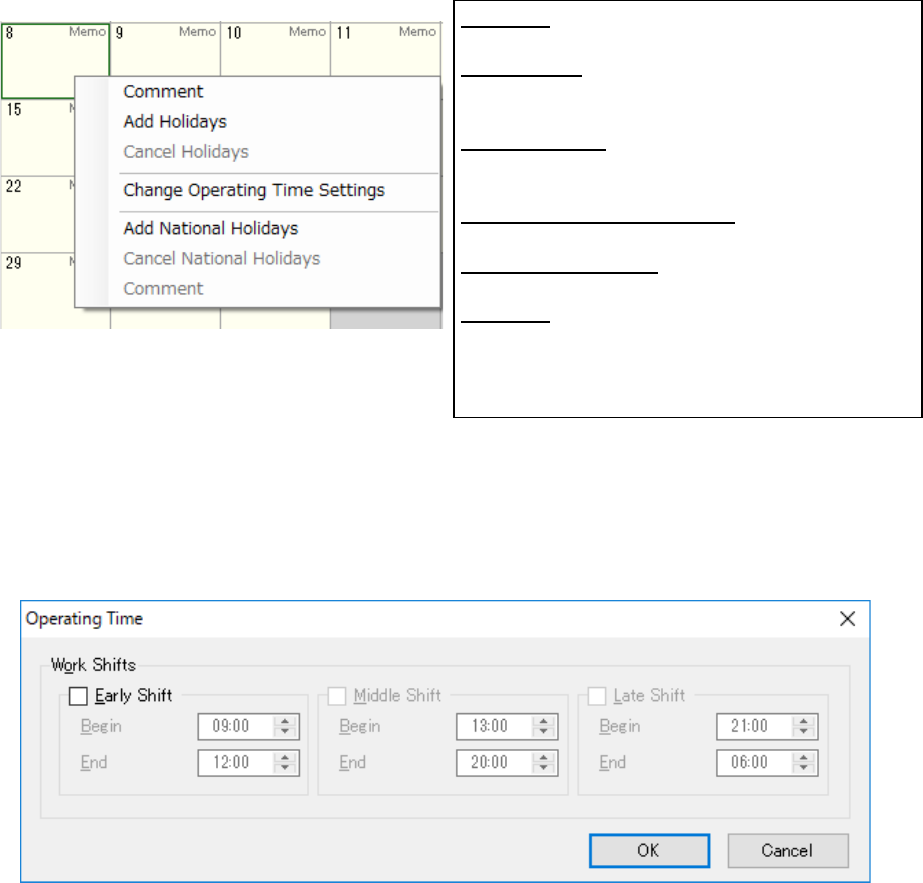
Figure 5.6-5 Calendar screen
Change the operating time
This function permits setting a time zone that is different from the time zone set by the
environment setting or user’s operating time. Set the start time and end time set in each of
“Early Shift”, “Middle Shift” and “Late Shift” so that there may not be any overlap time zone.
Figure 5.6-6 Change the operating time
Comment: A window is displayed. After description
is performed, a comment is displayed under the date.
Add Holidays: After Add holidays is executed for the
holiday indicated in red, the indicated color is changed
into a holiday.
Cancel Holidays: When Cancel holidays is executed
for the holiday indicated in red, the indicated color is
changed into a user’s working day.
Change Operating Time Setting: Changes the
operating time of the user working day.
Add National Holidays: Sets the selected day as a
national holiday.
Comment: A window is displayed. After description is
performed, a comment is displayed under the date. *
Up to 32 characters can be entered regardless of
double byte or single byte.
JaNets Instruction Manual 5. Shopfloor Setup
5-37
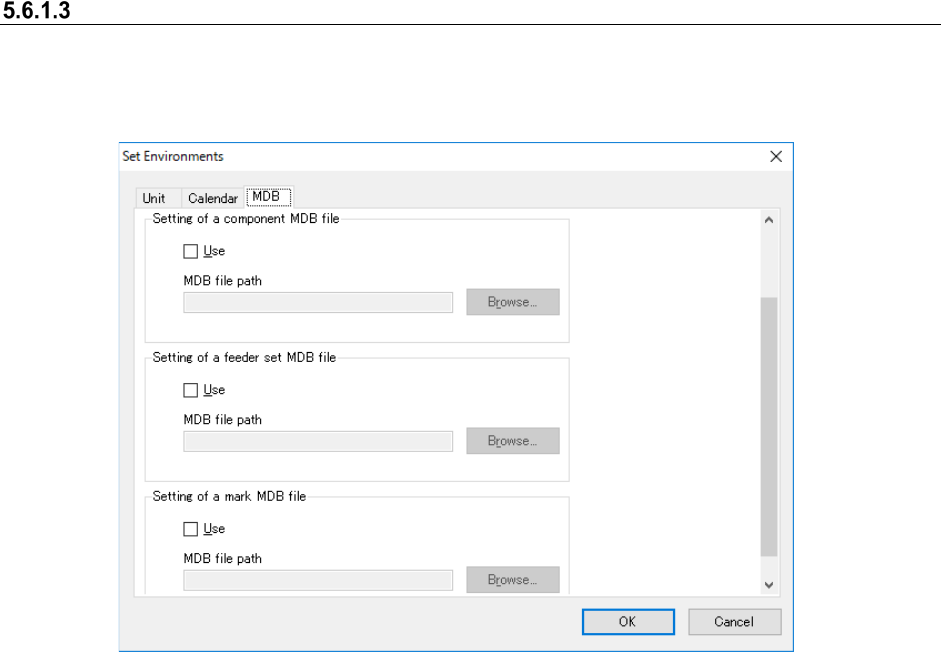
MDB setting
When you add a Data Manager option to the system and select the “Use” radio button of the
“Server” for the “JaNets Configuration” of the Launcher, you do not have to make the MDB
settings.
Figure 5.6-7 “Set Environments” screen (MDB)
Set the maximum number of display items of the component data to be displayed in the standing
information. Up to 20,000 items can be set.
Set the use/no use of the component MDB and set the path of the MDB file to be used.
Set the use/no use of the feeder set MDB and set the path of the MDB file to be used.
Set the use/no use of the mark MDB and the path of the MDB file to be used.
JaNets Instruction Manual 5. Shopfloor Setup
5-38
Setting up equipment
You can control the number of nozzles or feeders owned by a user. Select the [Tools] command
from the menu bar, and then the [Equipment Setup] command from the “Tools” menu. The
“Equipment Setup” screen appears.
Figure 5.6-8 [Tools] – [Equipment Setup]
Setting nozzles
Figure 5.6-9 “Equipment Setup” screen (Nozzle)
Setting the number of Supply device
Figure 5.6-10 “Equipment Setup” screen (Tape Feeder)
Standard Nozzles:
[Nozzle No.]: Nozzle Nos. 500 ~ 511, 501H ~ 503H,
506H ~ 508H, 601M ~ 604M, 606M, 608M ~ 611M,
607M, 619M ~ 621M and 7500 ~ 7509 are displayed.
Other Nozzles:
“Nozzle No.”: The nozzle number imported from the
INI file is displayed.
Key operations for the Standard Nozzles/Other
Nozzles:
Enter the number in the “Number” cell directly. When
you press the [ALT] key and the [O] key at the same
time, you can move to the top “Number” cell of the
“Other Nozzles.”
Use the up/down arrow key to move to the “Number”
cell above or below the current cell.
When you click the <OK> button without entering any
value in the “Number” cell, “0” is entered in the
“Number” cell.
Import:
The system obtains the nozzle number from the INI file
* When you import the nozzle number, put the INI file
in the installation folder \Custom\Nozzle of the
JaNets manually.
When no INI file is available, optimization cannot be
executed normally.
* Obtain INI file from the mounter main body.
Number: Set the number of tape feeders
owned by a user.
* Enter a number in the “Number” cell
directly.
* Use the up/down arrow key to move to the
“Number” cell above or below the current
cell.
* When you press the [ALT] key and the [L]
key at the same time, you can move to the
top “Number” cell.
* When you click the <OK> button without
entering any number in the “Number” cell,
“0” is entered in the cell.