JANETS_INM.pdf - 第215页
JaNets In structio n Manual 7. Program Editor 7-8 Figure 7.4 -5 Detail s etting scr een T able 7.4 -3 Detail setting items Item Contents Machine na me tab Displays the tabs of the ma chine of t he curre ntly s elected li…
JaNets Instruction Manual 7. Program Editor
7-7
Editing PWB Data (Circuit Settings)
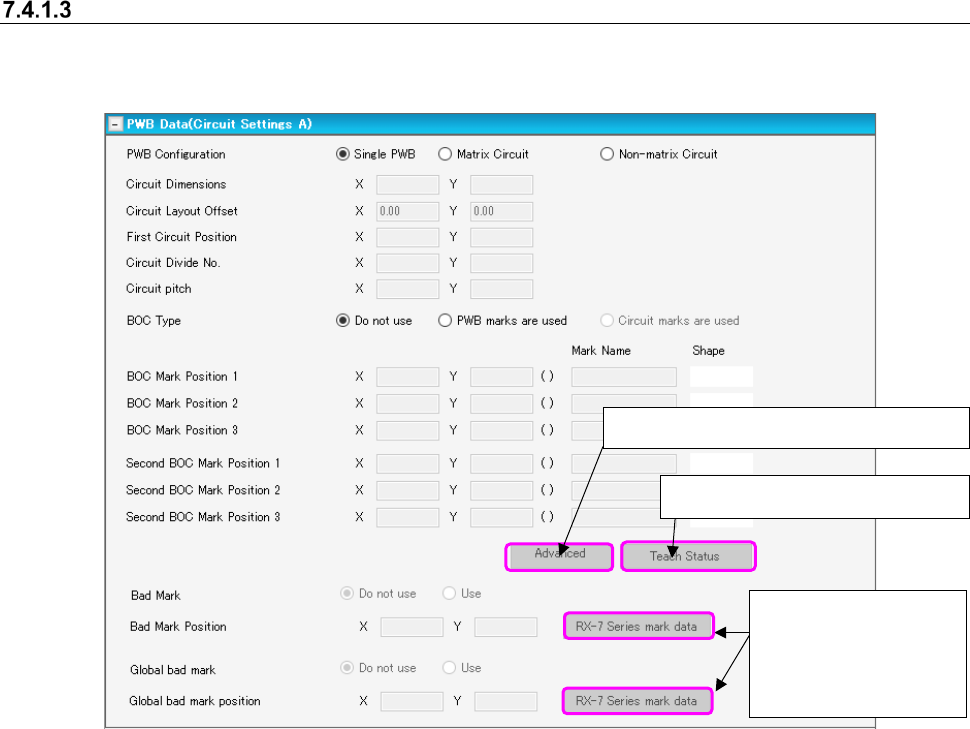
When you select the “PWB Data” from the tree view, and then the “Circuit Settings A,” the following
screen appears.
Figure 7.4-4 PWB data (Circuit A settings) screen
When you press the <Advanced> button, the BOC mark information for each machine can be
displayed or set.
Only RX-6/RX-7/RS-1/JM-100 can set the BOC mark.
The <Advanced> button is enabled only when two or more BOC mark positions are set or two or
more second BOC mark positions are set.
[When a JX-350 is used]
The area in which you are supposed to enter information on the third BOC mark is displayed.
It is displayed on the “Advanced settings” screen and the “Teach Status” screen also.
[In Case of the Line only for JM-10 and JM-20]
None of the menu item “Global bad mark,” the <Advanced> button and the <RX-7 series mark
data> button are displayed on the screen.
[In Case of the Line including JM-100]
RX-7 series Bad Mark Information becomes non-display.
Displays the “Teach Status” dialog.
Displays “Advanced settings” dialog.
Displays the dialog box
for setting bad mark
data to be used with an
RX-7 series.
JaNets Instruction Manual 7. Program Editor
7-8
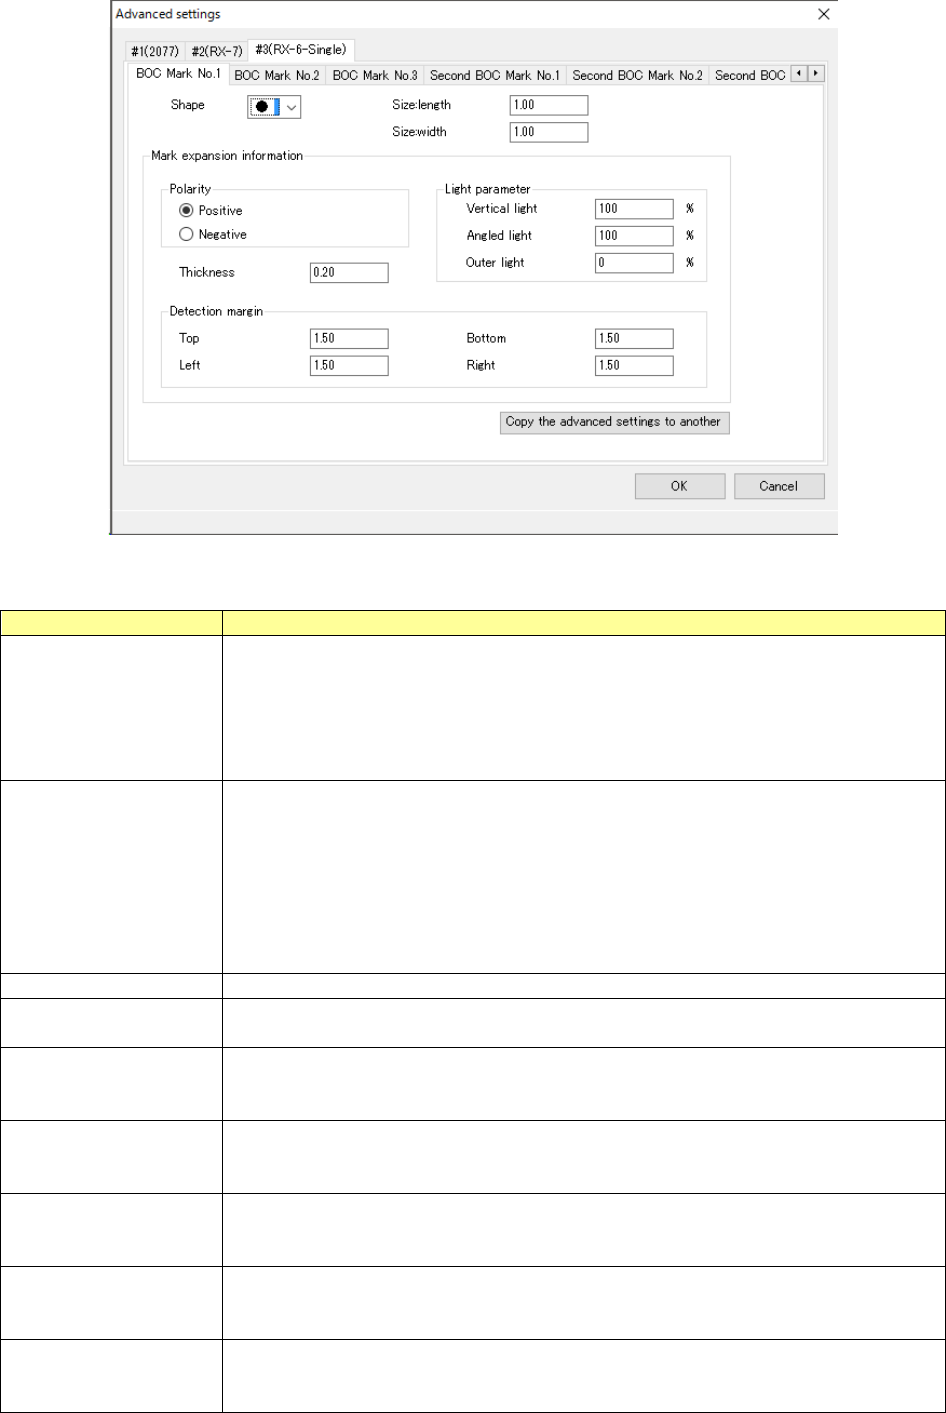
Figure 7.4-5 Detail setting screen
Table 7.4-3 Detail setting items
Item
Contents
Machine name tab
Displays the tabs of the machine of the currently selected line, and performs BOC mark
setting for each machine.
#1 (RX-7), #2 (RX-7) ----
Only RX-6/RX-7 can edit BOC marks.
The other machine or user template mark can display them but cannot edit them.
(Each item in the BOC mark setting is indicated in gray and cannot be edited.)
BOC mark No. tab
The tabs of BOC mark No.1 ~ 3 and second BOC mark No.1 ~ 3 are displayed and the
set value of each BOC mark is displayed. However, the BOC mark or second BOC
mark for which the coordinate position XY is not set in the “PWB data (circuit setting A)”
panel are displayed but cannot be edited.
When the specified BOC mark is already taught, (*) is indicated for the tab.
Example: BOC mark No.1 (*)
If the mark information in the tab is changed, the teaching information (*) of the tab is
cancelled.
Shape
Sets the mark shape from the combo box.
Vertical size and hori-
zontal size
Sets the mark size.
The input range is 0.5 mm to 3.00 mm.
Polarity
Sets how to image the mark for the PWB.
Select Positive (PWB = dark, mark = bright) or Negative (PWB = bright, mark = dark).
Default: Positive
Line width
Sets the line width of the skin shape.
Input range: 0.20 mm ~ half value of mark size
Default: 0.20 mm
Detection margin (up)
Sets the upper width to detect a mark.
Input range: 0.01 mm ~ (Visual filed – Mark size)/2
Default: 1.50 mm
Detection margin (down)
Sets the upper width to detect a mark.
Input range: 0.01 mm ~ (Visual filed – Mark size)/2
Default: 1.50 mm
Detection margin (left)
Sets the upper width for mark detection.
Input range: 0.01 mm ~ (Visual field – Mark size)/2
Default: 1.50 mm
JaNets Instruction Manual 7. Program Editor
7-9
Item
Contents
Detection margin (right)
Sets the upper width for mark detection.
Input range: 0.01 mm ~ (Visual field – Mark size)/2
Default: 1.50 mm
Lighting parameter, ver-
tical lighting
Sets the vertical lighting.
Input range: 0% ~ 200%
Default: 100%
Lighting parameter, an-
gle lighting
Sets the angle lighting.
Input range: 0% ~ 200%
Default: 100%
Lighting parameter, outer
ring lighting
Sets the outer ring.
Input range: 0% ~ 200%
Default: 0%
“Copy detail setting to
other marks” button
Copies the set mark information to other marks or the same model.
For details, refer to the “Copy the set mark information to other marks” screen.
OK button
Updates all the data set by detail setting and closes the screen.
The changed BOC mark is put to a production enable status and teaching is provision-
ally finished.
Cancel button
Throws away all the data set by detail setting and closes the screen.
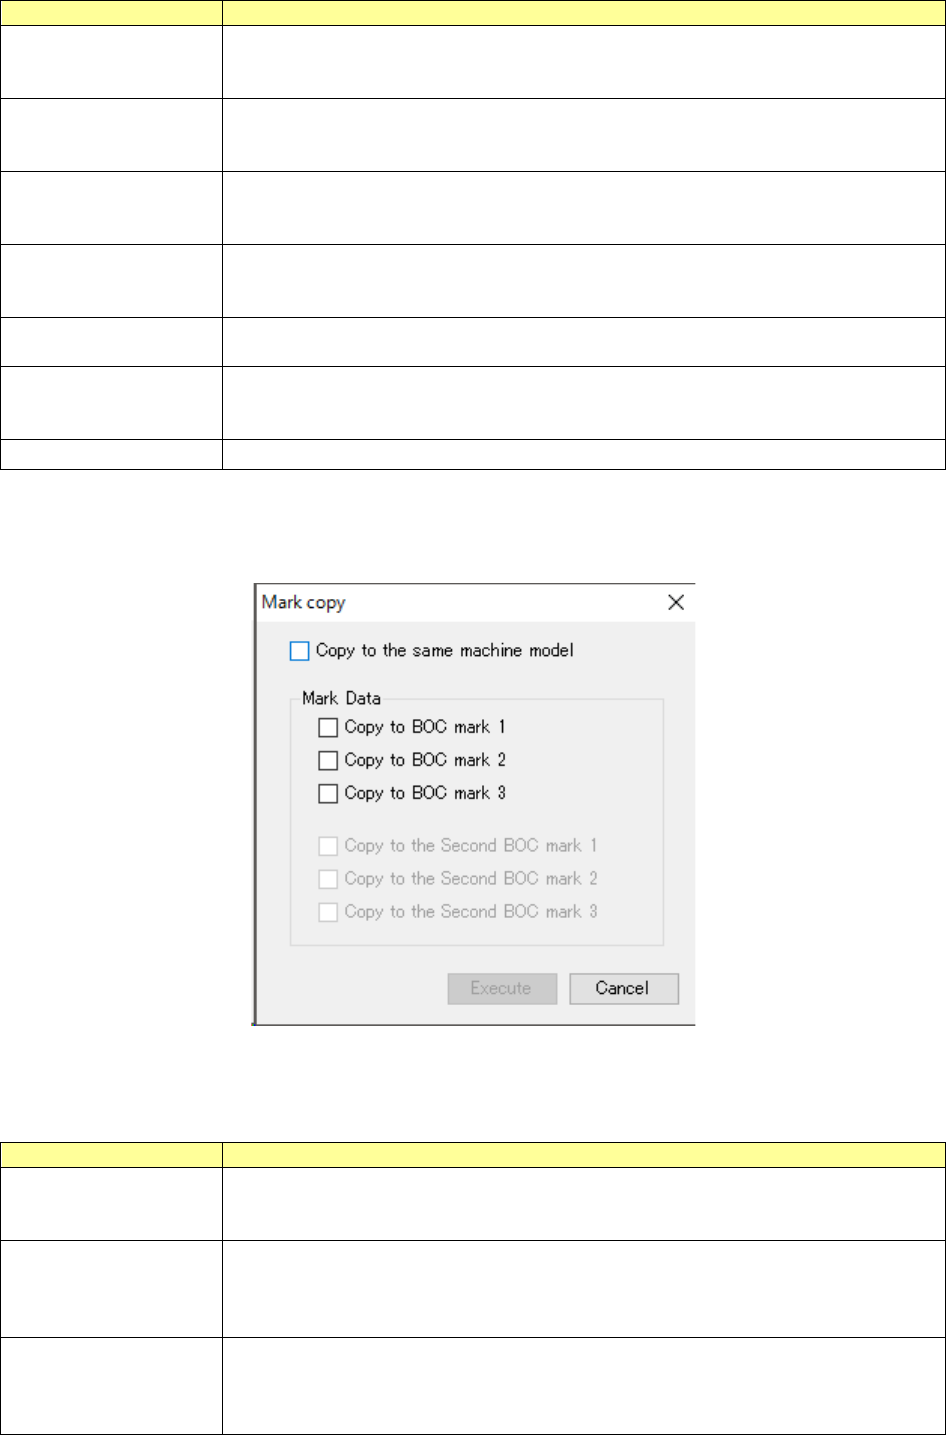
When you press the “Copy the detail setting to other marks” button of the detail setting screen, the
contents of the setting are copied to other marks or the same model.
Figure 7.4-6 “Copy the detail setting to other marks” screen
Table 7.4-4 Setting items to copy the detail setting to other marks
Item
Contents
Copy to the same model
The contents of BOC mark setting of the currently displayed machine are copied to the
BOC mark of the same model set by the mark data group box.
If the same model does not exit, the contents will not be copied.
Copy to BOC mark 1 The contents of currently displayed BOC mark setting are copied to BOC mark 1 of the
currently displayed machine. However, if the BOC mark 1 position and mark name of
the circuit setting are not set or BOC mark 1 is a user ten-plate mark, this item cannot be
selected.
Copy to BOC mark 2
The contents of currently displayed BOC mark setting are copied to BOC mark 2 of the
currently displayed machine. However, if the BOC mark 1 position and mark name of
the circuit setting are not set or BOC mark 2 is a user ten-plate mark, this item cannot be
selected.