JANETS_INM.pdf - 第227页
JaNets In structio n Manual 7. Program Editor 7- 20 7.4.2 Editing placeme nt data Placement data When you se lect the “ P lacement D ata ” fro m the tree view , t he following screen appears. Figur e 7.4 - 22 “ Placemen …
JaNets Instruction Manual 7. Program Editor
7-19
Setting the code parsing data
When you select the “2D Code (OCC),” “Multi-code read,” “Back side multi-code reader” and “2D
(individual)” in the 1D/2D code reader field on the “Basic Settings” screen, the “PWB data (Code
Parsing Data)” screen appears.
In addition, the “Code Parsing Data” is displayed in the tree view of the PWB data.
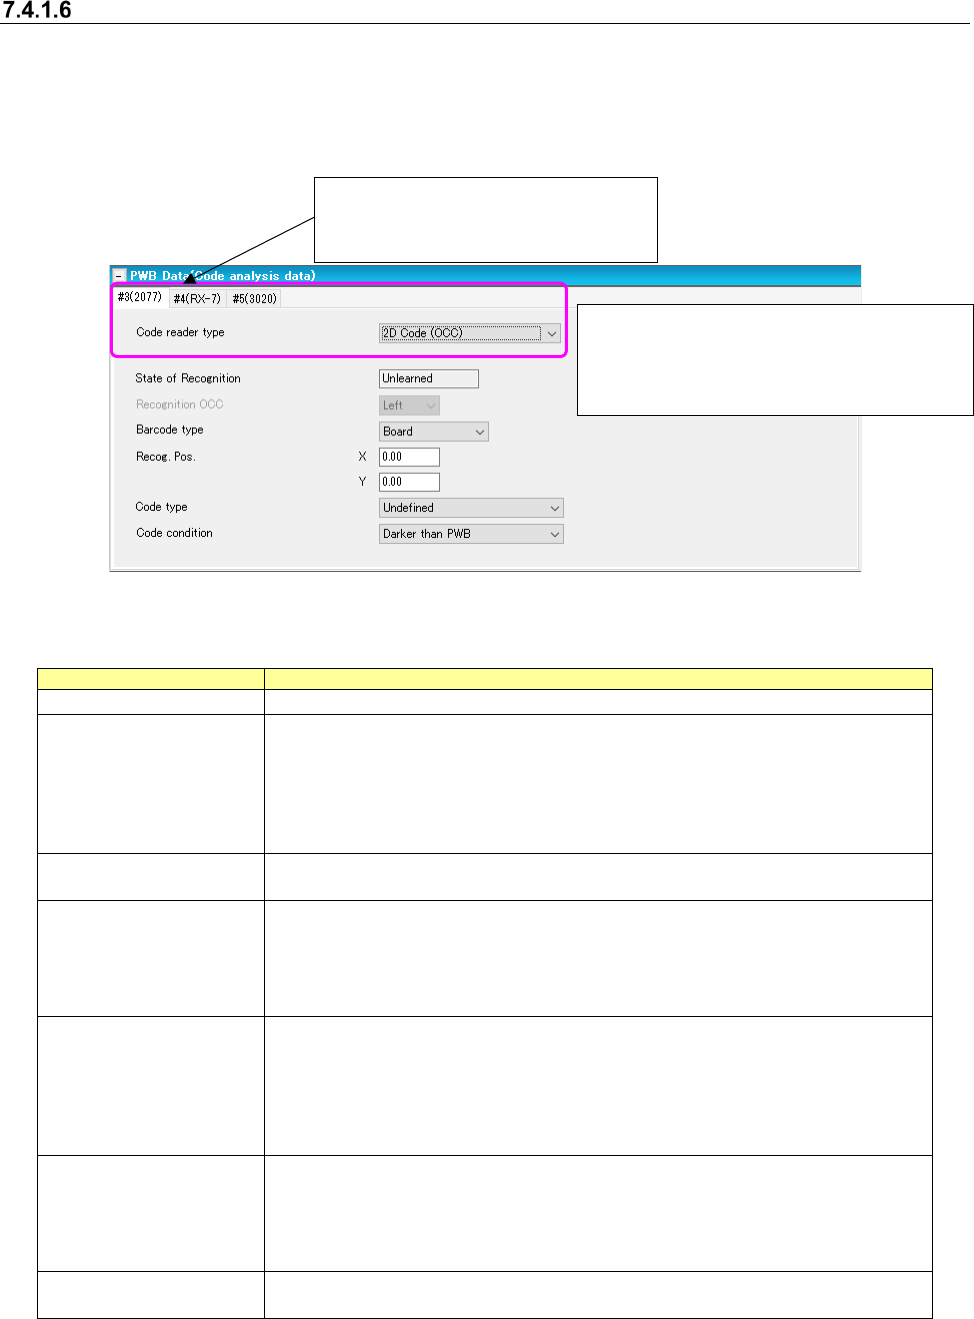
Figure 7.4-21 “PWB Data (Code Parsing Data)” screen
Table 7.4-9 PWB data (Code analytical data) screen
Items
Description
Code reader type
Specify the code reader type for each machine of the production line.
State of Recognition
Display the learning state of code data.
Only when all the machines which can use the code on a line have
referred to the state of mark recognition learning of code data and learned
it, the “Learned” is displayed.
Except for it, the “Unlearned “is displayed.
This item cannot be changed but be viewed.
Recognition OCC
Select an OCC used for recognition.
This is an unselectable item.
Barcode type
Select between “Board” (default) and “Circuit.”
When selecting “Board," use the barcode stuck on every board.
When selecting "Circuit," use the barcode stuck on every circuit.
When a PWB configuration is a "Matrix circuit" or a "Non-matrix circuit,"
"Circuit" is selectable.
Recog. Pos.
Input the coordinates from a reference point to a center of code.
A reference point changes depending on a barcode type.
When "Board” is selected as a barcode type, the coordinates come from
the board origin.
When "Circuit" is selected as a barcode type, the coordinates come from
the circuit origin.
Code type
Select a code type.
Select from among “Undefined” (default), "DataMatrix", "QR Code",
"Micro QR Code", and "1-D."
Only when a "multi-code reader" is selected in the setting of the
traceability of a basic setup, "1-D" is selectable.
Code condition
Select a code condition.
Select between “Darker than PWB” (default) and Brighter than PWB.”
* If any of the code parsing data is changed,
the “State of Recognition” menu item is set
to “Unlearned,” and the code data is
cleared.
*This menu item is displayed on the
screen only when you select “2D (indi-
vidual)” in the “1D/2D code reader”
JaNets Instruction Manual 7. Program Editor
7-20
7.4.2 Editing placement data
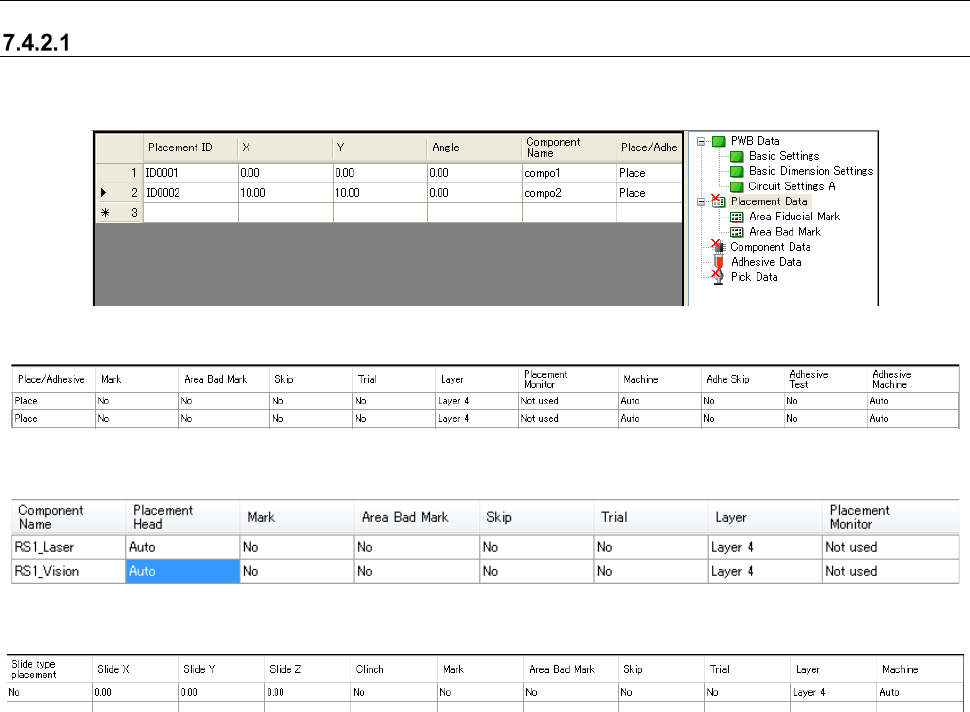
Placement data
When you select the “Placement Data” from the tree view, the following screen appears.
Figure 7.4-22 “Placement Data” screen 1
Figure 7.4-23 “Placement Data” screen 2 (In the line mode)
Figure 7.4-24 “Placement Data” screen 2 (In the EPU mode)
Figure 7.4-25 “Placement Data” screen 2 (In case of the Line Mode Including JM-100)
[When a production line includes a JM series machine]
None of the menu items, “Place/Adhesive,” “Placement Monitor,” “Adhe Skip,” “Adhesive Test” and
“Adhesive Machine” are displayed on the screen.
[When the JM series EPU is used]
The menu item “Placement Monitor” is not displayed on the screen.
[In Case of the Line Including JM-100 and EPU of JM-100]
Slide Mounting, Slide XYZ and Clinch Setting are displayed.
JaNets Instruction Manual 7. Program Editor
7-21
Placement ID and component name can be copied and pasted with the Ctrl+C key and the Ctrl+V
key.
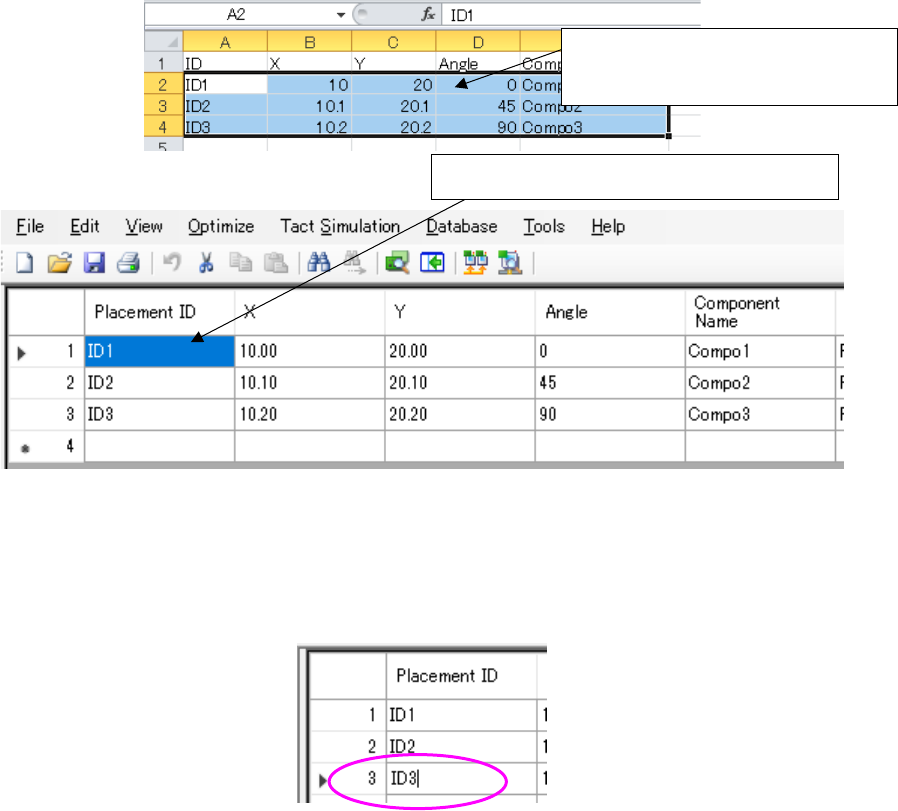
Regarding the placement ID, placement coordinates X/Y, angle, and component name, the data
created with another text editor or Excel can be copied with the Ctrl + C key, and then pasted with
the Ctrl + V key.
Figure 7.4-26 Copy and paste operation on the Placement data list screen
(If a comma is included in the placement ID, it cannot be pasted correctly. Convert it to another
character and then perform pasting.)
However, when the cell of placement ID and component name is editing, placement ID and com-
ponent name cannot be copied and pasted with the Ctrl+C key and the Ctrl+V key.
Figure 7.4-27 You cannot perform the Ctrl + V operation while editing a “Placement ID.”
Moreover, when the cell of placement ID and component name has a cursor, the "copy" and “paste”
of an edit menu cannot be performed. (The copy and paste of an edit menu is performed to a line
of placement data.)
* In the EPU mode, “Placement/application”, “Machine specification”, “Application skip”,
“Application test” and “Application machine specification” are not displayed.
In the line mode, “Placement head specification” is not displayed.
* Placement layer
A placement layer (displayed in the “Layer” column) is set in “the priority order of placement,”
and you can enter a value in the range of 1 to 10,000 when you use an RX-7 series.
When the placement data is uploaded changing the input range from 8 to 10,000 on the side of
an RX-7 series after being downloaded with the JaNets, the Program Editor considers the
placement data incomplete. (The layer is supposed to be blank.)
In order to re-optimize the placement data, set up again in the range of the layer 1 to 7.
The data row entered with Excel can
be copied at a time.
Copied data is pasted to the “Placement ID”