JANETS_INM.pdf - 第252页
JaNets In structio n Manual 7. Program Editor 7- 45 Pick conditions screen (JM - 100 S eries ) Figure 7.4 - 63 Pick conditions (JM -100 S eries ) scre en T able 7.4 - 27 Pick - up conditions (JM -100 S eries ) s creen it…

JaNets Instruction Manual 7. Program Editor
7-44
Pick conditions screen (JM-20 Series)
Figure 7.4-61 Pick conditions (JM-20 Series) screen
Table 7.4-25 Pick-up conditions (JM-20 Series) screen items
Item
Description
Z Two-Step
Speed Control
Specifies whether to control the speed at which the nozzle moves up or down to pick up a
component in two steps.
When you want to control the speed in two steps, enter the height at which the speed shall be
controlled for the second time to move up and move down the nozzle respectively.
Control Mode
Selects how the end of a nozzle should be pushed to pick up a component, “Stroke” or “Load.”
Picking Stroke
(Stroke)
Specifies how much to push the end of the nozzle to pick up a component in the unit of mm.
Default: 0.20 mm. When a gripper nozzle is used: 0.000 mm. When “Tray” is selected as
the packaging style: 1.000 mm. When the length of the shorter side of the outer dimensions
is less than 0.45 mm: 0.000 mm
Picking Stroke
(Load)
Specifies how much to push the end of the nozzle to pick up a component in the unit of gram.
The input range and the default value vary depending on the nozzle number and the centering
requirements.
Vacuum Control
Specifies whether to make an adjustment of vacuum time to pick up a component.
To make an adjustment, enter the adjusting time in the unit of ms.
Chuck nozzle
grip force
Changes the chuck nozzle gripping force by changing the vacuum pressure with the electro-
pneumatic regulator.
Select the grip force among “Weak,” “Medium” and “Strong.”
Waiting time after
a component is
detected
Sets the waiting time from when a component is detected until when it is picked up.
* You can set this item only when “Stick” or “INS Bulk” is selected as the packaging style.
Pick conditions screen (JM-10 Series)
Figure 7.4-62 Pick conditions (JM-10 Series) screen
Table 7.4-26 Pick-up conditions (JM-10 Series) screen items
Item Description
Picking Stroke
(Stroke)
Specifies how much to push the end of the nozzle to pick up a component in the unit of
mm.
Vacuum Control
Specifies whether to make an adjustment of vacuum time to pick up a component.
To make an adjustment, enter the adjusting time in the unit of ms.
Waiting time after a
component is detected
Sets the waiting time from when a component is detected until when it is picked up.
* You can set this item only when “Stick” or “INS Bulk” is selected as the packaging style.
JaNets Instruction Manual 7. Program Editor
7-45
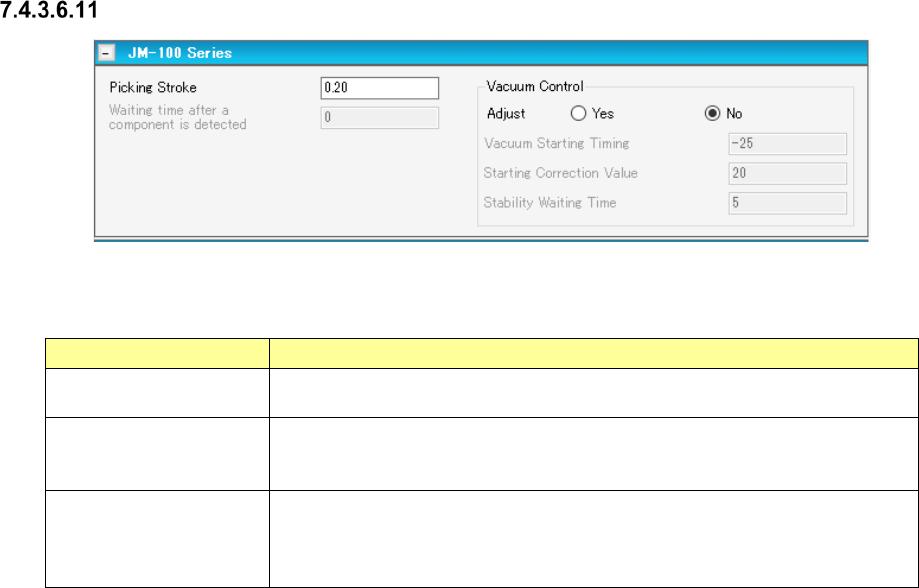
Pick conditions screen (JM-100 Series)
Figure 7.4-63 Pick conditions (JM-100 Series) screen
Table 7.4-27 Pick-up conditions (JM-100 Series) screen items
Item Description
Picking Stroke
(Stroke)
Specifies how much to push the end of the nozzle to pick up a component in
the unit of mm.
Vacuum Control
Specifies whether to make an adjustment of vacuum time to pick up a
component.
To make an adjustment, enter the adjusting time in the unit of ms.
Waiting time after a
component is detected
Sets the waiting time from when a component is detected until when it is picked
up.
* You can set this item only when “Stick” or “INS Bulk” is selected as the
packaging style.
JaNets Instruction Manual 7. Program Editor
7-46
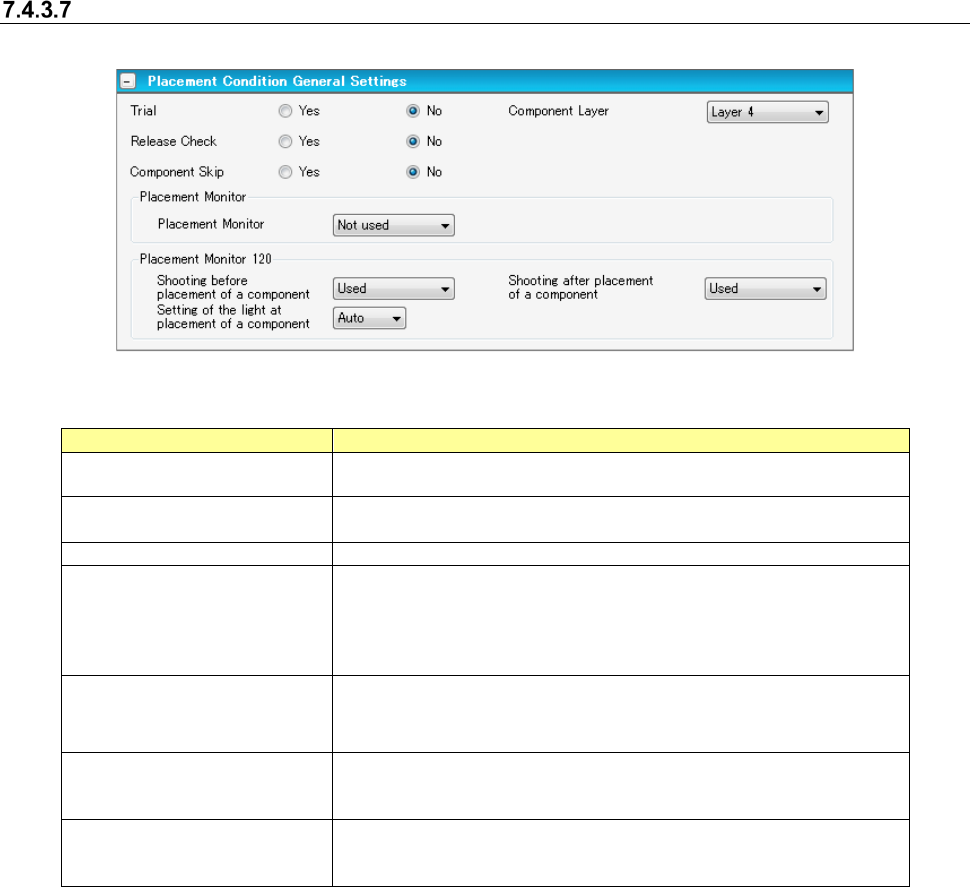
Placement conditions general setting screen
For component placement, settings are made according to the general data of the machine type.
Figure 7.4-64 Placement conditions general setting screen
Table 7.4-28 Placement condition common setting screen items
Item
Description
Trial
Specifies for every component whether the component is placed at
the time of execution of a trial.
Release Check
Specifies whether the component that is left after placement of laser
centering component is checked by laser.
Component Layer
Select placement sequence by component.
Placement Monitor
Specifies the operation of a placement monitor for every component.
Select one from among the “Not image” (default), “Image,” “Compo-
nent existence,” and “Movie.”
When you use a Placement Monitor for an RX-6, specify the "Place-
ment Monitor 120."
Placement Monitor 120
Shooting before placement
of a component
Specify whether or not to image before placement.
Placement Monitor 120
Shooting after placement of
a component
Specify whether or not to image after placement.
Placement Monitor 120
Setting of the light at
placement of a component
Select the light from "Auto" or 1~8 at the time of placement.
[When a production line includes a JM series machine]
None of the menu items, “Placement Monitor” “and “Placement Monitor 120” are displayed on the
screen.