JANETS_INM.pdf - 第298页
JaNets In structio n Manual 7. Program Editor 7- 91 Icon Description Displa ys the editin g mark er for setting t he com ponent cent er of exter nal dim en- sions. Blue m arker: Sets the c enter position of the com ponen…
JaNets Instruction Manual 7. Program Editor
7-90
Odd-shape body information (without lead)
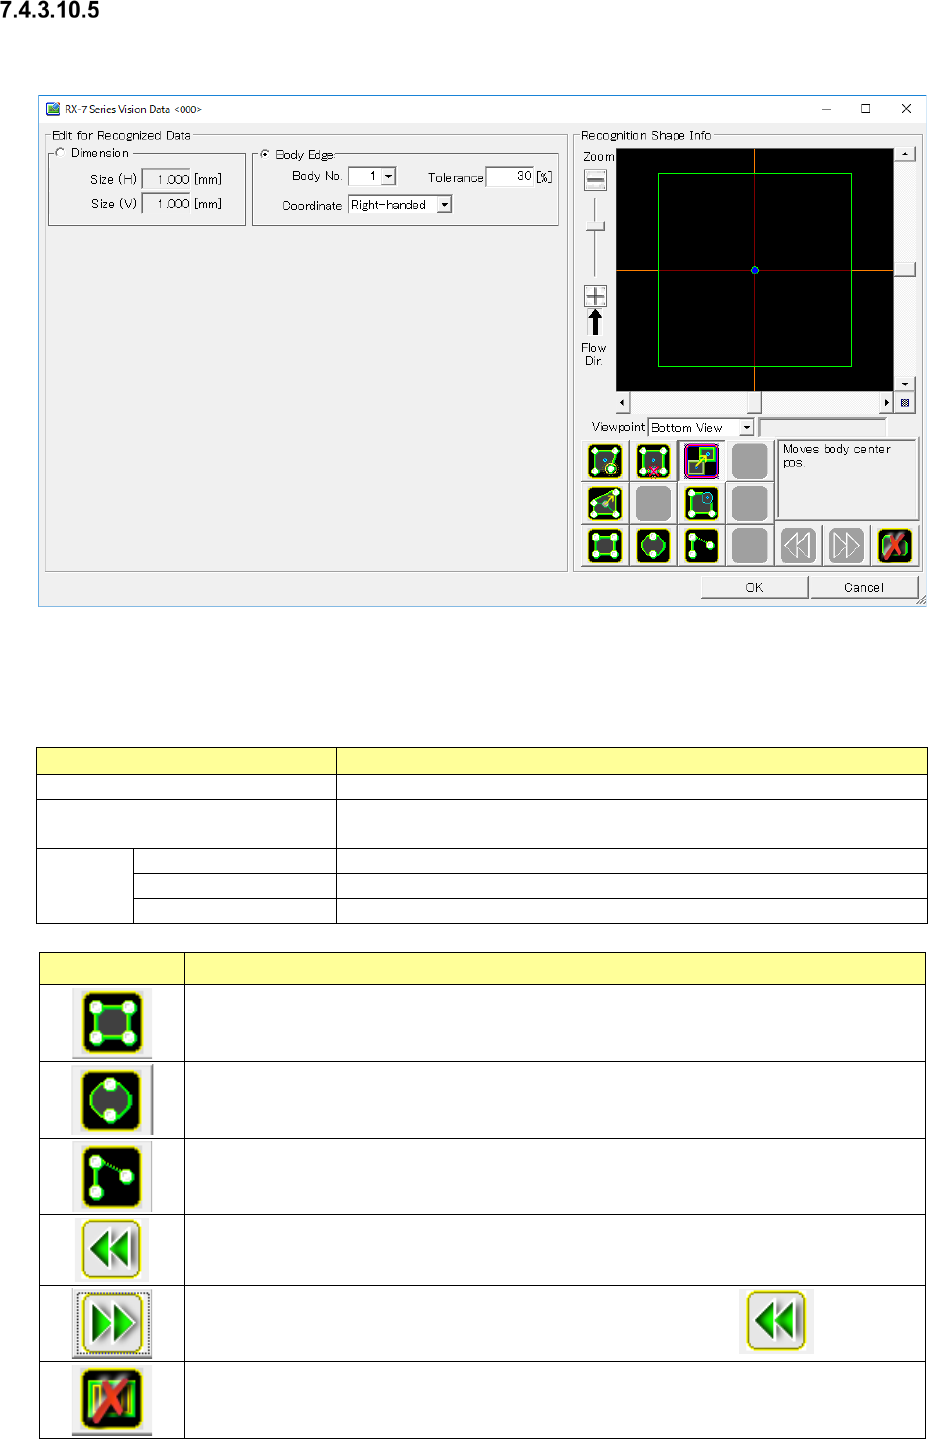
When you press the <Edit> button, the screen like one shown below appears.
Figure 7.4-132 “RX-7 Series Vision Data <ODD>” screen
(for an oddly-shaped component with no lead)
Table 7.4-67 RX-7 Series Vision Data screen
(for an oddly-shaped component with no lead) setting items
Item name
Description
Component image
Takes in a component image.
External dimensions
Changes the center position and screen resolution in the recog-
nition shape window.
Body
Body No.
Select a body No.
Tolerance
Enter the tolerance in the range of 1% ~ 99%.
Coordinate system
Select one of “Left-hand polarity” and “Right-hand polarity.”
Icon
Description
Newly creates the body information of a rectangular shape.
Newly creates the body information of a circular shape.
Newly creates the body information of the start point only.
Put back recognized data editing to the preceding status.
Retries the put-back operation to the preceding status by the icon.
Deletes all the lead parameters.
JaNets Instruction Manual 7. Program Editor
7-91
Icon
Description
Displays the editing marker for setting the component center of external dimen-
sions.
Blue marker: Sets the center position of the component.
Adjusts the image resolution.
Displays the editing marker for adding a peak to the body. Touch the peak position
of the body on the take-in screen to create a new peak. Or divide the side by
touching the white marker displayed on the side.
Displays the editing marker for deleting a side or peak of the body.
White marker: Deletes the side or peak position.
Blue marker: Deletes the information of the all the body parameter selected by
[Body No.].
Displays the editing marker for moving the center position of the body.
Blue marker: Sets the center position of the body.
Displays the editing marker for setting the length of each side of the body.
White marker: Sets the side length or peak position of the body.
Displays the editing marker for setting the soundness of each side or peak of the
body.
White marker: Adds the roundness of the side or peak.
Light blue maker: Adjusts the magnitude of the roundness.
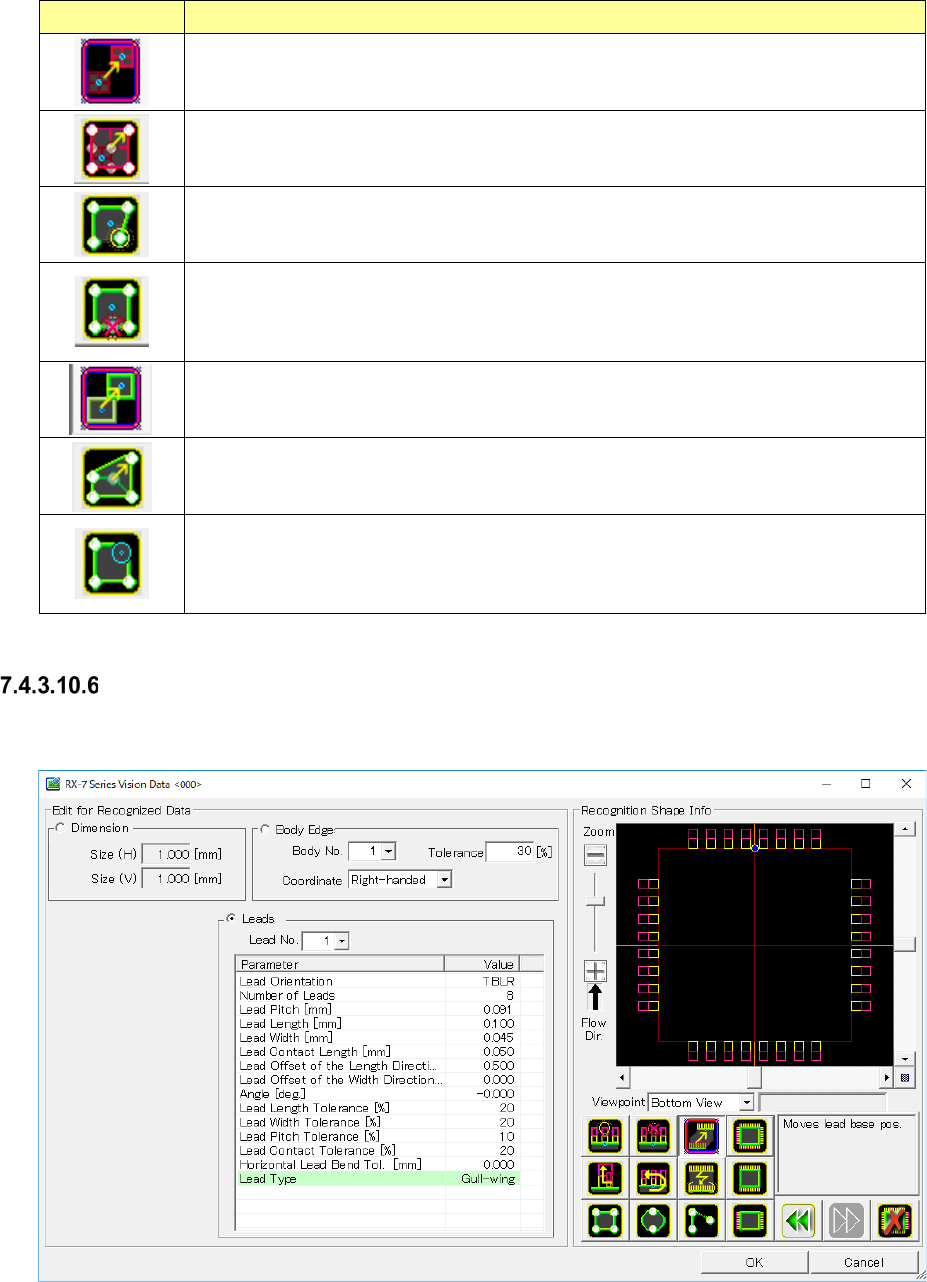
Odd-shape body information (with lead)
When you press the <Edit> button, the screen like one shown below appears.
Figure 7.4-133 “RX-7 Series Vision Data <ODD_LEAD>” screen
(for an oddly-shaped component with leads)
The input items are the same as the odd-shape body information (without lead).
JaNets Instruction Manual 7. Program Editor
7-92
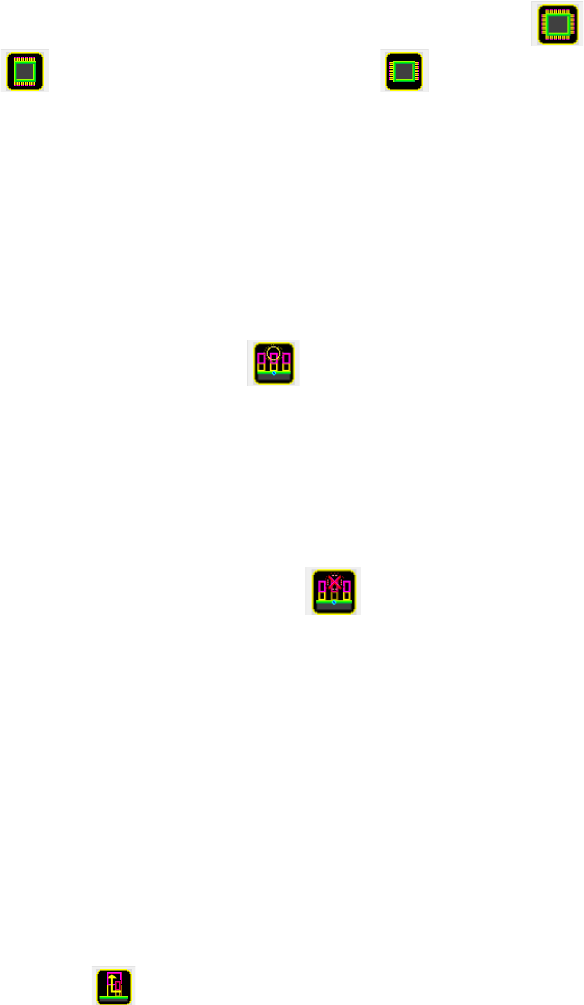
◆ New lead creation/lead number adjustment
1) Click [Lead].
2) In [Tool box], select a type of a newly created lead among the all-direction lead button ,
up/down direction lad button and left/right direction lead button . Then, click the
target button. (The up/down direction lead button is described here.)
3) After a new lead is created, a new lead set is created on the frame of external dimensions.
The lead portion of the lead set is displayed by yellow frame line and the contact surface is
displayed by pink. In the reference position of the lead set, a blue marker is displayed.
4) In the combo box of [Lead No.], select the lead No. of the lead to be edited.
5) To add the number of leads, click the read adding button in [Tool box].
6) Click the position where leads are to be added in the outside of the lead set to which the
number of leads are added. The number of leads required for this position will be added.
When the blue marker in the reference lead position is clicked with the mouse, one lead is
added.
7) To reduce the number of leads, click the lead reducing button in [Tool box].
8) At the end of the lead, a white marker is displayed. Click the marker of the lead to be deleted
with the mouse, the lead is deleted. (If any other than both ends of the lead is deleted, lead
loss information is configured.)
◆ Lead width/pitch/length editing
1) Click [Lead]
2) In the combo box of [Lead No.], select the lead No. of the lead to be edited.
3) In [Tool box], click the lead size button .
4) To change the lead length, click the white upward marker at the end of the lead with the
mouse and drag it as it is.
5) The lead length varies depending to the mouse button position. After the end of the adjust-
ment, release the mouse button.