JANETS_INM.pdf - 第330页
JaNets In structio n Manual 7. Program Editor 7- 123 (4) Replacement contents (L aser Centerin g (Laser Centering Ge nera l Settings)) Set the data on the laser c entering method to be r eplaced on t he followin g “ Las …
JaNets Instruction Manual 7. Program Editor
7-122
(2) Replacement contents (Packaging Style)
Set the data on the packaging style to be updated on the following screen.
Figure 7.6-6 “Replacement contents (Packaging Style)” screen
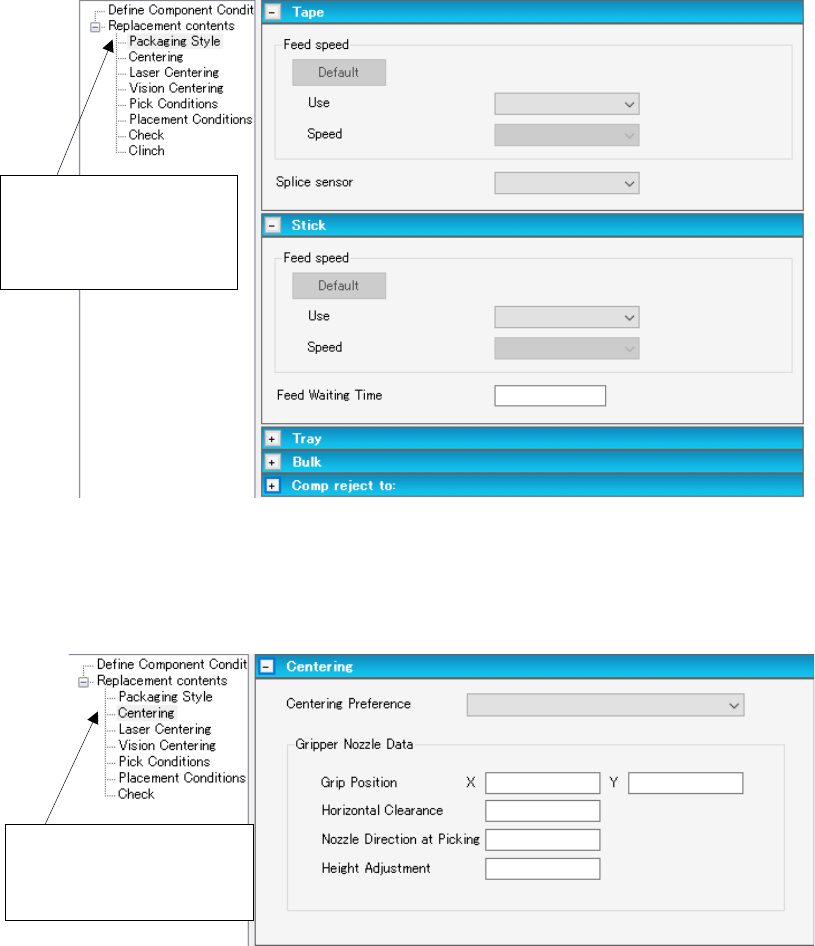
(3) Replacement contents (Centering)
Set the data on the centering method to be replaced on the following screen.
Figure 7.6-7 “Replacement contents (Centering)” screen
Select “Centering” from the
tree view to display the
“Centering” screen.
Select “Packaging Style”
from the tree view to dis-
play the “MTC/MTS/DTS”
screen.
JaNets Instruction Manual 7. Program Editor
7-123
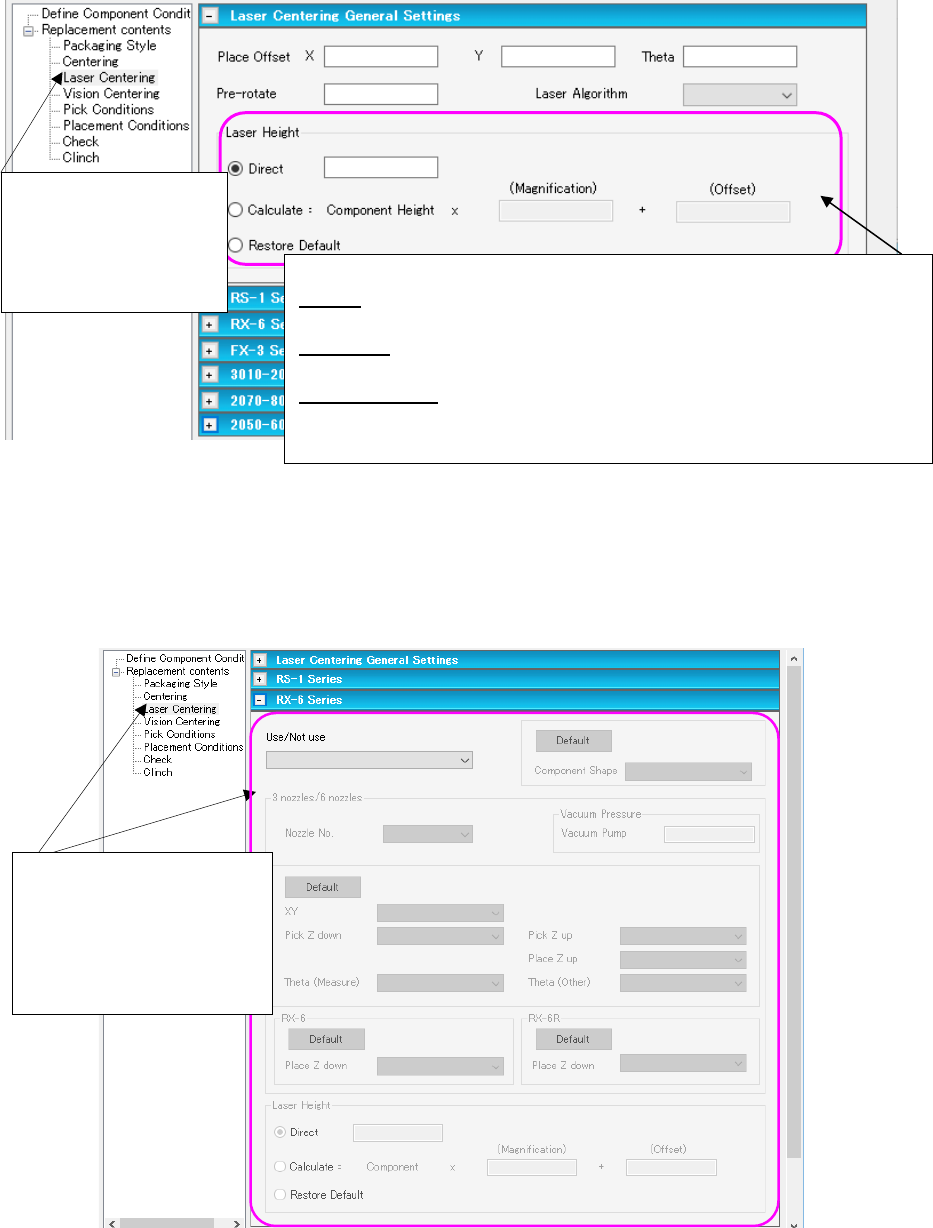
(4) Replacement contents (Laser Centering (Laser Centering General Settings))
Set the data on the laser centering method to be replaced on the following “Laser Centering
General Settings” screen.
Figure 7.6-8 “Replacement contents (Laser Centering
(Laser Centering General Settings))” screen
(5) Replacement contents (Laser Centering) for an RX-6 series
This section describes data to be replaced that is set on the “Laser Centering (RX-6 series)”
screen as a typical example.
Figure 7.6-9 “Replacement contents (Laser Centering (RX-6 Series))” screen
Select “Laser Centering”
from the tree view to
display the “Laser Cen-
tering General Settings”
screen.
<Laser Height>
Direct: Enter an offset value from the top side of a component to the laser
surface.
Calculate: Enter a scaling factor in the “Magnification” field and an offset
value in the “Offset” field for the component height.
Restore Default: This radio button returns the entered value to the default
value.
* Enter these fields in the same manner on the screens shown below too.
Select “Laser Centering”
from the tree view to display
the “Laser Centering Gen-
eral Settings” screen.
Then, open the RX-6 series
screen on the right side.
JaNets Instruction Manual 7. Program Editor
7-124
Table 7.6-2 Menu items on the “Replacement contents
(Laser Centering (RX-6 Series))” screen
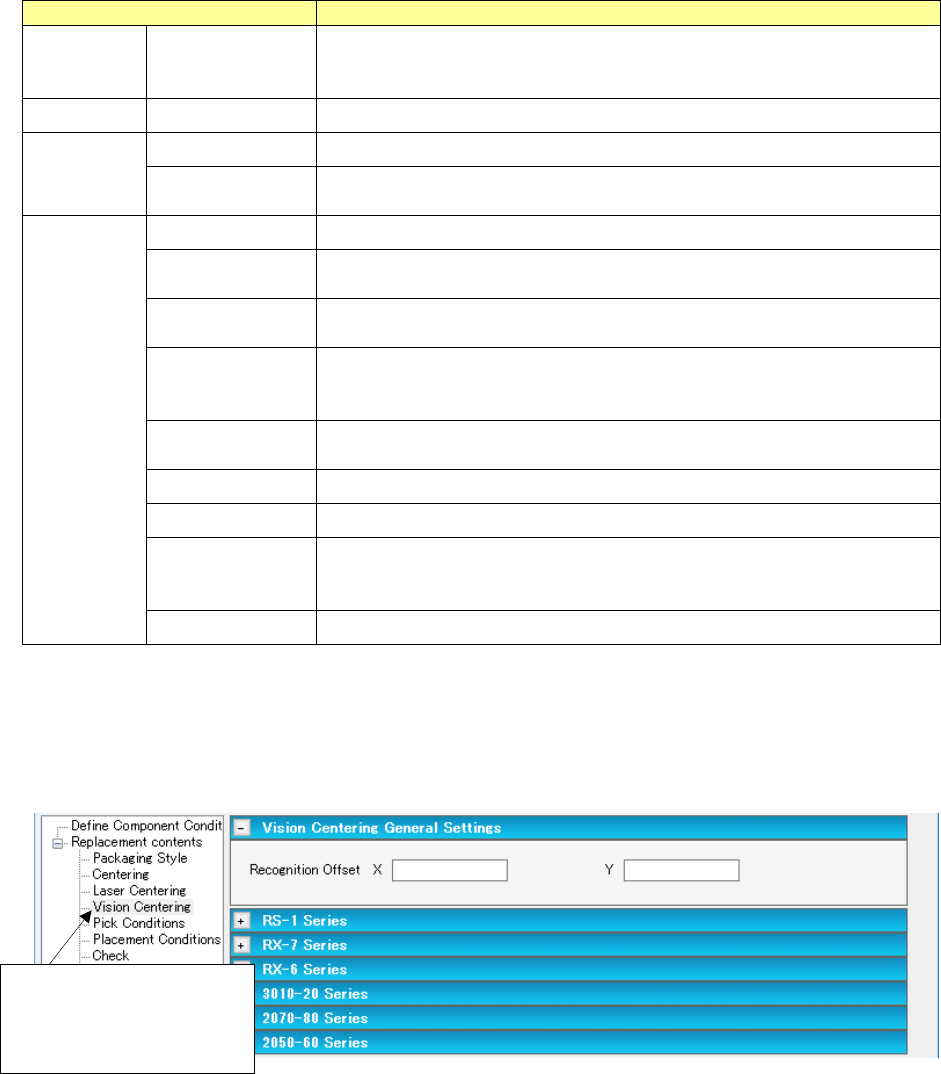
(6) Replacement contents (Vision Centering (Vision Centering General Settings))
Set the data on the vision centering method to be replaced on the following “Vision Centering
General Settings” screen.
Figure 7.6-10 “Replacement contents
(Vision Centering (Vision Centering General Settings))” screen
Menu item
Description
Use/Not use Use/Not use Specify whether to use the laser centering method or not in the combo box.
Select one of the following: “Use (applicable to “Use” data only),” “Use (ap-
plicable to “Not use” data only),” “Use (applicable to all data)” and “Not use.”
Nozzle No.
Nozzle number
Set a nozzle number in the combo box.
Vacuum
Pressure
Ejector
Set the ejector whose pressure reaches a value for picking up a component.
Vacuum Pump
Set the vacuum pump whose pressure reaches a value for picking up a
component.
Speed XY Set the XY-axes speed in the combo box.
Pick Z down
Set the speed for moving down the Z-axis to pick up a component in the
combo box.
Pick Z up
Set the speed for moving up the Z-axis to pick up a component in the combo
box.
Place Z down Set the speed for moving down the Z-axis to place a component on a board
in the combo box.
Set this menu item for an RX-6 and that for an RX-6R separately.
Place Z up
Set the speed for moving up the Z-axis to place a component on a board in
the combo box.
Theta (Measure) Set the theta-axis speed (during measurement) in the combo box .
Theta (Other) Set the theta-axis speed (unless it measures) in the combo box .
Component
Shape
Set the component shape in the combo box.
Select the shape among “Restore Default,” “No Definition,” “Config0,” “Con-
fig1,” “Config2,” “Config3” and “Config5.”
<Default> button
Restores each speed to the default value.
Select “Vision Centering”
from the tree view to display
the “Vision Centering
General Settings” screen.