JANETS_INM.pdf - 第408页
JaNets Instr ucti on Man ual 8. Job Optim izer 8- 23 Deletin g a r eservati on file fr om a d atabas e Perform the op eratio n ① or ② below . Figure 8.3 - 38 Main scr een – [Program Explorer (“Manage ”)] – [Delet e] ② Se…
JaNets Instruction Manual 8. Job Optimizer
8-22
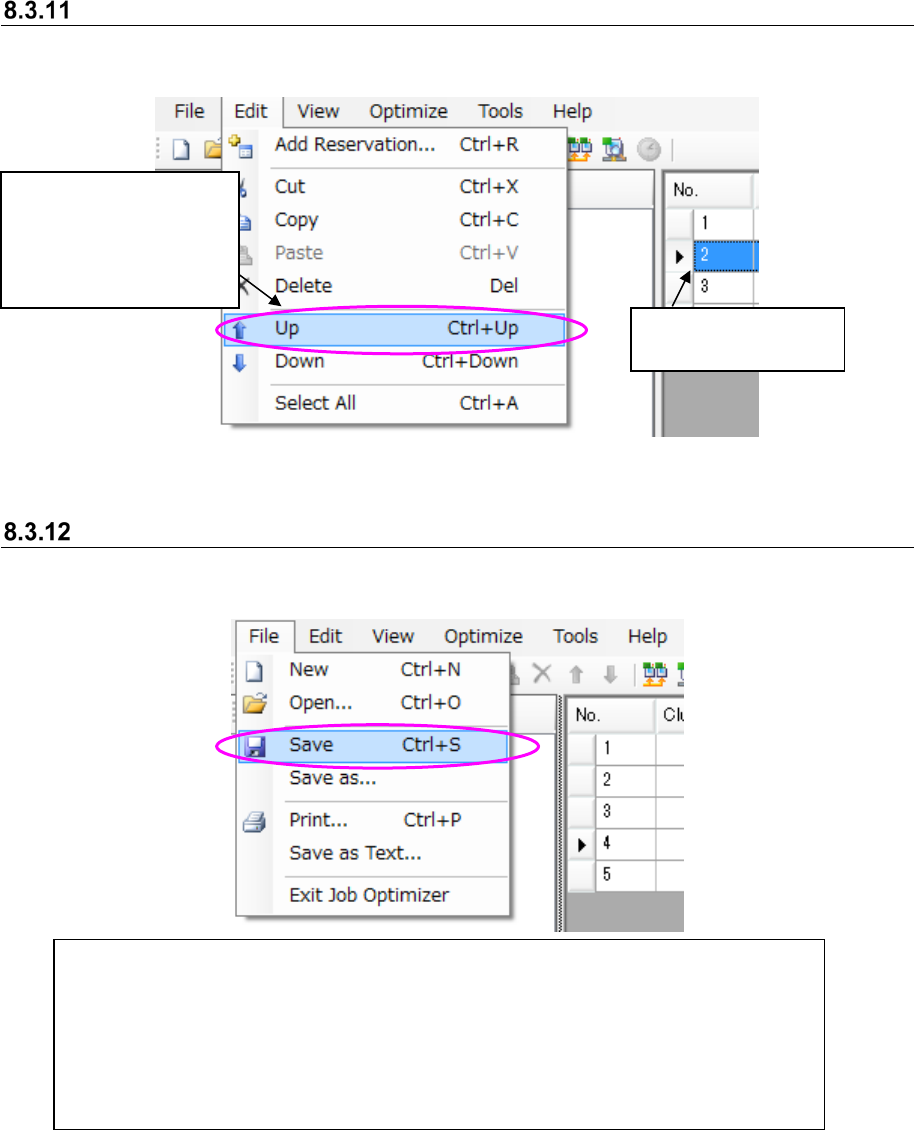
Reservation list – Moving reservation data
Follow the instructions ① and ② below.
Figure 8.3-36 Main screen – [Edit] – [Up]
Reservation list – Saving a reservation file
Follow the instruction ① or ② below.
Figure 8.3-37 Main screen – [File] – [Save]
①
Select the [File] command, and then the [Save] command.
②Select the [File] command, and then the [Save as] command.
* As the initial folder of the dialog box opened with following the instruction ②,
the folder “reservation file folder of the selected line (to be set with “ Shop Floor Setup”)
+ year (4 digits) folder + Month (2-digit) folder” is opened.
The default reservation file name is displayed as “year (4 digits) month (2 digits) day
(2 digits) hour (2 digits) minute (2 digits) second (2 digits)”.
② Select the [Edit]
command, and then
the [Up] command or
the [Down] command
on the “Edit” menu.
①Select a line on the
Reservation list.
JaNets Instruction Manual 8. Job Optimizer
8-23
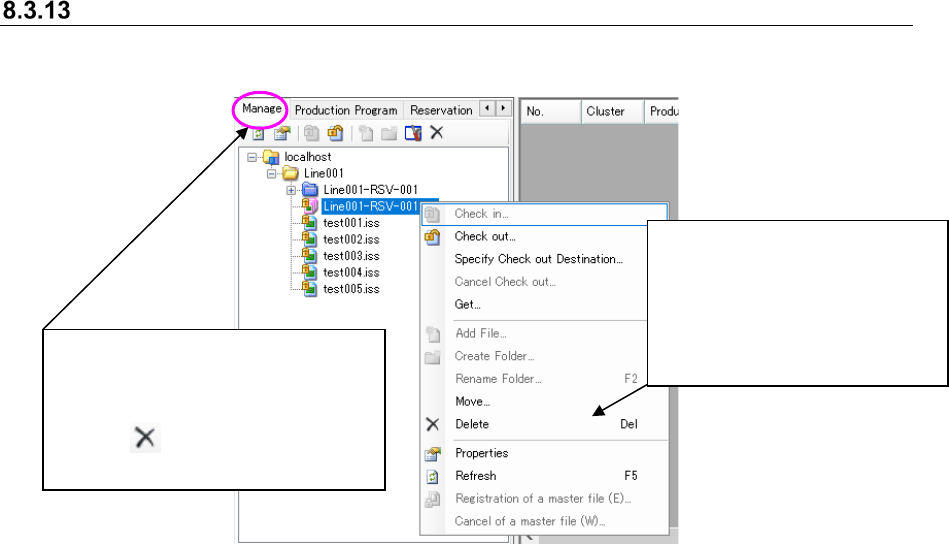
Deleting a reservation file from a database
Perform the operation ① or ② below.
Figure 8.3-38 Main screen – [Program Explorer (“Manage”)] – [Delete]
②
Select the [Delete] command.
* The confirmation message for
deleting the file appears on
the screen. When you click
the <Yes> button, the selected
file is deleted, and the
message is closed.
①
Select a reservation file (or two or
more reservation files) displayed on
the “Manage” tab of the Program
Explorer, and then click the “Delete”
icon ( ) of the tool bar for the
Program Explorer.
JaNets Instruction Manual 8. Job Optimizer
8-24
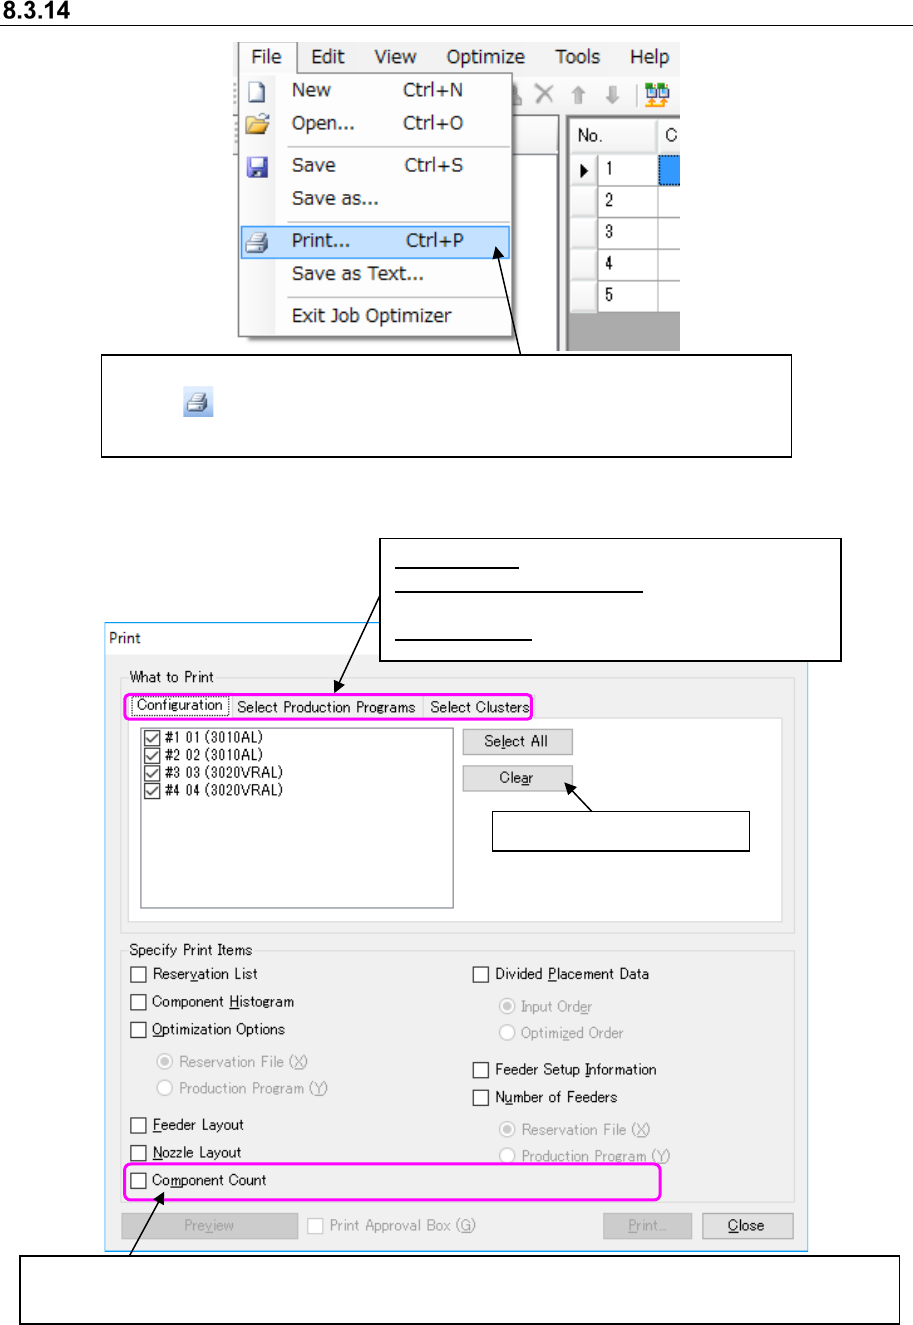
Print
Figure 8.3-39 Main screen – [File] – [Print]
Figure 8.3-40 “Print” dialog box ①
Configuration: Changes the machine to print.
Select Production Programs:
Changes a production program to be printed.
Select Clusters: Changes a cluster to be printed.
Select the [File] command, and then the [Print] command, or click the
“Print” ( ) tool from the toolbar. The “Print” dialog box ① appears on the
screen.
This button deselects a check box.
When this dialog box appears on the screen, none of the print items are selected. When you select a print
item, the dimmed <Preview> button, “Print Approval Box” check box and <Print> button are enabled.