JANETS_INM.pdf - 第411页
JaNets Instr ucti on Man ual 8. Job Optim izer 8- 26 If the Job O ptimizer finis hes cal culatin g the num ber of pages to be print ed to find t hat the numb er of pages is mor e than 10, it issues a war ning. Figure 8.3…

JaNets Instruction Manual 8. Job Optimizer
8-25
Figure 8.3-41 “Print” dialog box ①– “Select Production Programs”
Figure 8.3-42 “Print” dialog box ①– “Select Clusters”
The <Print> button displayed on the screen above starts creating a document to be printed.
Figure 8.3-43 Creating a document
When the Job Optimizer finishes creating a document to be printed, it starts calculating the
number of pages to be printed. When you select the <Cancel> button to cancel this calculation, the
Job Optimizer displays the Figure 8.3-44 Calculating the number of pages to be printed Figure
8.3-46 “Print” dialog box ② screen.
Figure 8.3-44 Calculating the number of pages to be printed
This button deselects a check box.
JaNets Instruction Manual 8. Job Optimizer
8-26
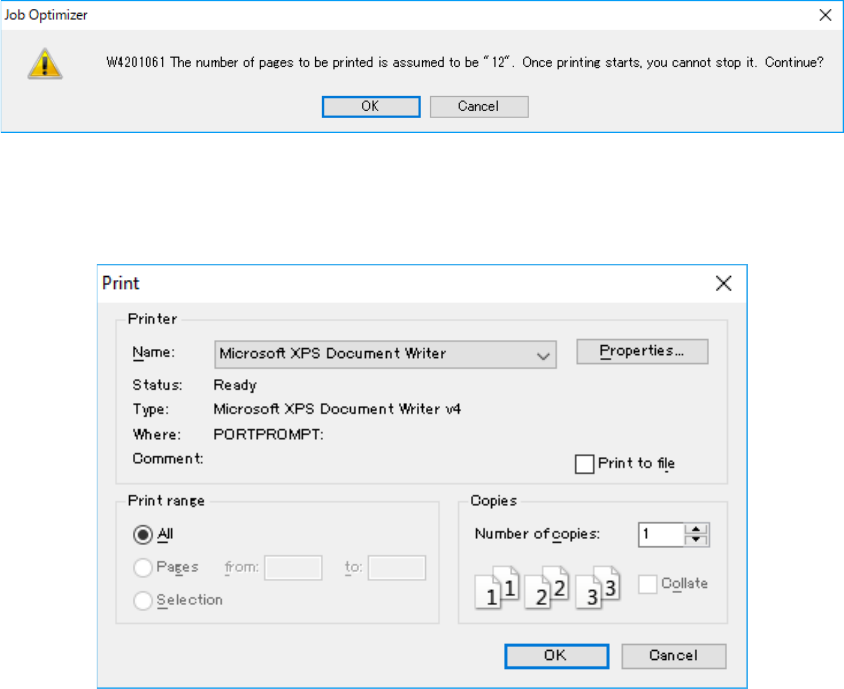
If the Job Optimizer finishes calculating the number of pages to be printed to find that the number
of pages is more than 10, it issues a warning.
Figure 8.3-45 Warning on the pages to be printed
When you click the <OK> button, the following dialog box appears on the screen.
Figure 8.3-46 “Print” dialog box ②
When you print a document, pay attention to the following items:
- Since the Job Optimizer prints a document continuously, get confirmation before starting
printing if you try to print many pages.
- Only the printing direction regulated with the Job Optimizer is supported.
- The check box “Print to file” is not supported. When necessary, use the text output function
described in the next section.
- To save a document in a file such as an XPS file and a PDF file, the Job Optimizer requires the
file save destination for each document. Therefore, it displays the confirmation dialog box every
time you save a document in a file. Note that you cannot combine two or more documents in
the same file.
JaNets Instruction Manual 8. Job Optimizer
8-27
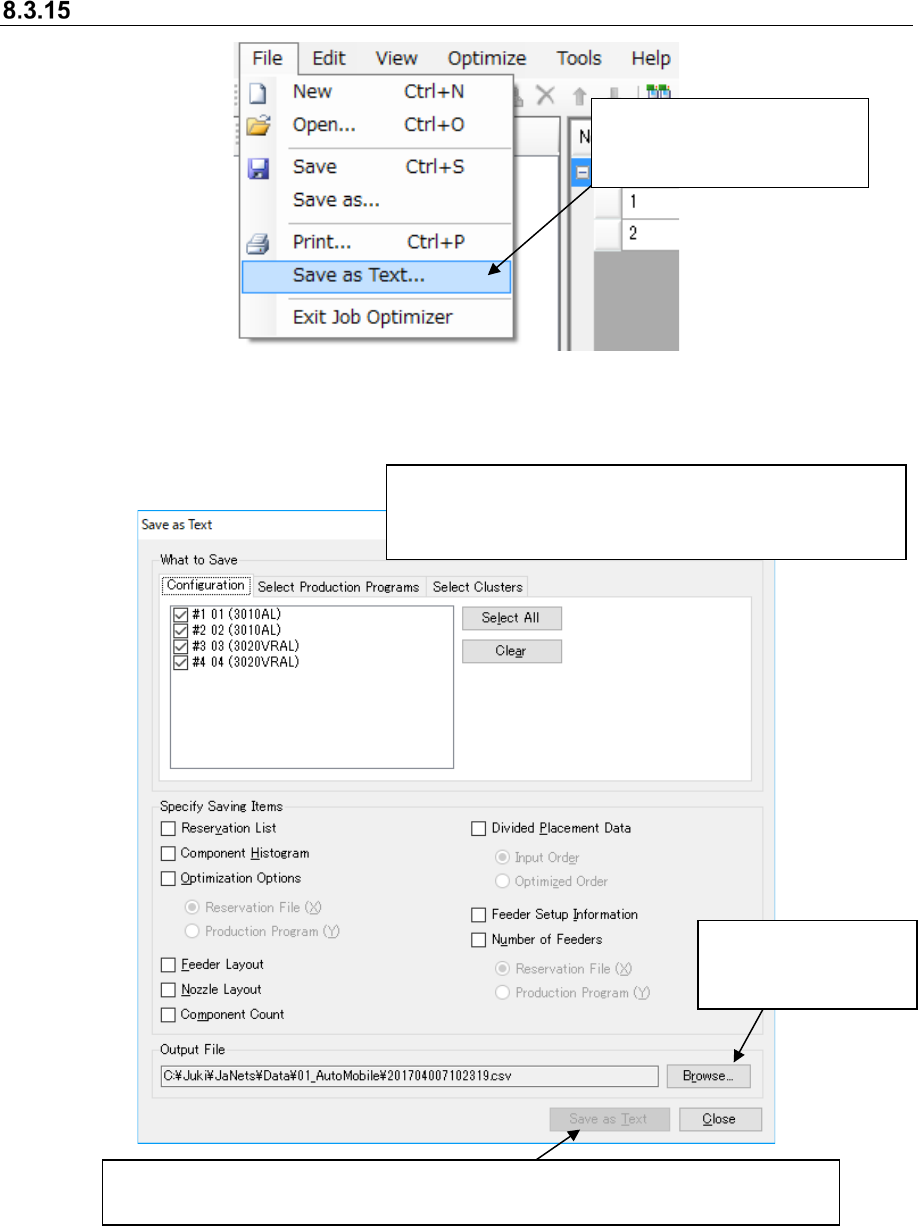
Save as Text
Figure 8.3-47 Main screen – [File] – [Save as Text]
Figure 8.3-48 “Save as Text” dialog box
* Set the menu items “What to Save” and “Configuration” in
the same way as you set those on the “Print” dialog box ①
of Figure 8.3-40.
Select the [File] command,
and then the [Save as Text]
command.
When you select one of the "Specify Saving Items" group, the <Save as Text> button
becomes available.
This button allows you to
change the file name or
the output folder.