JANETS_INM.pdf - 第417页
JaNets Instr ucti on Man ual 8. Job Optim izer 8- 32 8.3.17.5 Cleari ng the numbe r of componen ts Follow the inst ructi on ① or ② shown below . Figure 8.3 - 57 “ No. of Components ” (Clear) * Whe n you follow either of …
JaNets Instruction Manual 8. Job Optimizer
8-31
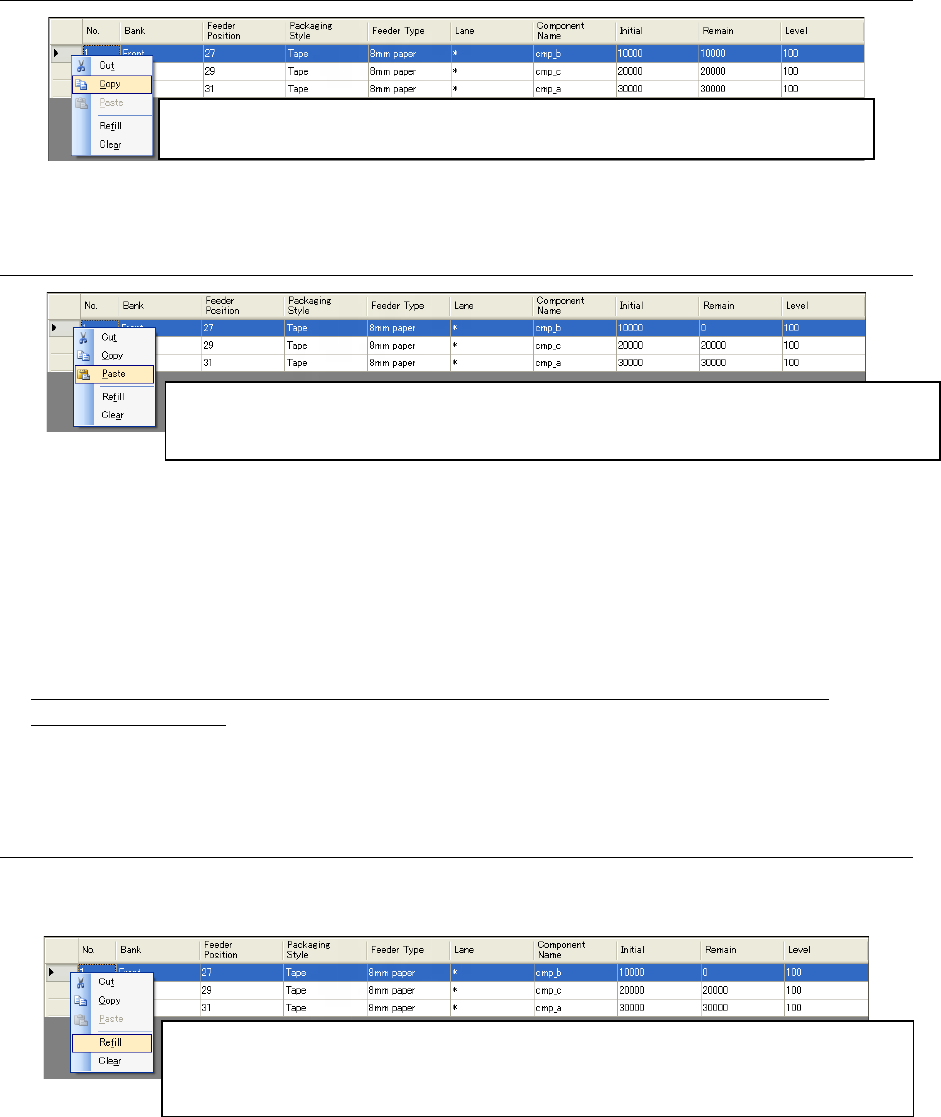
8.3.17.2 Copying the number of components
Figure 8.3-54 “No. of Components”
(Copying the values in the “Initial,” “Remain” and “Level” fields)
8.3.17.3 Pasting the number of components
Figure 8.3-55 “No. of Components”
(Pasting values in the “Initial,” “Remain” and “Level” fields)
* When pasting a value to “Initial”, “Remain” and “Level” for a component of which “Packaging
Style” is “Tray”, you cannot paste a larger number than the maximum number of components
that can be stored in a tray. If you try to paste the larger number, the maximum number is
pasted.
Information common to the commands [Cut], [Copy], [Refill] and [Clear] on the “No. of
Components” screen
To select two or more lines ([Refill] command): While holding down the [Ctrl] key, select lines
with the mouse, or after selecting the start line, select the end line while holding down the [Shift]
key.
8.3.17.4 Refilling components
Follow the instruction ① or ② shown below. In this case, the corresponding initial value is
copied to the “Remain” filed of the selected lines.
Figure 8.3-56 “No. of Components” (Refill)
Click the selected line with the right button, and then select the [Copy] command from the
displayed menu. The values in the “Initial,” “Remain” and “Level” fields can be copied.
Click the selected line with the right button, and then select the [Paste] command from the displayed
menu. The cut or copied values in the “Initial,” “Remain” and “Level” fields can be pasted. The number of
lines of data on the number of components copied to the clipboard can be pasted from the selected line.
①
Select the desired line from the “No. of Components” dialog box, and select the <Refill> button
displayed on the bottom of this dialog box.
② Select the desired line from the “No. of Components” dialog box, and click the selected line with the
right button. You can also execute the [Refill] command for two or more lines.
JaNets Instruction Manual 8. Job Optimizer
8-32
8.3.17.5 Clearing the number of components
Follow the instruction ① or ② shown below.
Figure 8.3-57 “No. of Components” (Clear)
* When you follow either of the above instructions, the values in the “Initial,” “Remain” and “Level”
fields are set to 0. This means that the system will not control the situation the number of
components becomes 0, that is, components run out. When you execute this command for a tray
component, the value set in the “Initial” field is copied to the “Remain” field, and “0” is set to the
“Level” field.
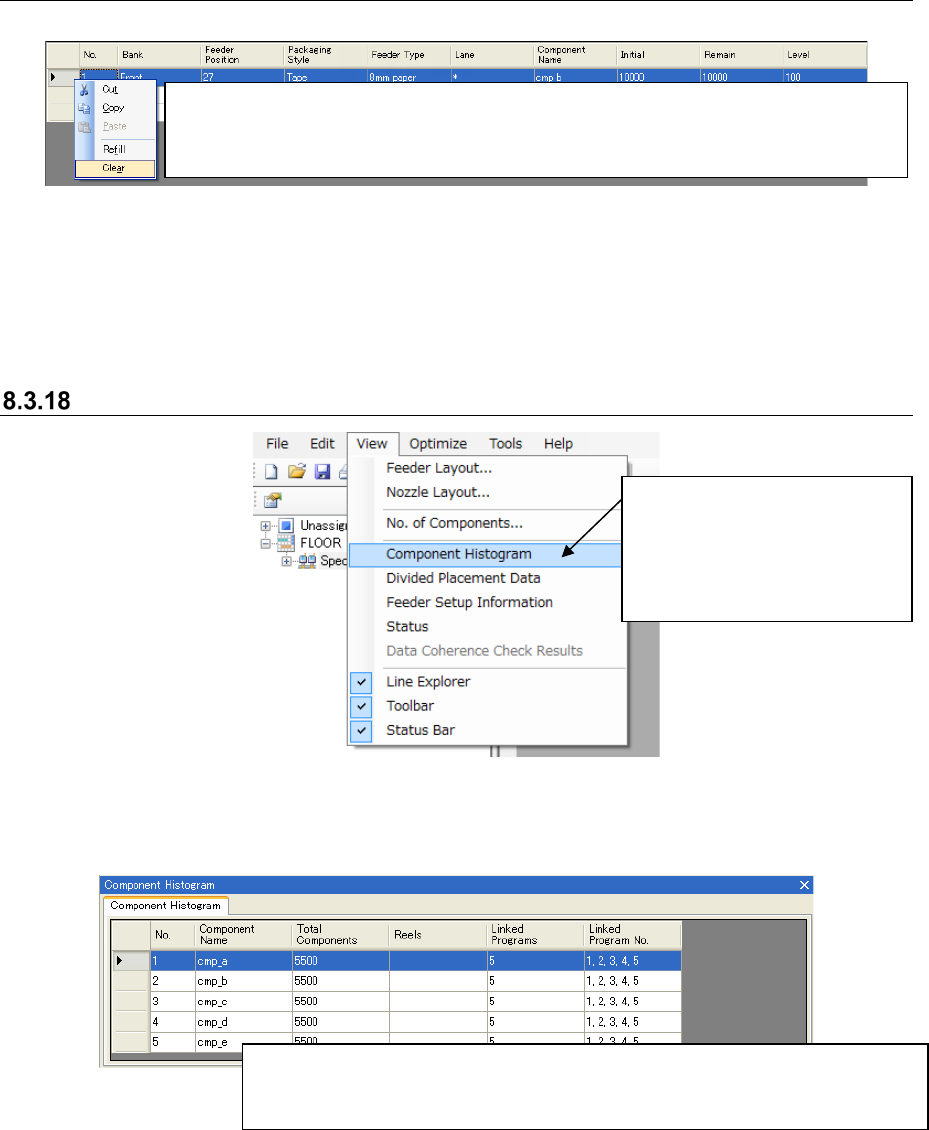
Component Histogram
Figure 8.3-58 Main screen – [View] – [Component Histogram]
The component histogram for the Reservation list is displayed on the Detailed data display area of
the Main screen.
Figure 8.3-59 Main screen – Component Histogram
①
Select the desired line on the “No. of Components” dialog box, and select the <Clear> displayed
on the bottom of this dialog box.
② Select the desired line on the “No. of Components” dialog box, and click the selected line with the
right button. Select the [Clear] command on the displayed menu.
The number of components of all component types used with the reserved
production program and the number of programs that use each component type
are displayed on the list under each component name.
①
Select the [View]
command, and then the
[Component Histogram]
command from the “View”
menu.
JaNets Instruction Manual 8. Job Optimizer
8-33
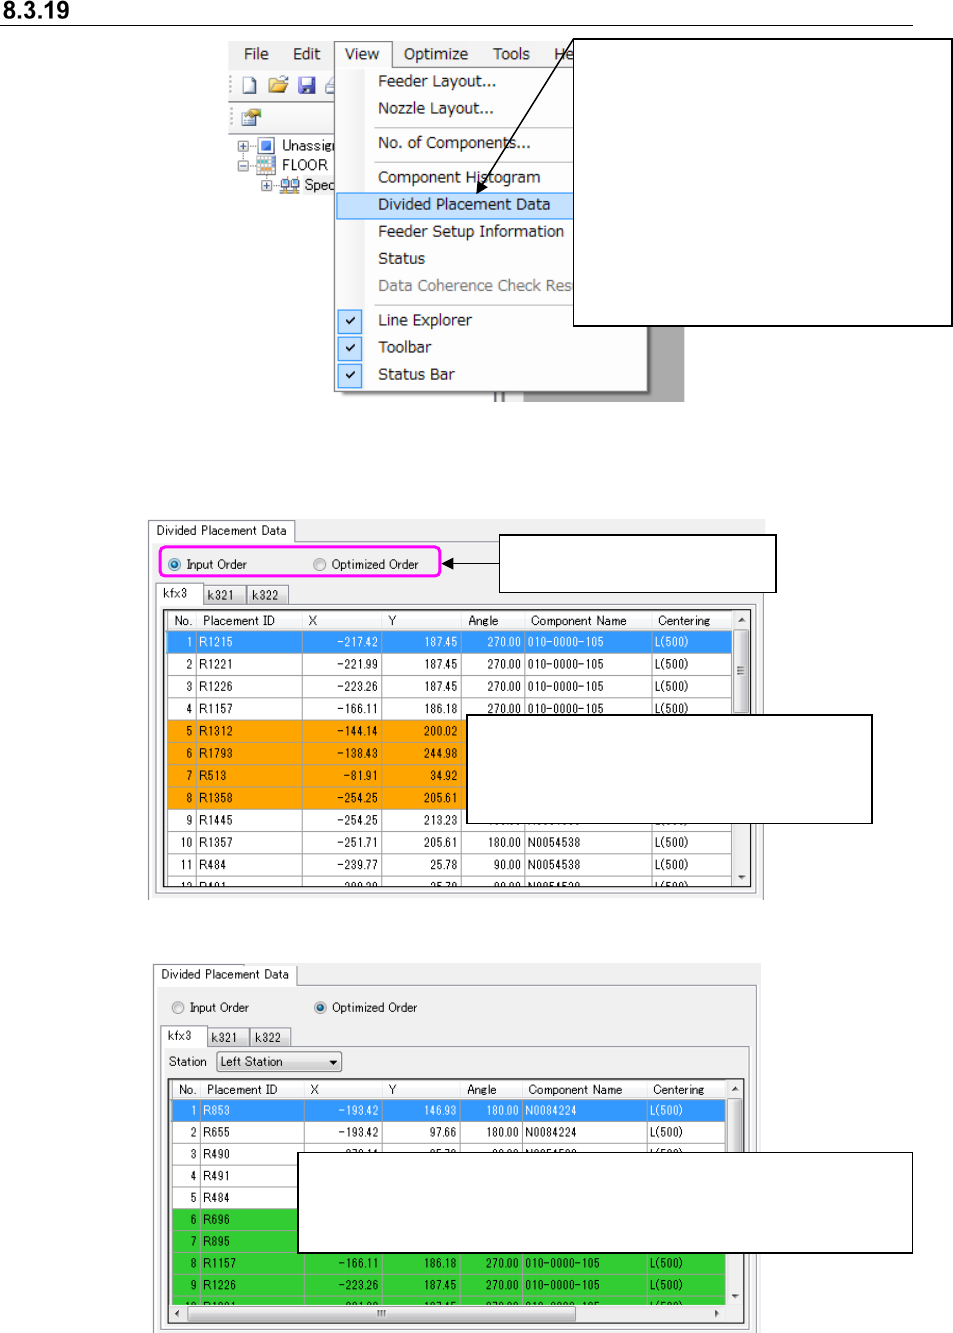
Divided Placement Data
Figure 8.3-60 Main screen – [View] –[Divided Placement Data]
The divided placement data for the production program selected from the Reservation list is
displayed on the Detailed data display area.
Figure 8.3-61 “Divided Placement Data” (Input Order)
Figure 8.3-62 Divided Placement Data (Optimized Order)
When “Yes” is set in the Skip” field of the
“Placement” data screen or “Component” data
screen, the background color of the line is
displayed in orange.
When you select the “Optimized Order” radio button, the background
color of lines is switched between the normal one and the colored one
every time components are paired (to be picked up at the same time)
during the cycle of a pick-up and placement operation.
Select the radio button “Input
Order” or “Optimized Order.”
①
After selecting one line from the
Reservation list displayed on the
Main screen, and select the [View]
command, and then the [Divided
Placement Data] command from the
“View” menu.
* If optimization is not executed yet,
if you change a production program
after optimizing it, or if no line is
selected on the Reservation list, you
cannot select this command.