JANETS_INM.pdf - 第439页
JaNets Instr ucti on Man ual 8. Job Optim izer 8- 54 Data C oherenc e Che ck This comma nd allow s you to per form the coheren ce check for the dat a you creat ed. Figure 8.3 - 92 Main scr een – [Optimize] - [Data Cohere…
JaNets Instruction Manual 8. Job Optimizer
8-53
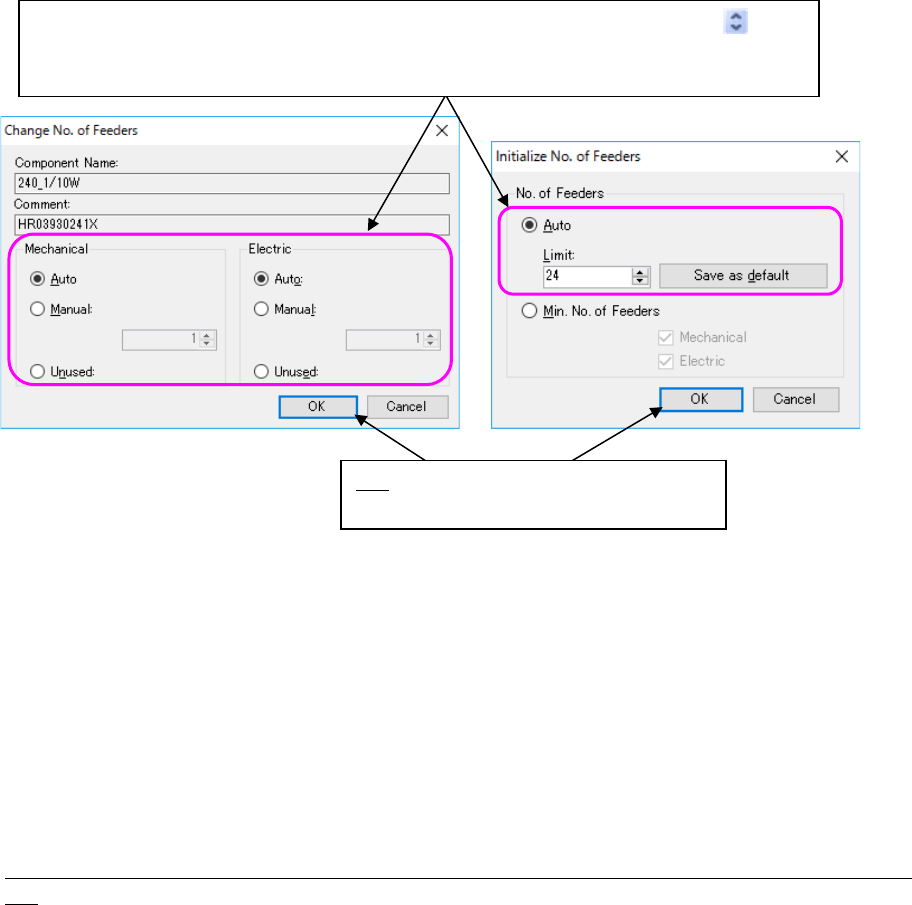
Figure 8.3-91 [Number of Feeders] – “Change No. of Feeders” and “Initialize No. of Feeders”
dialog boxes
* To specify the upper limit of the number of feeders when you select the “Auto” radio button for
the menu item “No. of Feeders,” click the <Initialize No. of Feeders> on the “Number of Feeders”
dialog box.
* Even if you select “Manual” to specify the number of feeders, if “Fix all feeder positions within a
cluster” of “Multi-optimize Options” is selected, the number of feeder that you specified would
be changed by the optimization.
* The optimization function uses settings of a reservation file (except when an option(s) of an
individual program is (are) used).
Precautions related to the number of components to be supplied when there is RX-7 series on the
line
The number of feeders cannot be controlled by the number of components to be supplied in the
optimization of RX-7 series.
Therefore, when feeders must be allocated to RX-7 series, only one feeder is allocated to the
RX-7 series.
(Except when pick data is already set in RX-7 series)
In the optimization of RX-7 series, only one feeder is allocated to make the most of the
characteristics of the head. However, when you select “The same component is allocated to the
left and right sides” of “Option depending on the model – RX-7 series”, the components with
many placement points may be arranged to the left and right stations. In this case, optimization
is executed for only the corresponding components by ignoring the setting of the number of
components to be supplied.
Select the desired radio button. When you select the “Manual” radio button, select the
button, or the [↑] key or the [↓] key to set a value. You can directly enter the desired value also.
When the line end is selected, the set default value is valid for the reservation file.
OK: Sets the desired value on the dialog
box, and closes the dialog box
JaNets Instruction Manual 8. Job Optimizer
8-54
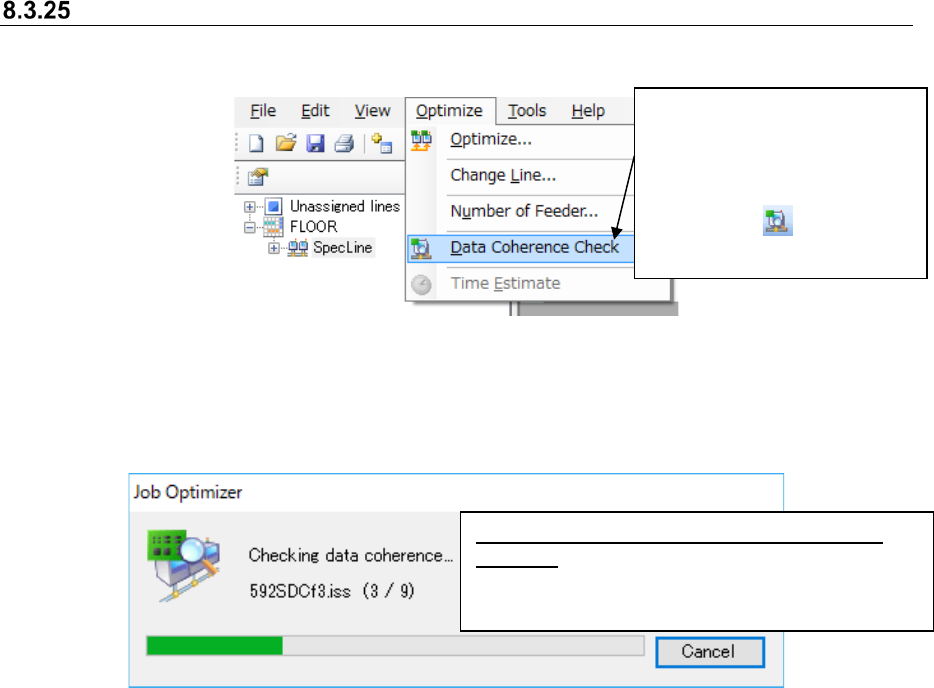
Data Coherence Check
This command allows you to perform the coherence check for the data you created.
Figure 8.3-92 Main screen – [Optimize] - [Data Coherence Check]
The system starts the data coherence check, and the “Data Coherence Check” dialog box appears
on the screen.
Figure 8.3-93 “Checking data coherence” dialog box
Select the [Optimize]
command, and then the [Data
Coherence Check] command
on the “Optimize” menu, or
click the “Data Coherence
Check” tool ( ) from the
toolbar.
When the Data Coherence Check normally
finishes: The message indicating that the Data
Coherence Check finishes appears on the screen.
JaNets Instruction Manual 8. Job Optimizer
8-55
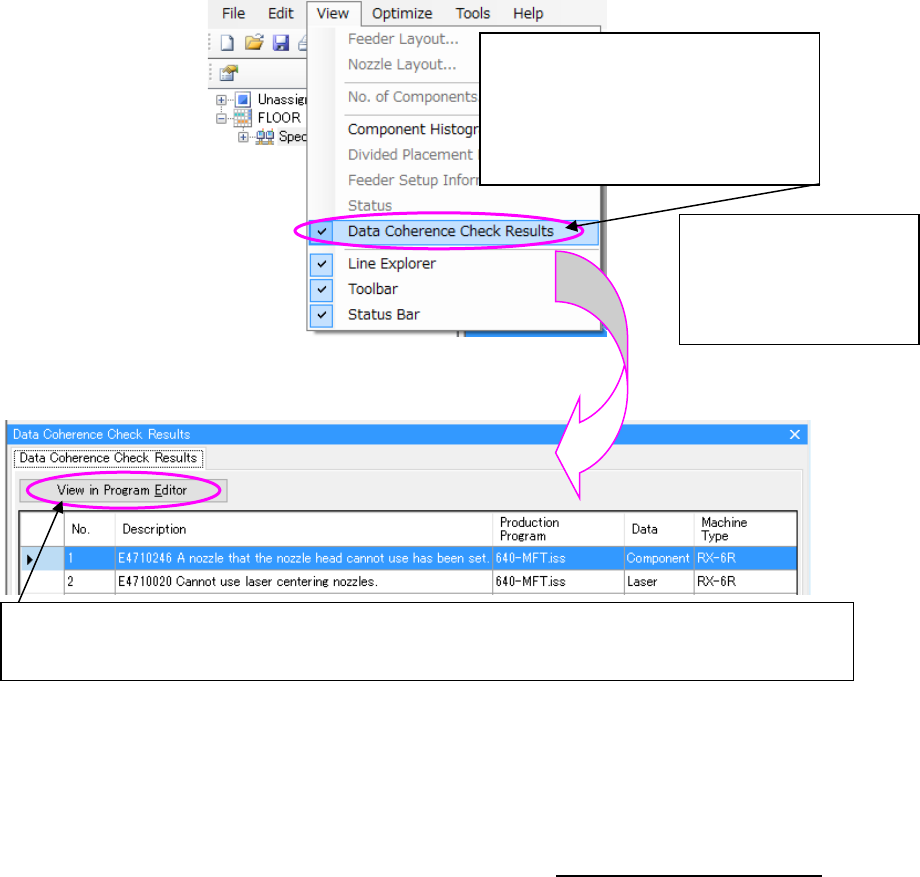
When any error is found while checking data coherence, the “Data Coherence Check Results”
tab is displayed. Also, you can select the “Data Coherence Check Results” command from the
“View” commend.
Figure 8.3-94 [View] – [Data Coherence Check Results]
Figure 8.3-95 Main screen – Detailed data display area: Data Coherence Check Results
* When the "Saving the state at the time of an exit" is set to the "No” in the environment setting of
the Program Editor, you start the Program Editor in the state of new creation. When you start
the Program Editor from the Job Optimizer, make sure that the "Saving the state at the time of
an exit" is set to the “Yes” in the environment setting of the Program Editor.
For the environment setting of the program editor, refer to “7-6-6-2 Environment setting.”
If the Data Coherence Check detects
an error, the “Data Coherence Check
Error” message appears on the
screen. In this case, you can select the
[Data Coherence Check Results]
command from the “View” menu.
The “Data Coherence
Check Results” tab
appears on the Detailed
data display area of the
Main screen.
Select one line, and click the <View in Program Editor> button, or double-click one line. The Program
Editor starts up. A production program selected with the Program Editor opens, and the error list
appears on the screen.