JANETS_INM.pdf - 第482页
J aN et s Inst ructi on M anual 11. Mark Database 11 -9 2. W hen you double - cl ick a li ne of m ark i nf orm at ion you w ant to c hange on the ar ea f iduc ial m ar k li st s cr een, the dial og box for chang ing a m …
JaNets Instruction Manual 11. Mark Database
11-8
11.6 Changing a Mark Data Name
You can change a mark data name registered in the database.
11.6.1 Renaming a BOC mark data
You can change a BOC mark data name. You can enter up to 16 half-width alphanumeric
characters as a name.
(Note that you cannot enter “#” alone)
Change a name by performing either one of the operations below.
1. Select a line of mark information you want to change on the BOC mark list screen.
Select the [Edit] command from the menu bar, and then the [Rename] command from the
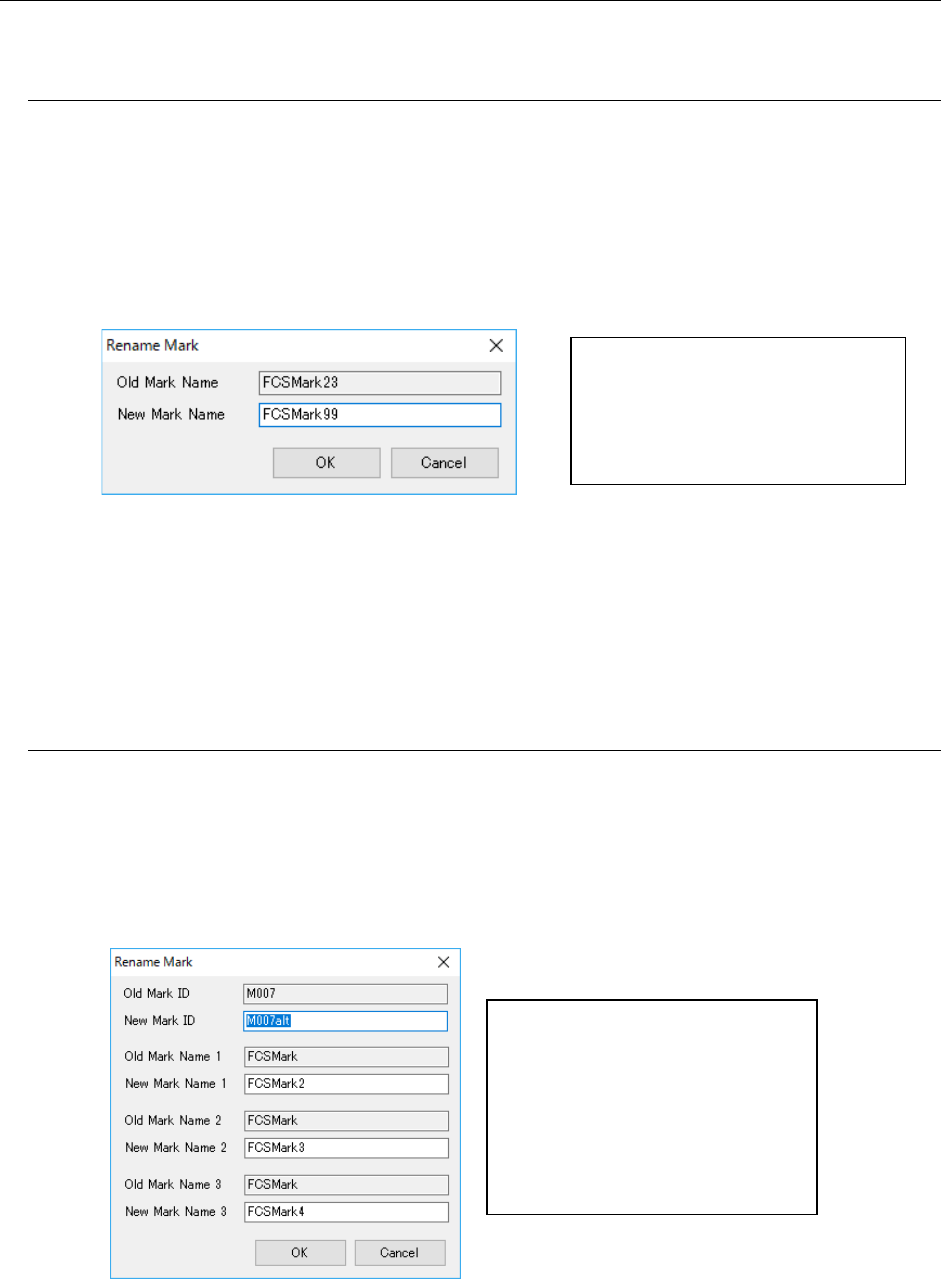
“Edit” menu. The “Rename Mark” dialog box appears on the screen.
Figure 11.6-1 “Rename Mark” dialog box
2. When you double-click the line of mark information you want to change on the BOC mark
list screen, the “Rename Mark” dialog box appears on the screen. Enter the desired mark
name in the “New Mark Name” field, and then select the <OK> button. The registered
mark data name is updated. (Unless you enter a name in the “New Mark Name” field, you
cannot select the <OK> button.)
11.6.2 Renaming an area fiducial mark
You can change a mark ID and mark names 1 to 3 of area fiducial mark data. You can enter up
to eight half-width alphanumeric characters as an ID or a name. Change a name by perform-
ing either one of the operations below.
1. Select a line of mark information you want to change on the area fiducial mark list screen.
Select the [Edit] command from the menu bar, and then the [Rename] command on the
“Edit” menu. The dialog box for a mark ID/mark name appears on the screen.
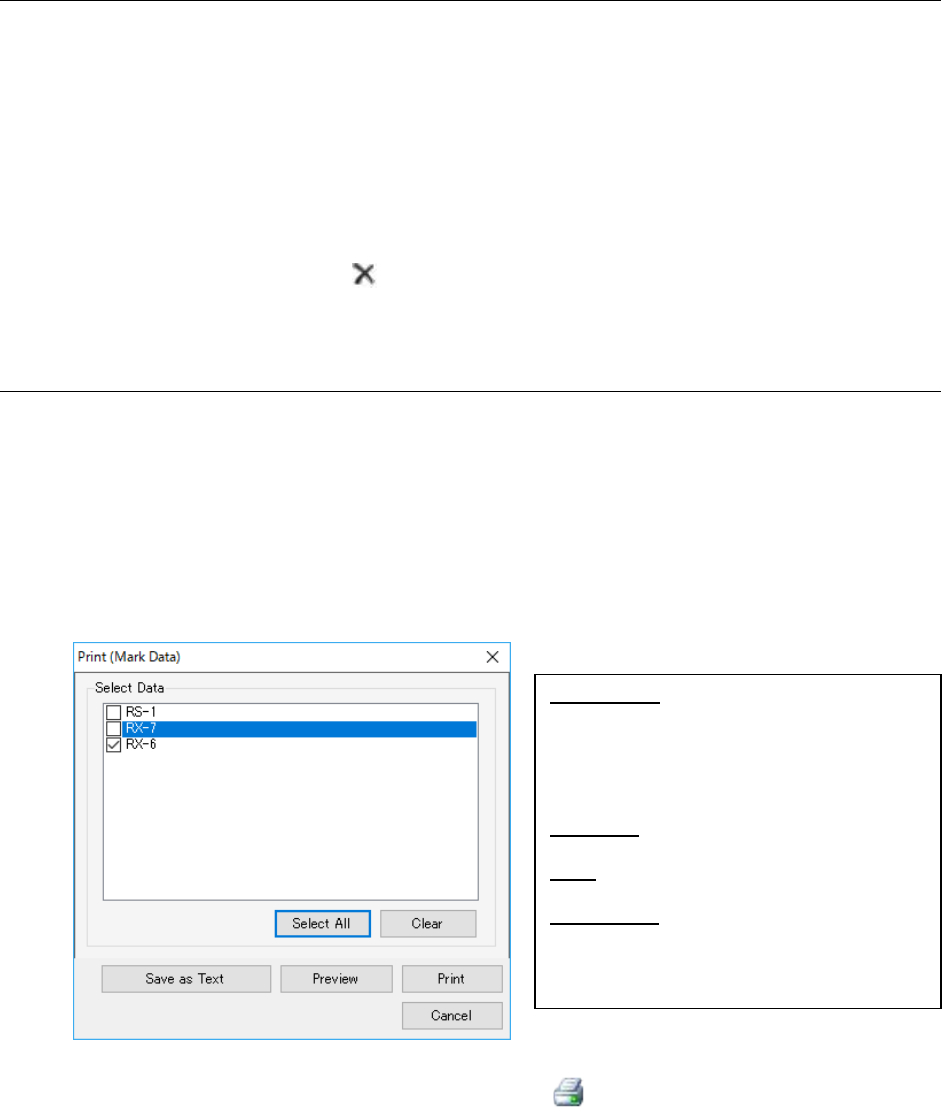
Figure 11.6-2 Dialog box for changing a mark ID/a mark name
Enter the desired mark name in the
“New Mark Name” field, and then
select the <OK> button.
The registered mark data name is
changed.
Enter the desired mark ID in the
“New Mark ID” field and the desired
mark name in the “New Mark Name”
field, and press the <OK> button.
The registered mark data name is
updated and the dialog box closes.
(Unless you enter any mark ID, you
cannot select the <OK> button.)
JaNets Instruction Manual 11. Mark Database
11-9
2. When you double-click a line of mark information you want to change on the area fiducial
mark list screen, the dialog box for changing a mark ID/mark name appears on the screen.
Enter the desired mark ID in the “New Mark ID” field, and the desired mark names in the
“New Mark Name 1” to “New Mark Name 3” fields, and press the <OK> button. The reg-
istered mark data names are updated and the dialog box closes. (Unless you enter any
mark ID, you cannot select the <OK> button.)
11.7 Deleting Mark Data
You can delete mark data registered in the database. Delete mark data by performing either
one of the operations below.
1. Select mark data to be deleted on the list.
When you select the [Edit] command from the menu bar, and then the [Delete] command
on the “Edit” menu, the dialog box for confirming your delete operation appears on the
screen.
* Only mark data that is selected on the list displayed at the present can be deleted.
2. Select mark data to be deleted on the list.
Select the “Delete” button (
) of the toolbar. The dialog box for confirming your delete
operation appears on the screen.
11.8 Print/Save as Text
This command prints or outputs mark data displayed on the list as text.
When the BOC mark data list screen is displayed, this command prints or outputs as text BOC
mark data. When the area fiducial mark data list is displayed, it prints or outputs a text area fi-
ducial mark data.
Execute the [Print/Save as Text] command by performing either one of the operations below.
1. Select the [File] command from the menu bar, and then the [Print/Save as Text] command
from the “File” menu. The “Print” setting screen appears. Select the item to be print-
ed/output on this screen.
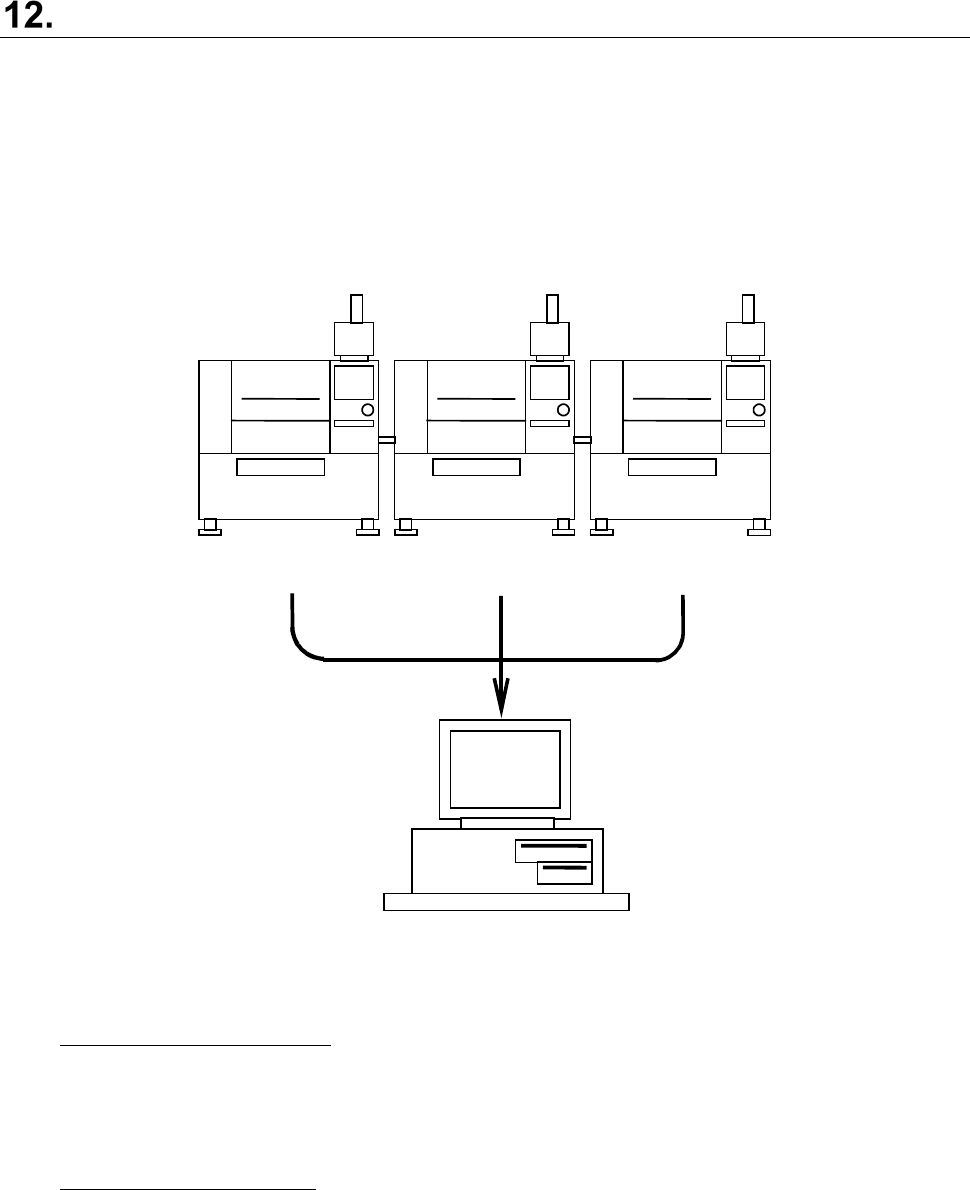
Figure 11.8-1 “Print” setting screen
2. When you press the “Print/Save as Text” button ( ) of the toolbar, the “Print” setting
screen appears.
Select an item to be executed on the displayed screen. (Operation is the same as that you
do at 1 above.)
Select Data: Displays the list of machine
types registered in the database for the se-
lected mark type in the form of check boxes.
The system prints or outputs as text only
mark information of the checked machine
type(s) only.
Select All: Checks check boxes of all dis-
played machine types.
Clear: Unselects check boxes of all displayed
machine types.
Save as Text: Displays the dialog box for
storing a file. Set where to output and a
name on this dialog box to output the data
in the csv format.
JaNets Instruction Manual 12. Machine Program Relater
12-1
Machine Program Relater
What is the Machine Program Relater?
This application groups together production programs of each machine of a production line
composed of JUKI mounters and placers, or optimized divided files of the JaNets to create a
production program for the JaNets.
Even though a customer who has already configured a production line with JUKI machines installs
the JaNets newly, he or she can manage production programs that have been used not for each
machine alone but as production programs in the format for the JaNets (*.iss).
Test.x01
Test.e47
Test.e48
Test.iss
FX
-3RA
KE-2070
KE-2080
Figure 12-1 Overview of the function
Manual relating function:
This function relates production programs of each machine or divided programs generated
after production programs created with the JaNets or MI Line Optimizer are optimized to
create a production program for the JaNets. (See Figure 12-1)
Batch relating function:
This function converts a group of production programs already created for an old production
line into files for configuring a new production line when the production line configuration
changes to configure the production line again.