JANETS_INM.pdf - 第58页
JaNets Instr ucti on Man ual 2. Install ation 2- 30 2.5 Setup Procedur e This section descr ib es t he setup oper ation of t he mach ine nece ssary for c ommun ication with anoth er machine in or der to, f or example, ob…

JaNets Instruction Manual 2. Installation
2-29
2.3 Installing the Component Database (DB)
For information on how to install the Component DB, refer to Chapter 2 “Install” of the Component
DB INSTRUCTION MANUAL”.
If you install the Component DB on the same PC with an JaNets, do not use the same folder as the
JaNets. Be sure to install the Component DB in a different folder than the one containing the
JaNets.
2.4 Installing the Flexline CAD
If you have the Flexline CAD, install it on a PC.
For information on how to install the Flexline CAD, refer to Chapter 3 “Install” of the Flexline CAD
INSTRUCTION MANUAL”.
If you install the Flexline CAD on the same PC with an JaNets, do not use the same folder as the
JaNets. Be sure to install the Flexline CAD in a different folder than the one containing the JaNets.
JaNets Instruction Manual 2. Installation
2-30
2.5 Setup Procedure
This section describes the setup operation of the machine necessary for communication with another
machine in order to, for example, obtain its production state.
2.5.1 Procedure for setting up an RX-6 series/RS-1 series/JM-20/JM-100
2.5.1.1 Creating a user account
Create a user account for the machine to communicate with a PC.
The name of an account to be created is “isuser,” and the corresponding password is
“is_user_2008.”
* Since an RX-7 series uses the different communication system, you do not have to make any
setting here.
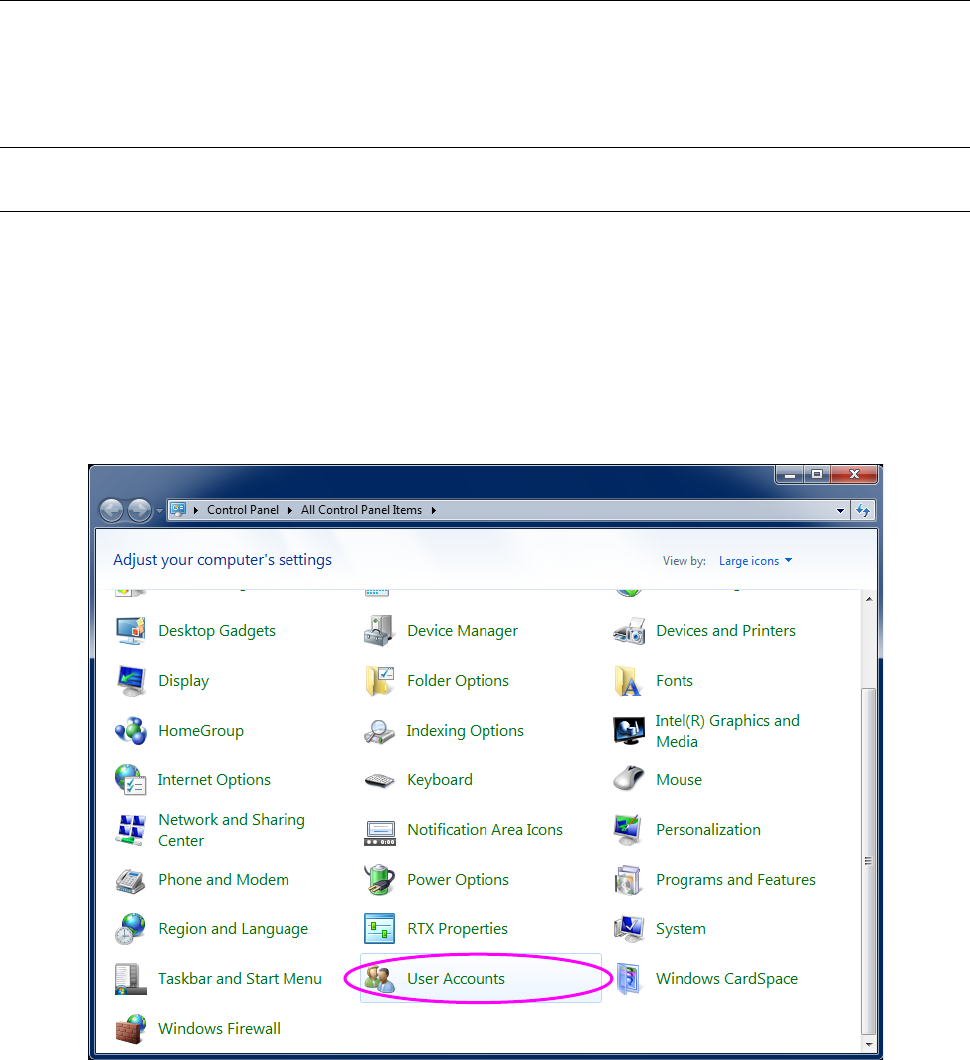
(1) Display the “Control Panel” shown in Figure 2.5-1 from the “Start” menu, and select the “User
Accounts” icon.
Figure 2.5-1 Control Panel displayed with a machine
JaNets Instruction Manual 2. Installation
2-31
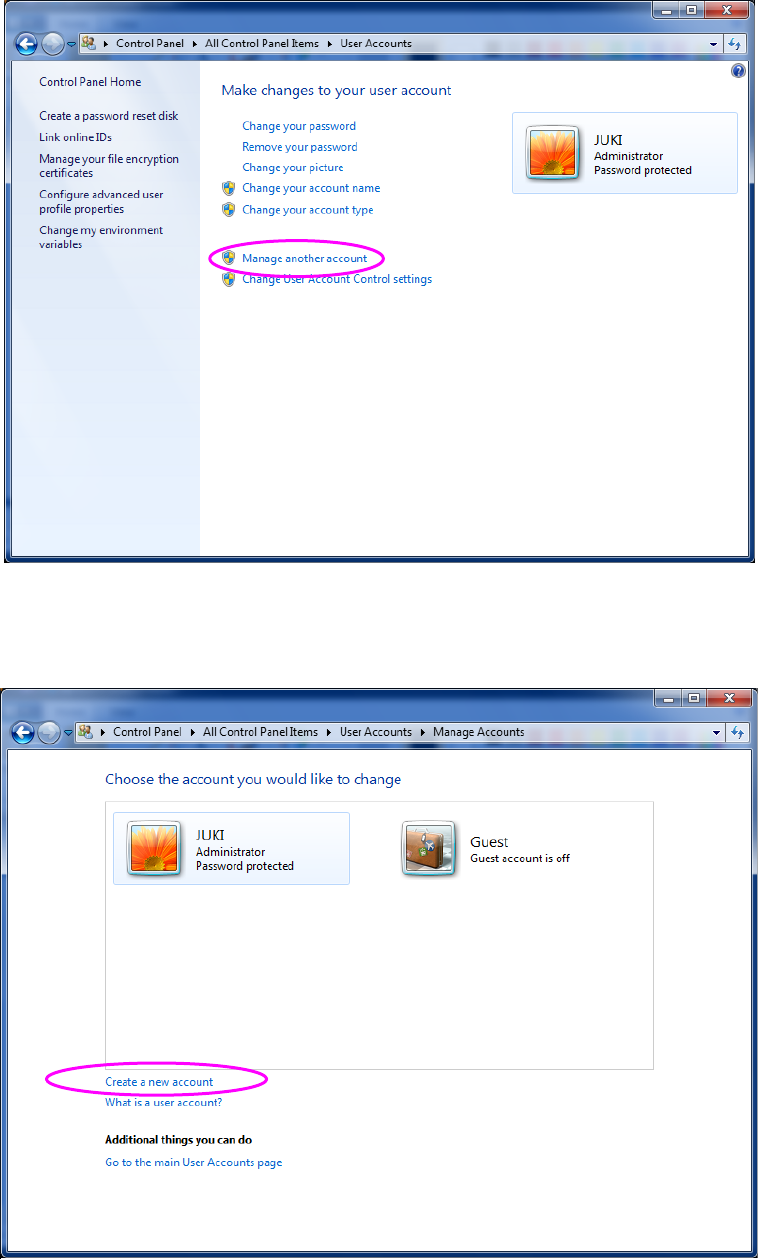
(2) When the “User Accounts” dialog box appears on the screen, select the item “Manage
another account.”
Figure 2.5-2 “User Accounts” screen (displayed with a machine)
(3) When the “Manage Accounts” dialog box appears on the screen, select the item “Create a
new account.”
Figure 2.5-3 “Manage Accounts” dialog box (displayed with a machine)