JANETS_INM.pdf - 第585页
J aN et s Inst ructi on Manual 14 . Snapshot Tool 14 -6 14.3.1.2 Div idi ng a compressed fi le W hen the si ze of a com p res sed f il e b ecom es l ar ger than a v alue s et in t he “ C om pr ess ed Fi le S plit Size ” …
JaNets Instruction Manual 14. Snapshot Tool
14-5
14.3 Collecting files
The system collects files on the list of objects to be collected, groups them and compresses it in
the folder specified in the “Compressed File Destination Folder” combo box.
14.3.1 Starting collecting files
When you select the [Collect] command or the “Collect” tool ( ) of the toolbar, the system starts
collecting files. When it starts collecting files, it displays the message box. When you select the
<Yes> button on this message box, it starts collecting files actually, and displays the “Save as”
dialog box for specifying a file in which compressed files are stored.
<About an error check to be performed while the system is collecting files>
(1) If a file listed on the list does not exist (or it cannot be copied)
After the corresponding error message appears on the screen, your selection of
the <OK> button causes the system to continue collecting files from the next one.
(2) When a disk used for collecting files is full (* Disk used for collecting
files: disk on
which the “snapshot” folder is located)
After the corresponding error message appears on the screen, your selection of
the <OK> button causes the system to stop collecting files and return to the
“Snapshot Tool” screen.
* The “disk” described here means all types of media to which files are copied
(Example: floppy disk and hard disk).
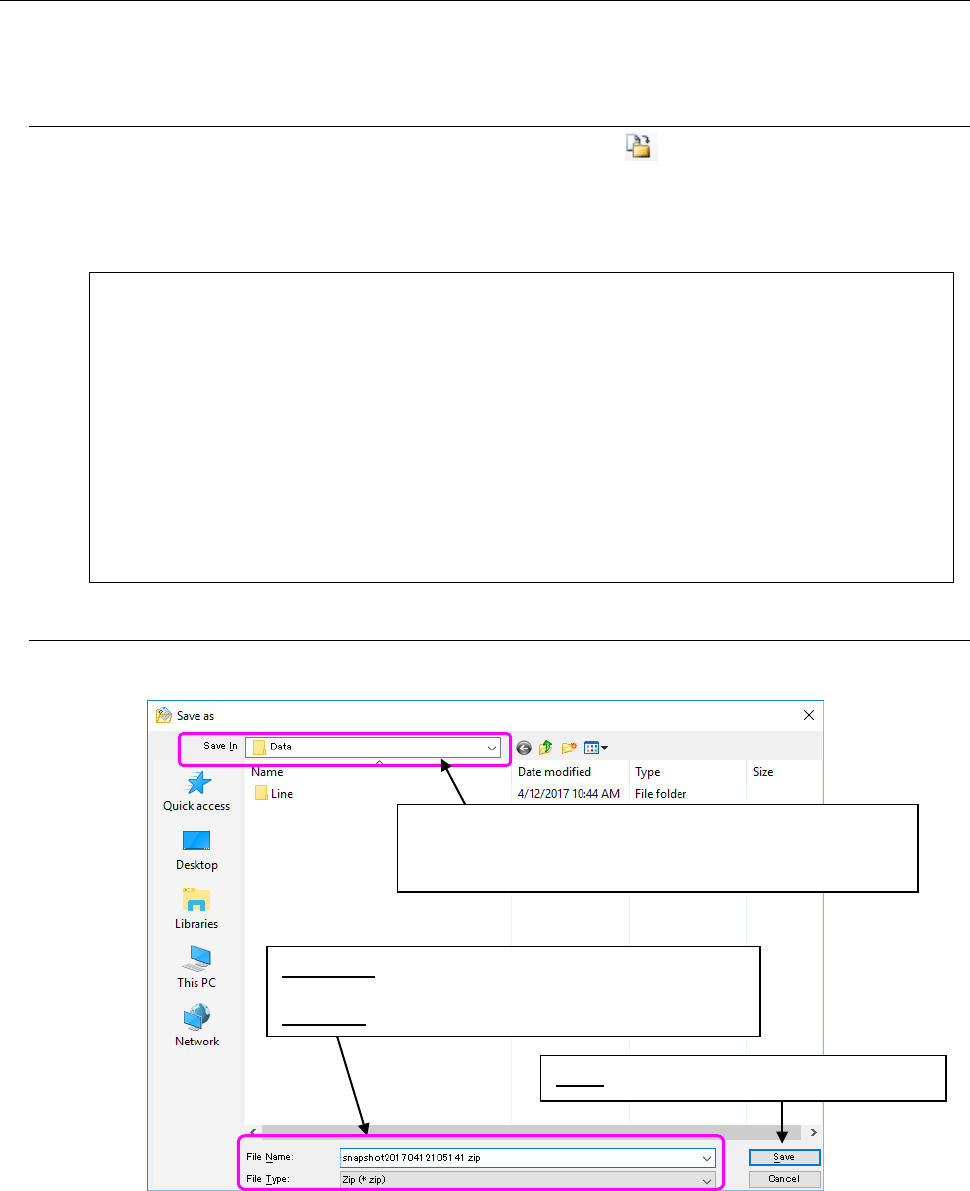
14.3.1.1 Specifying where to compress files
When the system finishes collecting files, the following dialog box appears on the screen.
Figure 14.3-1 Dialog box for specifying where to output the compressed files
When the system finishes compressing files, the message box “Collection complete” appears on
the screen. When you select the <OK> button, the main dialog box reappears on the screen.
* Whether a file is collected successfully or not is displayed in the “Result” field of each file on
the list of objects to be collected.
Specify a folder to which files are output.
* Folder set as a place to which compressed files are to be
output on the “Set Environments” dialog box (default)
File Name: Enter a desired file name here.
*snapshot(year month day hour minute second) (default)
File Type:
*.Zip format (compressed)
Save: Starts compressing the collected files.
JaNets Instruction Manual 14. Snapshot Tool
14-6
14.3.1.2 Dividing a compressed file
When the size of a compressed file becomes larger than a value set in the “Compressed File
Split Size” combo box, the system displays the message asking you whether to divide the file.
When you select the <Yes> button, the system starts dividing the file. When the system finishes
dividing the file, the message box “Collection complete” appears on the screen. When you select
the <OK> button, the “Snapshot Tool” screen reappears.
Divided files are named as “compressed file name.1, 2, 3, ...” A batch file for combining divided
files is generated in the same folder. The name of this batch file is “compressed file name.bat.”
14.3.2 Adding a file to/from the list of objects to be collected
You can add a file to the list of objects to be collected or delete one from this list.
There are two ways for adding a file to the list, ① and ②.
① Select a file on the Windows Explorer, and drag and drop it to the list of objects to be
collected. (You can select two or more files at the same time).
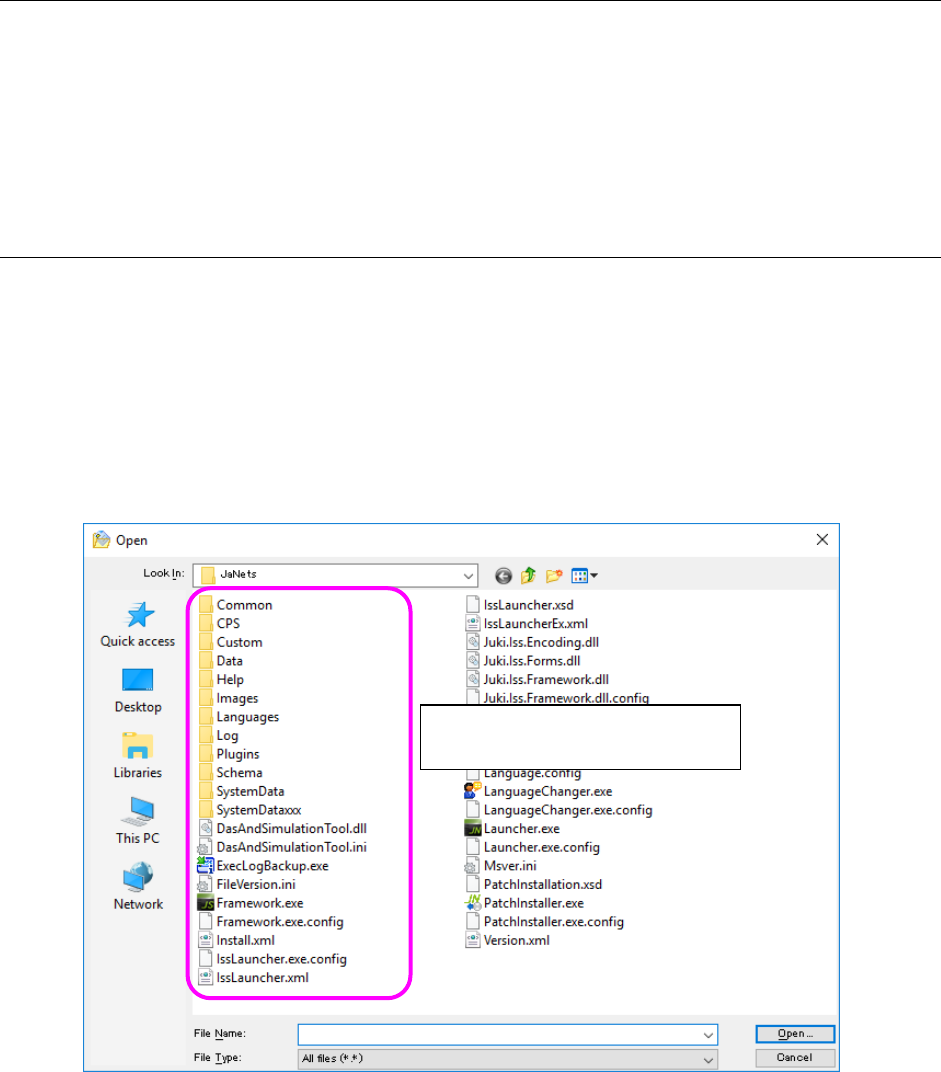
② Add a file on the “Open” dialog box.
Select the “add” tool from the toolbar to start up the “Open” dialog box (see the screen shown
below).
Figure 14.3-2 Dialog box for adding an output file
For the instruction ②, there is another way for starting up the “Open” dialog box.
− Select the [Edit] command from the menu bar, and then the [Add] command on the “Edit”
menu.
− Click the right button of a mouse on the list of objects to be collected to display the pop-up
menu. Then, select the [Add] command on this pop-up menu.
Select a file to be added (you can
select two or more files).
JaNets Instruction Manual 14. Snapshot Tool
14-7
14.3.3 Deleting a file from the list of objects to be collected
Select a file (or files) to be deleted from the list of objects to be collected. Select the “Delete”
tool from the toolbar. The confirmation message appears on the screen. When you select the
<OK> button, the system deletes the selected file(s) from the list.
There are other ways for deleting a file from the list of objects to be collected:
After selecting a file to be deleted,
− Select the [Edit] command from the menu bar, and then the [Delete] command on the “Edit”
menu.
− Click the right button of a mouse on the list of objects to be collected to display the pop-up
menu. Then, select the [Delete] command on this pop-up menu.
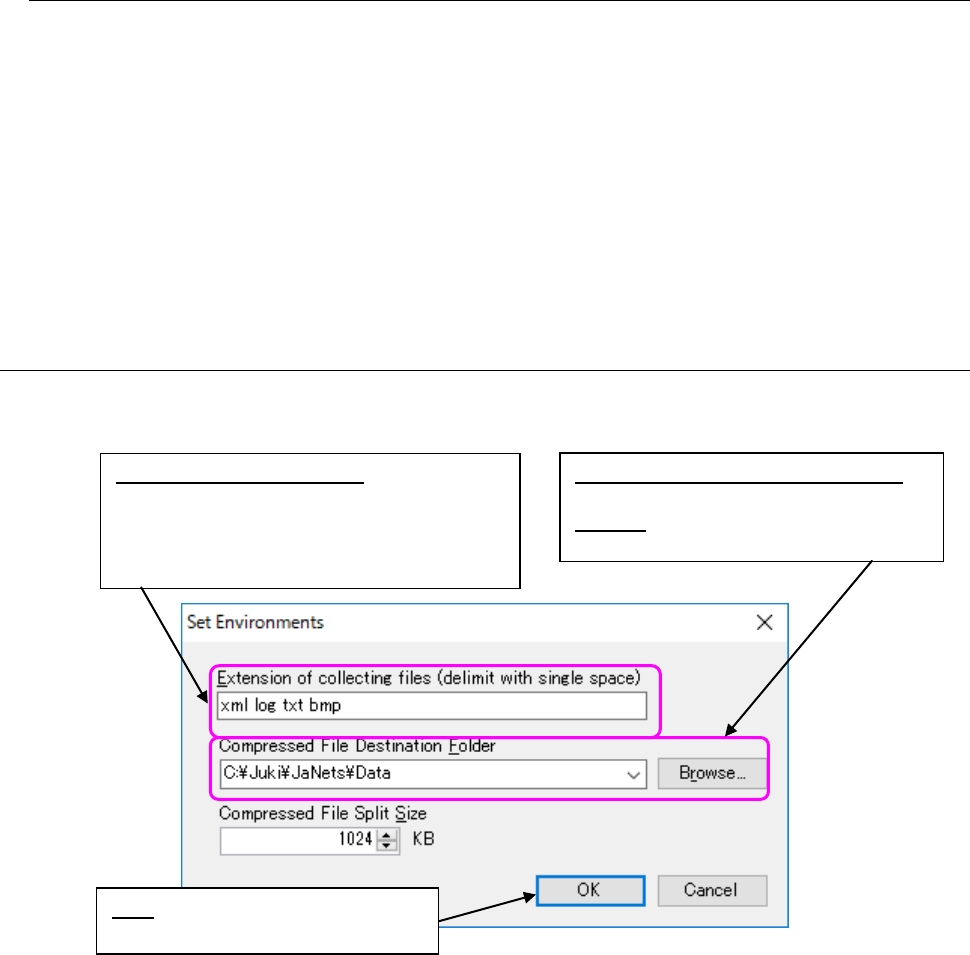
14.4 Setting the environment
On the “Set Environments” dialog box, you can change the settings for collection of files. When
you select the [Set Environments] command, the following dialog box starts up.
Figure 14.4-1 “Set Environments” dialog box
* When you change the type of files to be collected, the system searches files to be displayed on
the list of objects to be collected again, and displays the searched files. (All “Result” columns
are cleared on the list of objects to be collected.)
* When you select the <Make New Folder> button on the “Browse” dialog box, you can create a
new folder also.
When you enter a new folder name in the edit box on the “Set Environments” dialog box, and
select the <OK> button, you can create a new folder too.
* The default size of a compressed and divided file is set to 1,024 KB (1 MB). The input range
is from 100 KB to 102,400 KB (100 MB). If you enter a value beyond this range, it is reset to
the minimum value when it is less than the allowable minimum value, or to the maximum
value when it is larger than the allowable maximum value.
OK: Saves your settings and quits
the “Set Environments” dialog box.
Extension of collecting files:
Enter characters indicating only the
extension without entering a “.” (period).
The system does not distinguish the lower
cases from the upper cases.
Compressed File Destination Folder:
Set with the “install directory \Data.”
Browse: This button allows you to specify
a folder on the “Browse” dialog box.