JANETS_INM.pdf - 第701页
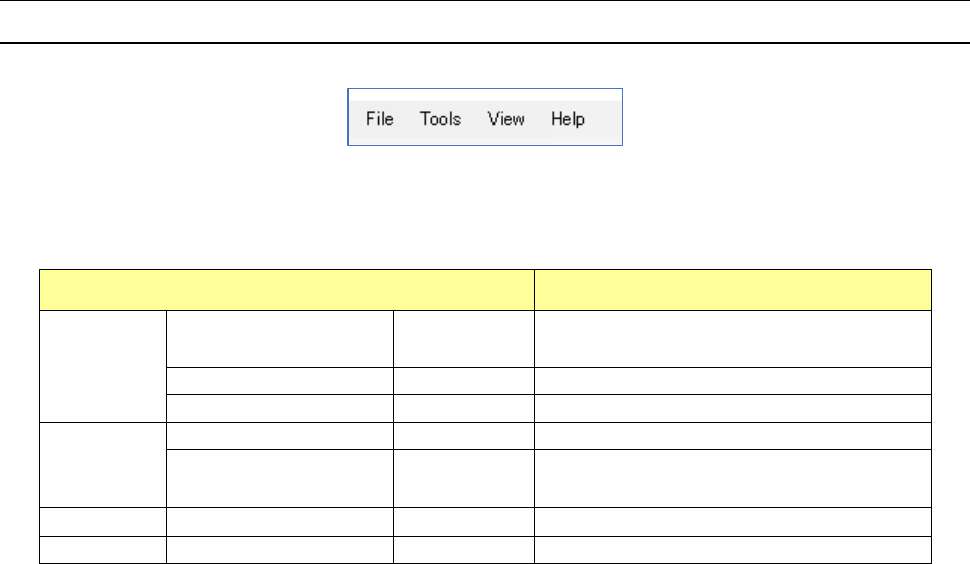
JaNets In structio n Manual 19 T ra ceMonitor 19 -2 19 -2 Menu Config uration 19 -2-1 T raceMonitor menu Figure 19 -2-1 T rac eMonit or menu T able 19 -2-1 Items of the T raceMonitor menu Menu items Descripti on File (F …
JaNets Instruction Manual 19 TraceMonitor
19-1
TraceMonitor
What is TraceMonitor?
TraceMonitor uses log data output from a machine registered in the database to display errors that
occurred during production in a ranking format or in a graph.
19-1 Starting up or Quitting TraceMonitor
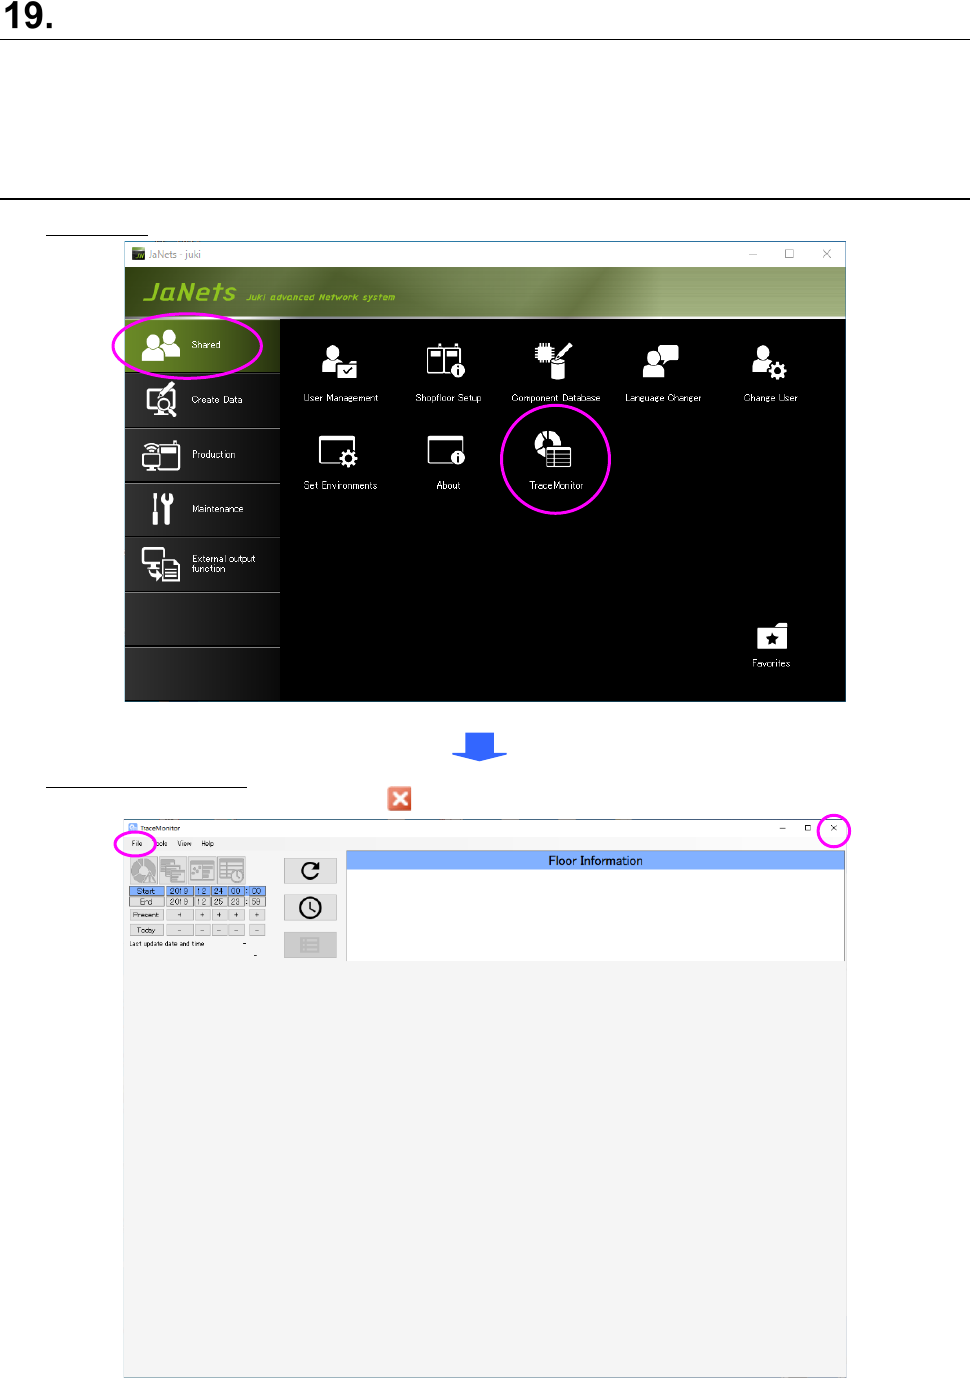
Starting up: Double-click the “TraceMonitor” icon on the “Shared” tab of the JaNets Launcher.
Figure 19-1-1 “JaNets Launcher” screen
Quitting TraceMonitor: Select the [Exit TraceMonitor] command from the “File” menu or select the
close mark ( ) on the title bar displayed on the upper right corner.
Figure 19-1-2 Screen displayed when you start up TraceMonitor for the first time
JaNets Instruction Manual 19 TraceMonitor
19
-2
19-2 Menu Configuration
19-2-1 TraceMonitor menu
Figure 19-2-1 TraceMonitor menu
Table 19
-2-1 Items of the TraceMonitor menu
Menu items Description
File (F)
Save (S) Ctrl+S
Saves data shown on the screen
displayed at the present.
Save all (L)
Ctrl+Shitf+S
Saves data shown on all screens.
Exit TraceMonitor (X)
Alt+F4
Shuts down TraceMonitor.
Tools (T)
Set Environments (E)
Alt+E
Opens the “Set Environments” dialog box.
Change Language (L) Alt+L
Starts up the Language Changer
application.
View (V)
Corrective Action (A)
Alt+A
Opens the “Corrective Action” dialog box.
Help (H)
About (A)
Displays the version number.
JaNets Instruction Manual 19 TraceMonitor
19-
3
19-3 How to Operate TraceMonitor
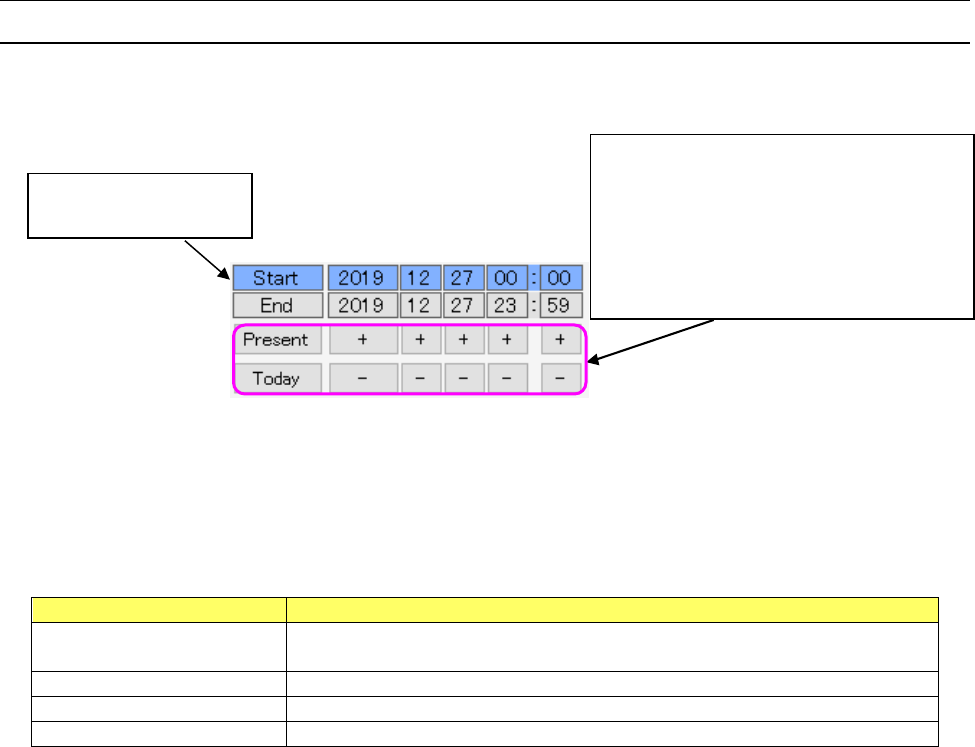
19-3-1 Selecting the date
You can specify the start time and end time of the error information collecting period.
When you click the year, month, day, hour or minute of the start date and time or of the end date and
time, you can select the time period for collecting data.
Figure 19-3-1 Selecting the date (when the start time is being selected)
You can change the time period to be entered by default at start-up on the setting screen. You can
select one of four settings shown in the table below. “Start-up day” is selected by default.
Table 19-3-1 Setting items of the menu item
“Search period at start-up” (on the “Set Environments” screen)
Item
Description
Search period at the last
shut-down
Period while information was searched at the end when you shut down
TraceMonitor the last time.
Start-up day
00:00 to 23:59 on the start-up day
1 week (specify the day)
One week from the specified day of the week including the start-up day
Most recent day
Specified number of days including the start-up day
<Button operations>
Present: Set the current date and time to the
selected time period.
Today: Set twelve o’clock of the current date.
+: Increases the year, month, day, hour and
minute of the selected time period.
-: Decreases the year, month, day, hour and
minute of the selected time period.
The period being selected
is displayed in blue.